Collecting use cases in the wild

Hi all,

I would like to suggest to have a community campaign to collect use cases in the wild from users.

The reason behind this is, from our discussions, it’s clear that everyone has different habits when using Seamly2D. I think there is a lot of value in documenting these real-world habits, both for us as users and for the future of the software.

How this helps us all

Documenting these “in the wild” habits creates a win-win for everyone:

  • For users: It’s “workflow insurance.” By showing how we work, we help ensure new features don’t accidentally break our existing patterns. Plus, we get a Showcase to learn organization tips from each other.
  • For Development: It provides a map of actual habits. These patterns can serve as regression test cases, helping anyone working on the code verify that changes won’t disrupt common drafting methods.

What could it looks like?

We could focus on small, specific “Challenges” or examples of “Minimum Patterns” to see how different people solve the same problem, for example:

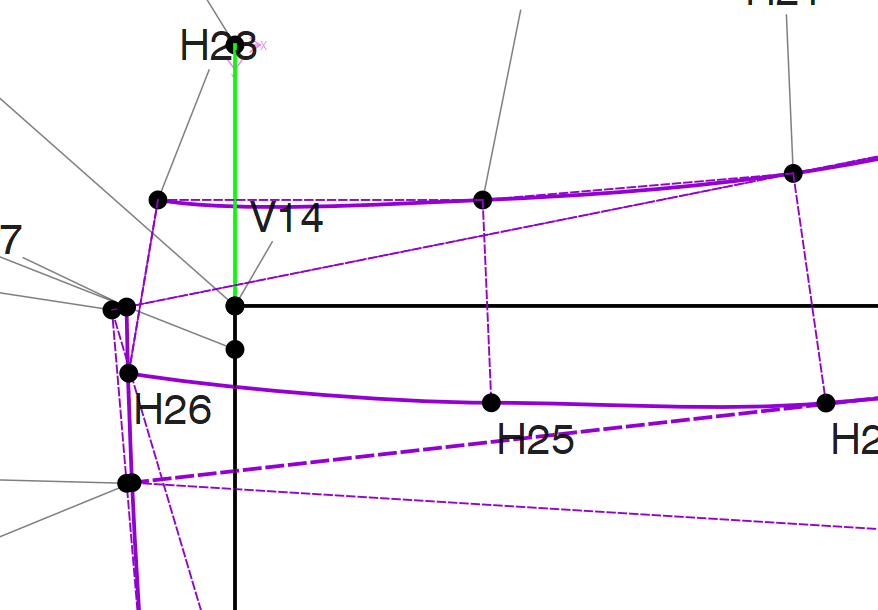
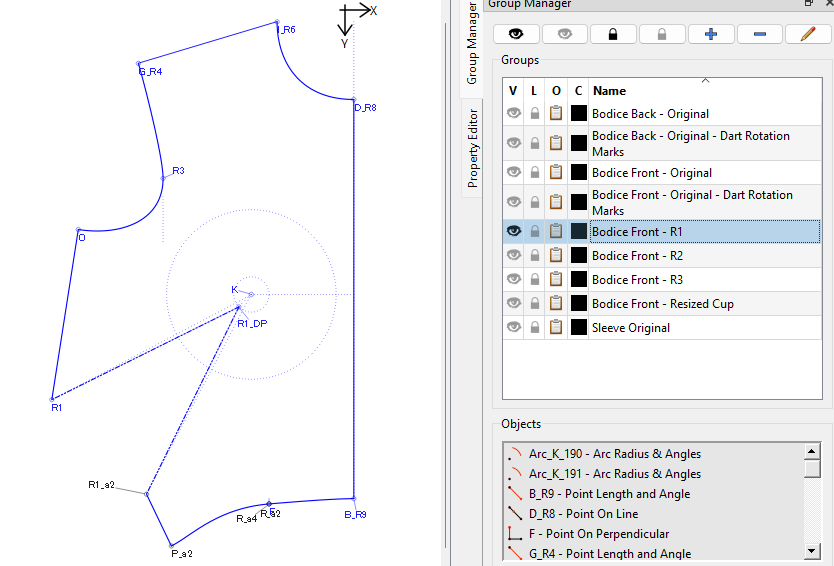
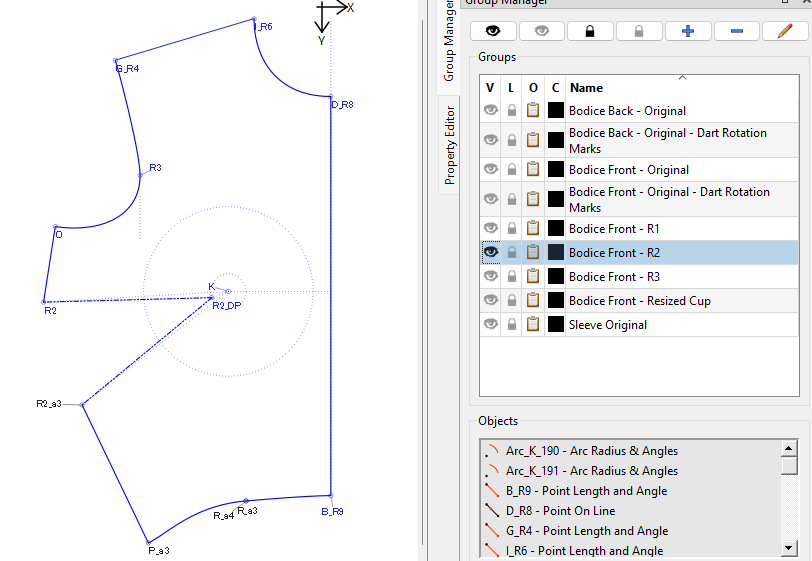
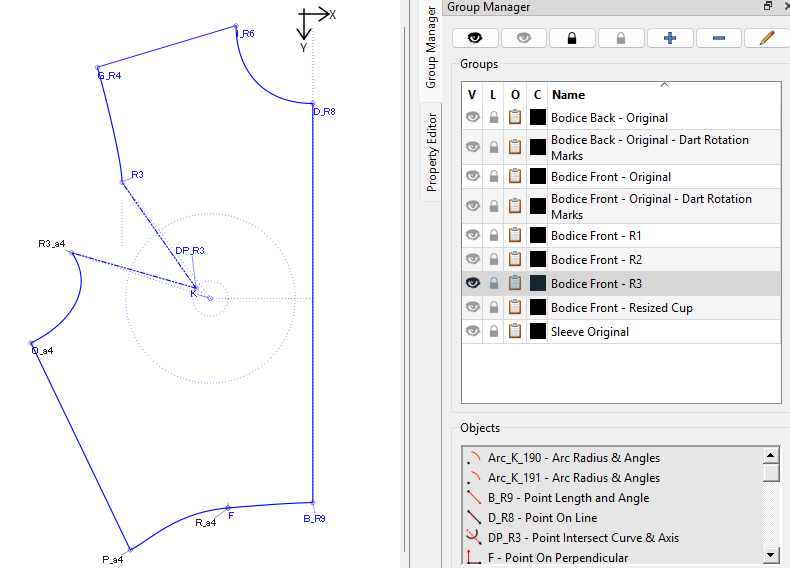
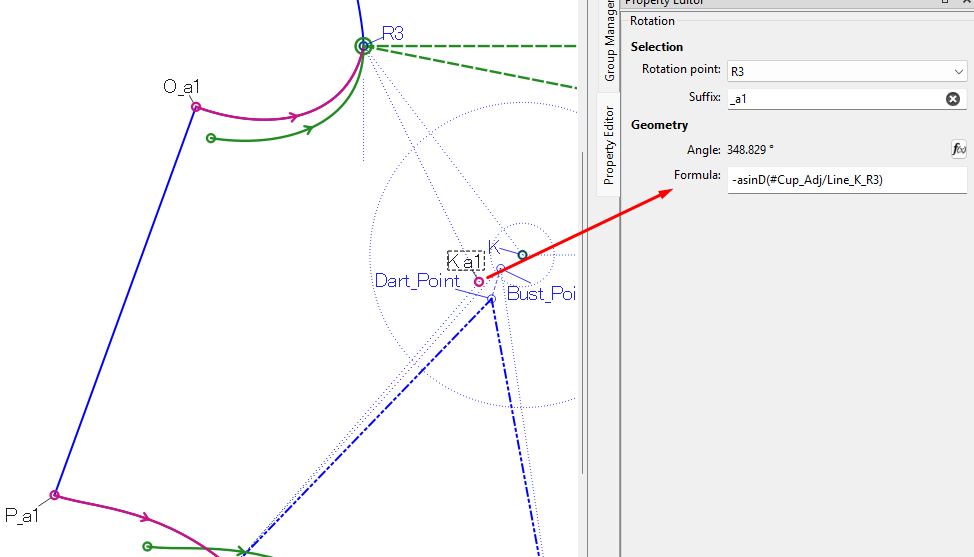
  • The Dart Challenge: How do you specifically move or rotate a dart in your workflow? (provide a pattern draft file, ask to move the dart for X inches and rotate…etc)
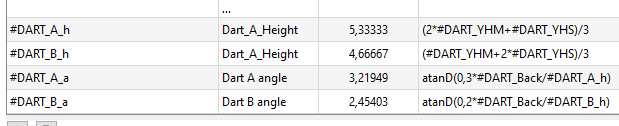
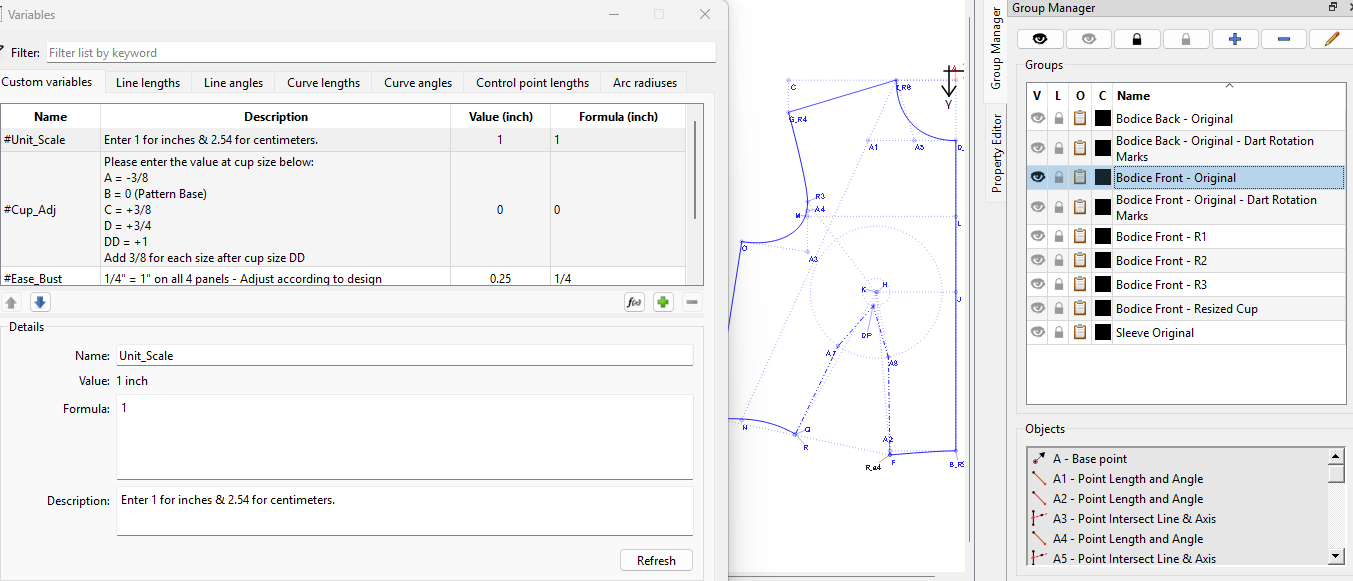
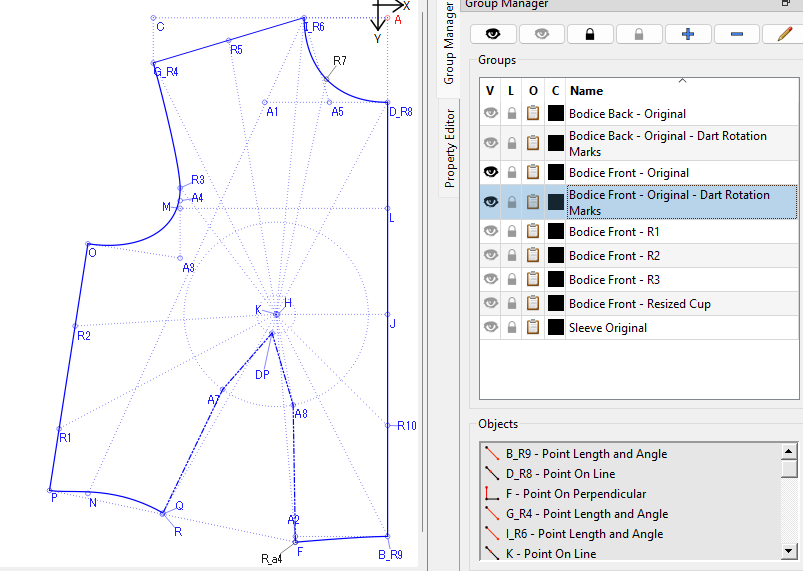
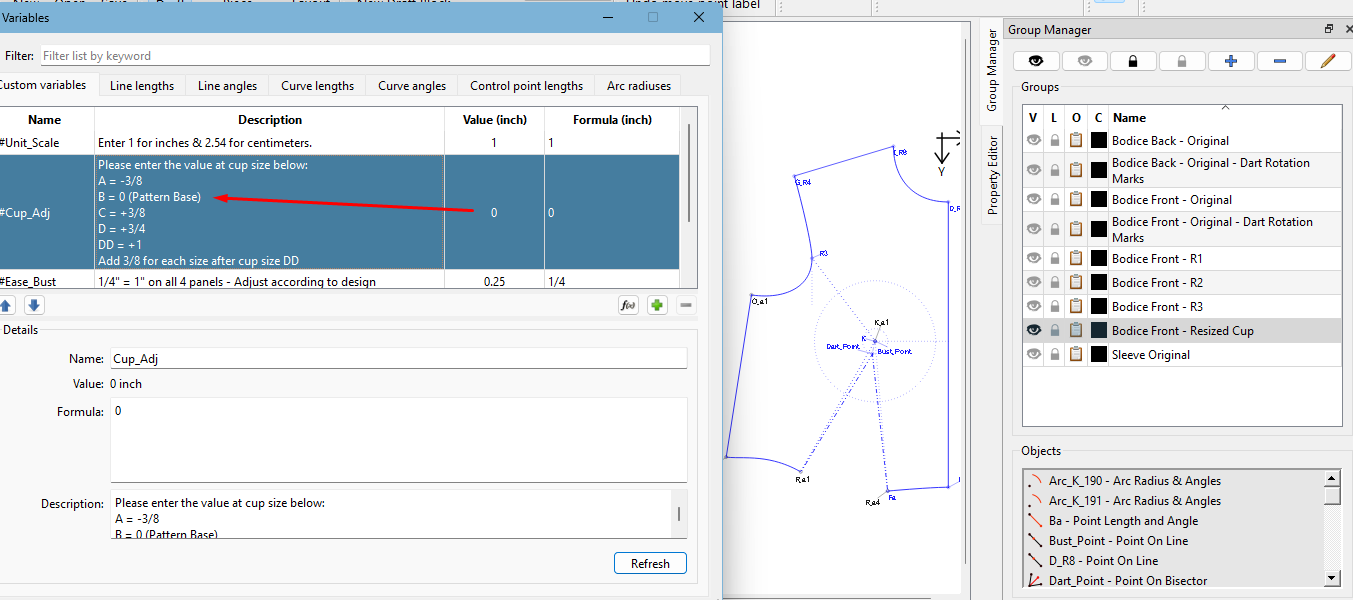
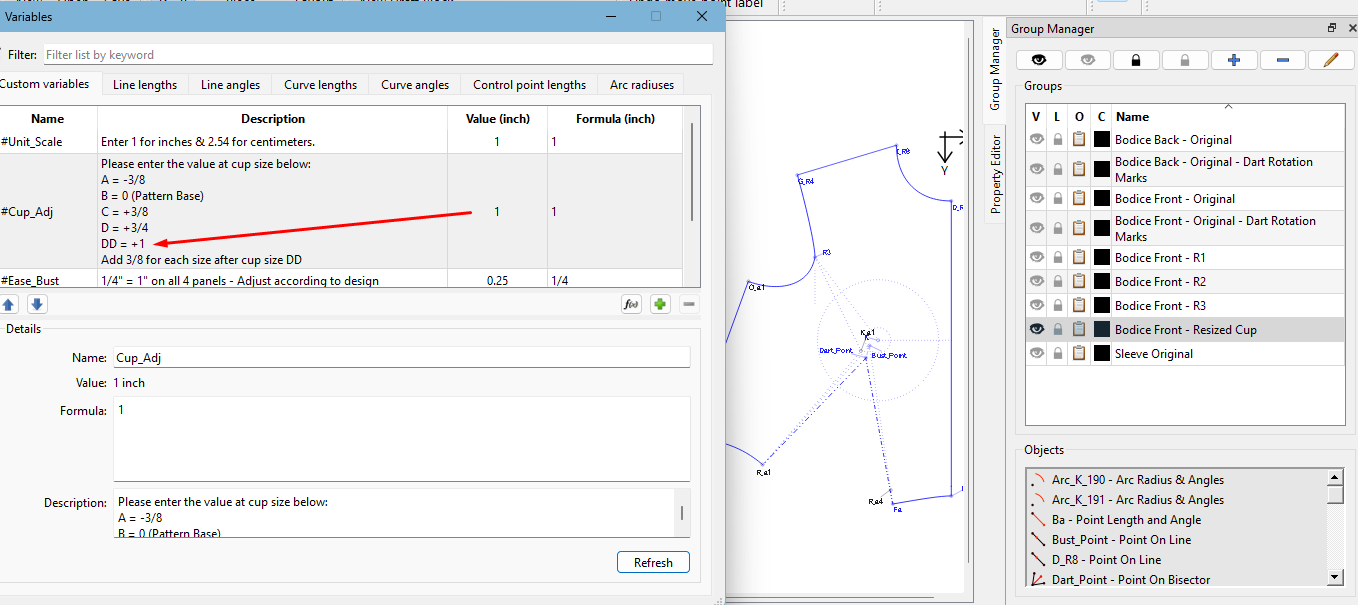
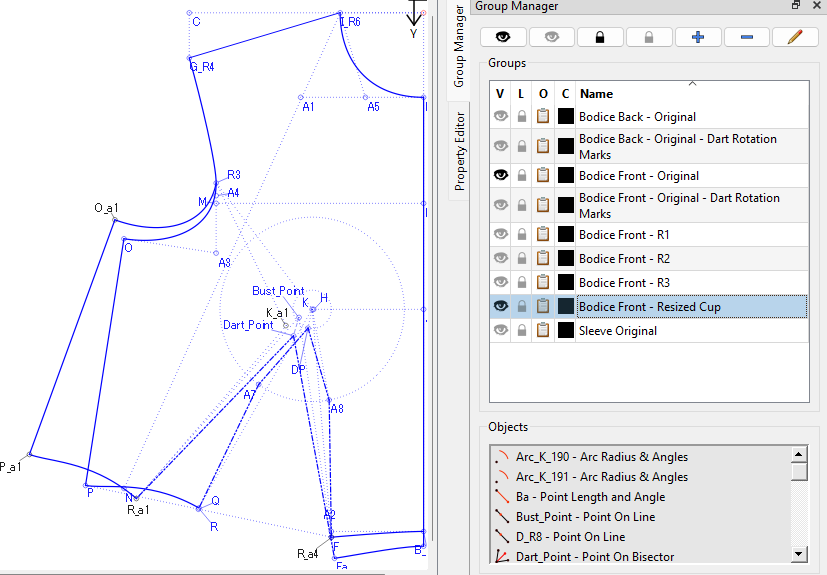
  • The Management Showcase: How do you use the Group feature or Variables to keep a complex pattern organized?
  • The Curves: How do you utilize curve or splines for specific garment types (like a sleeve, neckline, hipline…etc)?
  • Multisize: How do you manage multisize pattern?

What do you all think? Would this be a useful way to help protect existing workflows and guide future development?

5 curtidas

I see two questions lurking behind this idea.

  1. Who is Seamly’s core customer? As I understand it, Seamly’s core customer is the small professional designer who wants to leverage the strengths of parametric computer aided drafting with a minimal budget, but who would love to provide Enterprise level resources to improve the software which helped them up, once they are able to establish strong resource flow.
  2. Who are Seamly’s fringe users? Major companies wishing to promote FOSS solutions in order to foster innovation & creativity? “Hobbyists” who want to leverage the strengths of parametric computer aided drafting either because FOSS is cool, or because they have no hope of ever having the budget for proprietary software? Something else?

Here’s a scenario, true or not I don’t know, properly undertaken this use-case collection plan can reveal the truth: perhaps the majority of users are hobbyists who value Seamly because of its dedication to the needs of the small professional. But that doesn’t mean that they can express that that is the case.

So, as long as the “hows” are setup so as to clarify the “whys”, I think this could be a great idea. As long as we can capture a sufficient spread of users without compromising their privacy rights.

:unicorn:

4 curtidas

I am not using groups, but I will rethink this. The decision is not fully rational but based on my past experience: I was very rarely using groups in CAD programs as they are not needed, and their use in graphic programs like Photoshop is a mix things (but similar to S2d)

At the beginning I was using Draft block but than I stopped as it is faster to do things in one block and there were not many advantages. If I remember right you cannot even switch off / change the visibility of blocks.

With both drafting blocs and groups (layers) I am missing an array of tools to use them: changing the visibility, position, rotation, copying them, isolating etc.

Otherwise, I am trying to have my drawings organised as clean as simple as possible. The problem is we are in general working with cutting system that were based on simple tools and paper manipulation. That’s why our drawings are becoming so complex, some old approaches are simply funny with new computing abilities, but my knowledge is still to small to change.

Still I am using trigonometry whenever I have time Variables as much as erosible:

for example, moving a point 1,5 down and 0,7 cm to the right is actual

length: arctan(1,5/0,7)

angle: sqrt(1,5^2+0,7^2)

whenever it is possible I move those things in variables, it’s easier for me check and change them there, I made mistakes :)))

I managed to do back yoke in this way:

but not yet bust dart manipulating, I need more experience :slight_smile:

3 curtidas

This is just the base sloper from the HJA book. It only consists of the bodice back & front and the sleeve. Since the front has the most adjustments that can be made to the sloper, I’ve hidden the back & sleeve.

As you can see in the Variables Table, I have full descriptions at each item so that I don’t forget what to change when I do need to change something. I try to keep the variables down to the bare minimum, and only the most important, so that I don’t get lost in long lists of variables, especially when choosing which one to use in the Formula Wizard. I also use very descriptive names for this same reason.

As you can see, I try to draft with the minimum of construction objects and, in this case, it isn’t necessary to have a separate group for these since the pattern presents a clean picture. I use dotted lines and a lighter line weight for construction lines, heavier line weights for main (stitch line) objects, solid lines for cut (stitch) lines and dash-dot-dot lines for darts.

I’ve put all of the dart rotation marks into a group of their own, so that I can hide them if I wish:

For each dart rotation, I have the most important lines in a group:

I haven’t done the dart outer cut lines yet or completed all of the dart rotations.

I did this pattern while studying the HJA (Helen Joseph-Armstrong) book and, at this point, I realized that I used the original bust points for the rotations and I still need to go back to fix this.

This brings us to the Bust Cup Size Adjustments, which I should have done before the rotations…

As you can see below, a zero in the Variables Table is equal to a B Cup:

By changing this value to one of the other amounts in the list, the cup size changes. Here, I’ve entered a 1 which is equal to a DD cup:

Formulas that are only specific to 1 place are in that places formula, whether it is trig or not. As you can see, the Variable is used to rotate the Bust Point to a lower position in a rotation that moves the side seam outwards and the front is made longer, to accommodate the larger bust, and the waist dart is also widened. The armhole shape is still maintained by the use of formulas in the curve:

Here is the bodice with both the original and the cup size visible so that you can see the changes:

I’m attaching this file here for anyone who would like to play around with it and see exactly how I created it. Please remember that this was my learning curve and that it does contain errors and is only meant to show how I work:

Armstrong Basic Blocks with Bust Adjustment Bodice with Rotations and Sleeve A.sm2d (71.6 KB)

HJA Size 6 - 34.smis (3.9 KB)

3 curtidas