Hi again, @MG2024. That’s not nice. We like to be friendly, and, like you, we all have day jobs and offer our assistance purely because we love the software and want people to get the most out of it, not because there’s some magic money tree somewhere that’s paying us to be here so that we can give up our day jobs.
With that said, let’s move on…
This forum is the FAQ. At the top right, there’s a magnifying glass. This is the search. Click on it and you can search through many topics on just about everything in the software and patternmaking.
Then there’s the User manual in the Wiki (link at the top of the page) where there are videos listed, on Youtube, in a number of languages that our amazing users have created and published.
Recently, @JCDesign has been updating the Wiki Seamly2D and SeamlyME user manuals.
Currently, the PDF user manuals are really old. I wrote them in 2017 with a lot of help from searching the forum and trial & tribulation while I was learning Seamly2D, however the information is still quite helpful and I’ll get onto writing new manuals later this year, once things have calmed down at my day-job (normally around October, November, December since I work for a number of small companies, auditing their books and doing the income tax, etc.).
So let’s all be friendly and make this a happy haven for everyone who is passionate about patternmaking - be it their career or their hobby.
And now onto the subject at hand…
Ok, so you want to add a hem allowance of (say) 2cm below the hemline, that needs to be folded over and hemmed in the construction of the garment. The one side is slanted and the other side is a curve.
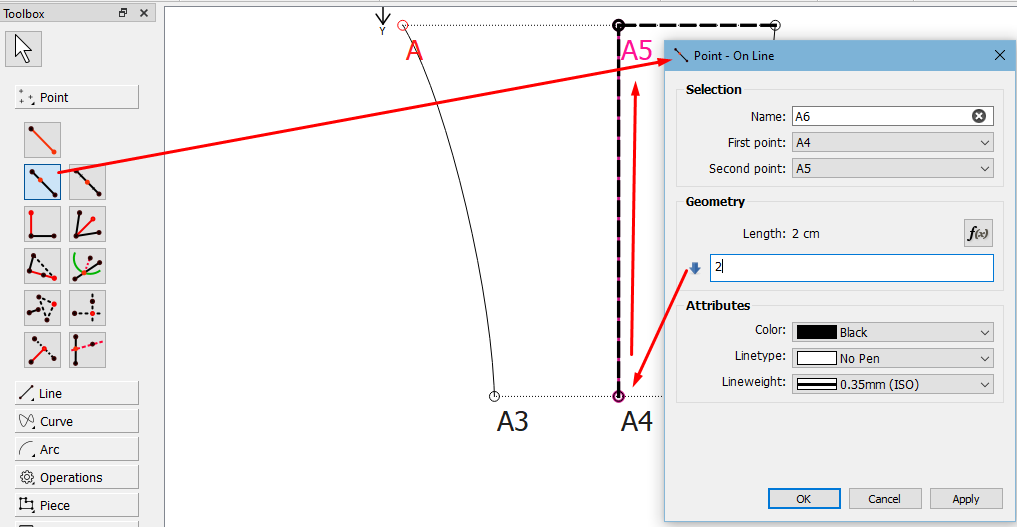
Firstly you need to place a guide point to establish the 2cm level where the stitches will go:
In the case of trousers, I’d use the Crease Line to do this and the Point - On Line Tool:
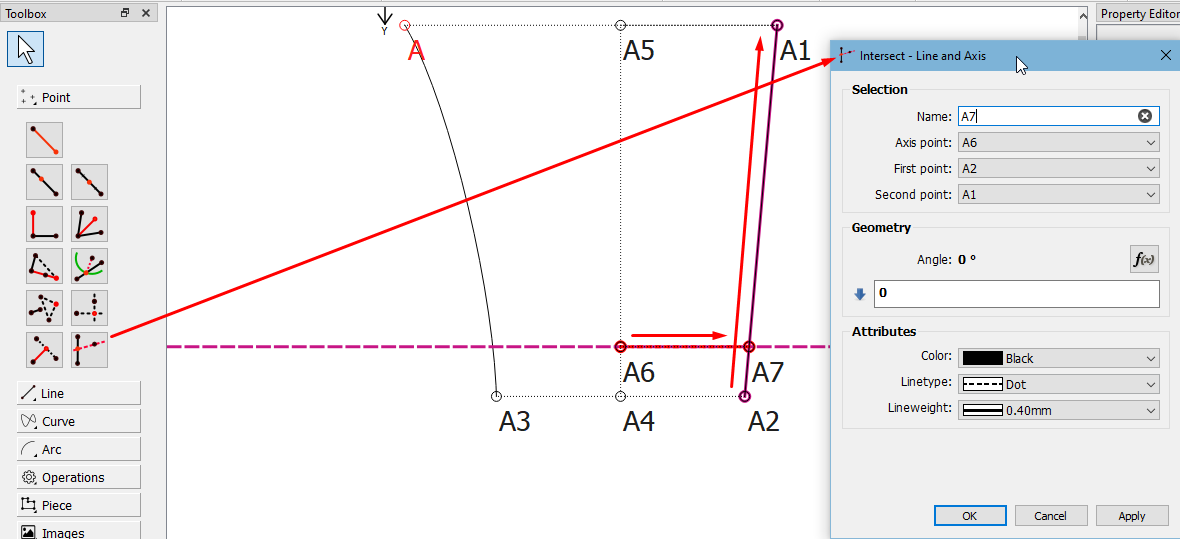
On the slanted edge, I’d use the Intersect - Line and Axis tool. Click the tool, select the 1st point of the line and then the 2nd point of the line, then select the point of your axis (the new point at 2cm from the hemline). Adjust the angle, if necessary:
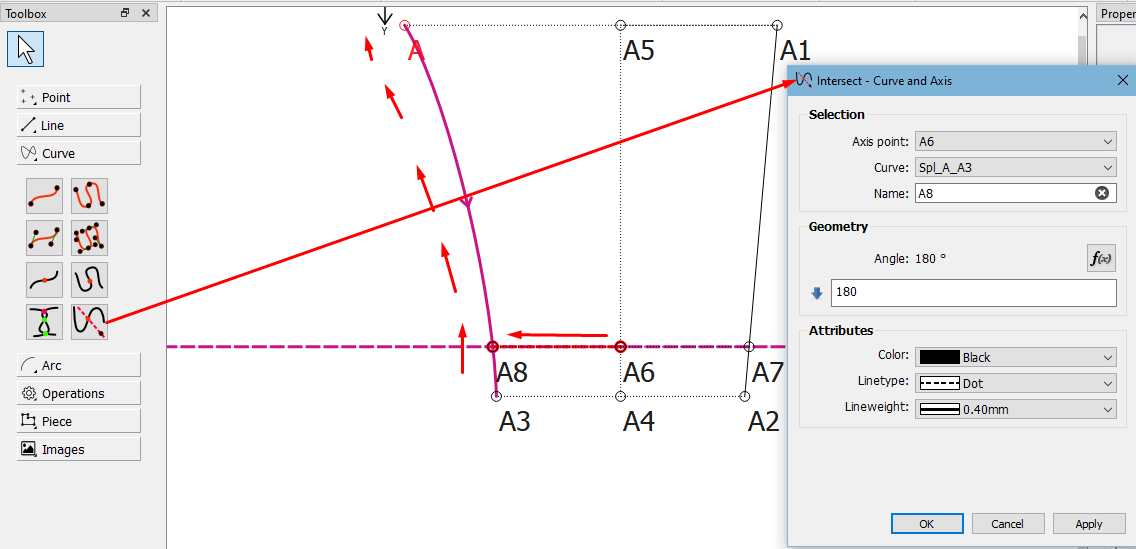
The next step is to use the Intersect - Curve and Axis tool. Click the tool, select the curve and then the axis point and, once again, adjust the angle to suit the other side:
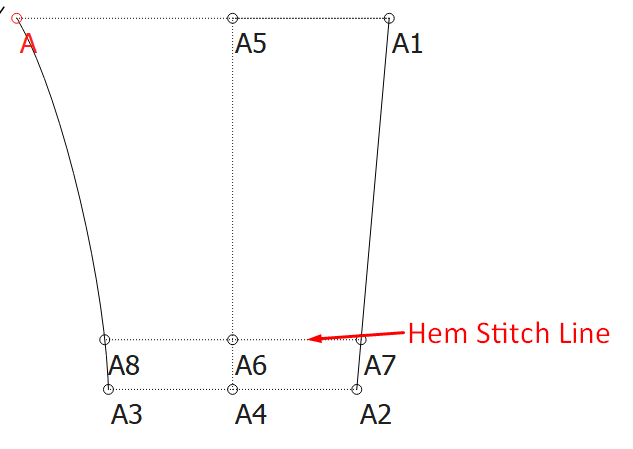
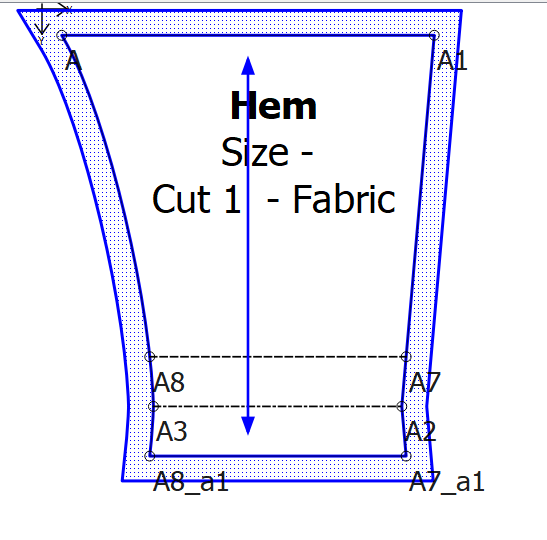
What you now have is the line where the hem will be stitched:
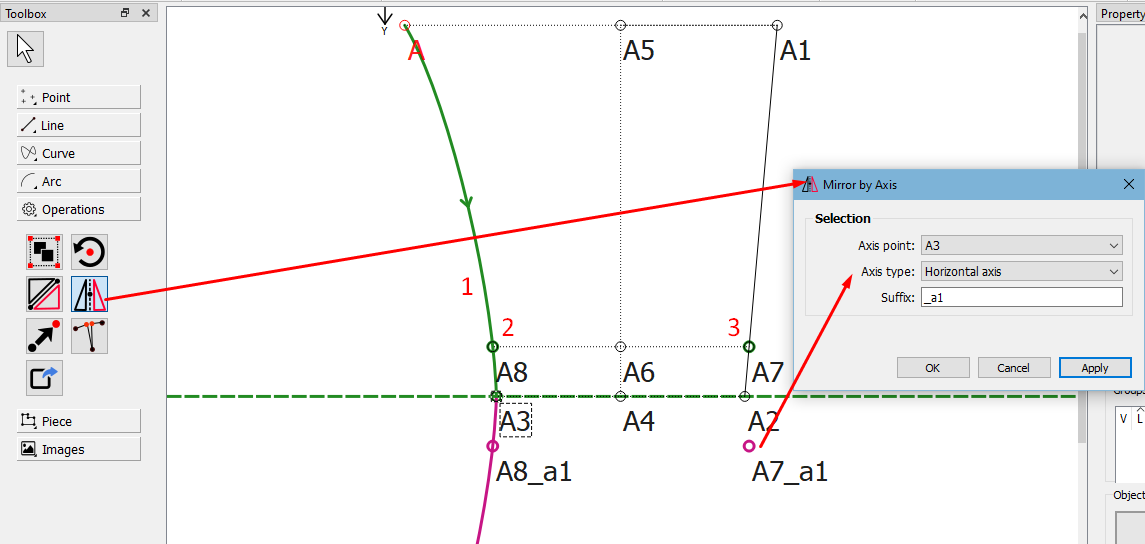
Now you are ready to mirror that section to the area below the Hem Line. Pick up the Mirror Objects by Axis tool. Select the curve, A8 & A7 (items to be mirrored), hit Enter, then A3 (or A4 or A2, it doesn’t matter), hit Enter and Select (in this case) Horizontal (if this isn’t a Vertical/Horizontal case, then use the Mirror Objects by Line tool):
Now you can use the Line Between 2 Points tool to connect the dots:

Now, if you create your pattern piece, you can add internal paths for the Hem Stitch Line and the Hem Line. Normally, you’ll still need to add a seam allowance for the bit that gets folded under:
And there you have it. And here is the file that I created to show you:
Hem Added.sm2d (8.0 KB)