Creating Smooth Curves: The Kolson Method

Here’s a draft of a typical 2 piece sleeve… as you can see most of the seams are not 90… the only place that is at a 90 is the back seam at the cuff - point N.

In any case… I think it’s an important point you brought up, in that most curves should vary with the measurements.

sleeve2-Piece_Sleeve

2 Likes

I bet if you have worn a suit “off the rack” it had a 2 piece sleeve. They are pretty common

Thank you for your input. I’ll change my tutorial to stress that what is important is that the angles of the two sides of a seam add up to 180 degrees in most cases.

1 Like

Tutorial is up…

If you have any questions, comments, or concerns, please post them here.

3 Likes

yay. I am glad to see that I am not the only one who believes in using the /wiki/talk: pages

1 Like

Hi! I’ve just upgraded S2D and I’ve noticed that the curved path tool it’s very slow (every time I make a change I need to wait few seconds before the curve starts to bend) while before it was immediate. Have you come across this problem?

Thanks!

how do the angles work when the curve changes direction? I’m having trouble getting a smooth curve on a sleeve cap.

2 Likes

The curve angle leading up to the point, & the curve angle leading away from the point are always 180 degrees apart, so the curve should always be smooth. If it’s not, your control points are probably either too long, or going in the wrong direction.

I hope this helps!

:unicorn:

1 Like

@emilyli

That is only true in the case of points within a spline, where the control points are automatically set 180 degs apart. If you have 2 “curves” one after the other, you can set the control points at whatever angle you want… although they should be 180 degs apart to make a smooth curve.

I should note that if you change a spline control point 1, control point 2 will automatically be changed to 180 apart… and vice versa. If for some reason you don’t want this behavior, use 2 curves instead.

I can see though in your screencap that the control point for point B6 is off… you probably want it at 0 degs… the other end B! should probably be at 180 degs.

2 Likes

i can not figure out the correct angles so that they are 180 and smooth.

could you help? dain jacket v3.val (25.1 KB) dain.vit (2.0 KB)

2 Likes

First off… not sure why the points B13 and B22 are used? The curves would transition better if they were not there and went from B6 to B11, and B20 and B15.

That being said… the control point lengths are incorrect for B6 and B13’s 1st point. You want to use the length of line B13_B25*.55 for B13’s 1st CP, and the length of B6_B25*.55 for B6’s CP with an angle of 0. I had to then grab B13’s 2nd CP to move the angle until it looked right. BTW… I don’t know if you know you can show / hide the (square) control points?

toggle cp

They are interactive, and set the CP angle. They can also be used to set the length, but only if you have not set a length formula for the point. I only looked at point B13, but I suspect the length of some of the other CP’s may be incorrect.

2 Likes

I just wanted to say thank you to all the people who have contributed to this thread and the wiki for these curves.

I am someone who struggled a lot with maths at school, have grown confident with arithmetic and basic algebra since (some accountancy background) but nothing else over the past 20+ years.

From these instructions I have understood the principle of a Bézier curve (well as to the extent as to why those intersecting lines make curves in the animation on the wiki), slowly understood where to draft the construction points (I feel the wiki could emphasise that they are placed using the intersect tool, I had a vague memory of reading it somewhere, but it would be helpful to have that (re)stated on the semi circle walk through).

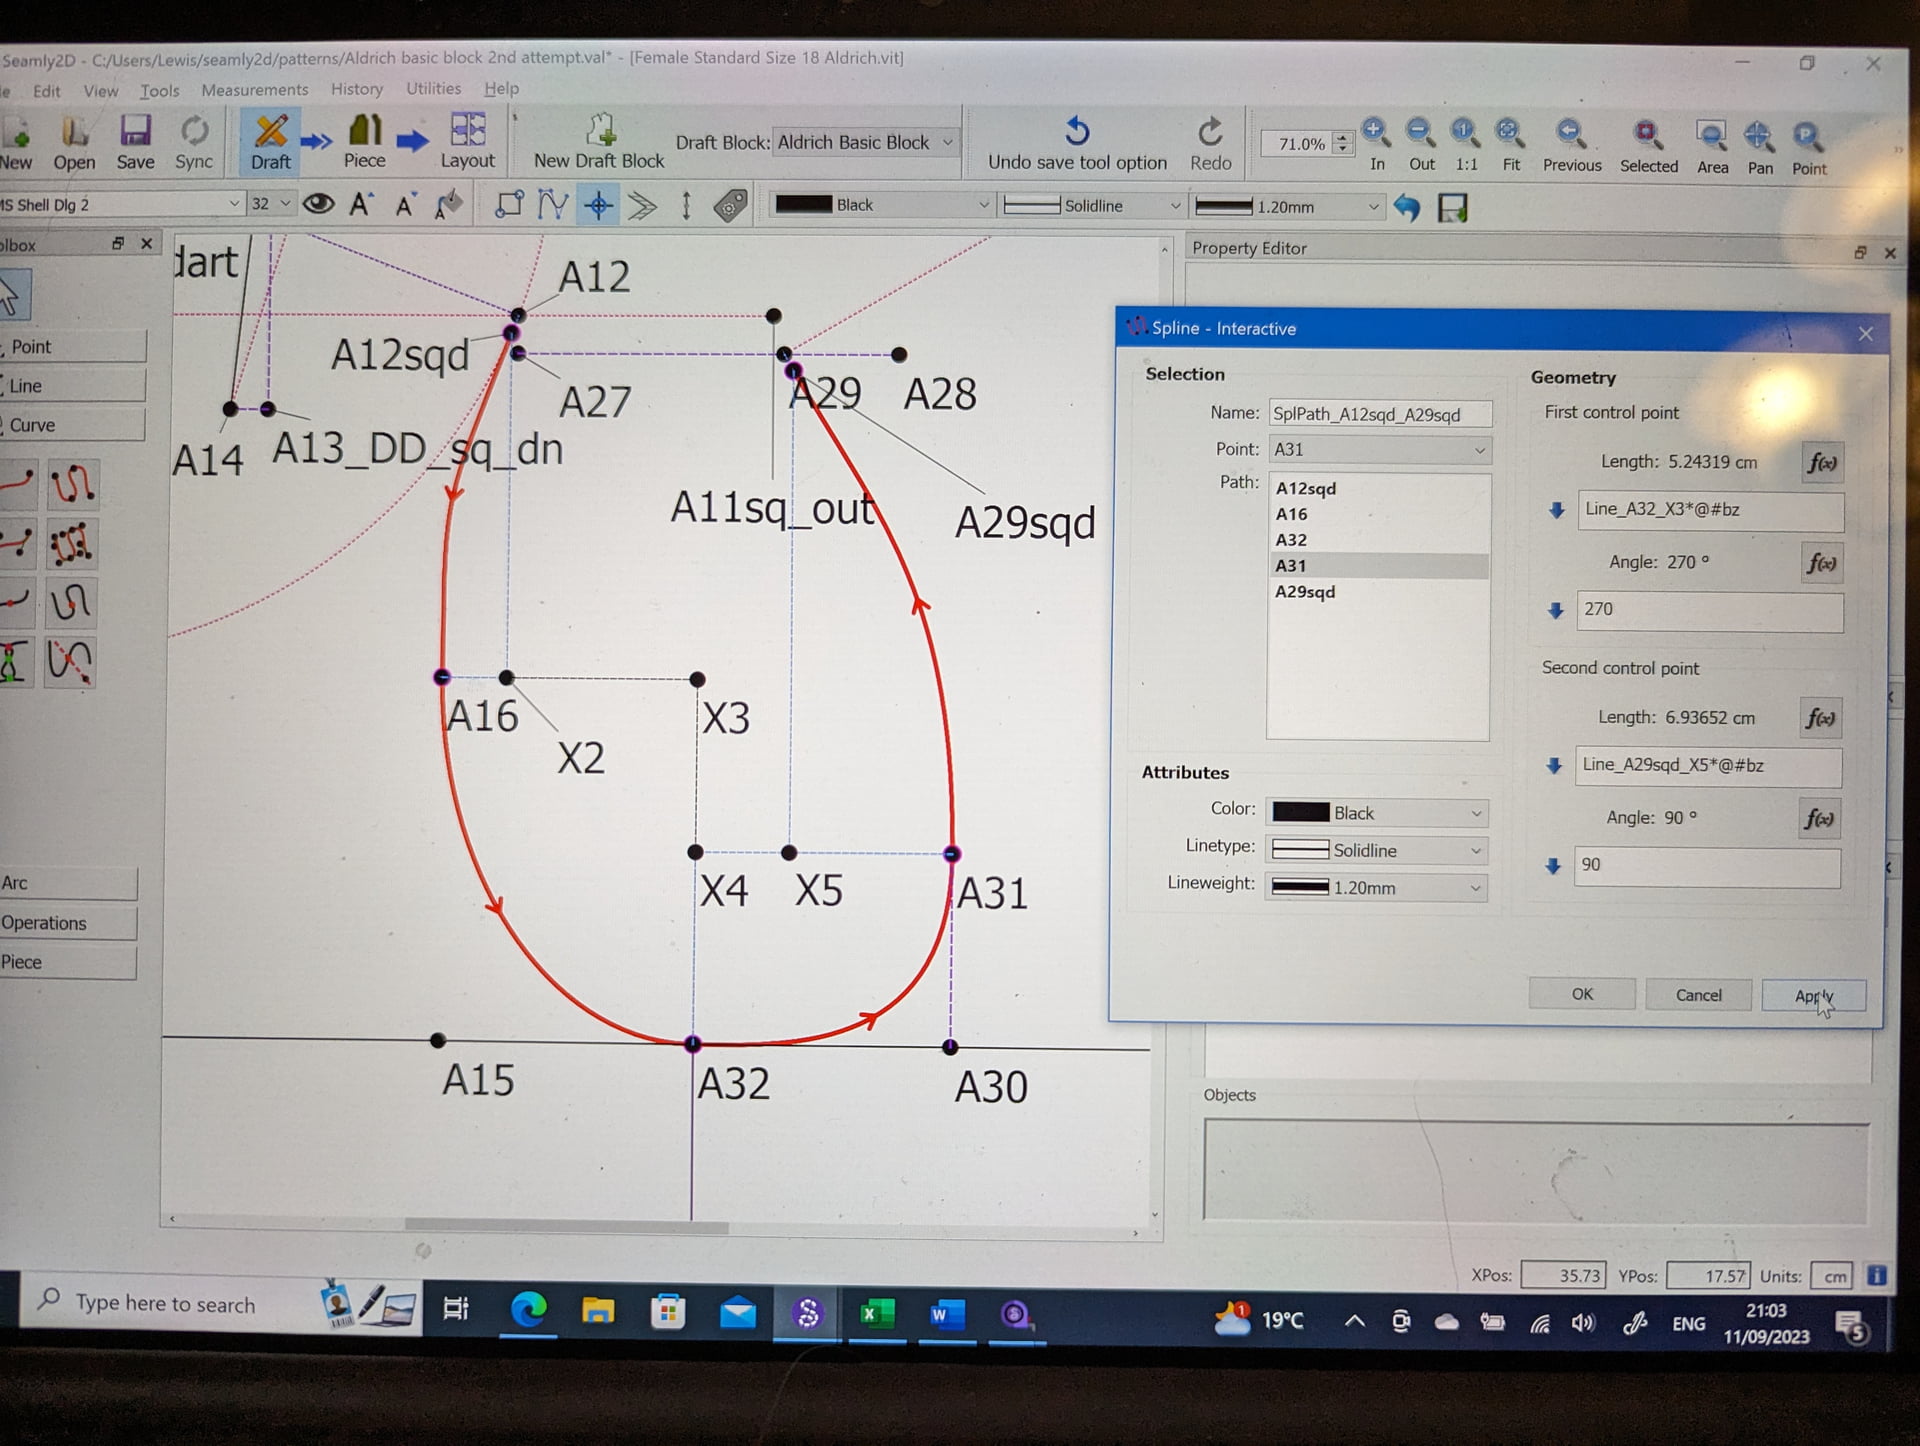
After a few false starts (realising I needed other lines / control points etc), the first time I made it through the spline I got to this and I am thrilled.

P.s. this may be in slight contravention of the Kolson method but I added a 0.5 cm right angle to the seam line at each edge of the curve, so they will really have a decent straight line when they meet sewn up, in the same way I’d add that when drafting on paper. I know my curve angles end at the correct angles but any errors in cutting would throw those out.

Anyway, thank you again, I’ve really enjoyed this aspect of the learning process.

4 Likes

You don’t have to do that. What you’re actually doing is putting a kink in the curve. For the control points for the curve end points use an angle formla to make the angle perpendicular to the shoulder seam. In your case you would add or subtract 90 from the angle of the shoulder seam… I can’t see all the points and don’t know which way the line is going to be specific… but it would be something like Line_A?_A12 + 90.

Also just a note… not all armhole / shoulder seams end at a right angle (or for that matter any seam / seam or seam / hem)) … especially with period jackets with drop shoulders. For ex:

shoulder

What’s important is that the angles on either side of the seam add up to 180 degs NOT that they both have be 90 degs.

3 Likes

Wow! @livingonanisland, your armhole looks amazing. Very well done!

1 Like

See, I had read and understood this previously but for some reason had the voice of my sewing teacher in my ear.

I moved the start and end of the spline to the proper points and I was very grateful that the software made it so easy to fix the formulas when I moved the control points.

2 Likes

Thank you :blush: now to start figuring out sleeves.

The Aldrich instructions require the sleeve to be drafted ‘overlaid’ on the bodice, whereas Kershaw drafts his sleeve in isolation.

In terms of placing balance points and notches, the Aldrich instructions look better to me, except I’m a bit worried about it all looking very messy.

Do you draft your sleeves in separate files to the block, or on the same and overlap them?

I’m vaguely aware that points can be toggled on and off, is that the main/recommended approach? Toggle off everything I don’t need for the sleeve then draft the sleeve, with a naming convention for its points like S1, S2 etc?

2 Likes

I generally draft the sleeve in a separate block.

If you were to draft the sleeve in the same block as the bodice I would definitely put the bodice and sleeve parts in seperate groups that will allow you to toggle on / off which parts you want to see at any given time. In fact, your’re going to want to make use of groups in general. For example… lets say you draft a sleeve in it’s own block, with a long and short version. You can put the objects that make up the long sleeve in one group, and the objects that make up the short sleeve in another. Now you can choose to see the long sleeve, the short sleeve, or both.

2 Likes

As @Douglas said, it’s best to put the bodice into a group. I don’t do well with toggling notch labels off, so I use groups to toggle things on & off. Unlike @Douglas, I did the Aldrich sleeve exactly as she instructs… on top of the bodice, but with the bodice in a group and the sleeve in a group. The reason is that she actually uses nodes in the bodice as the starting points for the sleeve. She does use different label names for the shared objects but I just pencilled the original node labels into the book to replace her new labels and left the pattern labels alone.

FYI, you won’t be able to access the curves, lines & nodes, for reference if you draft the different items in different files, so best to keep them, all nice, neat & tidy, in one file. Some like to place them on different drawing boards inside the file, but then you can’t rotate the sleeve (for example) and move it to create a dolman sleeve which gets grafted onto the bodice, so I do everything in one file and on one drawing board, just nicely filed into groups.

Yeah… I start with A (mainly for the bodice), then B for perhaps the sleeve, then C for the skirt, etc. etc. and I name the groups accordingly… A - Bodice front, A - Bodice back, B - Long Sleeve, B - Short Sleeve, C - Skirt front, C - Skirt back, etc. etc.

This way, I know that (in my master pattern) everything in one the Bodice groups will only have nodes that start with A and the sleeve will be B. But this is how I do it and you can develop your own system. I also have groups that are especially for creating the pattern piece and one for all the extra objects that are necessary to get to the point of creating a pattern piece, so that I can hide all the extra goodies while selecting the needed objects for the final pattern piece.

Yes… I would add, that I would draft by whatever way the system is using. Given that my main focus has been on mens wear, most of the systems I’ve used draft the 2 part sleeve separately from the body, as multiple jacket styles will use the same sleeve pattern.

2 Likes