Hi @emmababi!
To achieve a scalable curve, use formulas.
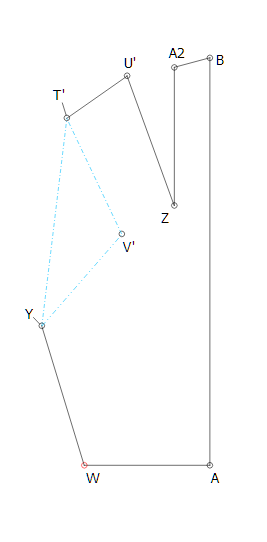
First, draw the reference lines of your armscye. We will use these lines in the armscye’s formulas:
- First draw a line from Y to T’ (eg Line_Y_T’)
- Then draw a line from Y to V’ ( eg Line_Y_V’)
- Then draw a line from V’ to T’ (eg Line_V’_T’)
Remember that angles move anti-clockwise, starting with 0 degrees at 3 o’clock

Also, remember the guidelines for creating scalable curves.
- Control handle lengths are initially 1/3 of the line between endpoints (eg Line_Y_V’ / 3)
- Never use a number as the length of control handles, always use a formula.
- Angles at endpoints are relative to the connected side lines. For example, use AngleLine_W_Y then adjust with -90 or +90 for right angles or -180 to reverse direction.
- Angles at midpoints are relative to the line between endpoints.
- Never use a number as the angle of control handles, always use a formula.
- After creating the curve with these guidelines, adjust the length of the control handles as needed to achieve the fit you want.
After you’ve created a curve this way it won’t be confusing
So, for @emmababi’s design: We have a curve with endpoint Y, midpoint V’, and endpoint T’
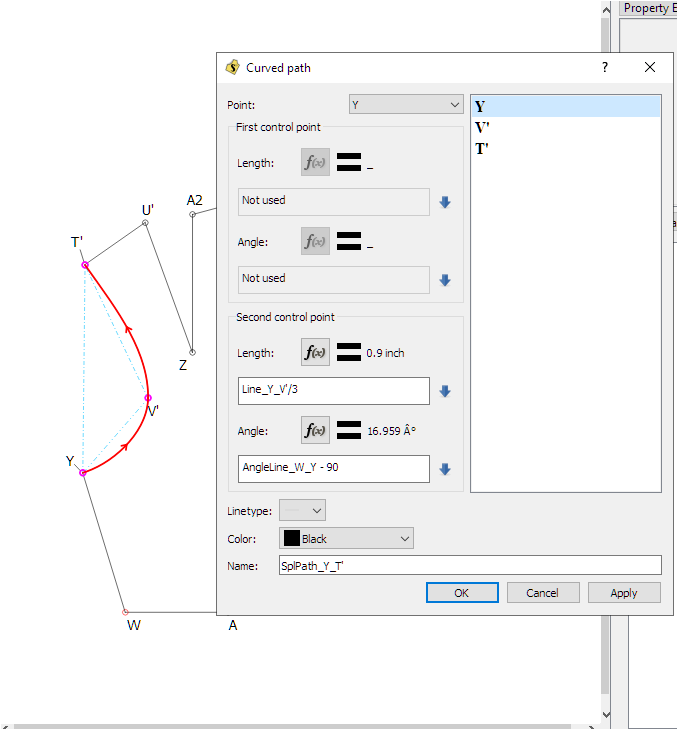
Define the curve from Y to V’:
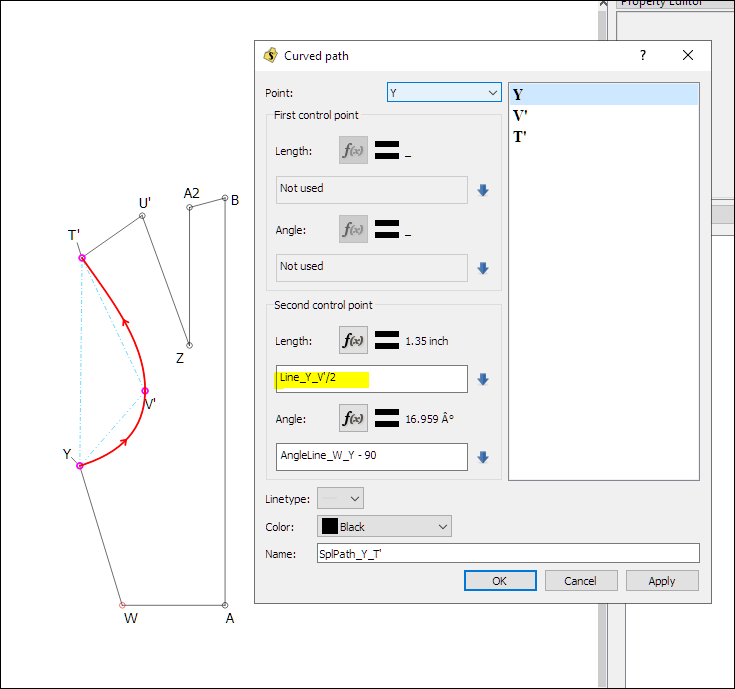
- 1st control handle length: (Line_Y_V’ / 3)
- 1st control handle angle: (AngleLine_W_Y - 90) --> Creates a right angle to Line_W_Y
- 2nd control handle length: (Line_Y_V’ / 3)
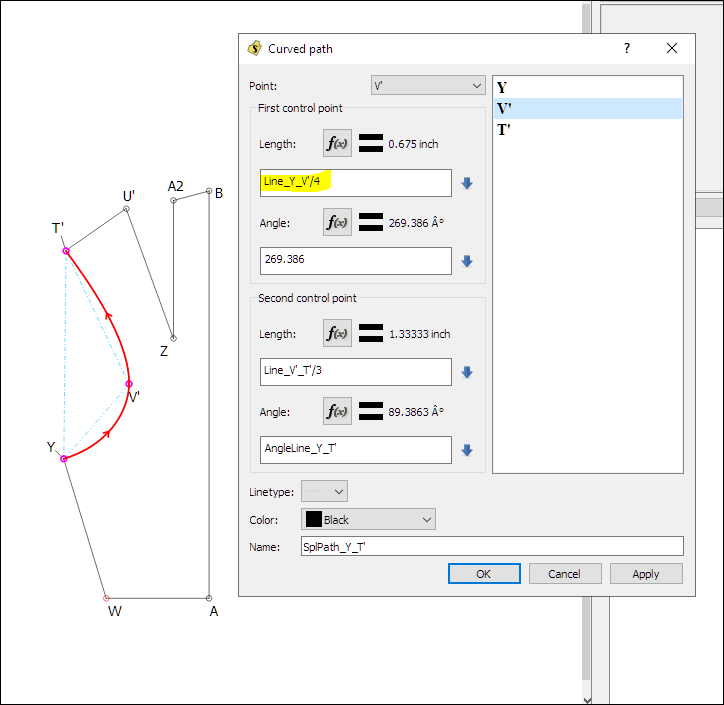
- 2nd control handle angle: (AngleLine_Y_T’ - 180) --> Creates a line in the opposite direction of Line_Y_T’. You can enter a formula here or enter it for the other side of midpoint V’.
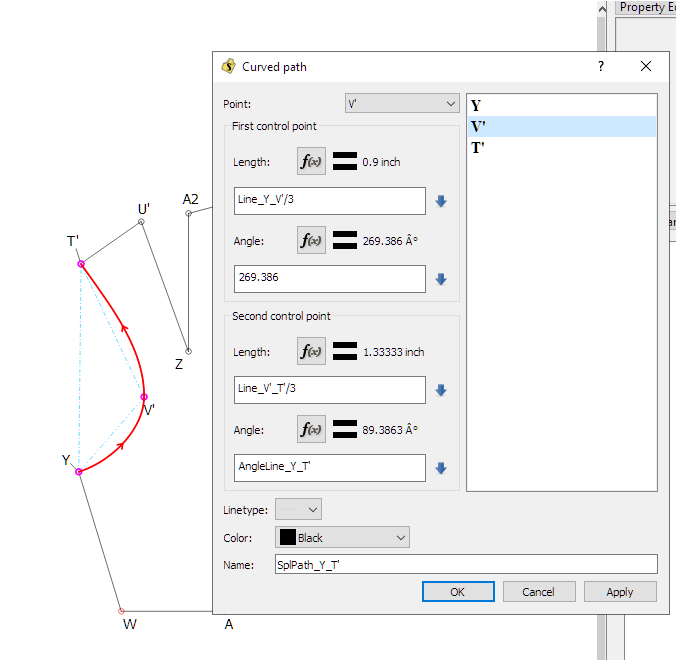
Define the curve from V’ to T’:
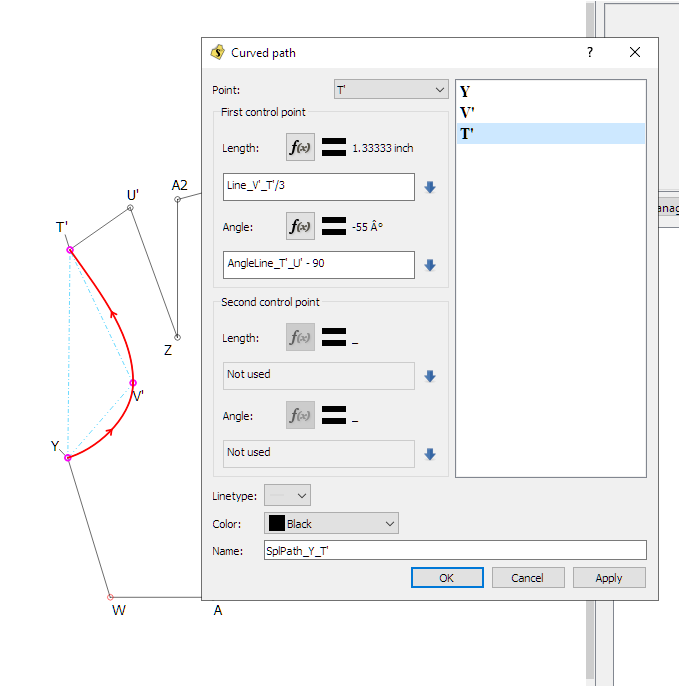
- 3rd control handle length: (Line_V’_T’ / 3)
- 3rd control handle angle: (AngleLine_Y_T’) --> Creates a line in the same direction as Line_Y_T’. If you entered the 2nd control handle angle formula, you won’t need to enter this one!
- 4th control handle length: (Line_V’_T’ / 3)
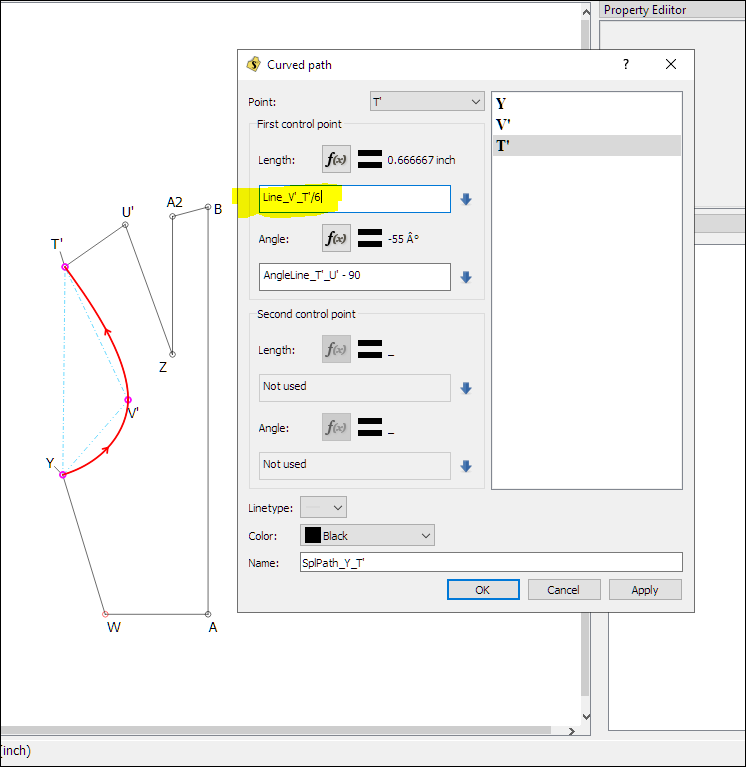
- 4th control handle angle: (AngleLine_T’_U’ + 90) --> Creates a right angle to Line_T’_U’
Then when you know the lines and curves are working in general, finalize the curve to achieve your fit or design requirements. Armscyes tend to be deep at the bottom and flat-ish in the middle. The following adjustments tend to work well to achieve a good fit for my armscyes. Of course, if you have an unusual armscye or design you would make different adjustments  :
:
- Under the armscye lengthen the control handle (eg Line_Y_V’ / 2)
- At the midpoint shorten the lower control handle (eg Line_Y_V’ / 4)
- At the shouldertip shorten the control handle alot (eg Line_V’_T’ / 6) . The 90-degree control handle at the shouldertip basically ensures that the front and back pieces line up without having to manually adjust them. This control handle can be very short. I know of patternmakers who just draw a 1cm line at the shouldertips for front and back, but I still like to make it a formula because I object to putting actual numbers in a curve because I like the curve to be EXACTLY THE SAME FIT (which is not “exactly the same curve”) for everyone.
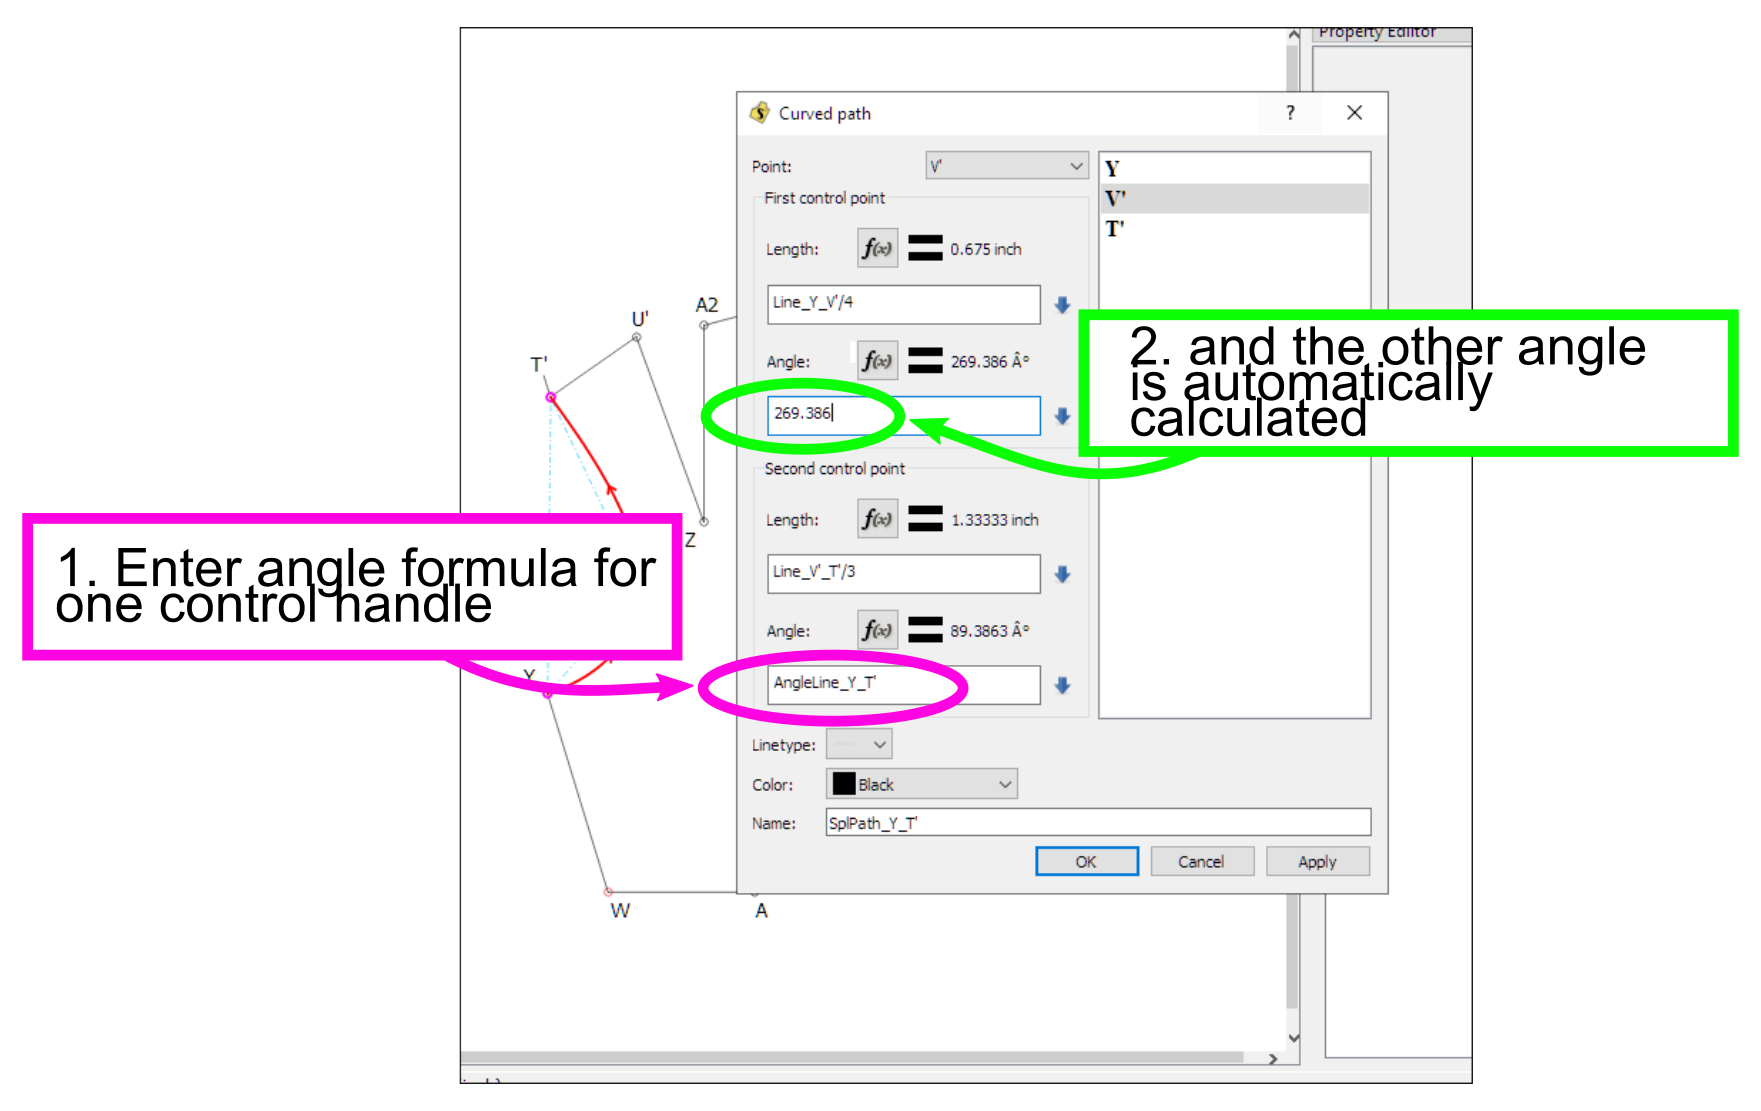
One last thing you need to know about creating curves with multiple segments:
Enter one angle formula at any midpoint of a curve, and the midpoint’s other angle is automatically calculated and appears as a number. The number is a calculated value that will change with respect to the angle formula.