The reference that @Sue made in the previous message to the tutorial IS a link. You should be able to click on it and it will take you to where you can play the video. I am going to repeat it in this reply so that you see what I mean. (I understand it can take a bit of time to get familiar with the details of how this forum software works as well as the Seamly2d tool. Don’t worry about it, you will get there)
@AmandaClarice, If you click on the words “How to Rotate a Dart, video” a new browser tab should open. In that tab, you will see what may look like a screenshot. Note that there is a > symbol in the middle of the picture. If you click on it, you will see a screen video that shows the actions used in the rotate dart tool. It does not have audio content.
Here’s a video which explains how to do this using the ![]() ‘Point from intersection of arc and line’ tool in the Point group.
Note: I’m using inches in my pattern, so I’m dividing the mm and cm’s by 2.54.
https://forum.seamly.io/uploads/db1488/original/2X/5/5b4339ea6bb210c846b13063b237ed3452b1d074.mp4
‘Point from intersection of arc and line’ tool in the Point group.
Note: I’m using inches in my pattern, so I’m dividing the mm and cm’s by 2.54.
https://forum.seamly.io/uploads/db1488/original/2X/5/5b4339ea6bb210c846b13063b237ed3452b1d074.mp4
HI @AmandaClarice, did this video help? It’s easier to see in full screen mode. I tried to use your bra making method’s instructions to extend the bra line from the adjusted side seam point (A27) down to the bottom line by a specific length. This translates geometrically as intersecting an arc (radius) from A27 with Line_A24_A1. Hopefully this is what you needed. If not, please let us know.
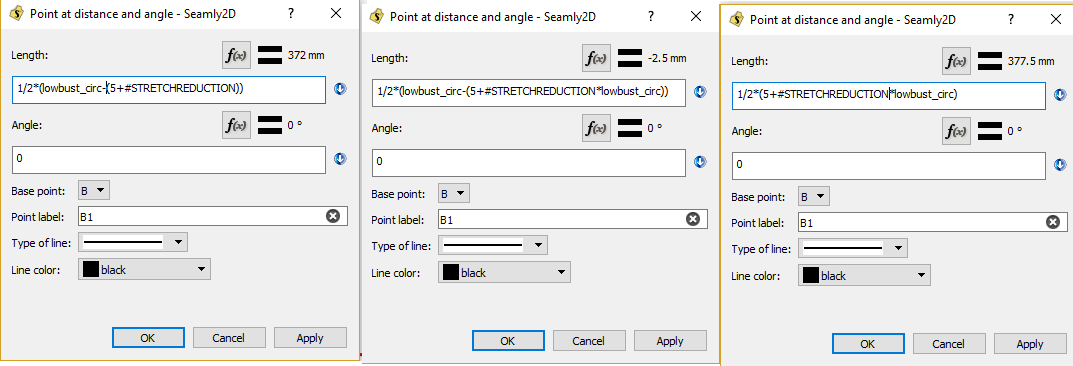
I am having difficulty with the cradle formula for Point B1. You can see the mm total varies at the top when I changed the formula experimenting to find out what I did wrong. The line becomes very small, -2.5mm 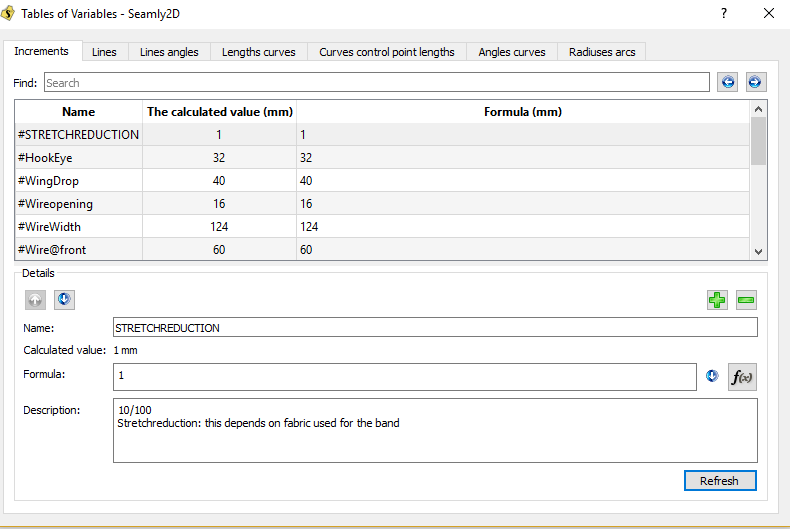
It’s a matter of the formula. I think that what you want is half of the lowbust_circ less 5 and less the stretch reduction of 10%.
So firstly, in the Increments, I’d put in the formula for StretchReduction “10/100” which would return a value of .1 which is 10%. This way, you can easily change the formula to 5 or 15% - Whatever the stretch reduction is.
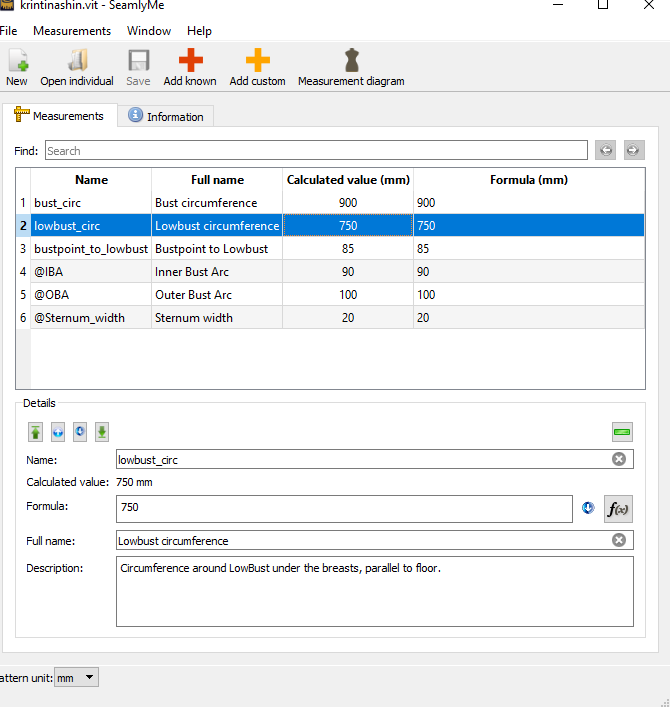
Then, starting with the formula for the half of Lowbust_circ to establish that in brackets: (lowbust-circ/2)
And then you need to deduct the total of 5 + 10% of the first half of the formula above: (lowbust-circ/2)-(5+((lowbust-circ/2)xSTRETCHREDUCTION))
(I had to replace asterisk with an x because it made everything after it italics.)
In this case, it should return a length of 332.5 (375-(5+37.5)).
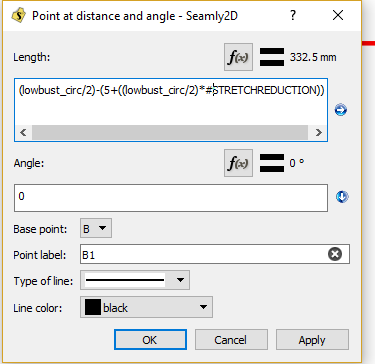 Thank you for your prompt response. I worked on since you responded, with your advice I figured out what was wrong. I got it to 332.5mm!
Sometimes I feel so overwhelmed and second guess if I can really do this, it can be confusing trying to understand the tools to make it work for my application.
kind regards Amanda
LOL, yes, my maths isn’t great so I break it down into baby steps as I did for you above. But I really think that you’re doing great. It’s just that you’ve chosen a difficult subject to learn the program on. I started with a basic bodice and have practiced on that a whole lot and only later went onto bras which are really intense curves and calculations in a very small area.
Keep going, don’t panic, take it step-by-step. You’re really doing very well 
And we’re here for you 
Would I please be able to get clarification? -What is the difference between Angle1 and Angle2 -90, +90 in a formula -Where Seg 1, Seg 2, Seg 3, Seg 4 is when making a formula?
Does the program have an offset button, ability to copy a pattern to flip the opposite side? How do I get the open source code to pass to my husband so he may see if he can develop tools.
Why is some of the measurements input in Table of Variables and others input in seamly Me. This should help me as I redo my pattern from scratch
The source code is in Github. The link is at the top of the screen but here it is again: GitHub - FashionFreedom/Seamly2D: Open source patternmaking software to democratize fashion.
I think, if you think about the measurements as constant measurements that may be used for all patterns, while the Table of Variables are unique measurements to the pattern like stretch (negative ease) and ease which are unique to the type of material that you are working with and the type of garment that you are designing. Some people do all their measurements in the Table of Variables, but I don’t because I like to change the measurement tables for different sizes and customers, which can’t be done in the Table of Variables.
In Seamly2D, the angles are anti-clockwise in the 360 degree circle. So it depends on where you are starting from and what you are using to reference an angle as to what you would add or subtract to get the line to go in the direction that you want it to go in. So if you have a line that goes at a 280 degree angle and you want a line to go out towards the left at 90 degrees, then you will use the Angle of line in the formula and -90 from it to get the line to go out at 190 degrees.
When you create a curve that touches a number of points, each section (segment) is referred to as seg 1, 2, 3, etc. and each segment has 2 handles to create the curve - one at the beginning and one at the end of the section. You can use these handles in formulas for angles.
Or… You can use the length of the curve for a specific segment in a line formula.
I hope these explanations help ![]() Let me know if you need further clarification, please.
Let me know if you need further clarification, please.
How do I get the open source code to pass to my husband so he may see if he can develop tools.
At the very top of this forum page you should see a banner
with (among other things) “Github” on it. If you Click that, it will take you to GitHub - FashionFreedom/Seamly2D: Open source patternmaking software to democratize fashion. where you can create a “fork” which is your own personal copy of the source.Hi There, it is my first time participating in a thread. I have designed the pattern for the basic underwired bra of Kristina Shin following the steps from the available video and making some adaptations with information from the book. I am going over the steps again and checking the drawing and found a “bug” in my design which I do not understand. When drawing the wire shape for the bra band I create two eliptical parts using the #WireSide, #WireFront and #WireBottom measurement and angles from 180 to 270 and 270 to 5.
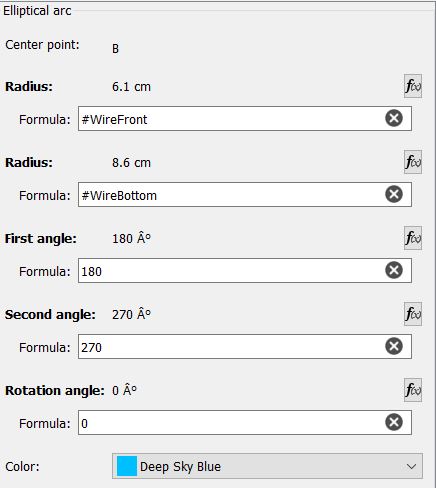
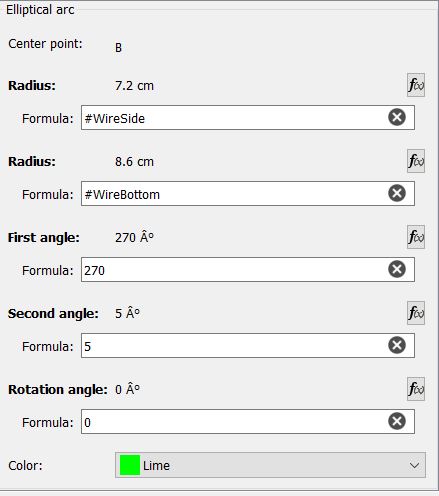 I then want to find the intersection point of these two curves and would expect them to meet at a point that connects to the center of the eliptical curves (B) with a vertical line (angle 270).
Using the “intersection point of curve and axis” tool (same happens with the “intersection point of curves” tool) I come up with a point that is not exactly vertical. It yields an angle of 269.969. Very near but not what I would expect. I would like to understand what i am missing here. Any ideas?
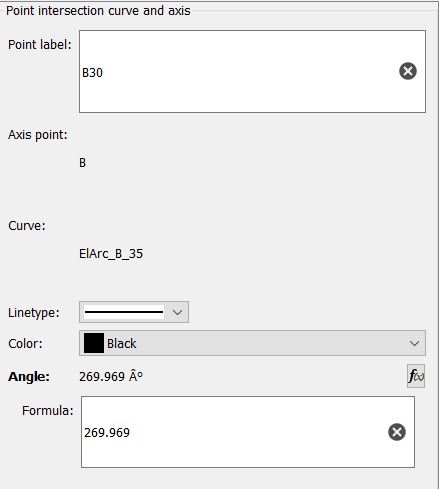
As far as that goes, you’re not missing anything. It’s just that, especially when dealing with arcs, sometimes Seamly has to fudge the results a little in order not to spend an in ordinate amount of time attempting perfection.
But your best tool for placing a point at the intersection of two elliptical arcs is the Intersection Point of Curves (CC) tool from the Curves toolset.
![]()
HI @rachel,
Did the Intersect Point of Curves tool solve the issue?
