Hmmm… 100mm = ~4inches… Maybe -500.0 to +500.0 would be better suited.
Here’s a 4" grade range for mens suit sizes - which is quite standard:
In other words the bust for ex: would increment 4" for each size in the range.
Hmmm… 100mm = ~4inches… Maybe -500.0 to +500.0 would be better suited.
Here’s a 4" grade range for mens suit sizes - which is quite standard:
In other words the bust for ex: would increment 4" for each size in the range.
I’m happy with that. I think 1m would be too little.
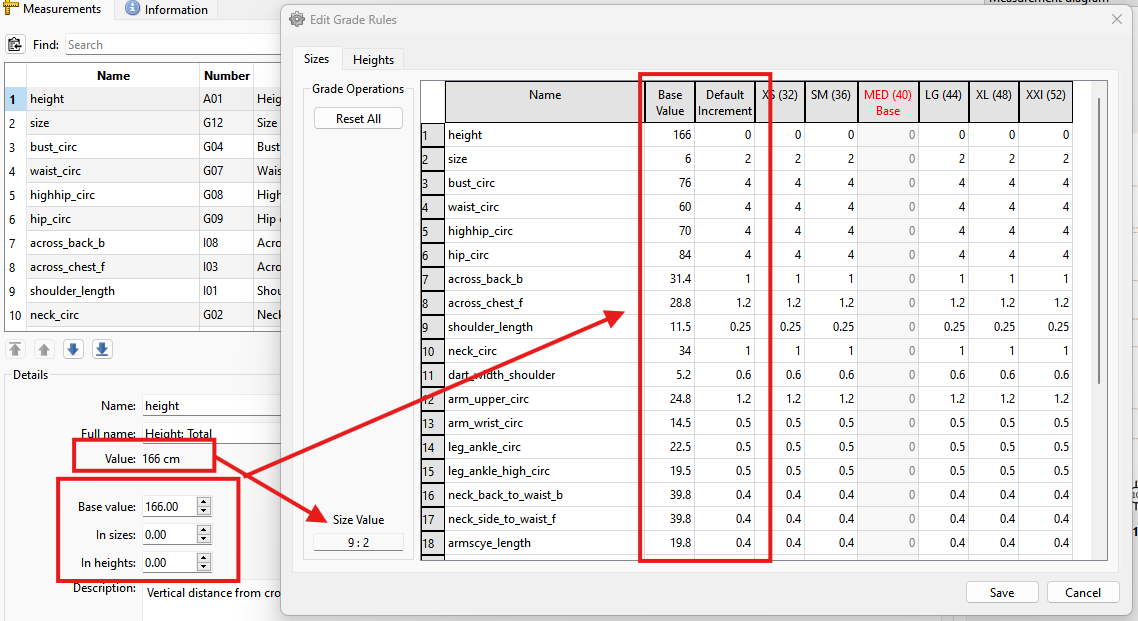
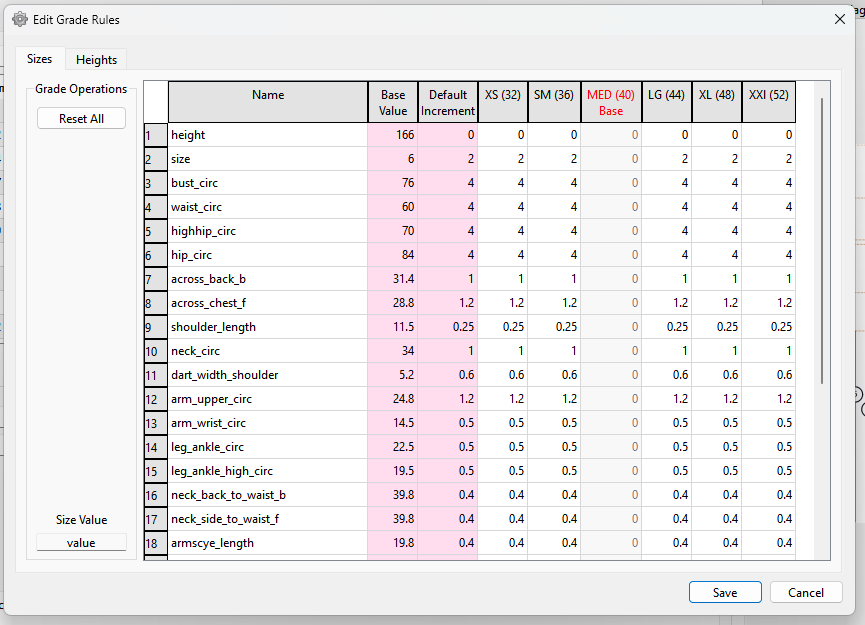
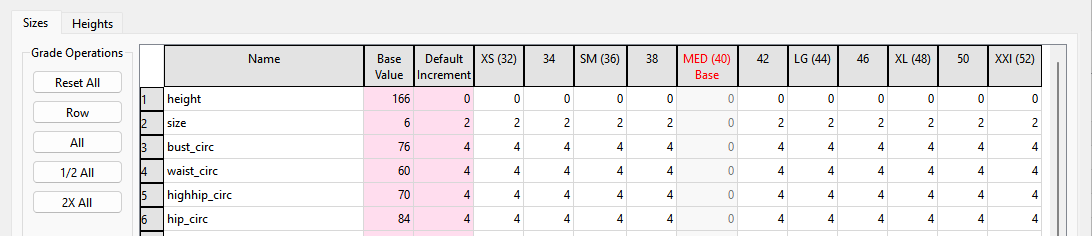
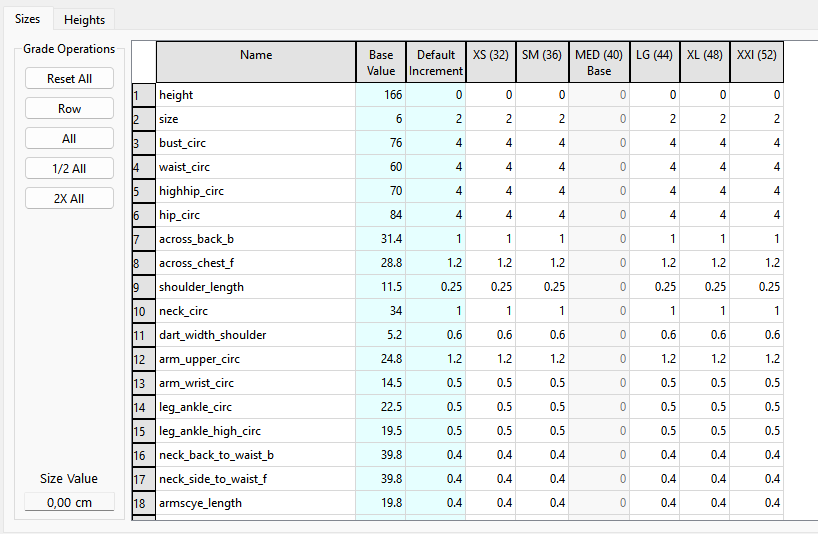
I’m updating the way the Base Value and Default Increments are added. I’m moving them from the main window as spinboxes and to the Grade Rules dialog as editable column cells in the size and height tables. It’s just a more sensible way to enter the data and takes less code as all the data is then stored in one of the tables.
Also the calculated value will display by clicking one of the size or height range cells. Currently I just have it returning the row & col as I have to update the Calculation routine to handle the added step values between sizes / heights other than 2 or 6.
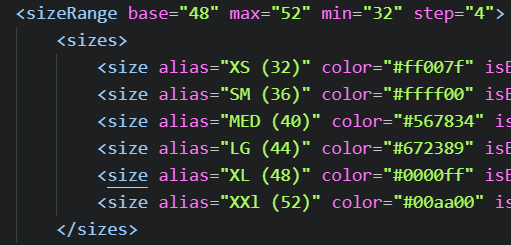
The way the Grade Rules will work is if it’s an existing pattern without any graderules it will fill a row with the default increment, otherwise it will read the stored increment values. The base size or height increment will always be 0 andis NOT editable.
Also by moving the spinbox data to the dialog it means there will be more vertical space to display more measurements.
I’m really excited about this, @Douglas . Thank you for all of your hard work. And I absolutely love the table layout where one can edit the increments.
Just a small suggestion… Do you think that the Base Value and Default Increment columns can be slightly shaded to separate them from the other increments? Perhaps a pale reddish colour to signify it’s importance?
Gehe ich von der Brustweite aus brauche ich pro Größe 40 mm.
Sure. Good idea. ![]()
BTW.. I now have the 2 tables synced so if you change the base value in one or the other the other table is synced. Also both the base value and the default increments are writing properly to the XML. Yay.
I just added a feature to auto fill the increments across a range, skipping the base size, by changing the Default Increment and pressing CTRL + Enter.


Then you can go and tweak which ever increments you need to.
Once this feature is added this whole mess will go away:
All that will be just this:
AND belong where it should - in SeamlyMe not 2D.
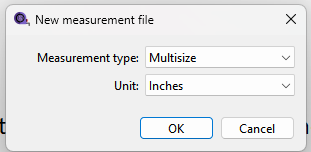
One it’s all working… down the road I then need to make it work with “inches”. ![]()
Validating it to “500” you’ll be fine. ![]()
![]() I’m so sorry, @Douglas . ..
I’m so sorry, @Douglas . ..
But in the light of the new changes, the measurement file will now cover a whole, wide range of sizes while a pattern may only cater for a few sizes, whereas currently it’s the other way around. A measurement chart only caters for a few sizes while a pattern could cater for a whole range.
To limit a multisize measurement chart (that caters for 20 sizes, in SeamlyME) to 6 sizes will limit it across all Seamly2D patterns that the measurement chart is used in.
If a person uses the currnet method of creating multisize measurement charts, then I think it will be useful to limit the measurements in SeamlyME so that one can’t go over the sizes that the chart is meant for.
![]() I can’t wait!!! Thank you, @Douglas
I can’t wait!!! Thank you, @Douglas
You just change the range in the combo boxes:
There’s no need to check a bunch of checkboxes. The size range is a function of the measurements not the pattern draft. You create size charts based on the size range and grading rules… and then grade a pattern according to the rules. Building the sizing into a pattern is backwards. This way we can create a single size chart and apply it to any number of patterns by simply loading the smms file. The way it is now you have to define the size chart in each pattern.
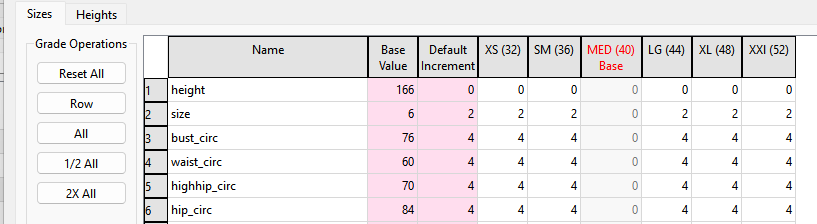
Base Value and Default Increment columns now shaded:
Note: The “Reset All” button basically undoes all the changes since the dialog was opened.
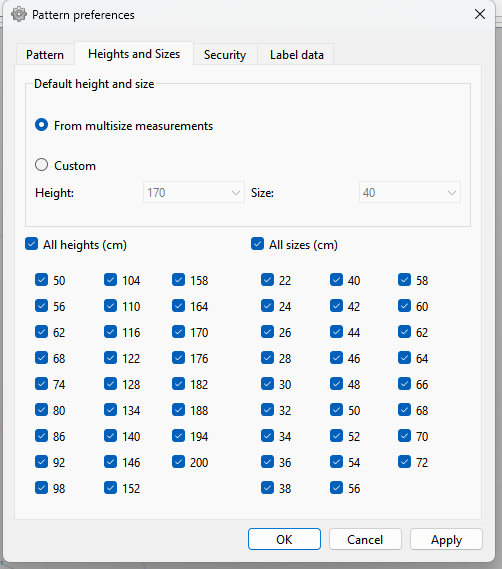
Fixed another odd choice which I never understood… the Size and Height drop down boxes in the status bar will now (default) start with the baseSize and baseHeight instead of the random choices of 50 and 176 respectively.
The base values were hardcoded here: ![]()

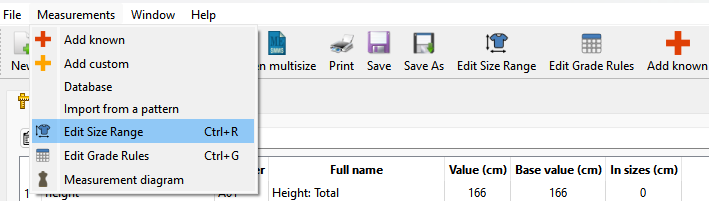
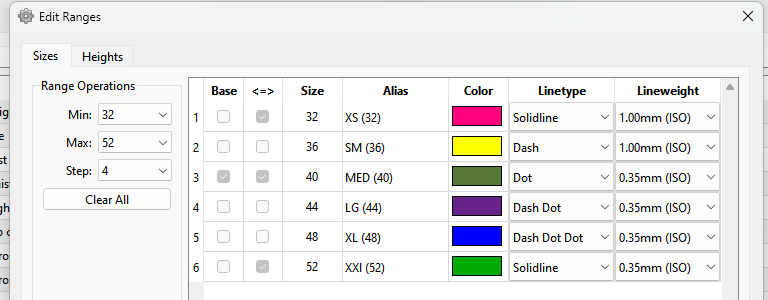
Added icons for the Size Range and Grade Rules along with Button actions on the toobar:
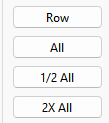
Added several fill options in the Grade Rules dialog:
Row: Duplicates the CTRL + ENTER where the range is filled by the selected row’s default increment.
All: Fills all the measurements across the range with the default increment.
1/2 All: Reduces by half all incrmenets across the range and the defualt increments.
2X All: Doubles the all incrmenets across the range and the defualt increments.
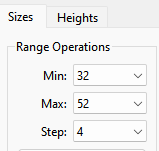
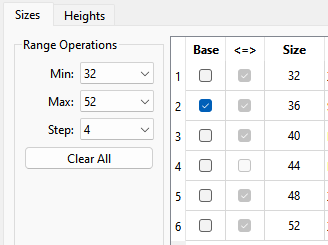
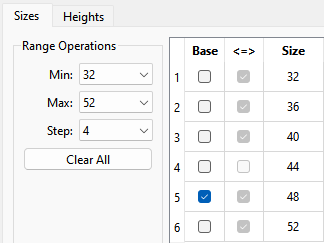
The later 2 are useful to adjust the whole table if the step is changed in the range. For ex: Given a step of 2 here:
If we change the range step to 4 - removing every other size - the increments need to double:
This is incorrect:
Clicking the 2X All corrects the increments by doubling them (maintaining any increments that deviate from the default) .
Conversely if the Size Range step was changed from 4 to 2, the increments need to decrease by 1/2… thus the 1/2 All.
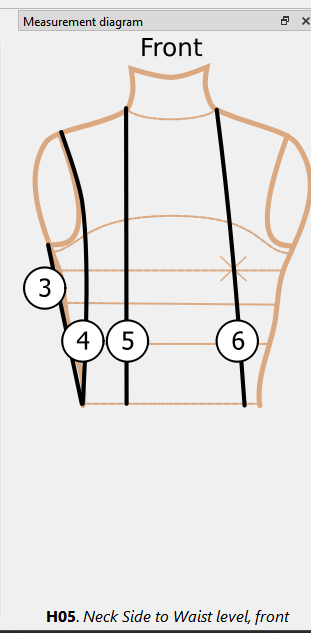
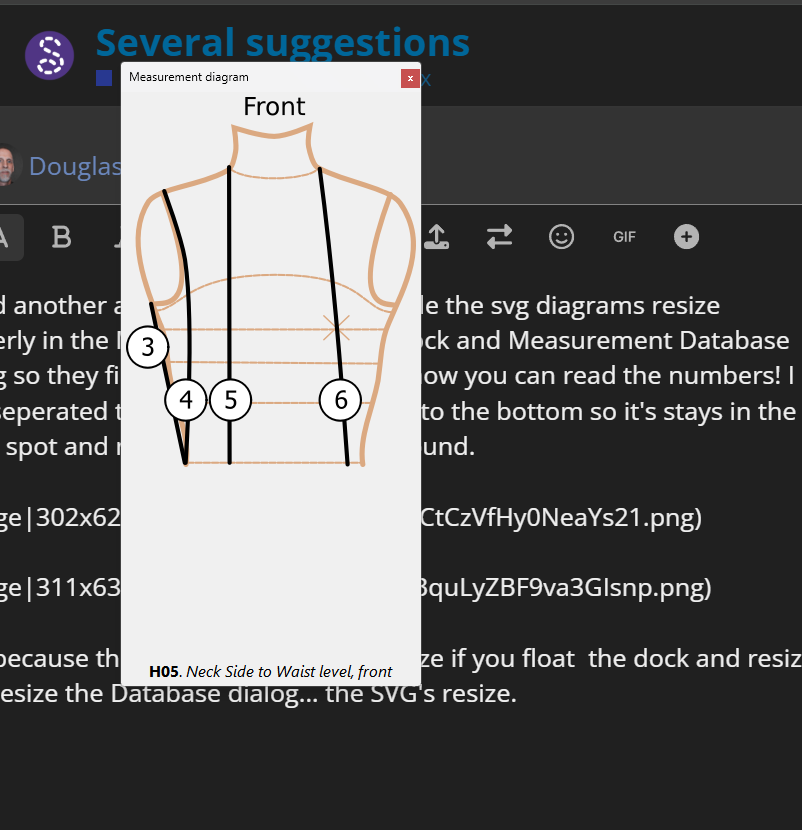
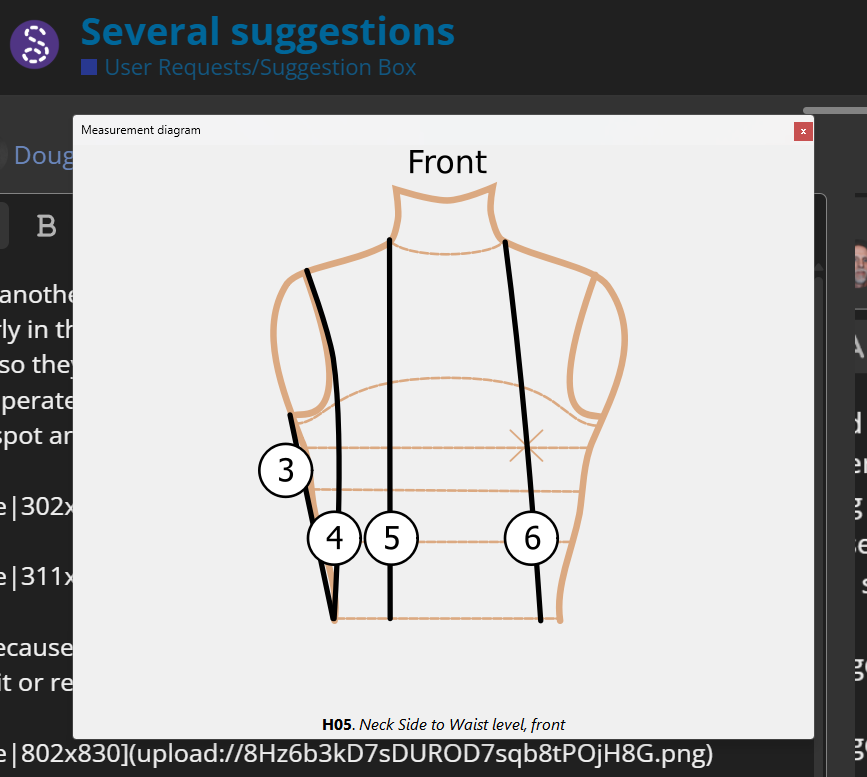
I fixed another annoying behavior… I made the svg diagrams resize properly in the Measurement Diagram Dock and Measurement Database Dialog so they fill the label container. So now you can read the numbers! I also seperated the Caption and pinned it to the bottom CENTERED so it’s stays in the same spot and not always jumping all around.
Also because the SVG’s now properly resize - if you float the dock and resize it or resize the Database dialog… the SVG’s resize.
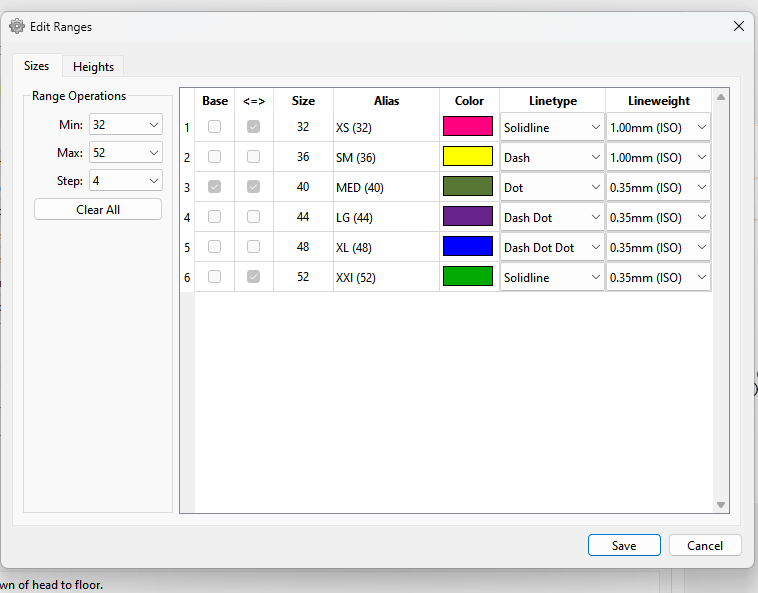
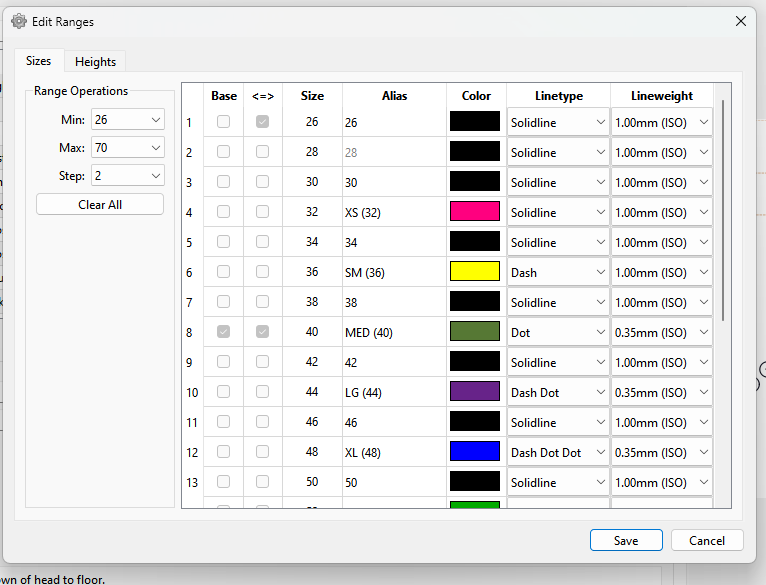
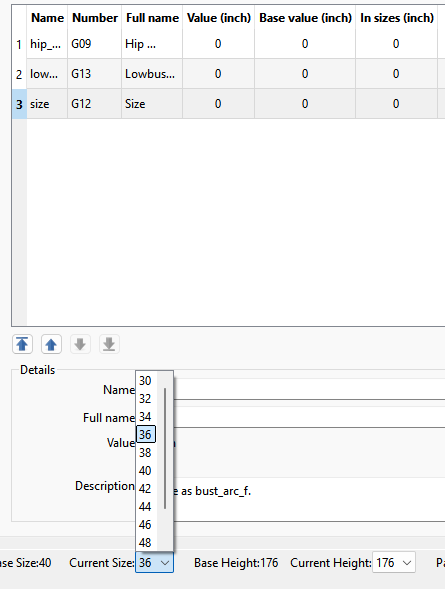
I enabled selecting the Base size or height in the Range Dialog.
Note that changing a base size or height on an existing range generally means the base values have to change.
Added Base Size and Base Height labels to the status bar in SeamlyMe, and changed the texct from “Size:” to “Current Size:” and “Height:” to “Current Height:”.
![]()
Wow, amazing work @Douglas, thank you ! ![]()
Red is usually for errors / cells with incorrect values, would it be ok to use another shading colour ? ![]()
Sure. I just used red because that’s what Grace suggested. ![]()
I also extended the minimum size range down to 0.
![]()
![]()
![]()
You are truly wonderful and amazing…
I can’t wait to start making my multisize measurement files in Imperial!!! This is so exciting, I just can’t thank you enough.
And to be able to change the grading rules (increments) at any point in a measurements chart/file is absolutely mind-blowing.
Thank you very much!!! ![]()