1930's jacket draft

Hey everyone

As promised in the introduction part, I’ve got some questions to ask - mostly about general drafting and how to apply that to Seamly 2D.

As background information, I am a selftaught drafter. I work in the film industry as props/set design/clothing department and I have a business with my friend. We sometimes get requests for making specific clothing, so I’ve been learning drafting on the side. I’ve made a few different (simple) garments over the years, mostly using Fusion & Adobe Illustrator and hand drafting all the required sizes.

However, recently we’ve been getting more and more requests to do different more complex garments and this is causing a scheduling issue with me. So I’ve decided to try and use parametric drafting in hopes that it’ll speed up things.

Here’s the catch though… I am running into issues where I don’t know enough about drafting since I haven’t gone to any schools. I’ve read countless books and tried watching as many tutorials as possible on Youtube (though they are often very surface level and basic), learning as I go. I’ve even talked to a number of tailors over the years and asked them too many questions, getting bits of information here and there.

Now, Seamly 2D doesn’t allow me to just wing it anymore, I need to understand a bit more about how things are drafted to get the mathematical parametres in place. So here, after all this talk, I’m going to be asking some questions… :slight_smile:

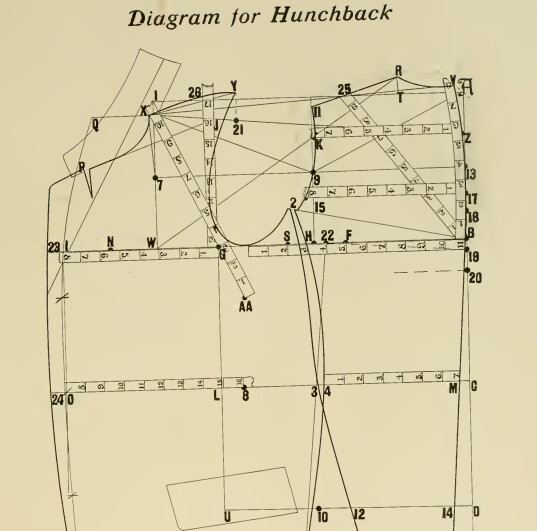
The garment: I am drafting a 1930’s military style jacket. I have 5 originals from different manufacturers of this very pattern, that I’ve disassembled and compared. They are all somewhat stretched in use, so the measurements from them are more of a hint, rather than accurate facts. They are also sewn all over the place, sometimes the stitching line is almost 2 cm from where it should be according to the cut edge.

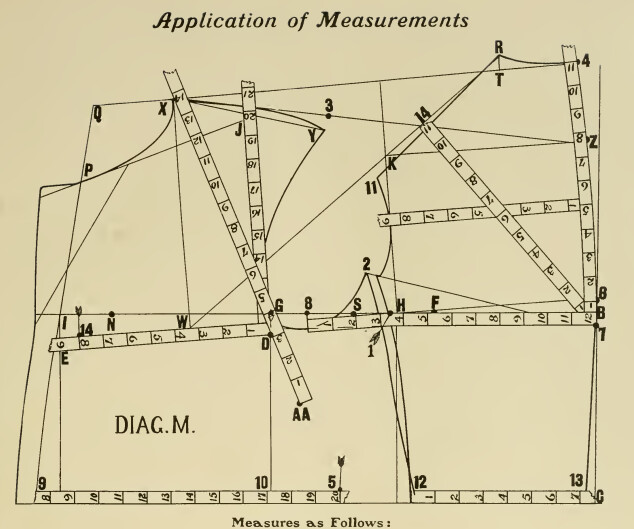
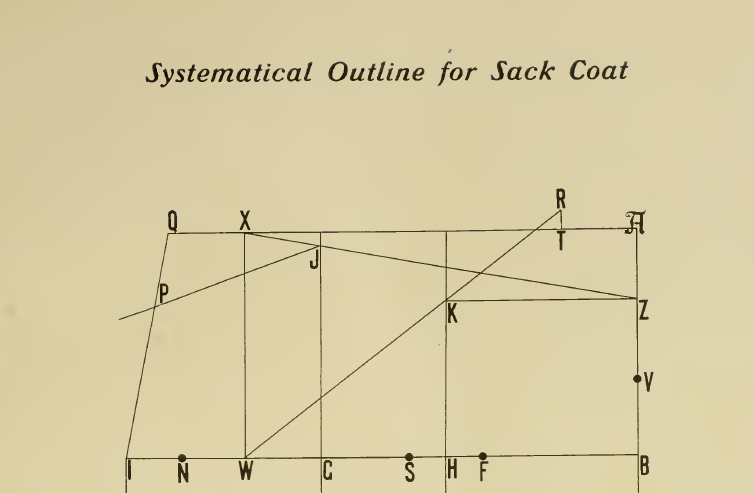
Anyways, here are two scans of the pattern from two different public domain drafting guides I’ve found (1936 and 1938 respectively) from a tailors guild paper.

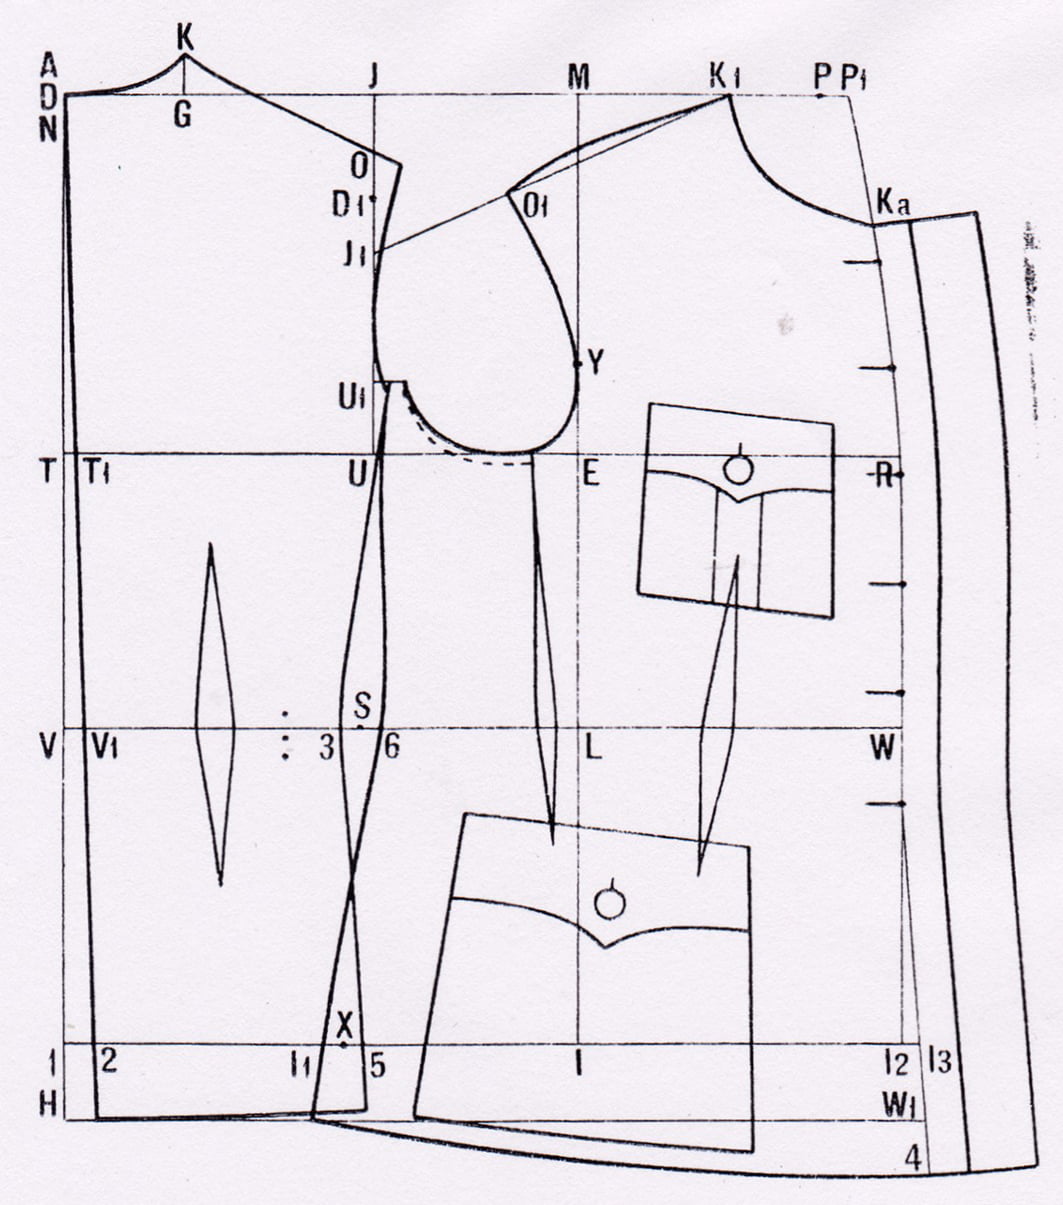
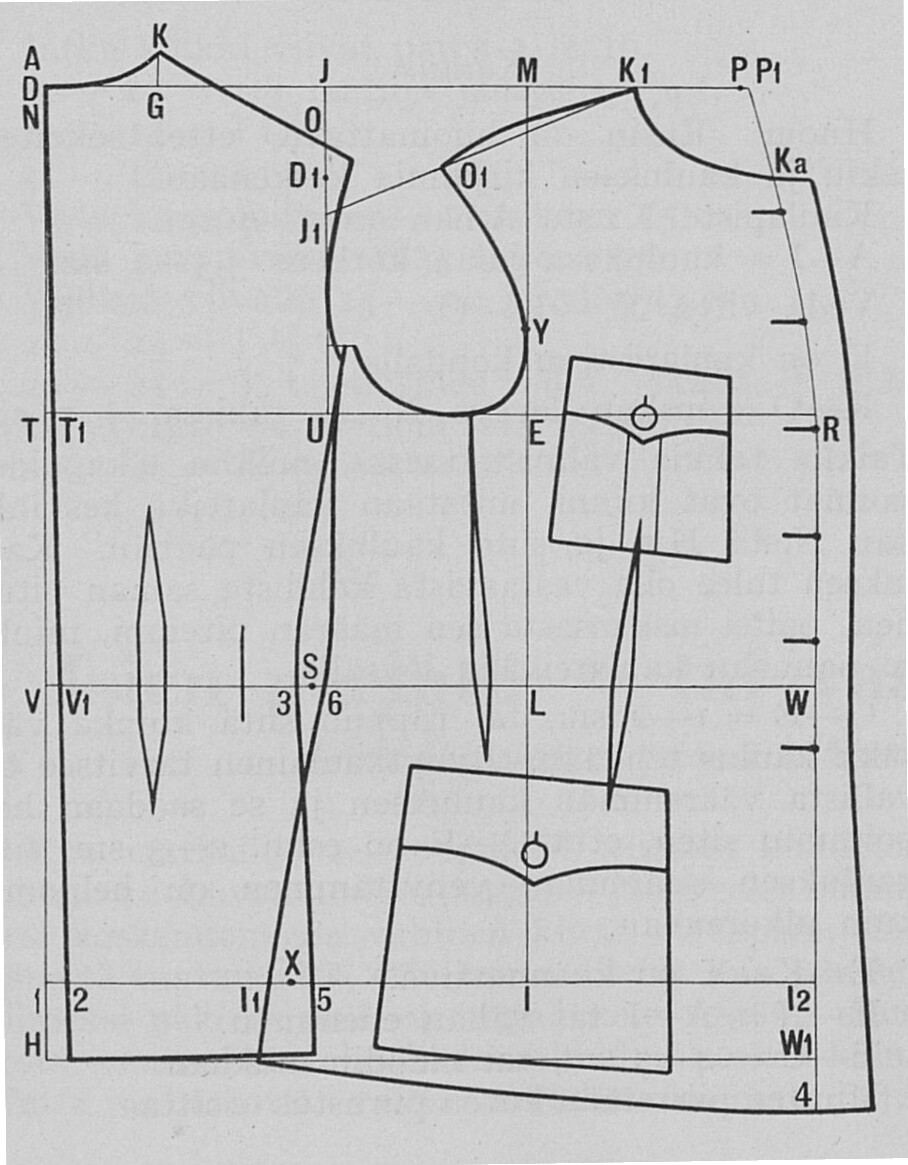
They both use a 1928 domestic “tailors drafting manual” system as a basis, which is a domestic system developed in order to harmonize sharing patterns between professionals. The issue is though that the system also leaves a lot of the explanations out, simply stating “draft this the usual way”. I’ve even talked to a tailor who specializes in old garments and he had no answers, he just uses his 40 years of experience to get past these points - experience I don’t have. On top of all this, the system includes simple seam allowance of unknown measure. Meaning, from experience with previous garments of the same system, I’ve figured there’s about 8 mm to 10 mm seam allowance included in the seams that attach to other parts if you’re doing open seams. Many of these patterns how ever require felled seams or welted seams, so you end up having to add extra seam allowance to achieve comfortable results.

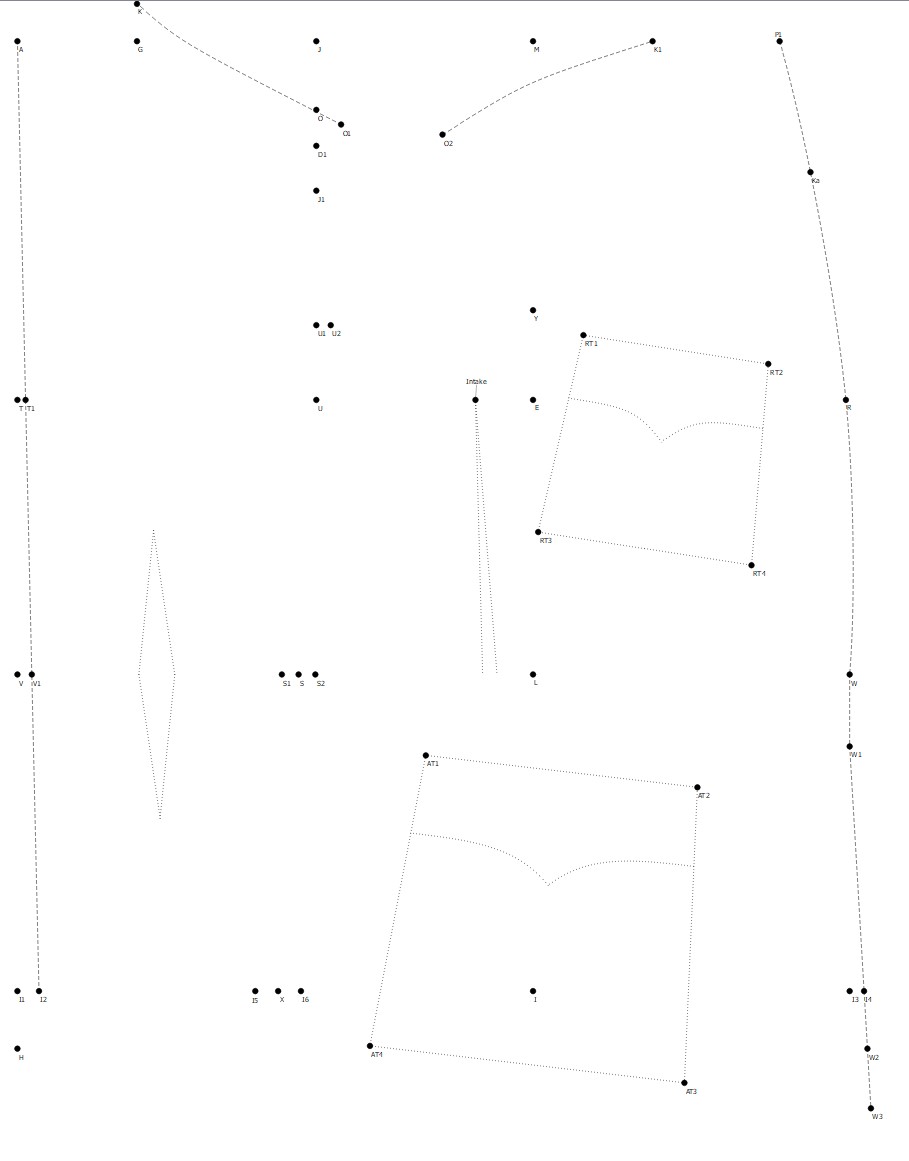
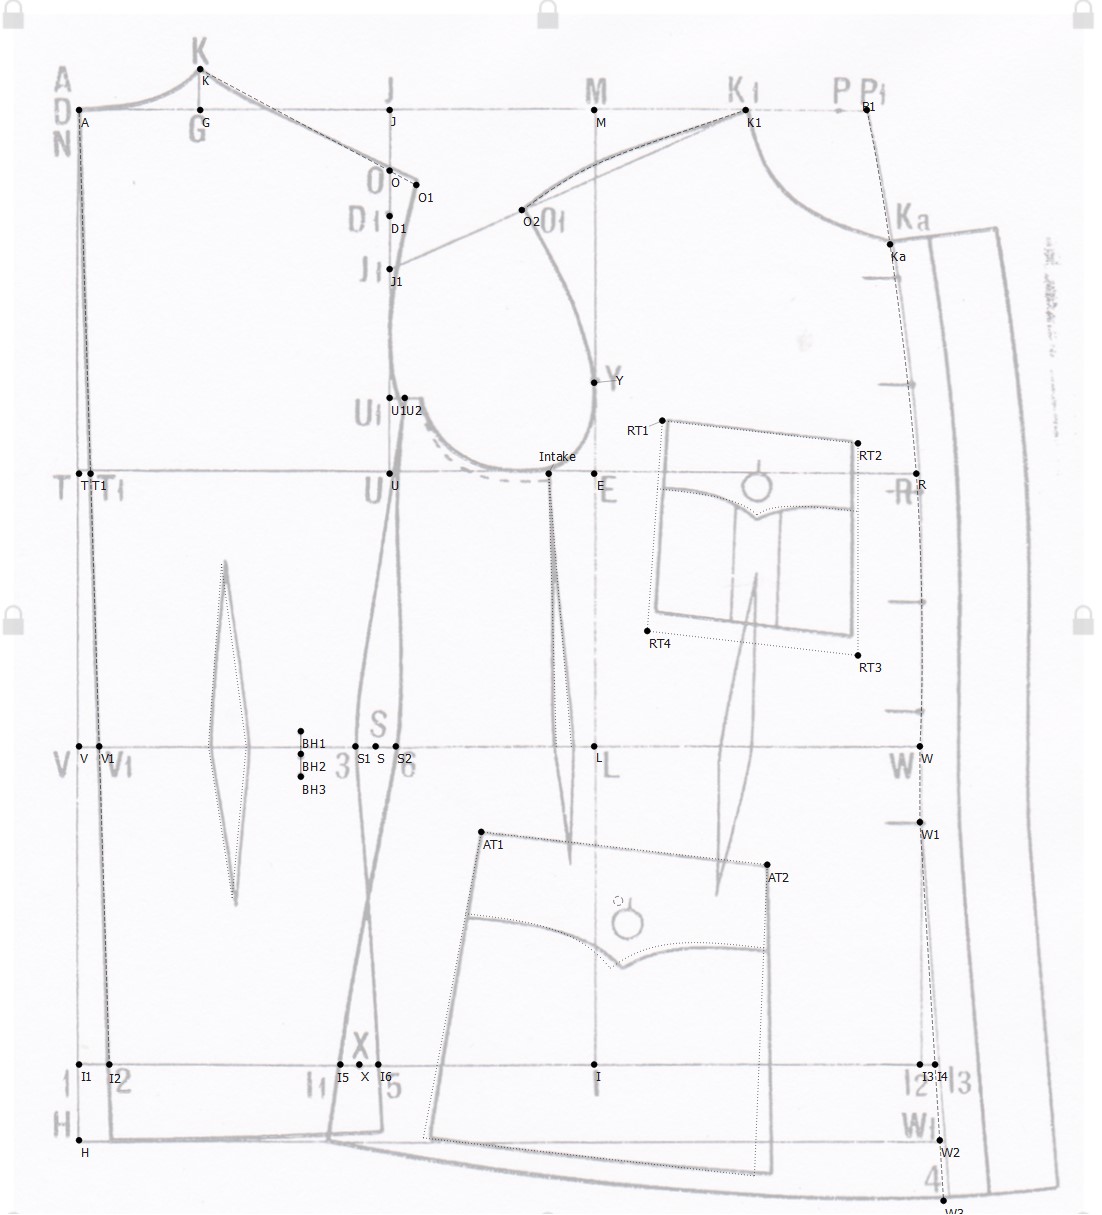
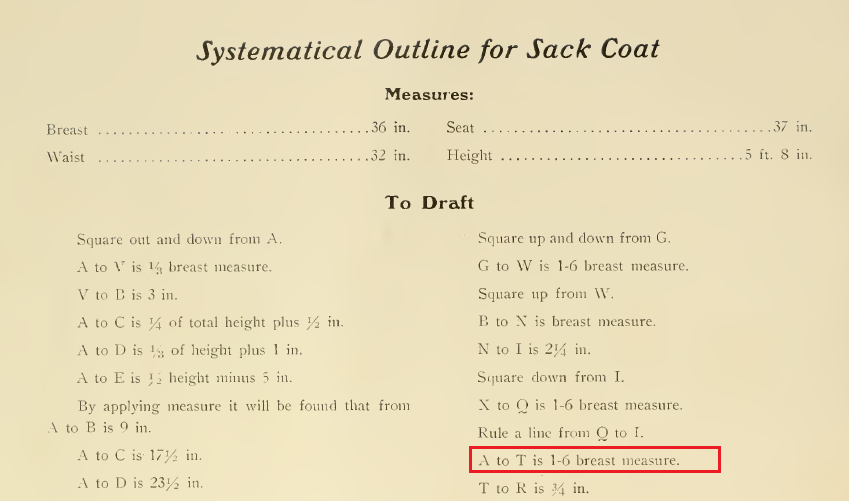
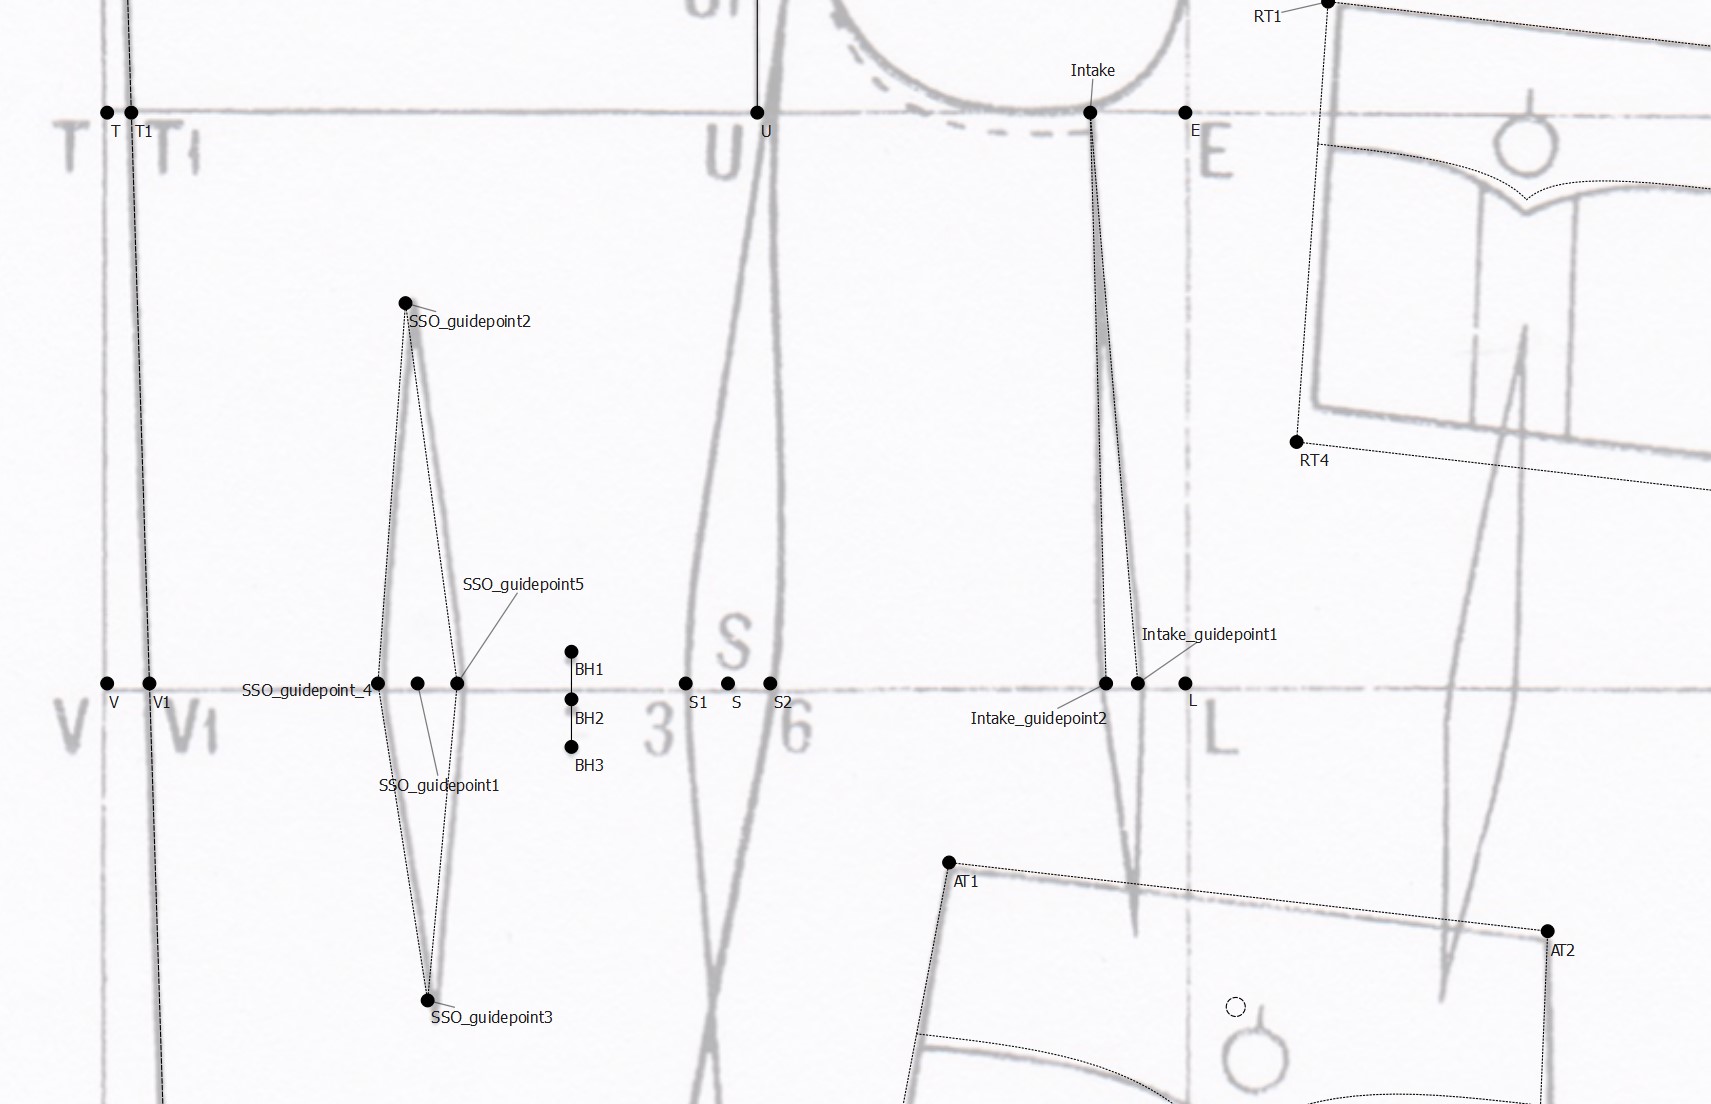
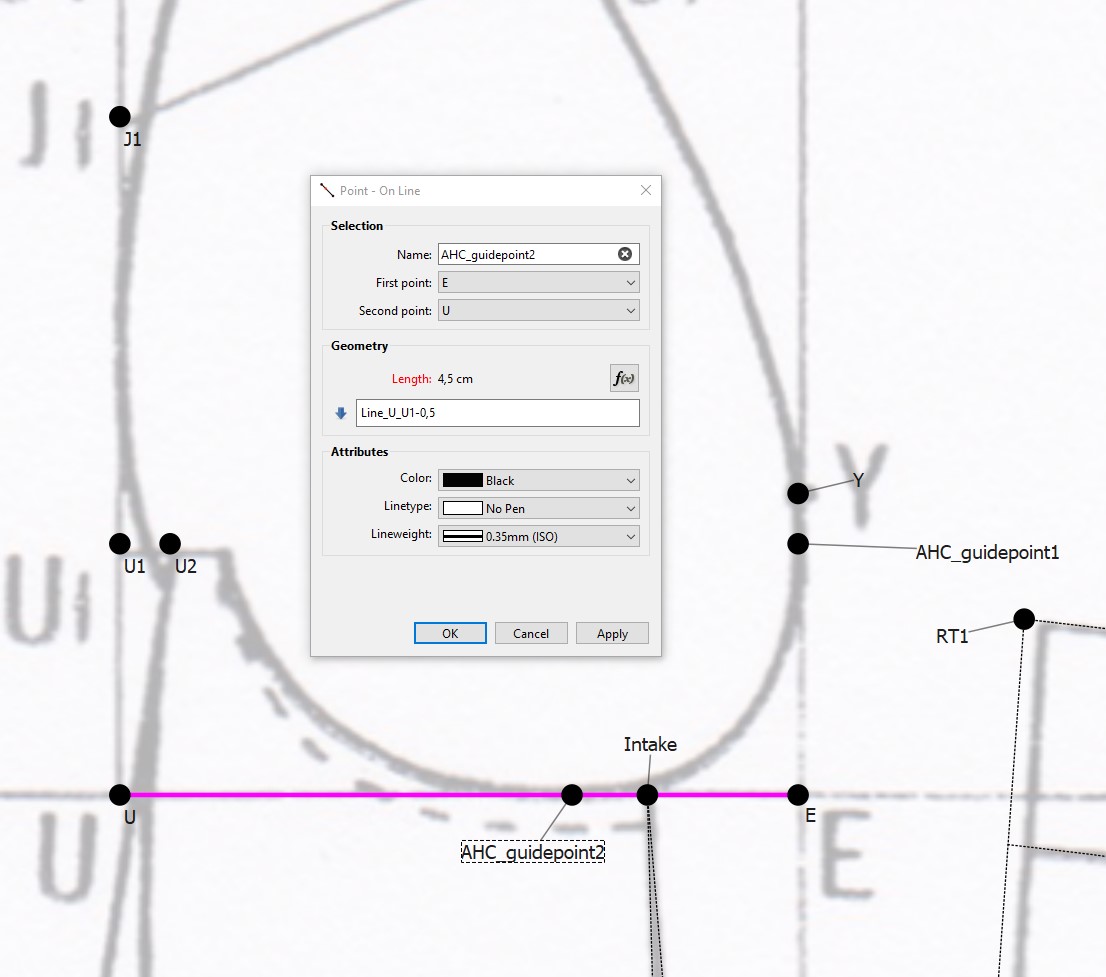
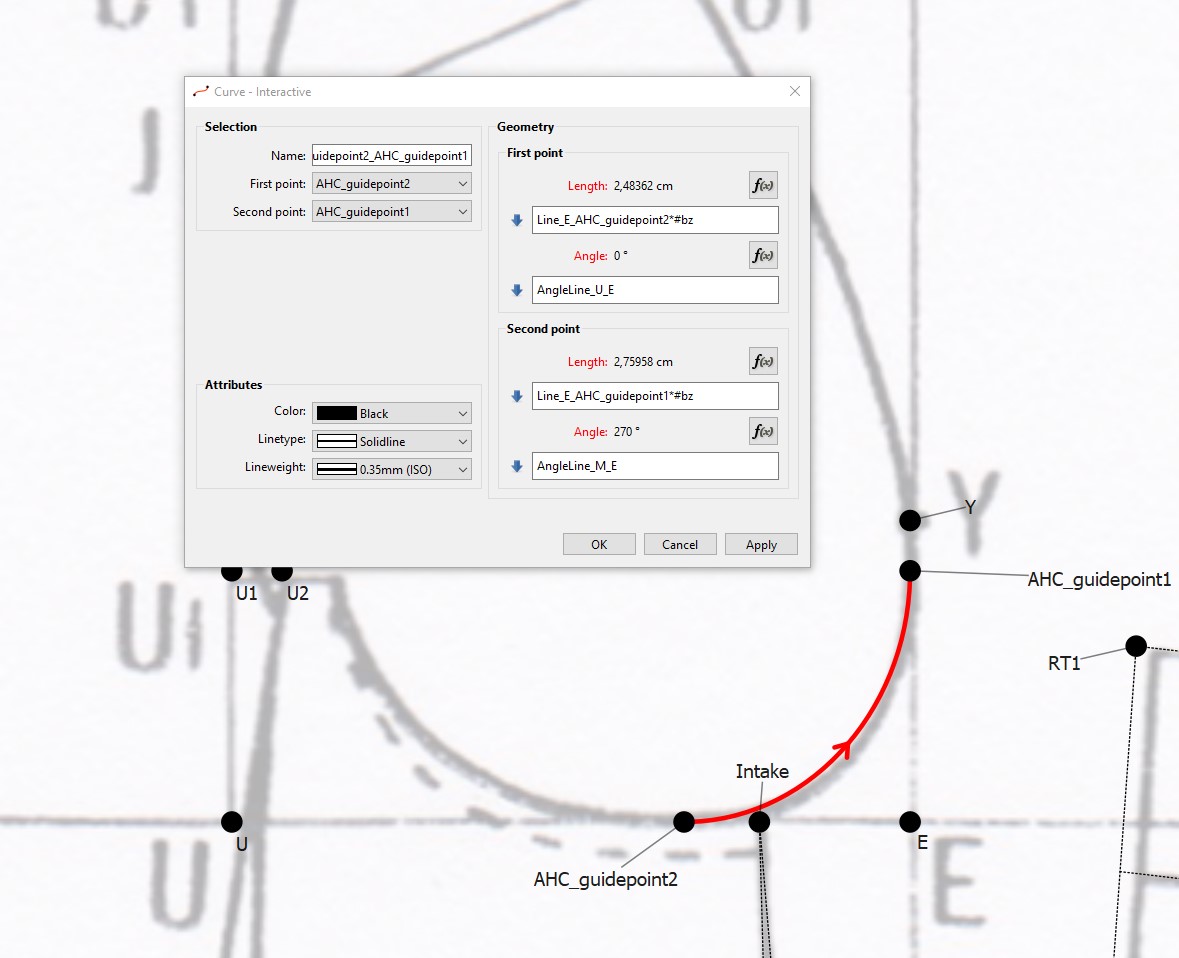
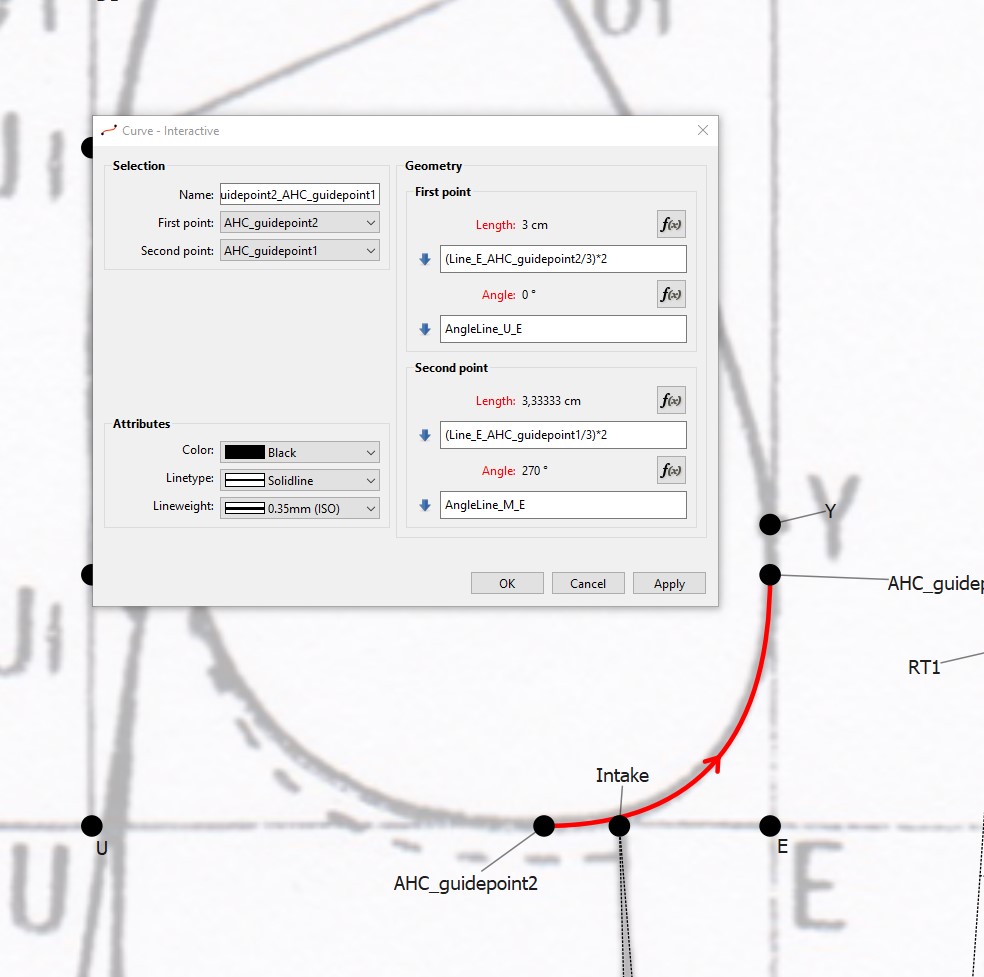
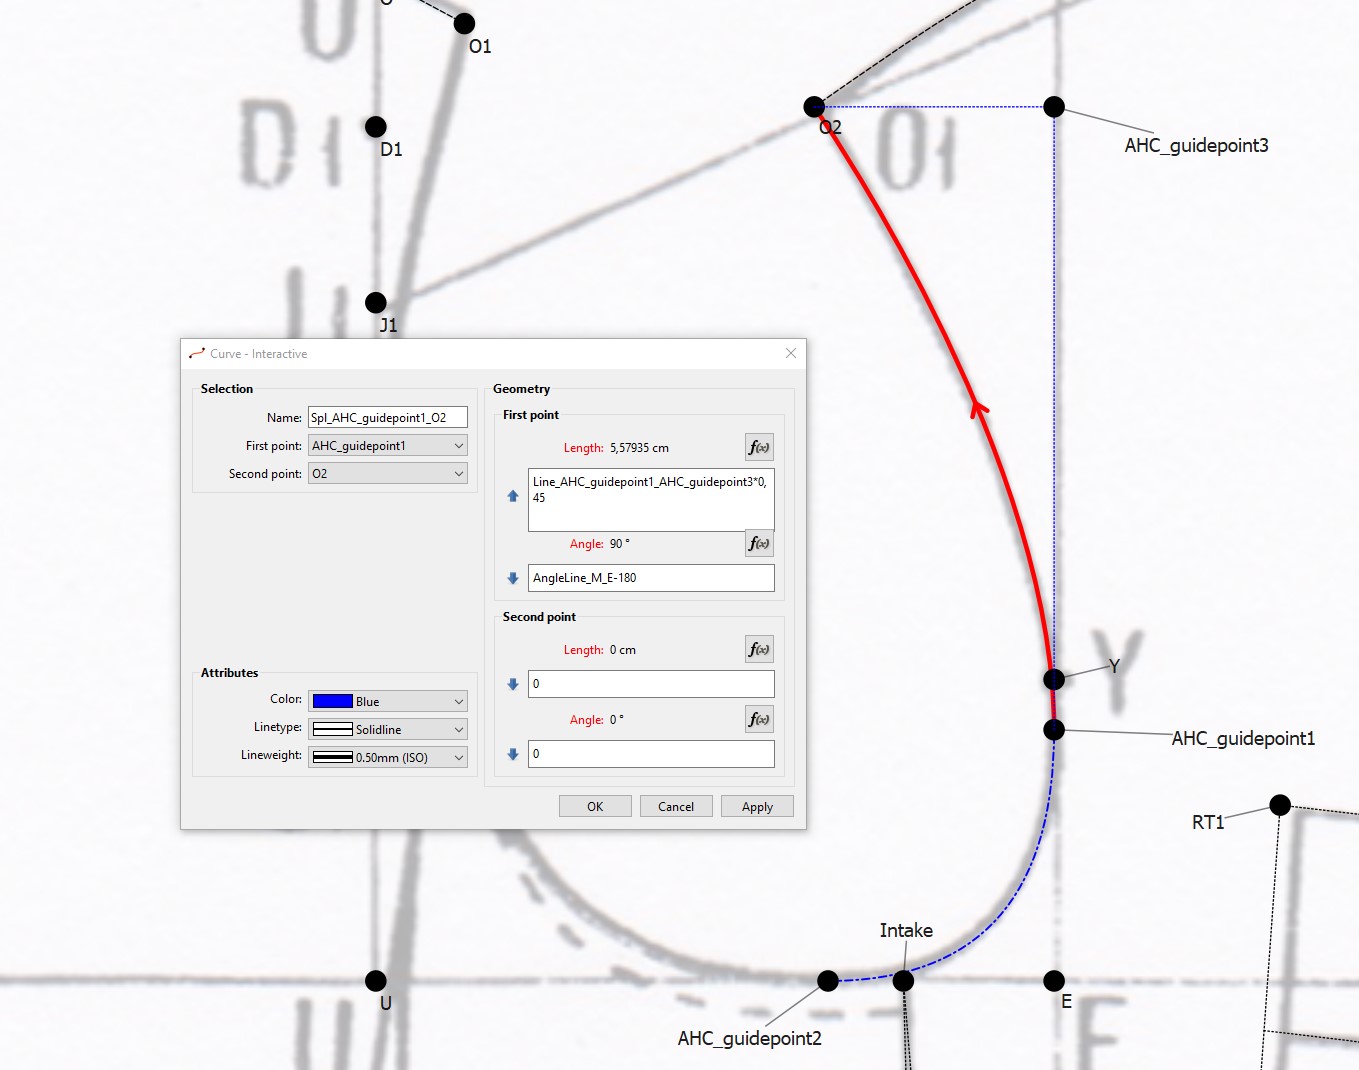
Here’s where I am currently with the draft, made to my best understanding of the system. These are all the points and lines that are explained in the drafting guide - rest of it is done “the usual way” or use “the usual measurements”.

Right now I am focused on the waist area (V1 - W) and how to determine the location of the side waist darts. Or mainly, how the second chest dart location would be determined and how their shape below the waist would be determined.

Also, I have not figured out yet how the skirt and side seam lengths are determined. All I know is they go through the points I1 and 5 (in the original drafting guide) or I5 and I6 on my draft. Then cross, using the points 3 and 6 in the original, or S1 and S2 in my draft. The length of the skirt itself seems to be full back length on the center back (A - H), but since the drawing includes side seam allowances, the actual drawn line does not match in length (also I assume there ought to be some allowance in the length anyways).

So what I’d really like to know right now are these two things:

**1) Is there are method to the madness of drafting the waist vents?

  1. How would I go about drafting the hem/skirt of the jacket? ** Also, I am planning of using this base layer just as a reference for making another draft on top of this WITHOUT seam allowances, so I can use Seamly to determine the final seam allowances, getting everything done in the same file without having to fiddle around with anything extra.

PS. Sadly there’s no option to just offset current lines it seems, so making the CF extensions requires some manual work in this.

2 Likes

… and just wait until I get to work on the armhole, which is a bit daunting to be honest.

1 Like

As for my background… I have a degree in Civil Engineering and have been drafting for 50+ years. I also have a degree in Thechnical Theatre and Design (set & costumes). Up until a fire completely destroyed our building, my partner and I ran a costume business for nearly 42 years. Last couple big jobs we worked on was the men’s wear for the National Tour of Annie, and the orphan girls uniform dresses for the movie Cabrini. :slightly_smiling_face:

If you use a system like the Supreme System by Croonborg (Aka Blue or Red Books)

of the Harry Simmons book:

They easily adapt to Seamly for drafting period clothing. You just follow the instructions.

Some systems have the seam allowance builtin… but in the case where you need additonal SA in some areas I suggest using a 0 SA where the SA is builtin, and add more SA where needed. Unfortunately at this point I haven’t figured out how to display and print a builtin SA, so you’ll have to note your SA on the printout manually.

Do you mean darts? This military frock doesn’t have vents.

The skirt section is part of the draft… do you only have the images you posted above?

1 Like

Thank you! I’ll check the books, I have a feeling I’ve skimmed the Supreme System book before, but perhaps a deeper look is warranted.

Some systems have the seam allowance builtin… but in the case where you need additonal SA in some areas I suggest using a 0 SA where the SA is builtin, and add more SA where needed. Unfortunately at this point I haven’t figured out how to display and print a builtin SA, so you’ll have to note your SA on the printout manually.

In this case I don’t believe internal seam allowances, or marking them, would really even be beneficial. The main reason I am curious about them/all this is that my mathematical brain keeps telling me all the curves would be easier to draft if they didn’t include seam allowances already. For example, the armhole is so much easier to draft without the seam allowance as is the case in this jacket.

Do you mean darts? This military frock doesn’t have vents.

Yes, darts indeed! My apologies, they are the same word in my native language, so I sometimes forget that they are two different things in English. Same goes with arc/curve - just one word for both here! Causes occasional confusion when talking about these things in English…

The skirt section is part of the draft… do you only have the images you posted above?

Yes, these are the only images. The only measurements provided are the CF length and CB length. For example the side seam length is a mystery - if I just draft the backpiece with an arc or an curve and then copy that length to the frontpiece, the side seam is about 6 mm or so too short. So I suspect there is a method to figuring out correct lengths that you can then use to draft a curved, form fitting line as in the drawing.

The drafting guide merely gives the locations of the points and concludes “draft outline as shown in the sample drawing”. Which I feel is not enough information - there has to be a method that was used to extrapolate the sideseam etc. from the information provided.

1 Like

I might add that the system used is based on proportional chest circumference measurements, this jacket uses ((chest circumference/2) + 4 cm) / 52 as the basic function that runs most of the sizing.

On top of that the provided size table uses Half back length, Full back length, Chest circumference, Waist circumference, Hip circumference, Sleeve length from the collar over the shoulder and neck circumference. Sadly the size table also doesn’t scale the same as the ones provided with the program, so I’ll have to make all the 29 sizes by changing the size table measurements and exporting individually (the size table provides sizes 46 - 56 in 3 lengths, as well as 9 “special” sizes).

1 Like

@Douglas is the professional in this regard, and I’m thinking that time may be of the essence here (I really don’t know what time-span is allowed from the order tp the delivery of the completed garments).

Looking at your images in the 1st message, I think that some of your next questions will be about adding collars and lapels to the patten once you have it drafted.

What sort of instructions did you receive with those images? Do they say that line X to Z is a portion of a measurement taken from a person? It doesn’t help to have a list of measurements and the objects in the pattern aren’t related to them - because the pattern won’t resize when you change the measurements file. In the Blue book (page 72) that @Douglas posted, the measurements are specific to certain parts that are drafted:

And here, you can see that the collar & lapel are drafted onto the patterh (page 75):

So these are things that I’d look for in the instructions. And I’d probably spend quite a lot of time setting up the measurements files and checking them so that they’re error-free. Once you can trust the measurements, the drafting will present some problems, but the end result will resize accordingly, if the instructions are followed to the letter.

I also suggest joining this forum:

https://movsd.com/BespokeCutter/index.php

under “drafting, fitting and construction” you will find a lot of discussions about different drafting systems, people there love to use old books and you also have a dedicated part for costumers.

I think it’s the best place to get a very good knowledge about exactly what you are searching for.

1 Like

Drawing curves has nothing to do with the SA. The SA is simply a contour that is added “outside” the mainpath, based on the SA width set before and after each node point in a pattern piece. If a pattern system has a builtin SA - which many do - you don’t want to be adding SA.

As far as drafting curves that will resize properly with a change in measurements is something you’ll need to look into. In order for curves to resize properly you need to add formulas to the control points.

The darts in most patterns are best handled as internal paths that are added to pattern pieces. As usual the width of the dart can vary on style of a person’s measurements.

In English… 2 differnent things. An “arc” is part of a circle, while a curve can be any freeform curved line. Technically the app is using bezier curves (spline) where in the app we refer to a “curve” as a single curve with just 2 points, and a “spline” as a series of multiple curves.

The drawings are pretty much useless with the drafting system instructions. Most systems will have instructions that will say something A from B is 1/6 Chest. C from B is 1/12 the Chest. etc, etc… These points are literallty some proportional points on the body. If you were drafting by pencil & paper, once these points are located you would connect the dots.

You might want to step back and take a look at some simple examples of using Seamly… the Military frock is quite a complex pattern to start with. Take a look at the example in the Wiki:

2 Likes

Most of the Blue / Red book “proportional” patterns are all based on Chest, Waist, Hips, and Height. That’s it. It then goes into how to apply direct measurements to adjust the fit.

1 Like

I do have another way of entering “existing” patterns in Seamly… but it’s a little tedius and requires some knowledge of grading. Here’s a knicker pattern (one of the only patterns that survived the fire because I made a copy to digitize) that we orginally used for a production of Amadeus. It requires drawing the pattern pieces out on a piece of paper, then locating the x,y dimentions of every grade point from an origin point. All the grade points are then located in Seamly, and since I know what size the orginal pattern is, I know how to formulize each point. It’s basically a form of radial projection.

Breeches.sm2d (59.2 KB)

Wolf_38.smis (4.2 KB) Wolf_40.smis (4.3 KB) Wolf_44.smis (3.9 KB) Wolf_34.smis (4.2 KB) Wolf_36.smis (4.2 KB) Wolf_46.smis (4.2 KB) Wolf_48.smis (3.9 KB)

JarrodY.smis (4.4 KB)

2 Likes

Looking at your images in the 1st message, I think that some of your next questions will be about adding collars and lapels to the patten once you have it drafted.

Collars I do know how to make, they are pretty much the same style in all of these uniform pieces I’ve made, with slight variation, and I’ve got an excellent guide for them :slight_smile:

What sort of instructions did you receive with those images? Do they say that line X to Z is a portion of a measurement taken from a person? It doesn’t help to have a list of measurements and the objects in the pattern aren’t related to them - because the pattern won’t resize when you change the measurements file. In the Blue book (page 72) that @Douglas posted, the measurements are specific to certain parts that are drafted:

The system is based on chest measurement of the wearer. Essentially, you take half the chest circumference, add 4 or 6 cm and then divide that by 52 or 54, depending on which of the two guides you look. Then you use that as a multiplier in most of the proportions, with a few exceptions that are fixed cm measurements.

For example: in the original image A-T is 20*Division. So for example 96 cm chest would have 96/2 = 48 cm 48 cm + 6 cm = 54 cm 54 cm / 54 cm = 1 cm (the “division”) Thus A - T would be 20 * 1 cm = 20 cm

My issue isn’t getting the measurements down - I’ve got them down just fine from the guide. It’s the cutting lines and their shapes that I am trying to figure out :slight_smile:

I am used to the Müller & Sohn system, which often explains quite nicely how the cutting line is formed from the draft. Unfortunately this old system does not explain anything, really.

2 Likes

Drawing curves has nothing to do with the SA. The SA is simply a contour that is added “outside” the mainpath, based on the SA width set before and after each node point in a pattern piece. If a pattern system has a builtin SA - which many do - you don’t want to be adding SA.

In this case they do have something to do with it. Or rather, they are part of the reason why certain parts are the shape they are. If you look at the U1 point in the armhole of the original sample draft, you clearly have the seam allowance in there.

If you look at this quick test sample, you can see that the seam allowance is drawn and included, where as without it it’d be just sharp point.

I’ve yet to find a good guide and/or explanation how to draw the lines including the SA based on this drafting system, where the SA is included in the measurements of the points already.

As in my previous reply, I am more used to Müller & Sohn system which gives you points without SA and explains how to draft the seam lines to which you then add the SA. I don’t know how to do it the other way around however.

The darts in most patterns are best handled as internal paths that are added to pattern pieces. As usual the width of the dart can vary on style of a person’s measurements.

The instructions give the width of the darts as well as the length of the backside. Backdart is 2cm wide and 20 cm long, the armhole dart is from 3 cm to the left of the point E, down to the waist where the side is 1,5 cm to the left of L and it’s 1 cm wide.

The “pocket dart” is just told to be 1,5 cm wide and drafted “between pockets as in the drawing”.

The drawings are pretty much useless with the drafting system instructions. Most systems will have instructions that will say something A from B is 1/6 Chest. C from B is 1/12 the Chest. etc, etc… These points are literallty some proportional points on the body. If you were drafting by pencil & paper, once these points are located you would connect the dots.

Yes, this is exactly as they are given in the guide. The images in the OP are just example of the “finished draft”. However, as I am trying to make this a parametric pattern, I need to figure out some mathmetical rules in which the lines are based on.

I’ve previously hand drafted and used Illustrator to draft sizes I’ve needed. For 29 sizes that is however a VERY big task to do and will include some variations between sizes (as they don’t smoothly change between sizes in equal portion, rather each size has slightly different proportions). I am attempting to avoid that issue by having set mathematical rules for each curve/spline/arch and line.

The current points scale nicely between sizes right now, however the cutting lines are still a mystery to me… :slight_smile:

Here’s my current draft overlaid on one of the drafting guides, showing that it matches pretty well. Slight deviation resulting from the scan from the original paper.

2 Likes

That has to do with the SA angle selected at a corner - again has nothing to do with drawing curves.

And again (unfortunately) at this time if drafting with the SA builtin we have no way to indicate the SA, or rather drawing the seamline inside the mainpath - which is now the cutline. This includes indicating the various corner angle types.

Again… if the SA is built into the draft, we have no way to indicate the SA and seamline. When we create a pattern piece we are just creating a path… what we call the main path. Normally the mainpath IS the seamline, and we then add SA (and thus cutline) based on the before & after widths for each node point. If the draft includes the SA, the “mainpath” is now the cutline… but we currently have no way to indicate the (shaded) SA and seamline. It’s a complicated task to acomplish that I just haven’t figured out how to do yet. I’m still trying to decipher this section of of the orginal dev’s code.

THAT’s how Seamly works. You draft your pattern… then add SA to pieces. If the drafting system includes SA, then you just don’t add SA… or add Zero SA… but there will be no way to indicate the seamline and corners. The path you draw simply IS the cutline.

I thought you said there were no instructions?

  1. You need to create a measurement file.
  2. You use the measurements in the formulas to parameterize the tools.

For example: In this case the instructions from the Red Book probably said A to M is 1/6 the chest scale (@ChestScale being 1/2 the chest - i.e. bust_circ).

image

So the formula fo the Pont on line tool is @ChestScale/6

Here’s the same thing from the Blue Book:

THIS is the formula for T:

That’s why Seamly uses the measurements to parameterize the formulas. You draw one pattern and simply change the measurement file to resize the pattern. As far as curves go… you have to parameterize the control points as well (or use fixed curves) so the curves smoothly resize correctly. There are topics on this ad nauseum so I’m not going to explain it here.

Again… if you draft and then add SA, the mainpath is the seamline and SA is the cutline. If the draft has builtin SA, then the mainpath is the cutline, and there is no seamline. You have to manually note it. Which is really not a big deal as if you ever worked with commercial tailoring patterns on tagboard they have no seamlines marked. Most of my paper patterns never had seamlines drawn… I just knew that all seams are 1/2" unless I noted otherwise on the pattern. You want corners clipped… just clip when cutting the pattern out.

2 Likes

Von Müller und Sohn gibt es ein sehr gutes Buch über Sakkos. Kannst du das nicht verwenden?

2 Likes

I think we are talking about different things and I am not being clear enough - probably has to do with me having to write this in my third language, as well as not fully understanding drafting. I’ll try and answer and explain in a bit more detailed manner, so you understand my thought process :slight_smile:

I’ll first answer individual points, and then give a bit of a more detailed explanation what I am trying to achieve here. Hopefully this’ll clear up some of the confusion and you’ll understand what I am after. I apologize that I am being a bit frustrating, there’s just so much going on and I’m trying to do a million things at the same time - and there’s only 24 hours in my day. Might have something to do with the level of confusion I am having here :smiley:

Anyways, here’s the individual answers:

That has to do with the SA angle selected at a corner - again has nothing to do with drawing curves.

What I am getting after here is that the cutline corner shape comes from somewhere. That somewhere is the seamline and how they meet up. The guide shows me the end result - and I am effectively trying to replicate that without knowing the starting position. The curves that are drawn in the sample image are the end result of the seamline + seam allowance, so if I want to replicate that accurately and mathematically in a parametric form, I would need to figure out where the seamline is supposed to be, and go from there. That line can be marked in Seamly - or I can just use geometry and mathematical functions to achieve the same.

And again (unfortunately) at this time if drafting with the SA builtin we have no way to indicate the SA, or rather drawing the seamline inside the mainpath - which is now the cutline. This includes indicating the various corner angle types.


Again… if the SA is built into the draft, we have no way to indicate the SA and seamline. When we create a pattern piece we are just creating a path… what we call the main path. Normally the mainpath IS the seamline, and we then add SA (and thus cutline) based on the before & after widths for each node point. If the draft includes the SA, the “mainpath” is now the cutline… but we currently have no way to indicate the (shaded) SA and seamline. It’s a complicated task to acomplish that I just haven’t figured out how to do yet. I’m still trying to decipher this section of of the orginal dev’s code.

This is indeed one of the options I am contemplating on trying to do. To figure out where the seamline is and use that as a cutline, then let Seamly add the SA to it.

This would be the labour intensive way, but would allow me to adjust seam allowance easier if I need to change it in some particular place after I’ve sewn up a sample.

Would it be wonderful to get it done straight in Seamly? Absolutely. But with a bit of mathematics I can just keep on adding guidepoints on Seamly and replicate the same effect. Just labour intensive.

My wife is a senior programmer, so I understand how difficult modifying excisting code can be, no worries there. I am here looking for ways to achieve things with the current toolset :slight_smile:

THAT’s how Seamly works. You draft your pattern… then add SA to pieces. If the drafting system includes SA, then you just don’t add SA… or add Zero SA… but there will be no way to indicate the seamline and corners. The path you draw simply IS the cutline.

I think this right here is something I have confused you with and I apologize for it! I do understand that this is how Seamly does it and I am not asking for a method to do otherwise in Seamly. I am thinking of ways to get around the fact that the SA is added to the original draft guide with the tools Seamly currently has.

In short, I want to figure out if there’s a way for me to calculate new points without the SA included in the guide, then use Seamly to create new SA.

I thought you said there were no instructions?

The instructions say this word for word (translated):

“Between V1–3 is the center point of the dart, and the darts are 2.5 cm; the finished length is 22 cm.

From point E to the cut-in is 3 cm, from point L 1.5 cm, and the dart intake is 1 cm.

The cut-in between the pockets is 2 cm when finished.”

Based on these instructions I have drafted these following guidepoints - the dotted lines are there just for my personal use to show me roughly the directions/lengths etc.

I have aligned the back dart to the CB line, as I think that’s how it is supposed to be aligned with. At least it matches roughly with the original draft sample seen on the background.

Intake points also match pretty well. However, the guide doesn’t talk about how long the bottom part is, so I haven’t drafted it here - I don’t know how to determine the lower point.

Same goes with the dart “in between the pockets”. I don’t know how to he location for it should be determined. In essence, what would the distance of each corner point be from some other point.

From the original draft guide on the background, I can see that the drawn lines have their actual points offset ffrom the waistline (V line horizontally), meaning that they in reality are not located on the V-line, but perhaps measured at an angle from some other point. In fact, same goes for the SSO_guidepoints on the back piece. Maybe they are not supposed to be on V-line, except for the SSO_guidepoint1 which is the centerpoint between V1 and S1 (S1 = 3 in the original draft sample).

  1. You need to create a measurement file.
  2. You use the measurements in the formulas to parameterize the tools.

This is what I have done :slight_smile: All the current points are referenced according to the measurement file and are parametrically defined. The current points move as expected and neatly, if I change the base measurements.

That’s why Seamly uses the measurements to parameterize the formulas. You draw one pattern and simply change the measurement file to resize the pattern. As far as curves go… you have to parameterize the control points as well (or use fixed curves) so the curves smoothly resize correctly. There are topics on this ad nauseum so I’m not going to explain it here.

Yes! That’s what I am trying to figure out - the parametric formulas/methods to achieve these curves. And if there’s some underlying methods to them that I don’t understand.

I did look through the forums, but I didn’t find anything exactly explaining these mathematics. I did find for example the “Kolson method” topics, where I got the function for the #bz -value that I have used on the CF curve for example. But this is just part of the issue :slight_smile:

If you’ve got any topics off the top of your head that could be useful, I am more than happy to check them! They most likely just didn’t catch my eye, as I don’t really even fully understand what I am looking for.

Again… if you draft and then add SA, the mainpath is the seamline and SA is the cutline. If the draft has builtin SA, then the mainpath is the cutline, and there is no seamline. You have to manually note it. Which is really not a big deal as if you ever worked with commercial tailoring patterns on tagboard they have no seamlines marked. Most of my paper patterns never had seamlines drawn… I just knew that all seams are 1/2" unless I noted otherwise on the pattern. You want corners clipped… just clip when cutting the pattern out.

Here I think we have a misunderstanding again. I am not looking to mark the seamline for manufacturing purposes - none of the other patterns I have drafted have them and I understand how they are to be used.

I am interested in figuring out the seamline for the sole purpose of using it to draft the SA in the pattern straight out of Seamly - and to have it included in all of the seams, not just the ones that are different from the original draft sample. (It lacks SA in the CF, hem, shoulder and side seam of the front piece, for example. Or rather, it has a single seam allowance, but some of the seams use welt seams which requires a bit of extra, some use just felled seams which to my understanding doesn’t need extra added).

I hope this clears some of the confusion - I am happy to write more, if I am not being clear enough. I understand we are talking about different things here, most likely because I don’t fully understand what I am talking about, so my explanations come off as confusing, contradicture and not precise :slight_smile: I am sorry about that!

1 Like

Now to further add to the confusion, I’d like to show a bit of a case study here of the issues I am having. Maybe that clears up some of the confusion or explains the issues I am having a bit more clearly.

Let’s take the armhole for example. Previously, I have just drafted this part by hand using a french curve and had it roughly match the drafting sample in the original guide. However, doing it to multiple sizes is a hassle and causes some issues.

So, here is the Seamly points I have replicated from the original drafting instructions with the drafting sample on the background just for clarity/rough reference. The instructions do not explain or say how the curves are drawn or how they relate to the points, simply this:

“Draw the auxiliary lines and outlines as shown in the drawing.”

I imagine there is a logic on how the curves are formed and what is the reason behind the shapes, but the drafting instructions and the 1928 book that formalized this drafting system both don’t explain this part at all. They just tell you to draw them. I can copy the lines from the drafting sample, but that is not mathematically accurate and I don’t think it works if I change sizes.

For example, the front armhole curve is tangential to M - E line somewhere below the point Y, but I don’t know what would determine this point. Same goes for the chest line - the armhole curve is tangential to it somewhere left of the intake, but I don’t understand what is it based off of. The resulting curve up towards the back, between the intake and the side seam doesn’t exactly match with the back armhole curve, unless you turn the pieces a little. I don’t understand where and how this amount would be determined so that the resulting curves would match.

So here’s the image of the armhole with the points I have extracted from the instruction:

All the lines and points you see here are parametrically determined according to the instructions.

To explain my thought process in trying to figure out some guidepoints for the resulting curve, I’ll show step-by-step how I would draft one attempt at drawing the curve.

First, I’m looking at the original, and it seems to me that the tangent point on yhe M-E line might be the same as U - U1 on the other side. So, I’ve done this:

Now, it seems that the chest line tangent is maybe… the same distance? Or maybe it’s slightly different. I have a suspicion, that there’s a mathematical formula to figure out the correct point for it, I just don’t know it.

I have however now defined it as the same as U-U1 minus 0,5 cm.

I’ve then drawn a spline curve, where the length of the control arms is the function #bz I found on the forums (so length*0,55….). It results in a curve that is close to what the guide shows, but not “deep enough” to be quite as smooth as seems to me would be needed for a nice, smooth armhole curve.

From working with bezier curves in the past, I also know about a rule of "two thirds”. Sadly I don’t know where I’ve read that. But if I try it on here with the same points, I get a curve that’s slightly better.

Moving from here, I’ve decided to drive a curve function that is only driven by the vertical line from the AHC_guidepoint1 to try and keep things simple. So I’ll add a guidepoint (AHC_guidepoint3) to determine the height from AHC_guidepoint1 to the height of O2, then use that as a basis for the length function. Here I used the length modifier * 0,45 simply because it resulted in a nice curve and was simple.

I don’t however think this is a sound, robust formula to define the curve and it probably only works well on this particular size. I imagina a better way would be to have a line drawn as a straight angle from O2 to M - E line and using the resulting crossing point as the basis for the function to define the resulting curve. Either using #bz function, or the rule of two thirds.

The end results are here:

This has gotten me some preliminary results, but needs further refining.

Unfortunately right now I don’t have time to go through the issues I have with the backside of the curve - my kids are screaming that daddy is on a holiday now and shouldn’t be working :smiley: so I’ll have to sneak up some time later on this holiday to see if I can continue the explanation.

However, I hope this gives at least some information on my thought process here and the issues I have. And perhaps it’ll be useful for someone else in a similar situation tackling this in the future!

By the way, one way I was thinking that I could use this to solve the seamline here is to simply move the AHC_guidepoint2 down by 0,75 cm (the probably amount of SA in the draft) and AHC_guidepoint1 to the right by 0,75 cm. Then using a new guidepoint on their crossing point just down and right of E for the length. This would result in a seamline that is evenly 0,75 cm from the current blue dash-and-dor cutline. On the shoulder I would need to solve a another curve that is 0,75 cm from the current shoulder cutline and do the same for the upper armhole curve to find their crossing point somewhere to the down and right of the O2 point.

But that is only if I want to find the seamline at all, we’ll see if it’d be useful to find and use for having Seamly determine the SA, or if it’s beneficial to just use whatever I can come up with the draw the curves including the SA.

Thank you for your patience everyone! :slight_smile:

2 Likes

Hey! I have the book, and I’ve tried to apply it to this previously. However I haven’t gotten results I want from that, unfortunately.

2 Likes

I also suggest joining this forum:

https://movsd.com/BespokeCutter/index.php

under “drafting, fitting and construction” you will find a lot of discussions about different drafting systems, people there love to use old books and you also have a dedicated part for costumers.

I think it’s the best place to get a very good knowledge about exactly what you are searching for.

Sorry, I missed this reply originally!

I have posted there previously. Perhaps I will post there again a bit later to see if there’s anything that could help me there :slight_smile:

2 Likes

Try it on multiple sizes to see how it actually turns out. As long as you used strong parametric principles it will adapt well. You won’t know if you used strong parametric principles without some experimentation. Maybe your kids would like to participate in your work by being measurement models.

:unicorn:

1 Like