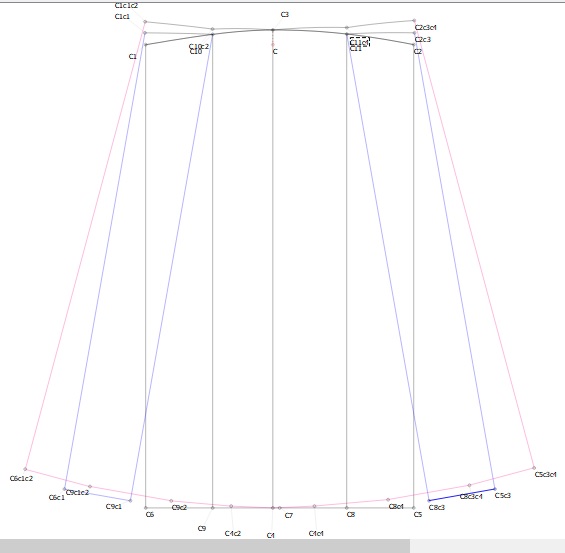
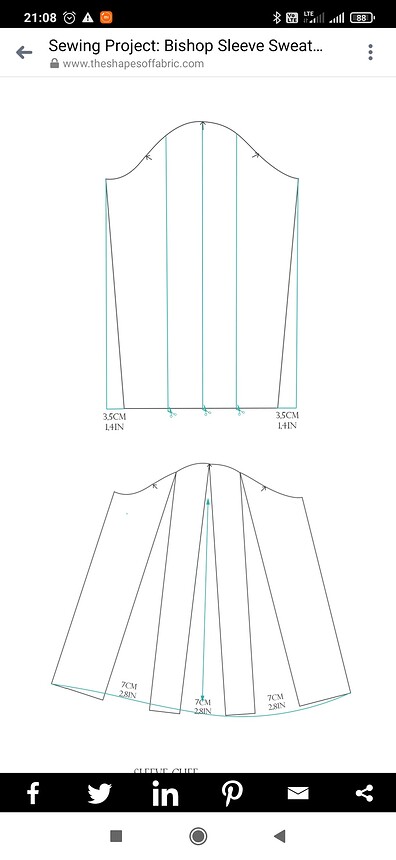
Hi, I need some help. How can you make such a sleeve in seamly2d? I’ve tried but I can’t. Greetings Alicja
You’re going to need to cut the sleeve into parts locating points along the bottom and cap curve… then using the rotate tool to “spread” the parts.
I’m sure @Grace can probably help you figure this out… She’s the master of the move and rotate tools. ![]()
![]()
![]() Thank you, @Douglas
Thank you, @Douglas
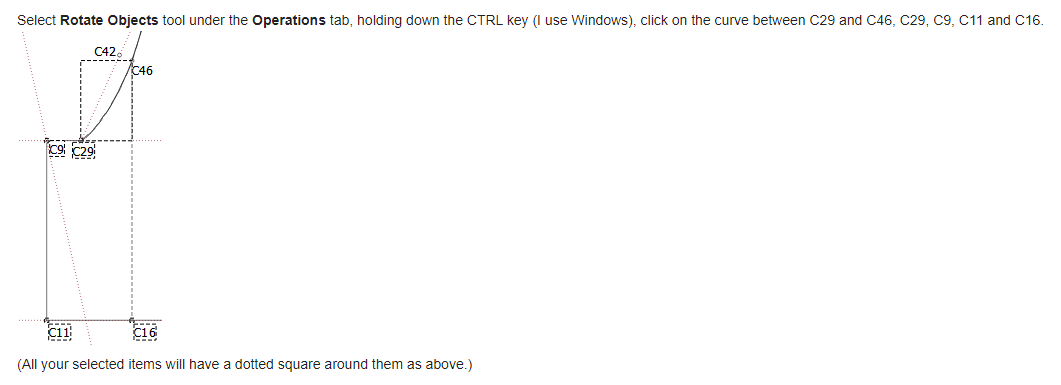
Hello, @Alicja. I did a whole tutorial on this in the Wiki a few years ago for a bell sleeve. You will find the tutorial here: Bell Sleeve - Seamly
Please don’t hesitate to ask again if you have any problems.
I don’t understand this instruction point. Should I redraw the curves of the sleeve cap one more time?
What I did in this tutorial is, I drew the curve in segments according to the sections that needed to be rotated and selected/rotated the curves at the same time.
Once you have completed all the rotations, you can redraw the full curve, if you wish.
It’s not really necessary to redraw the curve, it’s only so that your work remains tidy. You’re going to have a lot of extra points in that area, so to have the complete curve being duplicated with each rotation will become very confusing. However, you are only going to rotate once on each side, so it shouldn’t be too busy. (And twice in the centre.)
Thank Grace

Is that how you wanted it? or is that your design?
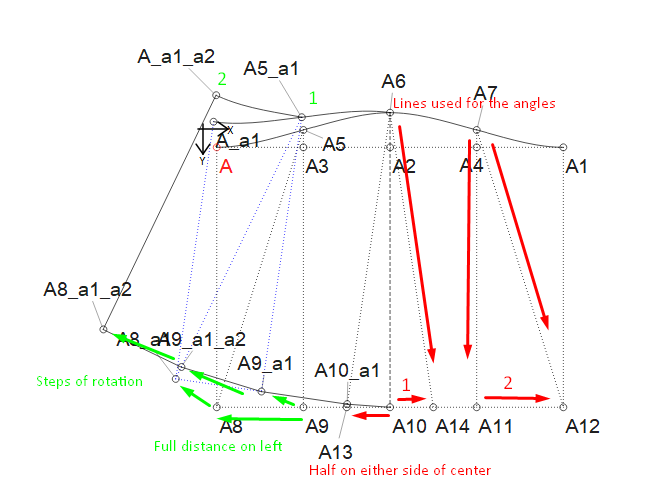
All the same, you’ve done a great job and the practice is good. Only 1 thing that I can see is that you didn’t do the center rotation, which is the 1st that you do and it’s half to the left and half to the right, taking everything on either side with that side’s rotation. Then the middle rotation on the one half gets done on the 1st rotation.
Oh, wow! I’m talking in circles again.
Here’s an example… If you wish, you can do the right side. I’ve done the left:

Slash & Spread.val (8.0 KB)
You can see how I have used the lines to get the rotation angles right in the formulas


