Construction point labelling

Hello everyone !

I’m quite new to Seamly (I downloaded it only 2 weeks ago), so first of all I would like to say a huge thank you for this software which I’ve really enjoyed using ! :heart:

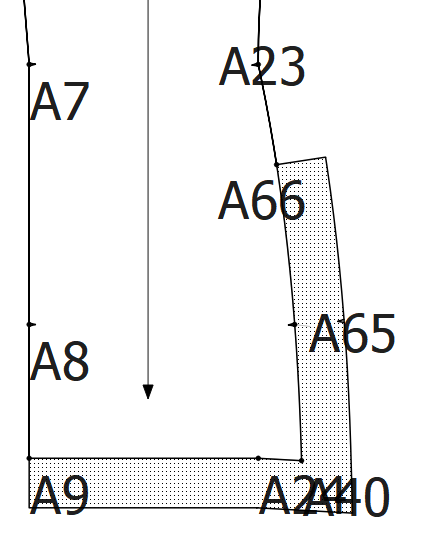
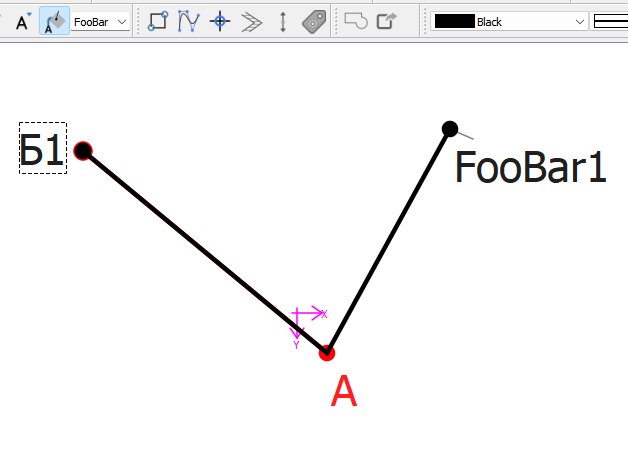
During the last two weeks I started reproducing on the software several patterns that I used to draw by hand, and during this process I faced a little annoying problem : I’m using the Aldrich method for men, and sometimes it requires the creation of “construction points” which are not labelled in the book (in order to create guidepoints for curves, darts, pockets…). In order to keep the same numbering between the points on my pattern and the points in the book, I’m using another letter for those points (in practice X1, X2…), but the fact is that since those points are not that frequent I keep forgetting the last number I used, and thus I have to test several numbers in order to find one which is not currently already in the pattern.

Since the modification is not very complex I decided to code an “automatic construction point labelling” button in the dialogs of the following tools : End Line, On Line, Midpoint, Perpendicular, Bissector, Length To Line and Intersect Arc and Line. I don’t know if this is a problem that other people are facing or if there maybe is already a functionnality in the software that could be used to make the creation of “construction points” easier, I’m thus creating this post :blush:

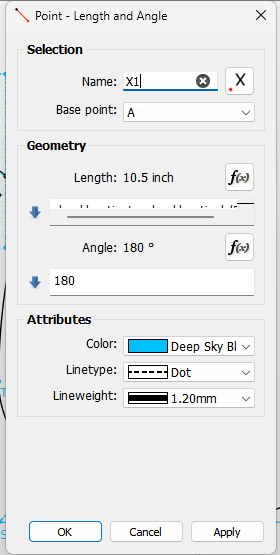
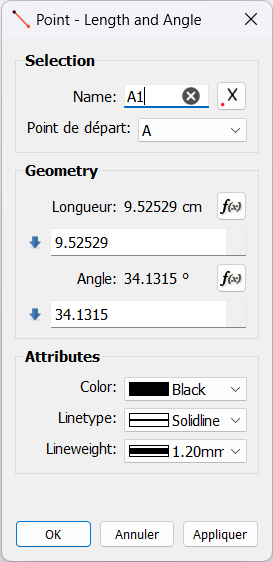
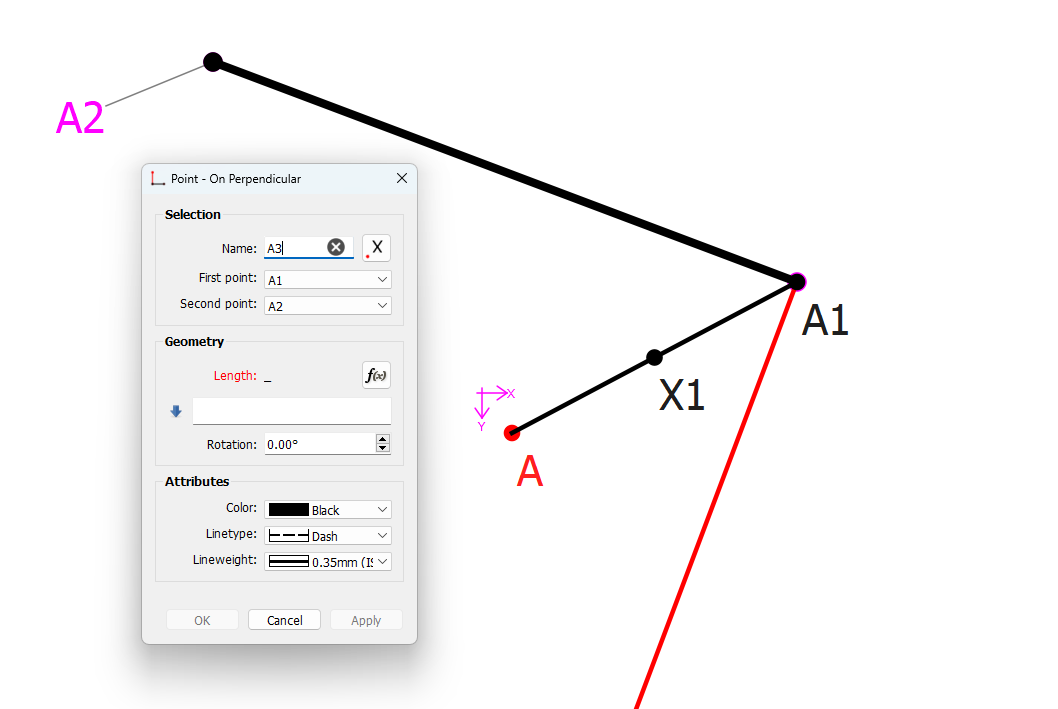
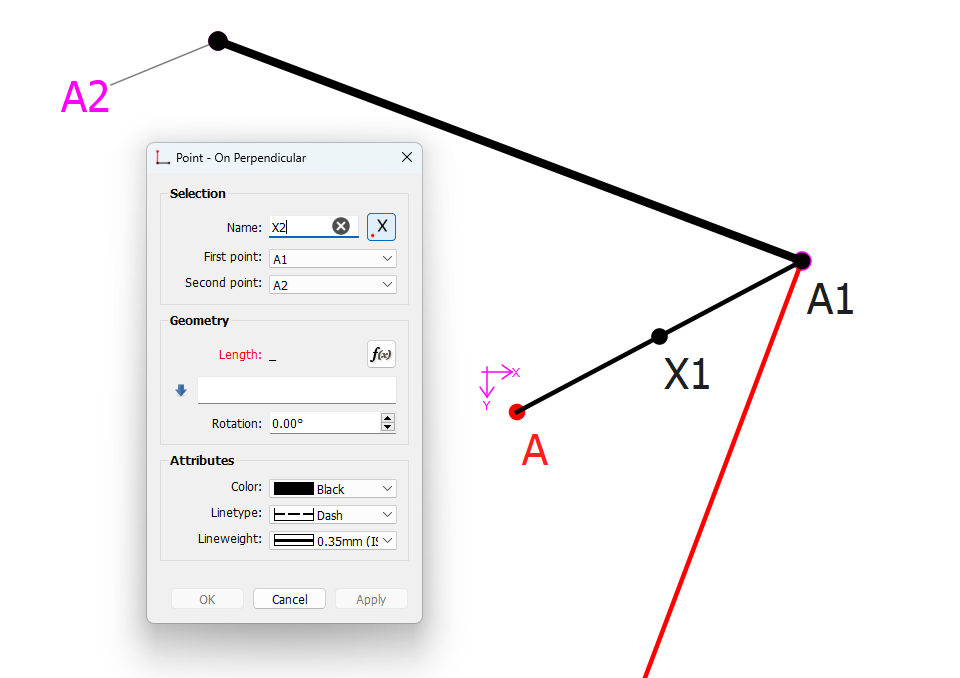
When the button is clicked, it fills the name with the next available “X” point, it is thus really simple to keep the original pattern numbering of the method used while using construction points.
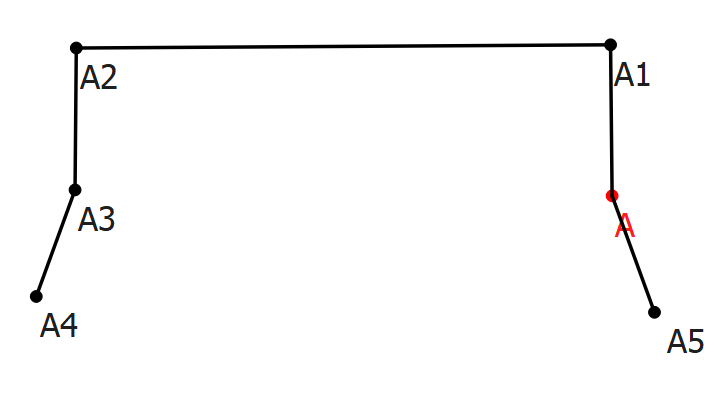
Before clicking:

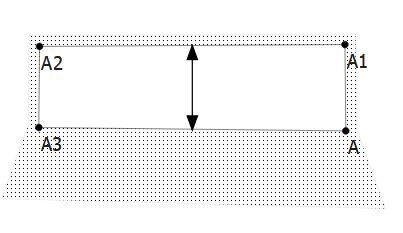
After clicking the button:

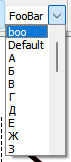
The button could be improved to also change the style of the line to a “construction line style”, or it can be removed and I add an autocompletion to the name field so it suggests the next available number for a given letter… But since this modification was quite quick and effective I decided to start with it.

You can find the code on my fork of the repo :

Looking forward to hearing your thoughts on this functionnality,

Cheers from France :blush:

4 Likes

Welcome to Seamly! Though more of tech-support than Dev myself, that is a wonderful example of the power of Open Source!

:unicorn:

2 Likes

Yes, I’d agree that it’s an area that can use improvement.

I give you props for thinking outside the box so to speak… but you may be too far outtside the box.

Having a button in the dialogs that changes the base name to X may suit your needs, but it may not be useful to others. A more robust method of setting the basename would be the way to go. I don’t know about the LabelType::NewConstructionPoint.

Having the button in the dialogs just adds clutter. Again, if the basename can be set - say in a toolbar - and then ONLY with new points is the basename default used. Just like you can set default pen attributes. It doesn’t make sense to be able to rename existing point names to the next X number. If it did. then one wouldl think the same functionality should exist in the Property Editor? - which trust me would open a big can of worms.

Also.not sure what happened, but I checked the Point - Length & Angle (endline) tool and the Length in the ui form is mucked up. I haven’t checked all the dialogs.

Screenshot 2024-02-18 175552

No. There’s more in the works to add grouping to the tool dialogs to allow for changing the pen style by group.

This should be the approach… being able to set the basename (letter) to a user defined default. Off the top of my head… a “Base:” combobox with None, A-Z items added to the Point Name Toolbar… and integrated into the tool dialogs just like the Pen Toolbar. I’d also rework the GenerateLabel() routine so it’s not duplicating a whole chunk of redundant code.

Then something like…

QString labelBase = getLabelBase(static_cast<quint32>(getActiveDraftBlockIndex()));
QString base = getDefautLabelBase(); //as set by toolbar
If (base != "None") 
{
   labelBase = base;
}

The whole “else if (type == LabelType::NewConstructionPoint)” clause is not needed.

I would also rework the getLabelBase() routine so as to take advantage of the “alpahabet” QStringList which takes into account the current language used. You can also use that string list to addItems(alpahabet) to a combox in one line vs 26 addItem(“A”… “Z”). Of course you’d prepend tr(“None”) to the list. And since you can’t add comboboxes to toolbars in Creator the combobox would have to be added in MainWindow::initPointNameToolBar(). A couple get / set routines added to the either the doc or settings class and that pretty much outlines what I’d do.

BTW… assuming you speak French? any interest in helping with the French translations?

3 Likes

Something else I noted… Using a button in the tool dialogs fails to take into account those tools that don’t open a dialog upon creation. Again, overriding the base label with a default base label solves this issue.

1 Like

Thank you for this detailed answer, @Douglas !

I suspected that it couldn’t be implemented in this state without modification since other solutions like the autocompletion seem far more versatile, at least it could launch the discussion about a related functionnality on which I would be happy to work :blush:.

This button was a quick fix to help me draw my patterns faster, it also allowed me to discover the code of the software and have a grasp on the way it works, so only for that it was really useful for me.

Speaking of the code, I was wondering what was the meaning of all the “v” prefixes in the directories (vtools, vgeometry, vformat etc.) :face_with_raised_eyebrow:.

It was what I had in mind so it could work with the tools that don’t open a dialog aha :stuck_out_tongue_closed_eyes:

I can definitely try to implement this basepoint combobox if I’m not interfering with other features in progress, and if it can be of some help :blush:

My only worry about this feature is that the letters that people seem to use when adding those construction points are close to the end of the alphabet to better distinguish them from the other letters. I fear it will still be not really practical to have to scroll into the combobox each time the user wants to use another letter for construction purposes, this is why I was more gowing towards the idea of “construction points”.

But if the point name field could automatically suggest the next available number it would solve the problem without the need of this construction point functionnality. Maybe the point name field could autocomplete the next available number if the tab key is pressed ? Like I’m entering X then tab and it automatically writes X2 if it is available?

But it will still require a modification of every dialog and property editors… But wouldn’t it be also the case if, as you suggested, we integrate the basepoint combobox into the tool dialogs like the pen toolbar?

Mmmm strange, it is completely ok on my computer :

image

But I have quite a lot of issues like the one you mention with other dialogs, for instance with the “export layout” dialog which is crushed at the top :

I think the dialogs should be given a little more flexibility, like the ability to be resized so they can be a little more dynamic and better adapt to computer’s configurations and to translations that are longer than the english words. I also need to launch Seamly with the “without scaling” option since it doesn’t support the 150% zoom of my computer.

Of course, I would be happy to help ! I started translating approximately half of the seamly2d_fr_FR.ts today, I’ll continue in the next days, I keep you informed. Here’s the branch I use for the translation :

2 Likes

I get it… keep in mind though the code is way more complex than you might think. Nothing is easy. I’ve been working with the code for more than 5 years and only now do I know how much I don’t know.

Well… it’s one of the annoying points with me. The original app that Seamly forked from was called Valentina, and the original dev for what ever stupid reason prefaced every class and file name with V. very annoying. I’ve slowly been renaming and removing the V’s as I update the app.

Certainly go ahead… that’s why I kinda outlined what I’d do.

You make the combobox entry “editable” so a user can just type in the letter. They don’t have to scoll if they know what letter they want. You can also choose to sort the combobox items.

comboBox->model()->sort(0, Qt::DescendingOrder); // default Qt::AscendingOrder

But you have to get the “next” base letter from somewhere. You want it dynamic and not just a generic X. Again… look at the Pen Toolbar and Attributes in the diialogs. That’s exactly what is happening… the PenToolbar initially reads the settings… then any time a new tool is created and the initial dialog opens it “autocompletes” the attributes with the Pen settings. Change the toolbar… it changes the default Pen Attributes. In the case of the Pen Toolbar you can also save the current Pen or at anytime Reset to the last saved Pen.

Yes… on the dialogs. No on the Property editor. Refer to my first response. The Property Editor has nothing to do with creating a new Tool… only editing an existing one.

I will take a look at it.

Excellent. Just a note… any translations also have to pass the translations tests to make it pass the CI workflow. There’s a lot of DO and DONT’s with the translations. I outlined a bunch in this topic:

3 Likes

I just finished testing the new combobox I developped following your indications, I opened a pull request to make the reviewing process easier:

Making the box editable as you suggested was such a great idea since it allows to use more complexe base names if required, not limiting the user to single uppercase letters.

I created a GetCurrentAlphabet function outside GetLabelBase for this purpose.

Since I directly modified the GenerateLabel method, there was no need to do any modification to any dialog, the new default base points are working with every tool if I’m not mistaken :blush:

Got it! I’ve read some threads about translations on the forum before starting, hopefully it should be ok ^^ Just to be sure: the “layouts” in Seamly are theoretically only “printing” layouts, and are not intended to be “cutting” layouts, right ? I’m asking because curiously it is one of the few words already translated in the french version but it seems quite misleading since, if I’m not mistaken, Seamly doesn’t place the pieces so their grain lines are aligned or things like that, correct?

image

2 Likes

I’ll take a look as soon as I get a chance.

That was my thought as well.

Just a code style note. I’d prefer to use camelCase for methods & functions rather than PascalCase that the prev dev used. It’s more in keeping with the Qt style. Use PascalCase for only Class names. I’ve slowly be renaming as I work on the code. I have no issue with renaming existing method to camelCase… just be judicious indoing do so. I always search first if a camelCase name already exists to avoid any collisions. Since GetLabelBase is limited in scope to the Pattern class using getLabelBase is not a problem. On the other hand doing a mass rename in the code of Get? to get? is likely to cause issues.

Correct. So yes, even with my basic grasp of French - “Plan de coupe” - is incorrect.

Correct. My long term plan is to eliminate the Layout mode altogether and turn the Piece mode into a proper marker / print layout… where the user has the option to manually place pieces on a defined width of fabric / paper. Part of that entails being able to restrain peices to the grainline (with a tilt fudge factor). It also requires being able to rotate pieces - which is something that is part of what I’m currently working on - Copying a Pattern Piece with flipping. The Piece copy will also allow me to fix the broken Union tool, or more specifically replace it.

3 Likes

I had spontaneously used camelCase but I switched to PascalCase in order to keep up with the convention used in the code when I saw that it was used for GetLabelBase, GenerateSuffix and GenerateLabel aha :laughing: Next time I’ll rename the surrounding functions instead :wink:

Oh, that would be very nice! The printing process is the only thing I really struggled with when I tested the software for the first time. The fact that we need to select a virtual paper size in the printing options before selecting the real paper format in the export dialog when printing a tiled layout is quite counterintuitive. It is also quite complex to optimise the layout to use as little paper as possible.

I also noticed that using file-> preview to get a preview of the tiled output before “printing to pdf” messes with the margins while the export button is perfectly fine.

But I have to say that the way tiled pdf are exported in Seamly if far better than Acrobat Reader : the fact that the user can select the margins and that there is still an overlap on two of the sides and that the cut lines are drawn all the way through the paper really helps to align the sheets.

I don’t know what could be the best solution, but maybe adding little symbols (little targets?) in the overlapping parts could be a nice feature to help with the alignment of the sheets, because it is sometime tricky to overlap the lines correctly.

To complete my feedback as a new user, if it can be of some help, the three other things I had trouble with while discovering the (no less amazing :star_struck:) software was that:

  • I searched the way to draw an “on fold” arrow on the pattern (and didn’t understand at first the “on fold” checkbox that I thought had no effect)
  • I searched a tool to offset a curve, because I use the Aldrich method for men which has included seam allowances, but it sometimes uses fitting lines for construction purposes.
  • I searched a way to display the fitting/seam lines on the pieces with the included seam allowances, and also thought the “built in” checkbox was kind of unuseful.

But I noticed that all these issues were previously discussed on the forum and have a corresponding github issue, so maybe I’ll try to work on some of them when the base point combobox will be merged :blush:

Ah, and I really have no clue what’s the use of the “custom seam allowance” tab. Even after testing it under all angles I have no idea how it works / what’s the use of it, since I discovered later that the “Automatic” seam allowance could do exactly what I wanted (add vents or things like that): image

2 Likes

Works for me.

Exactly. I spent 42+ years patten making and cutting, and I got real good at laying out pattern peices and maximising the use of fabtic. Also the layout engine really starts to bog down the more pieces you are trying to layout… at which point I can manually lay them out faster. We’ll still keep the “auto” engine, but I;m sure many users would just find being to manually place peiece to be easier.

Diagonal lines is a good option as it forces both vert & horz to line up. Personally at my shop… while I have taped together more than my share of patterns… we would just run next door and have the print shop plot patterns out. :slight_smile:

There’s some legacy stuff still in the app… as it is currently the “On Fold” is strictly a place holder for labels so you can print on the Piece label that the piece is to be “Cut on Fold”. Eventually I plan on adding proper “Symbols” that a user can add to pieces… a Cut on Fold symbol being one.

… Unfortunaelty the orignal dev had no clue about what is needed in a pattern making application, so this area was not well thought out. You can use the “Built In” option, that won’t add seam allowance… but it doesn’t always suit ones needs. There are many cases in systems where the seam allowance is included, but in certain places there is added seam allowance. Which we currently can’t do… unless by using zero SA’s with added SA’s you can accept that the printed seam allowance is not what it is. I started working on solving the issue with adding or subtracting seam allowance… but I hit a wall trying to resolve some of the conversion between paths in the code. After working on the Copy Piece feature I have more insight, and hopefully can resolve that issue.

Trust me… the seam allowance issues are probably beyond your scope at the moment.

The Custom SA allows you define a seam allowance that is added to the piece… it’s something that I’ve have to deal with in the Copy Piece feature. For example here’s a test piece I did

image

image

The piece path is A3, A2, A1, A… the Custom SA is a path A4 to A5. It allows you for example to create a foldout hem on a tapered sleeve.

3 Likes

The custom SA also allows you to 0 the SA on the ‘cut on fold’ line and (in some pattern making systems) some seams need slightly wider or narrower SA’s than other seams, depending on bulk & stress.

1 Like

Which I’m assuming one could use in conjunction with the built in SA option to add custom SA in those areas where extra SA is needed.

1 Like

We’re going to have LS now, so power’s going to go out soon…

The built-in SA is normally specified which lines have which SA for the seamstresses, so this isn’t anyone’s problem but the person making the pattern which includes the SA in the drafting instructions. So the drafting outline becomes the cut line.

It’s only when SA is added to the draft lines (which become the stitch lines) that this is applicable.

Thanks to @Onetchou we have a new feature. You can now override or customize the base point name for new tool points. You can select a base letter from A-Z based on the language set for the point names from the Combobox dropdown on the PointName Toolbar:

Screenshot 2024-02-27 192744

Or you can enter a custom name.

Screenshot 2024-02-27 192736

Changed is the label in the Preferences from “Label Language” - which has nothing to do with the pattern piece labels - to “Point name text:”

Screenshot 2024-02-27 192806

You can download an artifact from here… or wait to Sunday night / Monday morning for the next release.

4 Likes

Thank you very much, @Douglas & @Onetchou. This is going to such a huge help, I can’t wait for Monday’s release :star_struck:

2 Likes

I’m very happy that this feature could be useful to you :blush:

Thanks to @Douglas for his patience, as it was my first contribution to the project :wink:

1 Like

Thank you. :slightly_smiling_face:

BTW… you may have noticed that the ci job run on the PR merge failed. It does this because the PR was merged from a fork, and not the main repo. That’s why I had to post the artifacts from the PR pull instead. In the future we can avoid this if you work on a local clone and push your branch to the main. This will require write privileges if you don’t already have so.

1 Like

I indeed noticed the fail but I didn’t know the reason…

I don’t think I have any privilege in the main repo since I’m new to the project… But I’m not 100% sure because I’m not aware of another method to determine my current privileges in a project that I don’t own, other than attempting to perform the tasks in question.

If it’s easier for you to proceed this way, I’ll be happy to receive the permission to create branches in the main project. It would allow me to create the upstream branch of the french translation that I’m still working on, for instance.

2 Likes

We can resolve that with Susan.

It’s a bit easier as I can just need to switch branches rather than switching repos. The more important thing again is there won’t be problems with the Merge PR build failing - if for any other reason to reduce failed build email notifications.

2 Likes

Thank you very much for this amazing feature. It’s working beautifully and I really, really appreciate it.

1 Like