Hi,
Maybe the bug is mine but I tried to put some custom seam allowance as told in a post i can’t find anymore.
My aim :
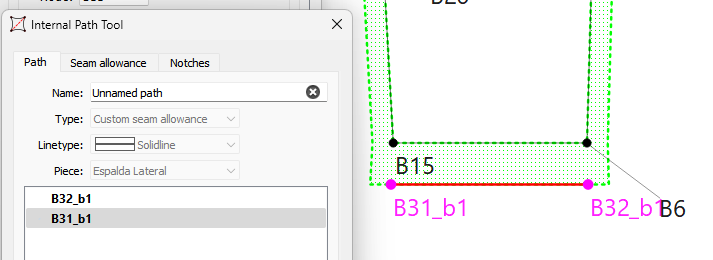
For this, I use the internal path tool, select the line where i want the cut line and “ok” it as “custom seam allowance”.
Then i go to the pieces, and to propriety->seam allowance and in the custom part I select the start point and end point, select “main path” and apply.
Sometimes it works and some other it doesn´t. When it doesn´t work, nothing happen and the seam allowance is the default one.
Am I missing something or is there a bug?
Maybe I’m just not thinking clearly today, but I’m not understanding the question. Maybe if you included a picture of what it looks like when it doesn’t work? A copy of the pertinent pattern (with the measurement file) might be even more helpful.
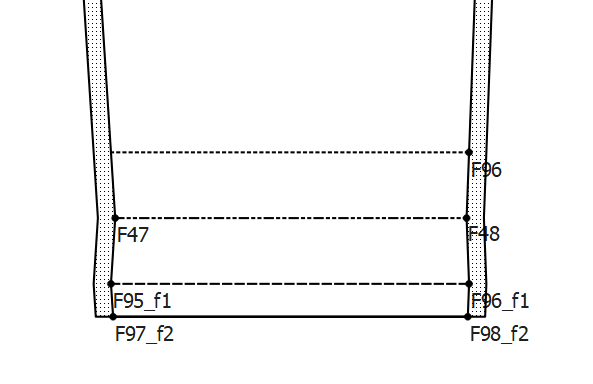
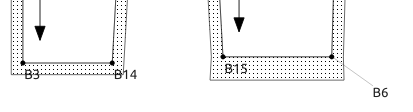
I agree with @Pneumarian that we’ll need your files and another pic to really see what’s happening, however, I learnt (way back when the seam allowances wasn’t working very well) to create the hems in the draft by placing nodes above the fold line nodes, at the depth of hem, and to mirror them by line, and then to repeat the process of the seam allowance on the hem stitch line.
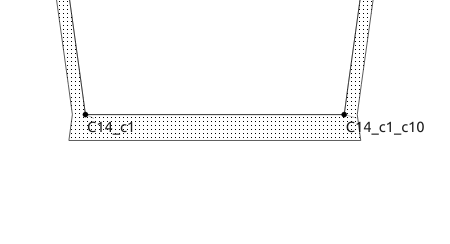
You won’t need a seam allowance on the bottom, because you have already added it manually. You pattern will look something like this:
thanks Grace,
I already read you in another thread with this method. But i would prefer to make it with the seam allowance because I think it is more understandable for my clients.
If we don’t find a solution i’ll do it this way.
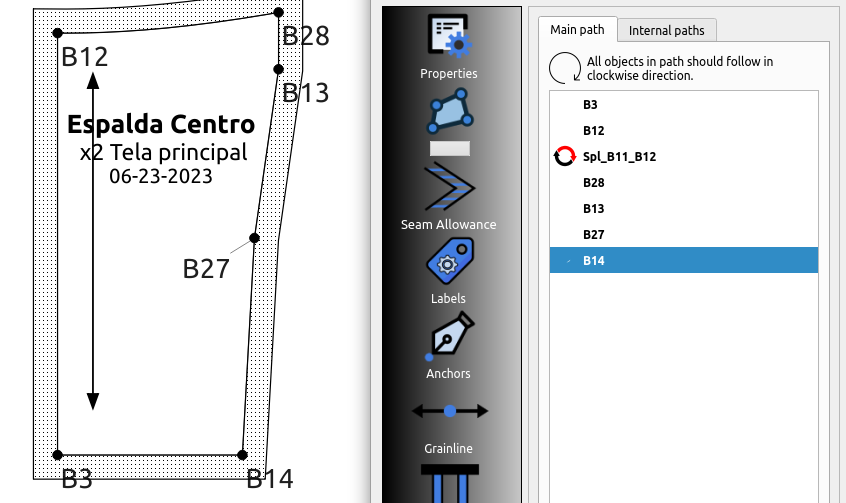
Hmmm… I see what you mean. The reason that it’s working on the left is because it’s using the line preceding the node to ceate the symmetary, which is the line that you want it to use on the right, too, but nothing changes.
Yup… I was just going to upload the fix. Glad you figured it out.
Not sure exactly what causes this anomaly, but sometimes it matters what point node the main path starts on.
BTW… a little suggestion. Get in the habit of naming your internal paths. It’s less confusing than seeing “Unnamed path”. I should note that I’m working on fixing / improving the Internal Paths, and added sequential default naming to the IP’s. So at least it will name the paths Internal Path 1, Internal Path 2, etc…
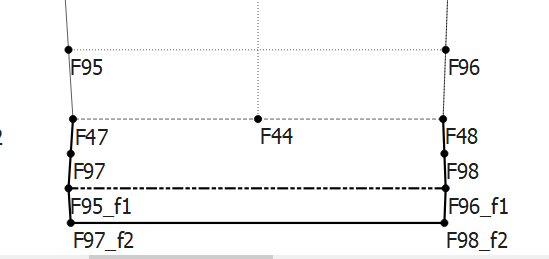
 dosen’t work
 works!!