Bonjour, j’aimerai utiliser l’outil “déplacement d’objet” pour vérifier si mes entournures dos/devant on une bonne continuité. De même pour calculer la profondeur d’entournure, je dois “décalquer” une des deux entournures pour la placer sur la ligne de côté de l’autre pièce, hors lorsque j’utilise l’outil “déplacement d’objet”, je n’arrive pas à placer correctement la pièce car je ne comprend pas où se place le point de pivot/déplacement. Le point de déplacement (point bleu) se situe à droite d’un des points, si je clique entrée, il y a alors le choix de pivoter mais je n’arrive pas à placer les nouveaux points sur les points du côté DOS. Est ce qu’il y a une astuce? J’utilise mal l’outil?
2 Likes
Welcome @Greta_Dancso
While I have worked on programming the move tool… @Grace actually has more experience using the move tool in a case such as yours. Hopefully she’ll be by at some point and can help you.
Hey @Grace… this is precisely a case that could apply with what we’ve recently talked about with draftblocks being able to freely move, rotate, and anchor. It would render the Move and Rotate tools rather moot.
3 Likes
Hello and welcome to the Seamly forum, @Greta_Dancso
When moving & rotating you need to make yourself very clear on what you are moving to where, because the default point of origin is set to the center point between 2 points of the move. If the 2 points are not connected with a line, I like to place a line connecting them.
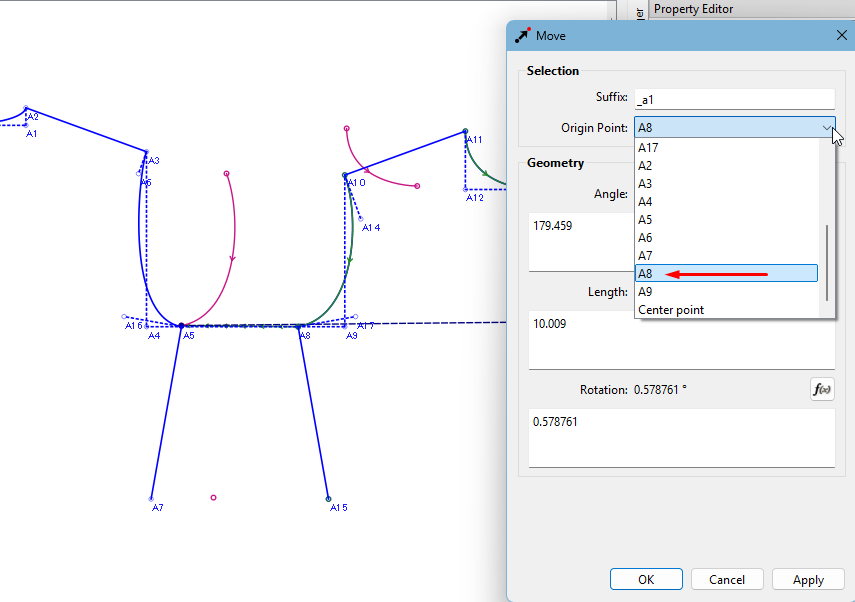
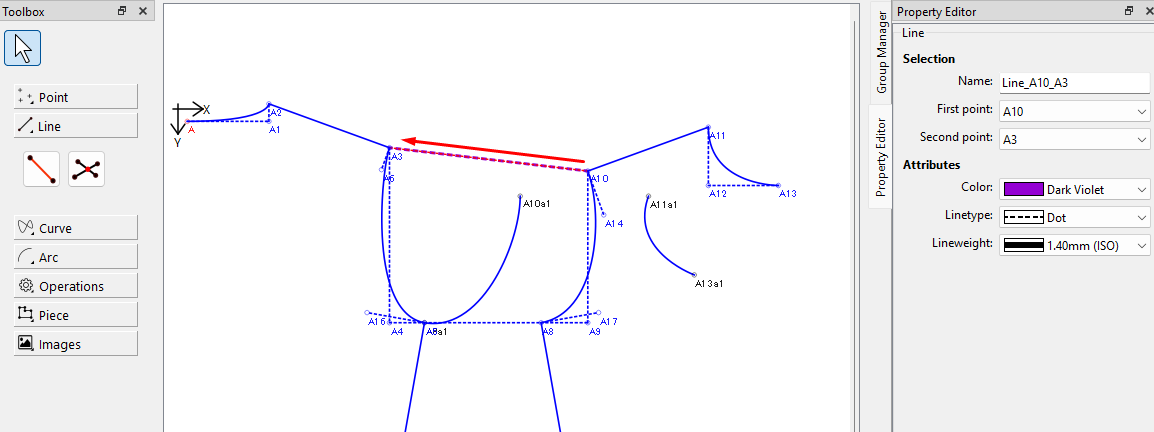
In this case, I am moving point A8 over to A5, so the 1st thing to do is to set the Origin Point to A8:
The next is to enter the angle that A8 needs to travel to connect with A5, so this is the formula of the line between the 2 points:
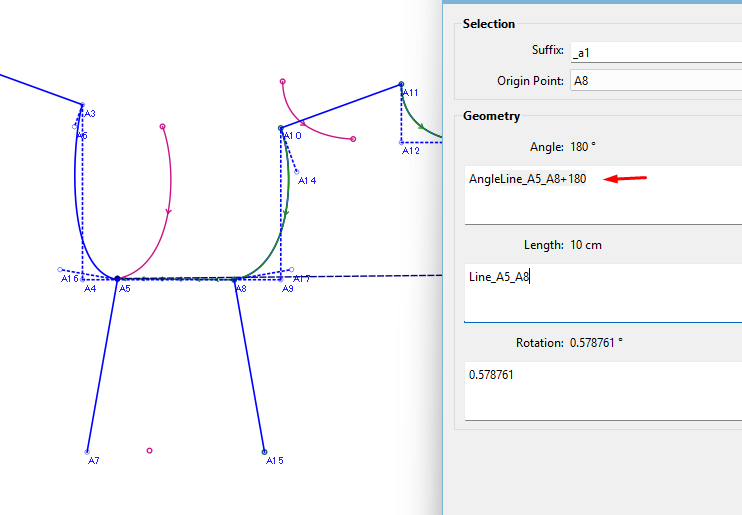
The Length is the length of the line between the 2 points:

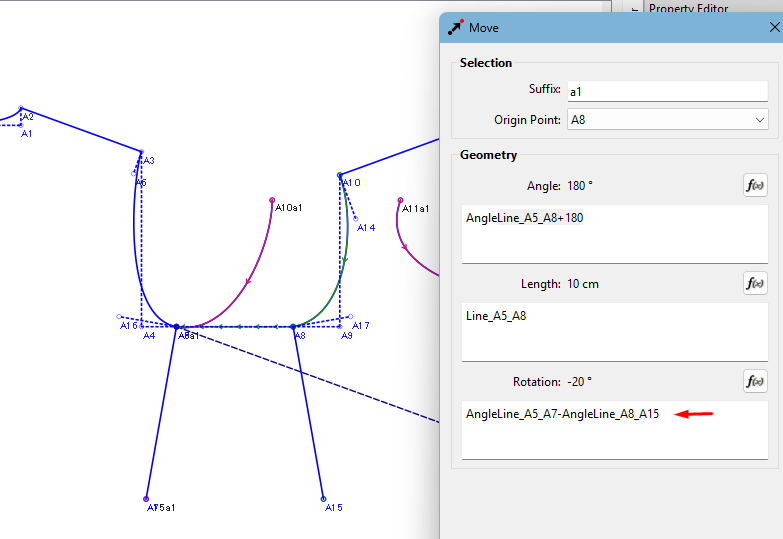
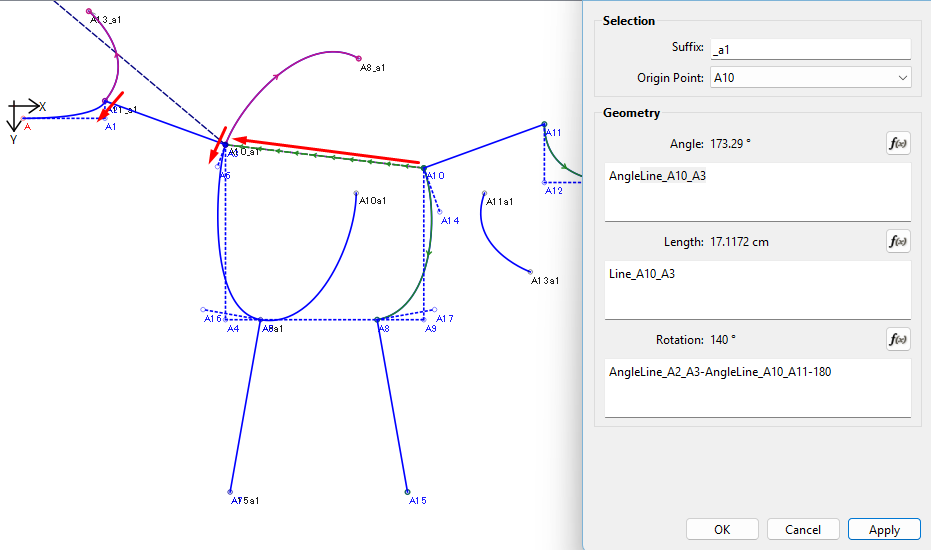
Next is to enter the rotation. In this case, you want to connect the 2 side seams to check if the armhole curve will continue from the one piece to the other smoothly. So the rotation is the angle of the line A8 to A15 minus the angle of the line A5 to A7:
In this image, I have clicked on the Apply to check that it has moved and rotated correctly.
If everything is correct, then click OK. and this is the result:
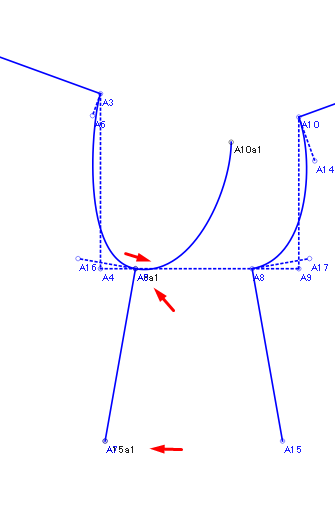
As you can see, the side seam points are on top of each other and the curve is continuous from the back to the front.
If the curve is not continuous, then you need to adjust the original curves.
The process is the same for the upper part. Normally you will need to place a line between the 2 shoulder tips:
After this, the process is the same:
While doing the rotations, remember the direction that the lines are created. In this case, the front shoulder seam was from shoulder tip to neck side while the back was from neck side to shoulder tip, therefore I deducted 180° from the front shoulder seam.
If there are darts on the shoulder seam and you want to check the neck line, you’ll need to do a separate move & rotate, draw a line from the front neck side to the back neck side and use the portions of shoulder seams between the neck sides and the darts for the rotation angles.
Here is my slap-up example with the rotations so that you can see what I did:
Test pattern.sm2d (7.5 KB)
I hope this helps you.
4 Likes
Merci beaucoup Grace, c’est exactement ce qui me fallait! Vous m’avez était d’une grande aide, j’étais bloqué dessus depuis un moment je ne comprenais pas comment cet outil fonctionnait, grâce à vos explications je vais pouvoir tout déplacer correctement! Encore merci!! ![]()
3 Likes
Thank you @grace. I knew you’d be able to explain better than me. ![]()
3 Likes
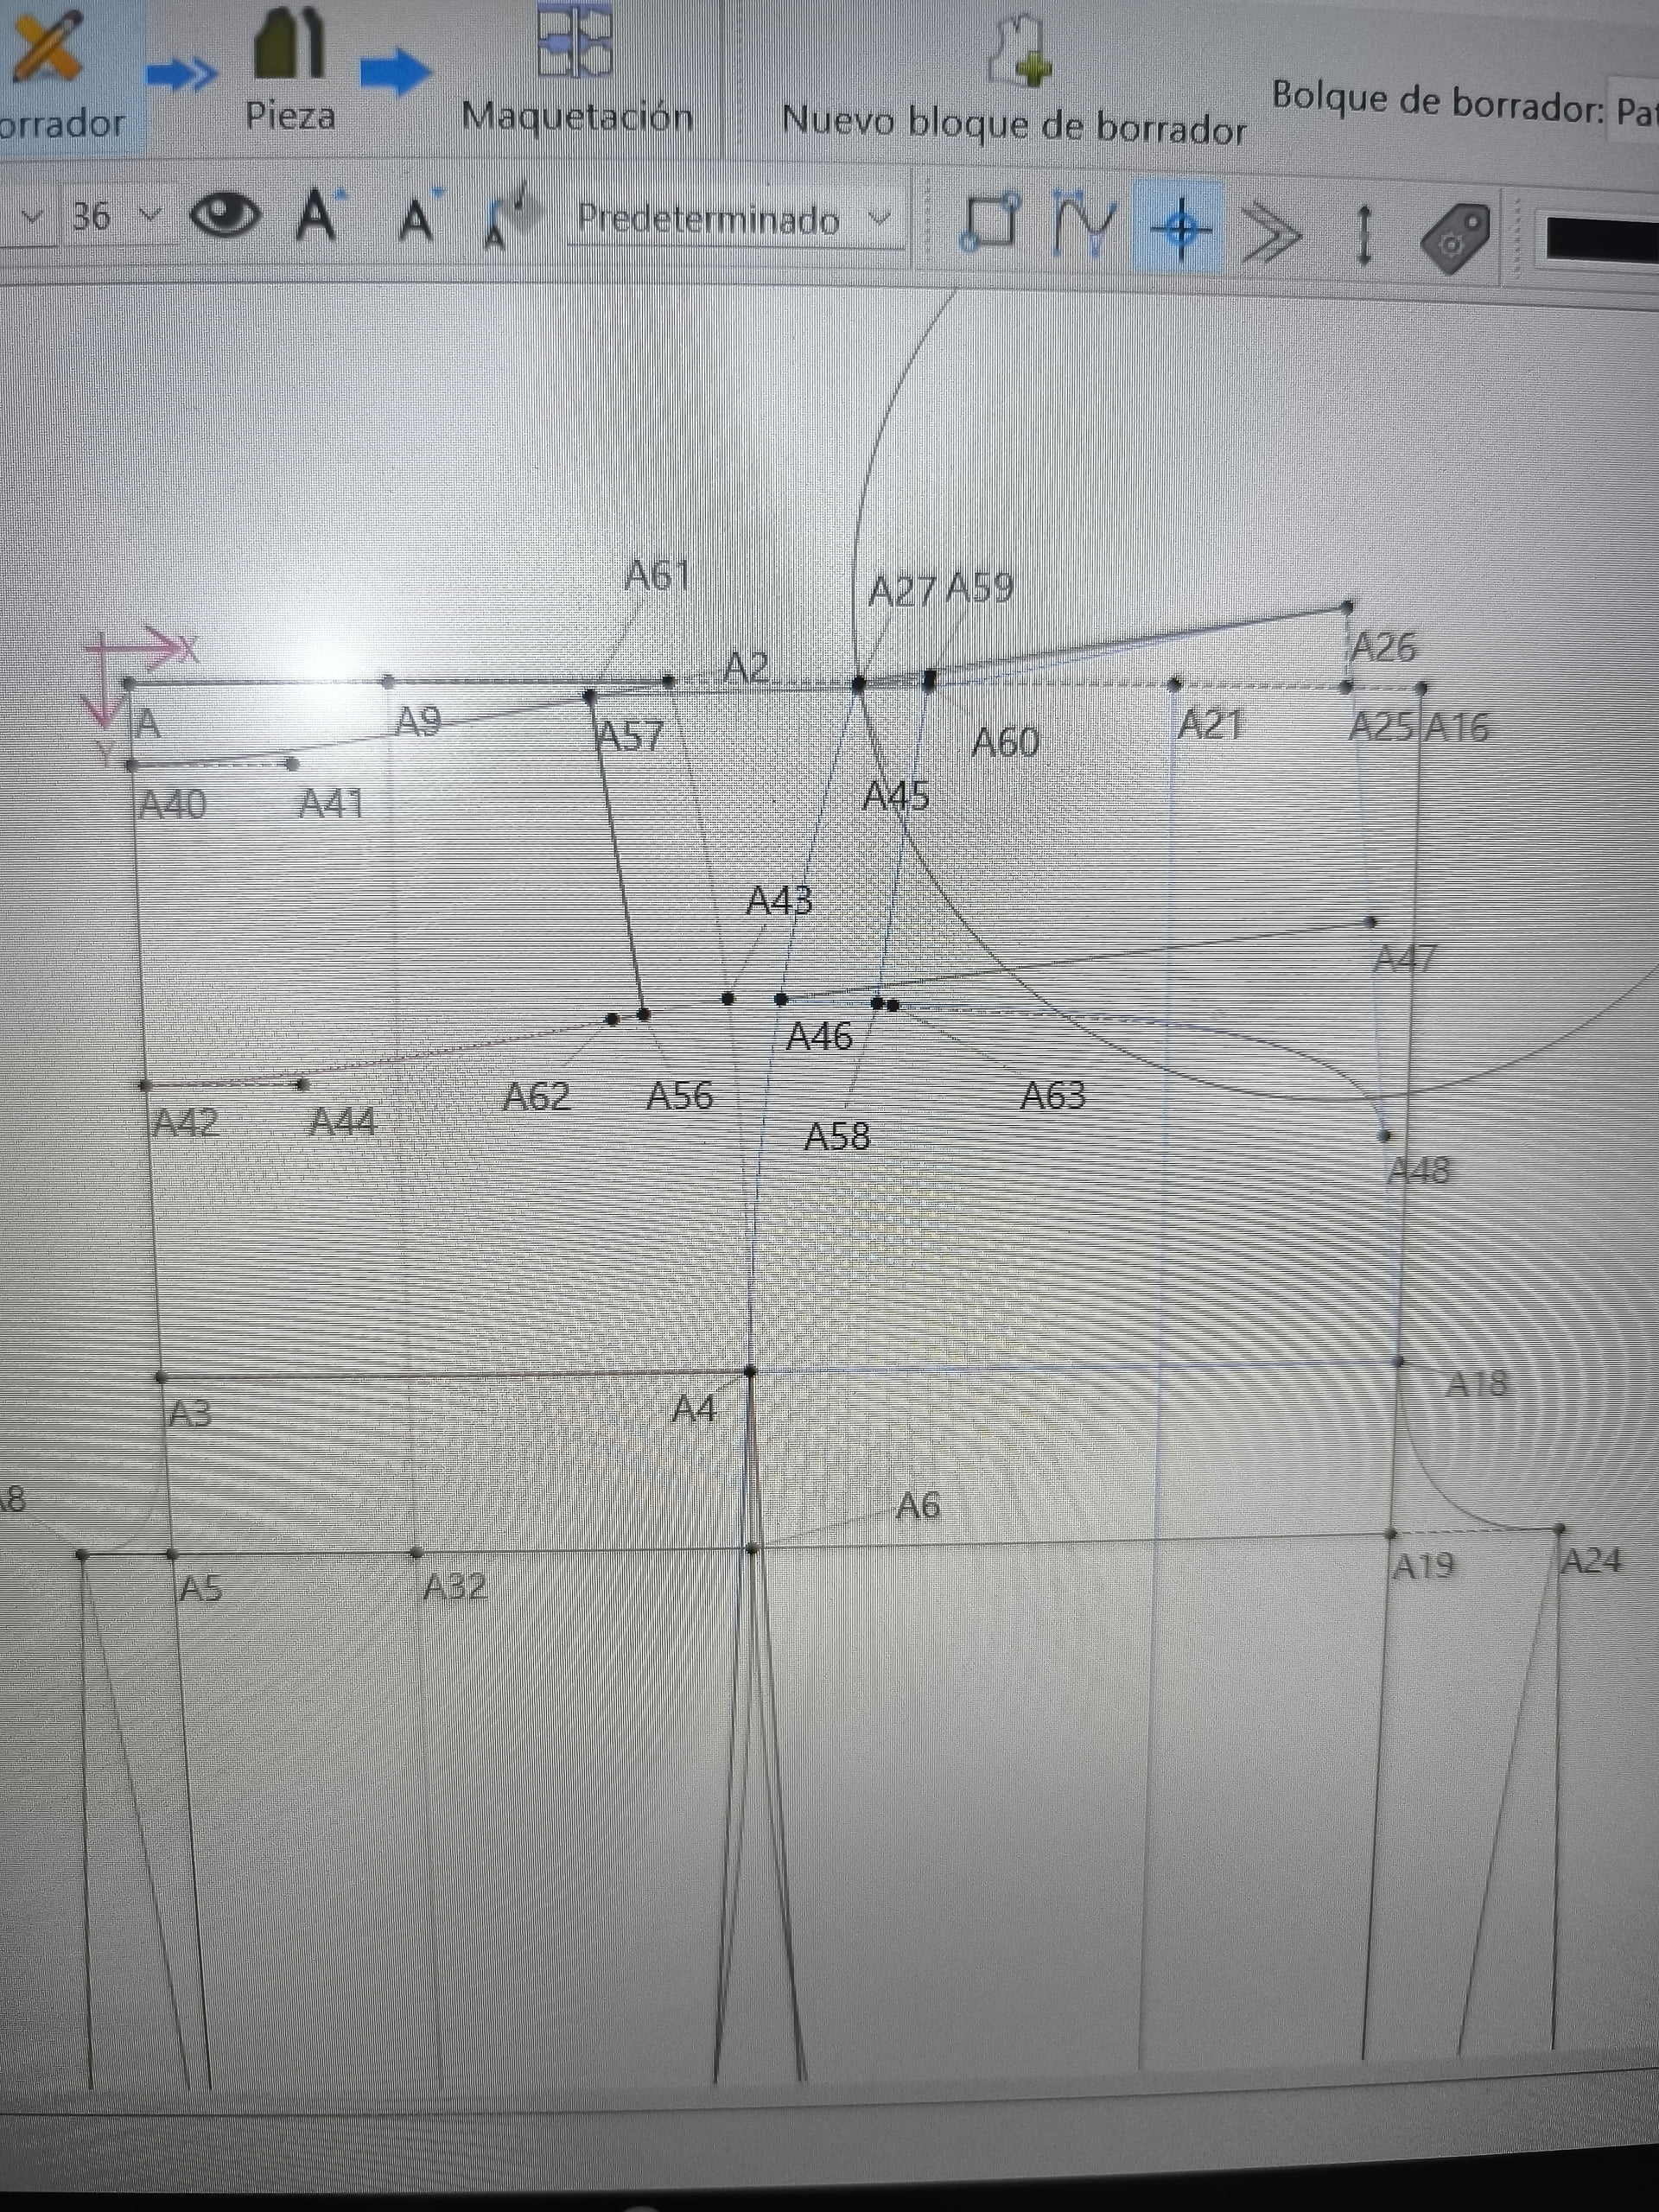
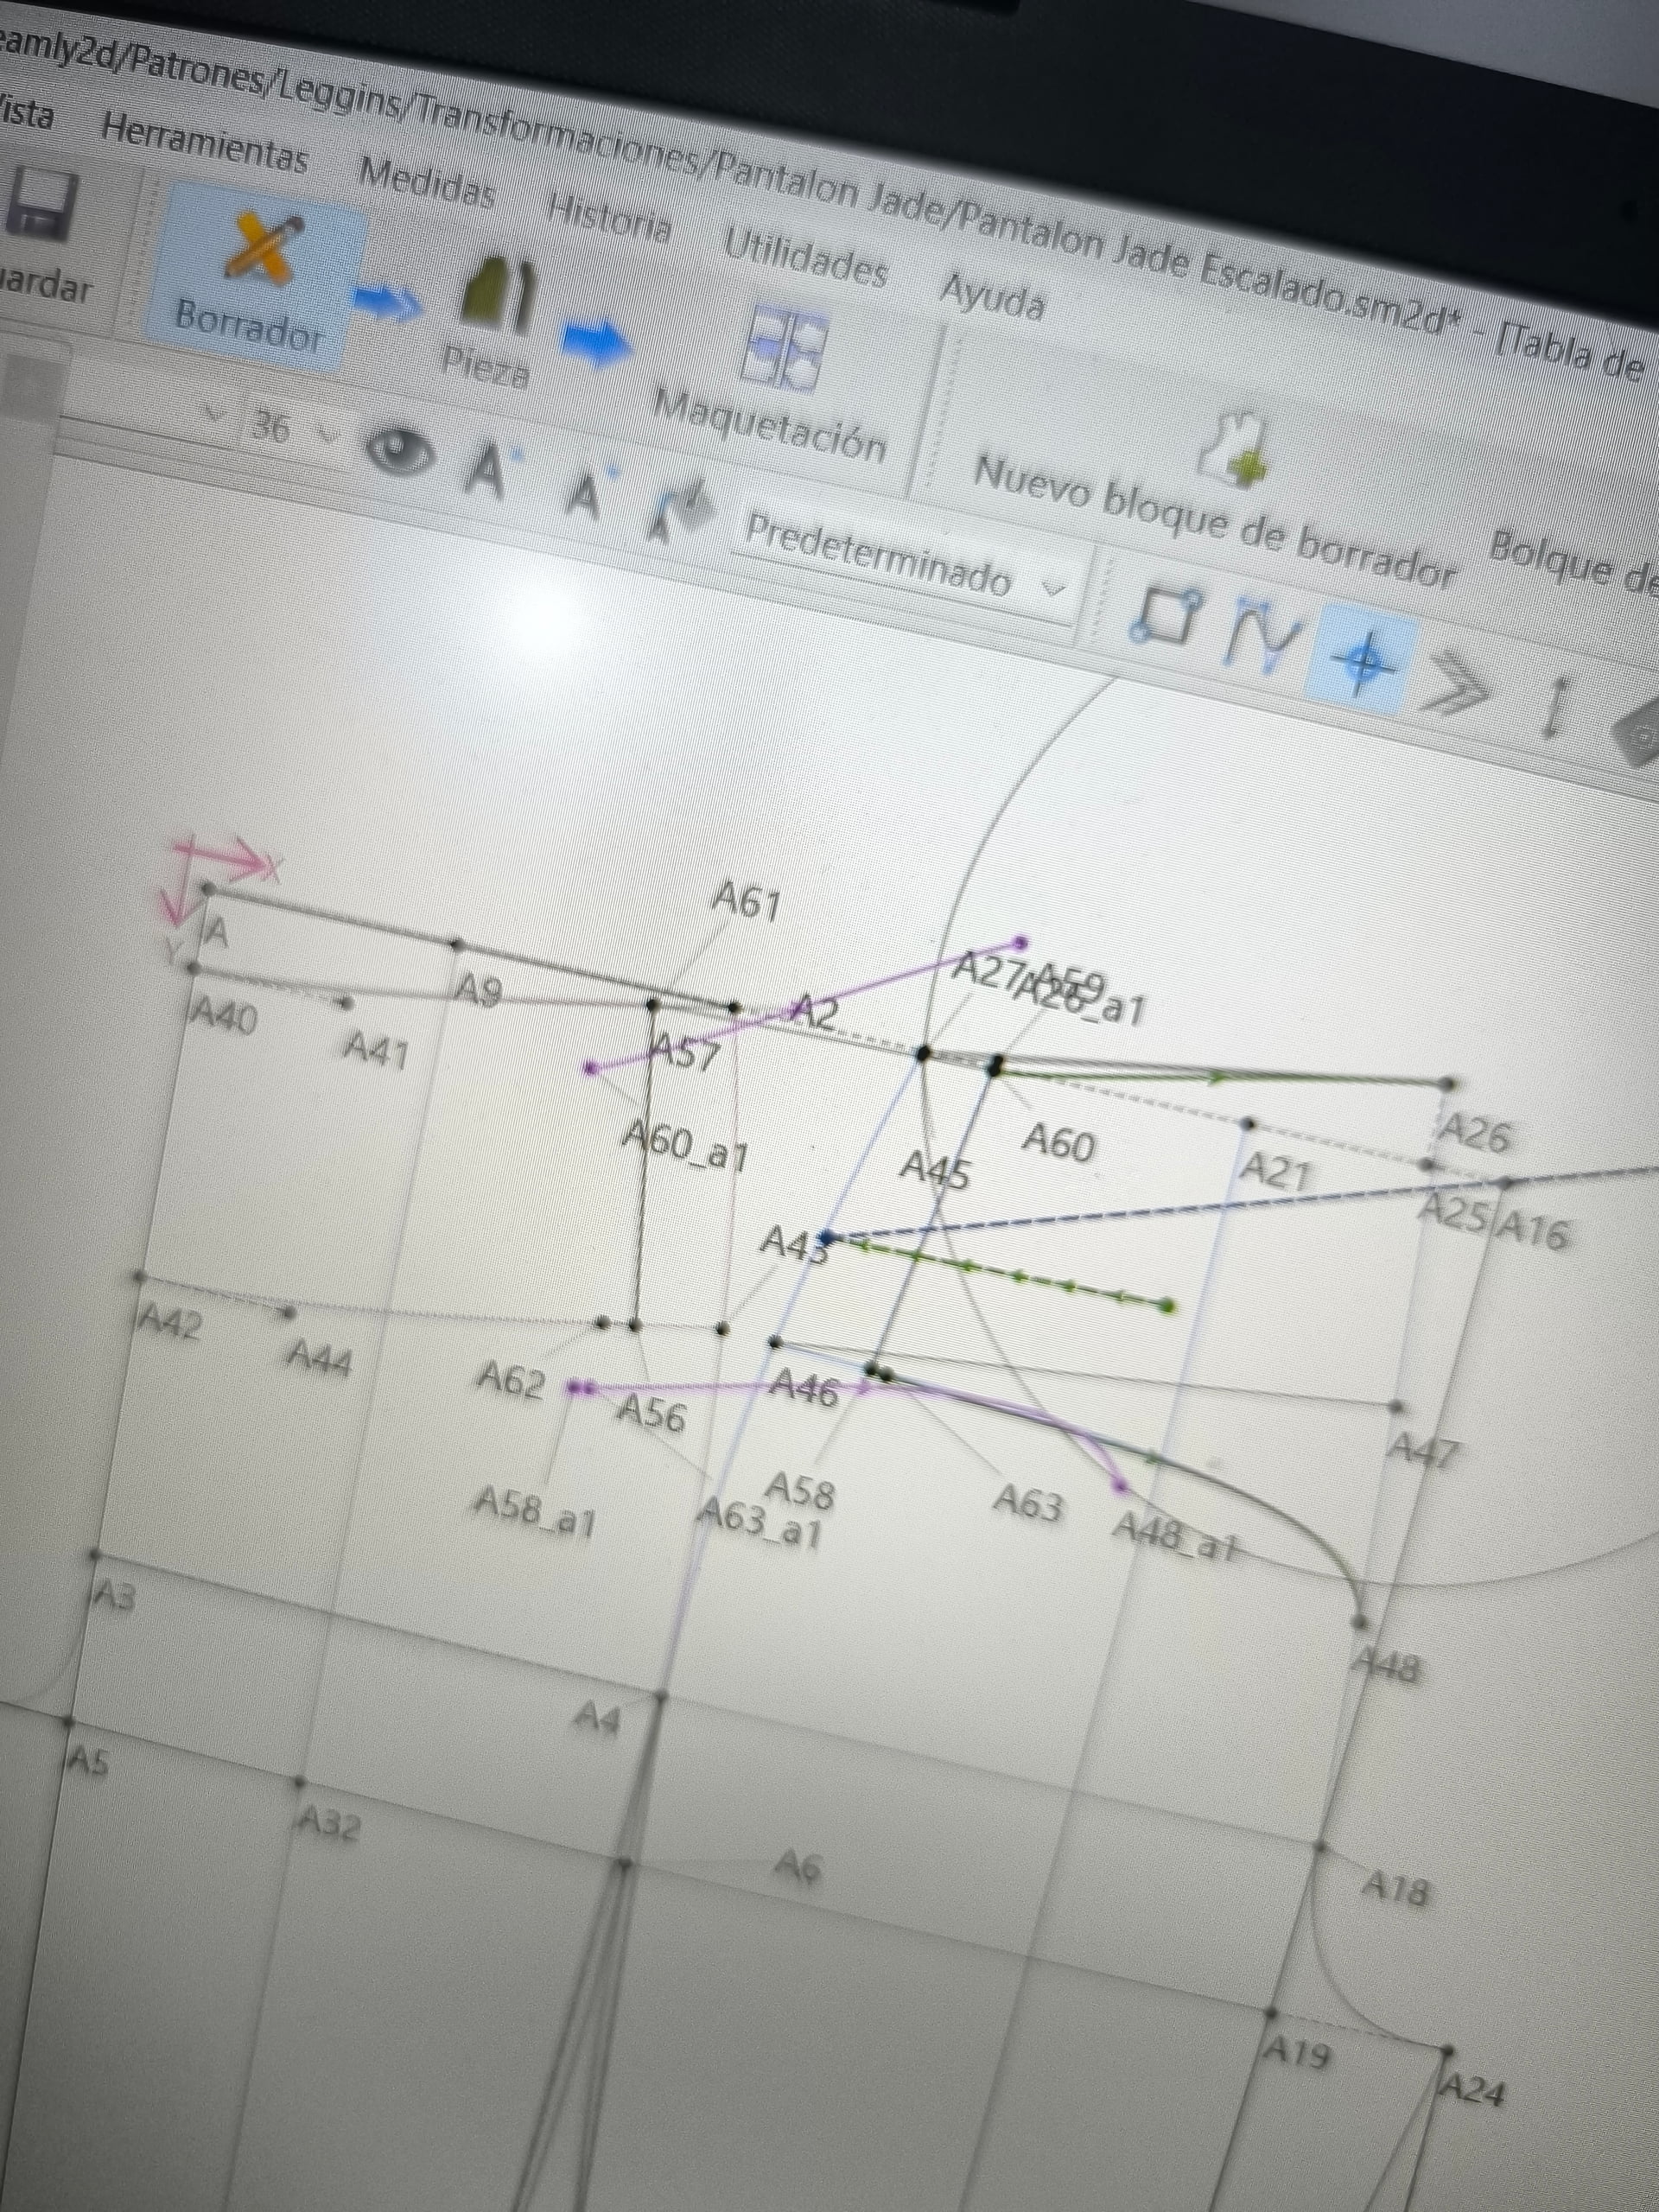
Hola buenas noches, soy nueva por aquí y estoy intentando unir mi Pretina de la parte del frente y mi Pretina de la parte de la espalda. Seguí los pasos y no dio resultado. No sé que estoy haciendo mal. Agradecería mucho si me pueden ayudar. Quiero moverlo el punto A60 y A58 para que se una con A61 y A56. He intentado diferentes formas incluso moviendo los dos objetos. Solo he conseguido hacerlo un poco al ojo pero no funciona para que el programa escale todas las tallas ya que al ojo sin formulas no se obtienen los puntos para todas las tallas
2 Likes
Hola y bienvenido al foro de Seamly, @Meiling
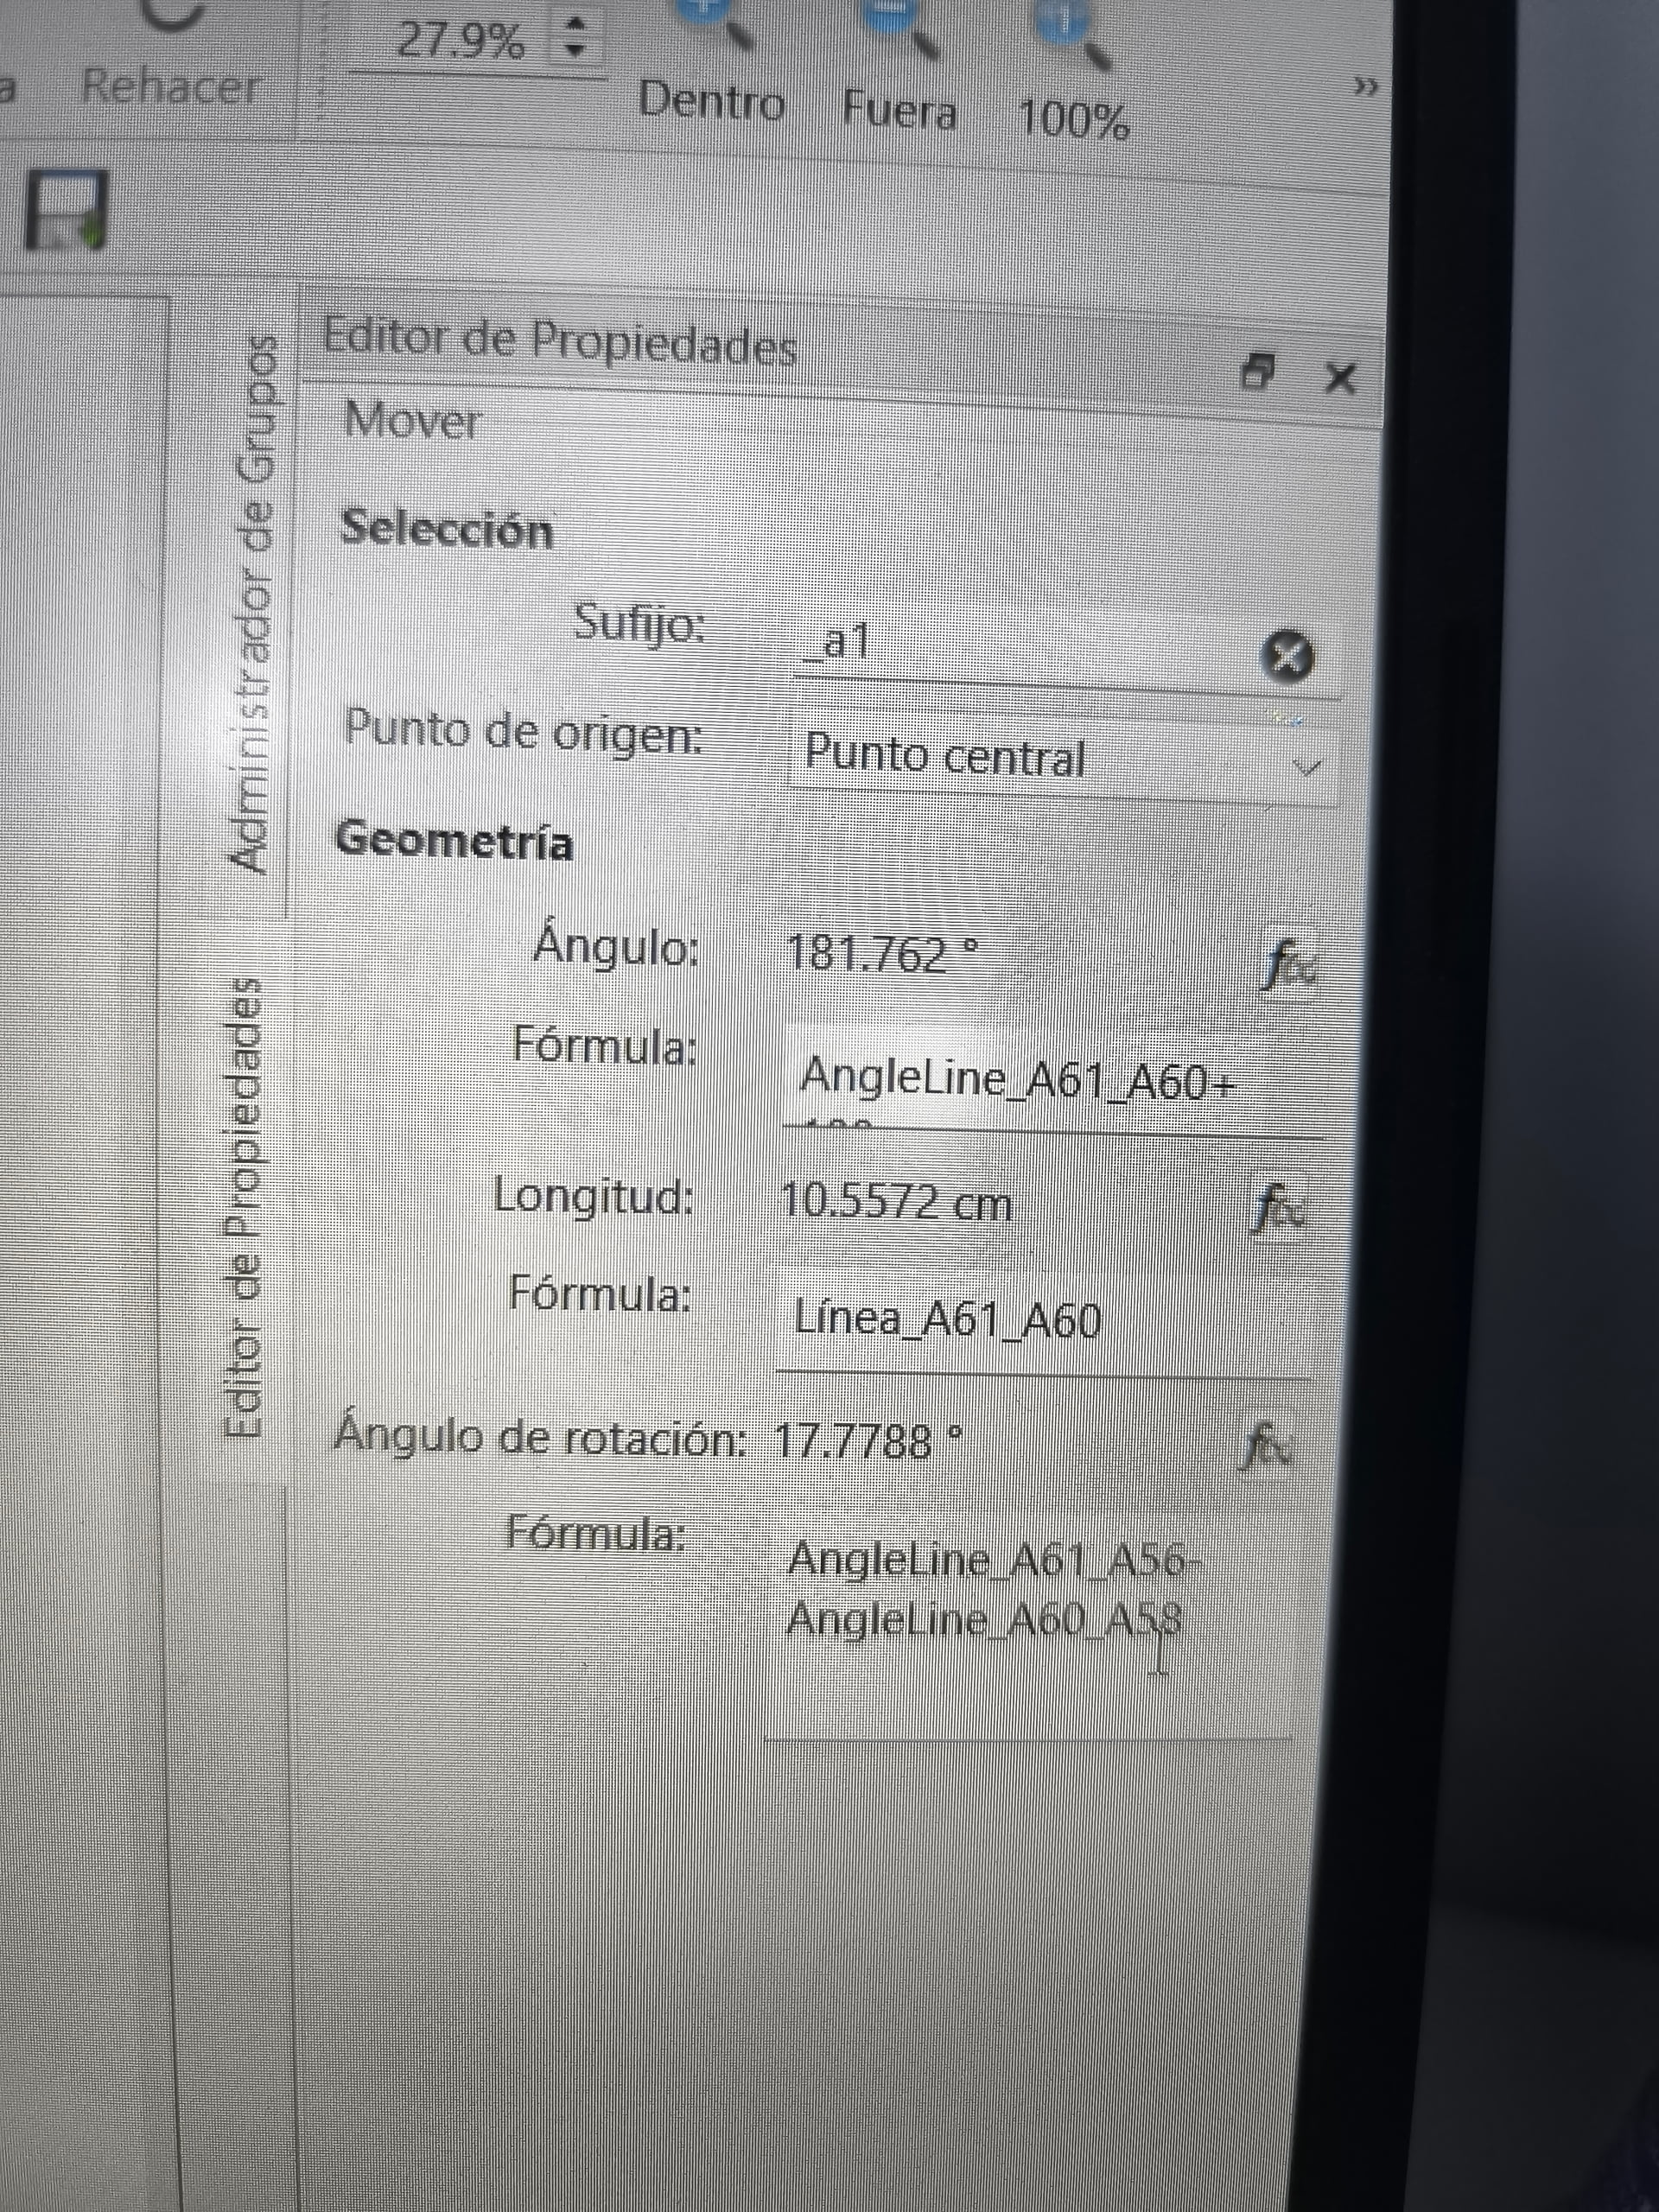
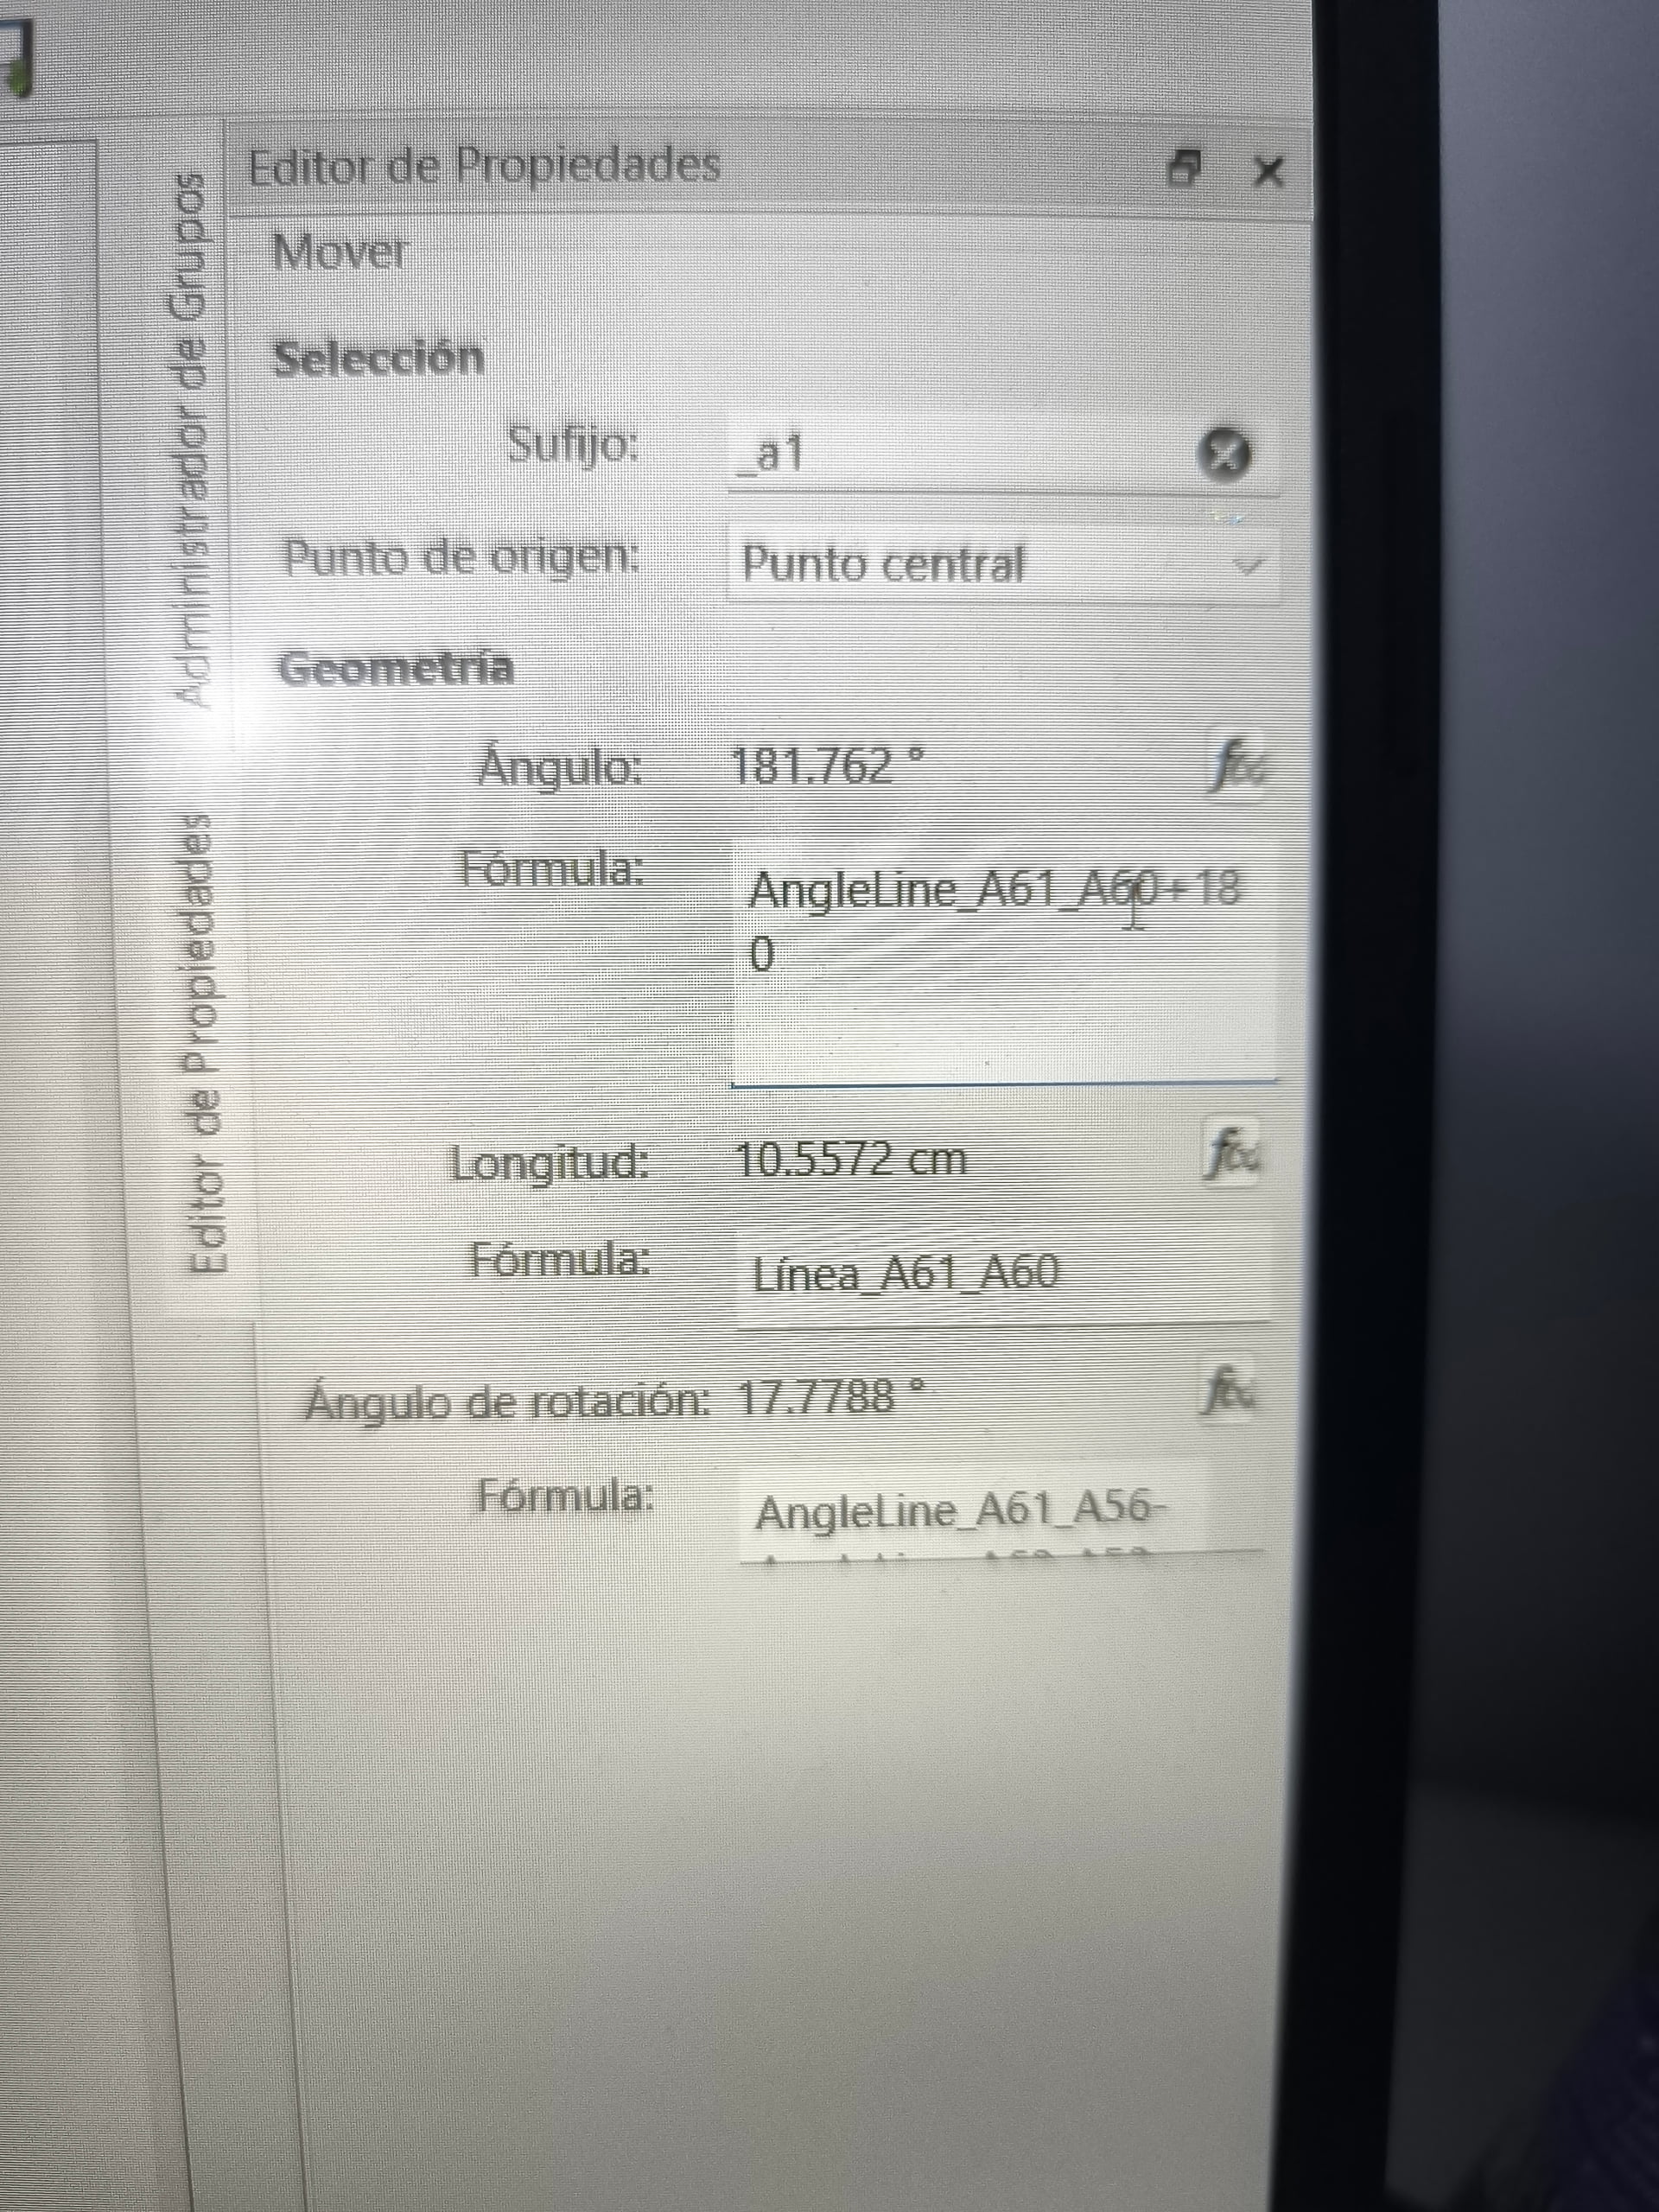
En primer lugar, traza una línea entre los puntos A58 y A56. Esta línea servirá como fórmula para el ángulo (dirección) y la longitud (distancia) del movimiento. El punto de origen será A58.

Puedes utilizar el punto central, pero se trata principalmente de un marcador de posición general y debe sustituirse para obtener una mayor precisión.
Hello and welcome to the Seamly forum, @Meiling
First place a line between points A58 and A56. This line will serve as the formula for the Angle (Direction) and the Length (Distance) of the move. The Origin Point will be A58.
You can use the Central Point but this is mostly just a general placeholder and needs to be replaced for better accuracy.
Select all of the objects on the right side of the waistband that you want to move & rotate.
The formula for the Rotation is correct as Angleline_A61_A56 - Angleline_A60_A58.
1 Like
Hola muchas gracias por responder, tarde un día completo intentando resolverlo, menos mal conseguí este foro ![]() . Solo faltaba eso para lograrlo, estoy muy feliz de haberlos encontrado
. Solo faltaba eso para lograrlo, estoy muy feliz de haberlos encontrado
2 Likes
¡Bien hecho! Queda genial. ![]()
2 Likes