Hey! Just started working on Seamly 2 weeks ago, as I started my pattern drawing classes. I learned a lot by just trying and searching the Wiki and forum, so I have been able to draw a base pattern, but now I wanted to understand all functionallity in the program, so I started exploring the functions in the formula dialogue*.*
Measurements, custom variables, line length and angles, and curve length are pretty straight forward to me. However Curve Angles, Control Point lengths and Arc Radii I cannot figure out how they work. Maybe I have overlooked them somewhere, but can someone help me with (where to find) their explanation?
Let’s start with the easy one… The arc Radii. Sometimes, you want to place a point at a certain distance from another 1 or 2 points. The best way to do this is to draw an arc from the points using the distance as the radius. If the distance is from 2 points, you’ll do this from the 2 points and where the 2 arcs intersect, that is where you’ll place the point - there is a tool for this (Intersect arcs).
If it’s only 1 arc, then the point will be at an angle to a point, in which case you will use the intersect arc and line tool and put in the angle that the line needs to intersect the arc at.
Curves: There has been quite a bit written on the forum about curve angles and control lengths and it’s really quite a difficult subject to explain. I’ve tried multiple times. The method that I always use for all curves, I’ve attempted to explain in this topic. I’d suggest having a look at the PDF file and attempting it yourself. If you have any questions, then I’ll try to explain. But I use variations of this method in all of my curves, everywhere in the pattern and my curves always turn out beautifully and resize smoothly.
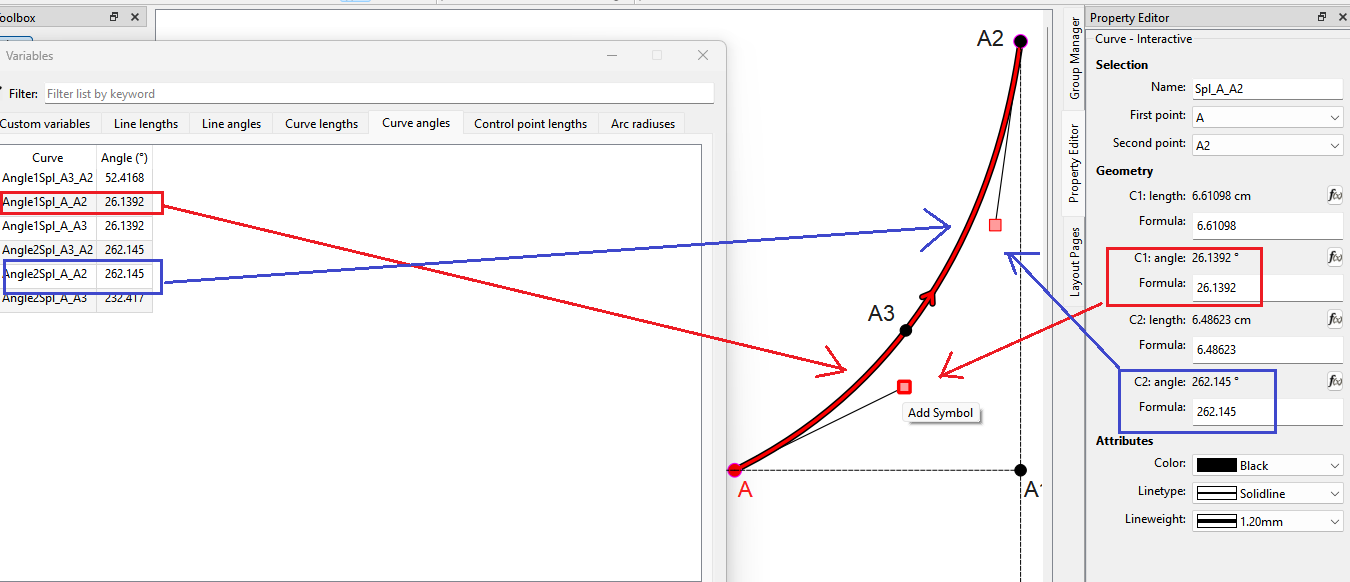
However… there is also an angle of the curve on either side of a Point on Curve which has no visible control points… which is why you will see here the angles for point A3… Angle1Spl_A3_A2 and Angle2Line_A_A3:
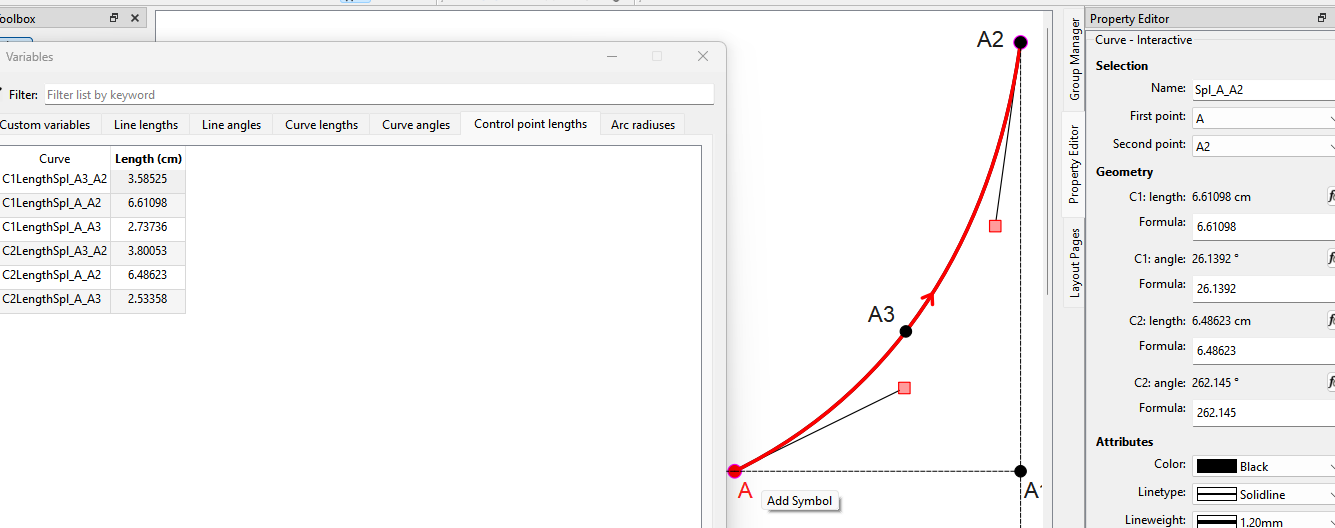
Likewise the Control point lengths represent the length of the control points at the start. end and on curve points. Again you will find here they lengths match the lengths of the visible control points C1 and C2… and the lengths of the invisible control points of the Point on Curve:
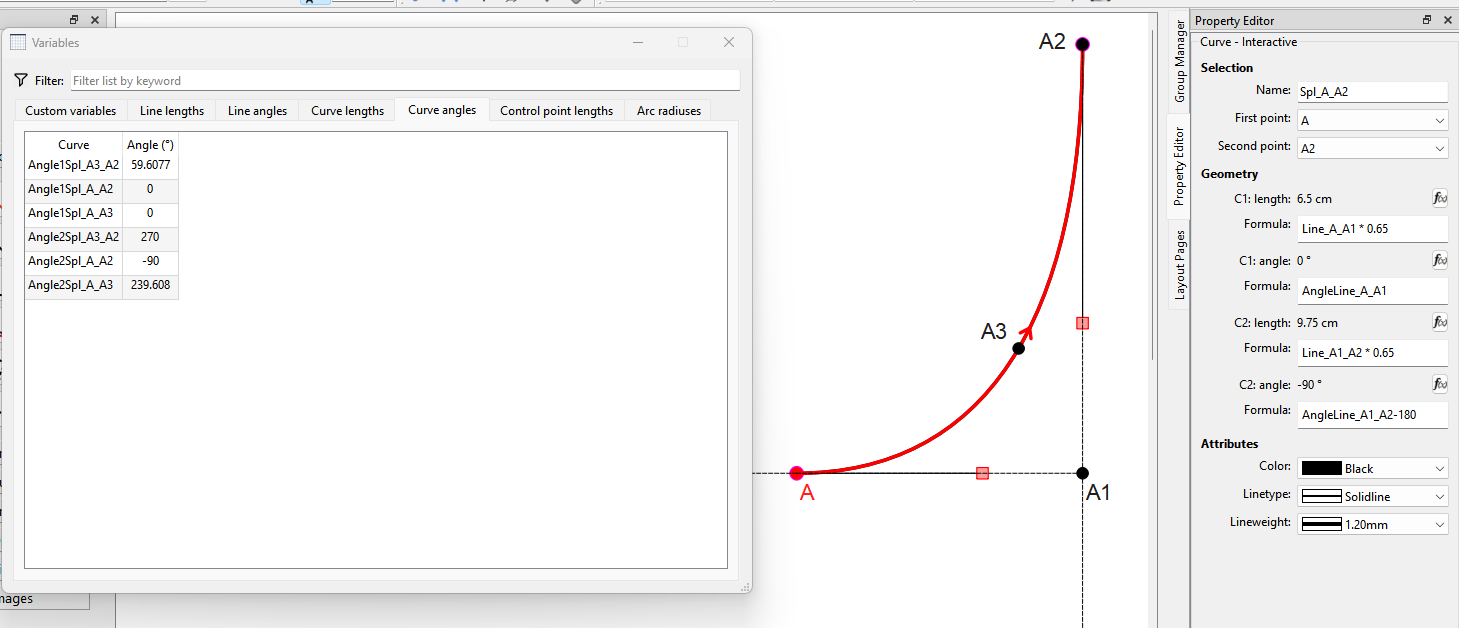
Here I have used formulas for the control points based on the lines A_A1 and A1_A2… which is a way to make the curve smooth and re-sizable across multiple measurements:
Ah, yes, I had found that topic already. It was the first reason I wanted to register on the forum so I could download the PDF, I will practice it tomorrow. The interactive Bezier curve reminds me of high school so need a fresh mind to dig into it.