Hi, my name is Melinda and I’ve just started using Seamly. I’m an experienced sewer and have some background in patternmaking + using Adobe Illustrator but this is my first time digitising sewing patterns. I’m excited.
I’ve started out with just a simple tote bag (rectangles are super easy) and managed to create the first piece and put on some labels. Here are my questions:
Positioning the Piece Labels. Not sure how to orientate/position a label.
Multiple Labels on 1 x Piece. Is it possible to create more than one label on a pattern piece? For example: the pattern piece displays 1 x block of text with all the pattern essentials, plus other small labels that are positioned near markers eg, cut 1 on fold (fold line), cut on bias grain, GRAINLINE (along the grainline) et al.
Thank you in advance. The software is great and I haven’t had too many difficulties getting it up and running.
You may find the AI experience useful as you may want to export Pieces in Piece mode and edit in AI… rather than using the Layout mode… but I digress.
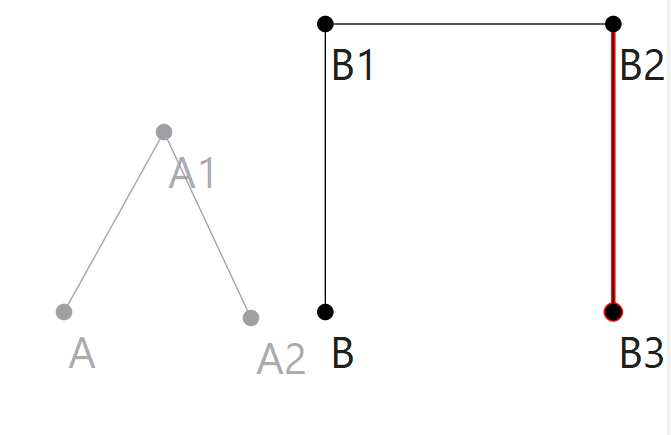
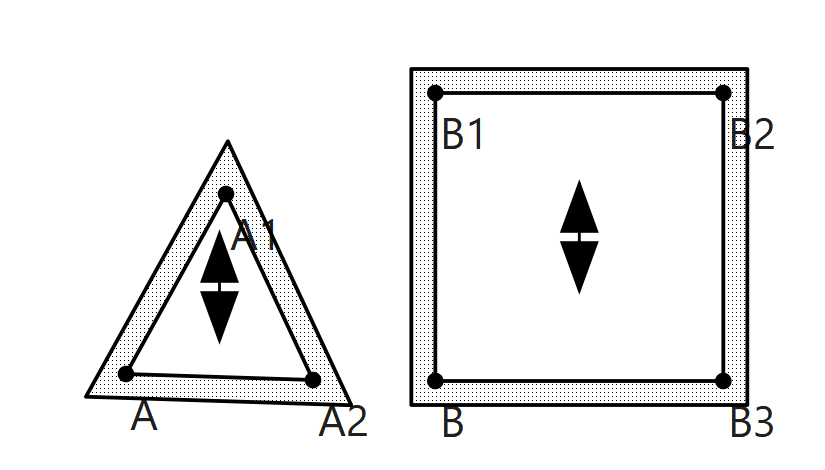
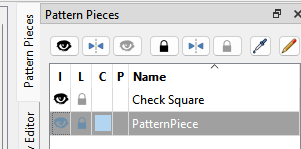
Yes. You will make a seperate pattern piece for the reference square, and then include it in a layout. You can either create the square in your A draft block if just using 1 block (some users prefer drafting with 1 block for various reasons) OR the easiest thing is just create the square in a New Draft block B:
You can however just include the square in a layout and then print just the square to check your print settings, rather than wasting paper printing a whole pattern only to find the settings are wrong. Don’t ask me how I know.
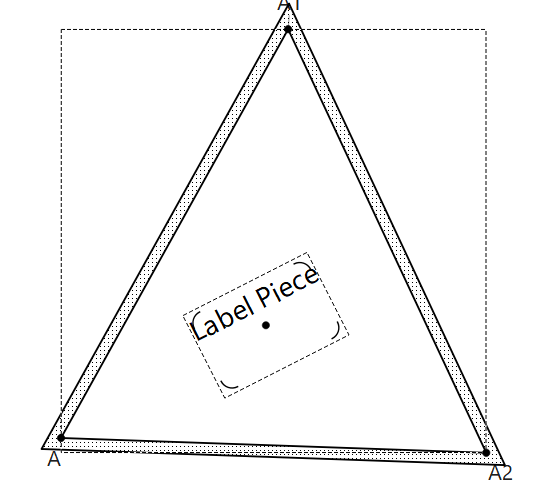
You can place, resize, and move a label within a piece, but it will not be anchored and the position can change if you are using multiple size patterns. Doing it this way the label has an offset from the top left corner of the piece to th etop left corner of the label. The piece may change size with a change in measurements, but the label offset will remain the same so it won’t be in the same relative postion. So for ex: If you always want a label to stay centered in a piece, it needs to be anchored.
You can create 1 Center anchor point and center the label on the anchor point.
You can create a Top left and Bottom right anchor point and
anchor the label between these 2 anchors. Doing so fixes the size and rotation of the label to the position of the anchor points.
I’m just going to illustate using the center point… you should be able to figure out using 2 anchors.
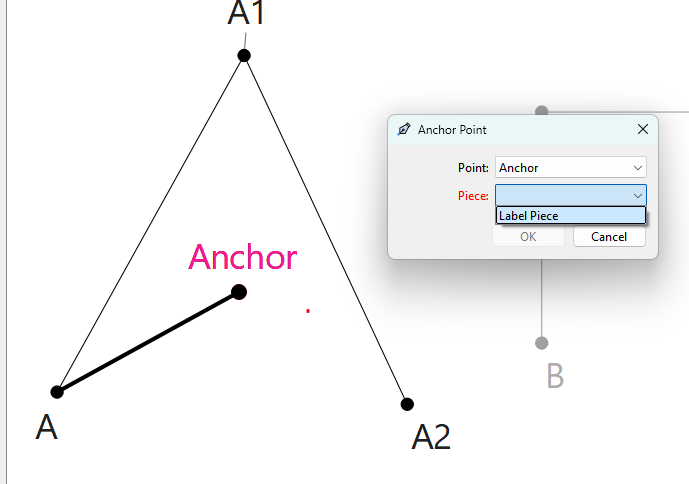
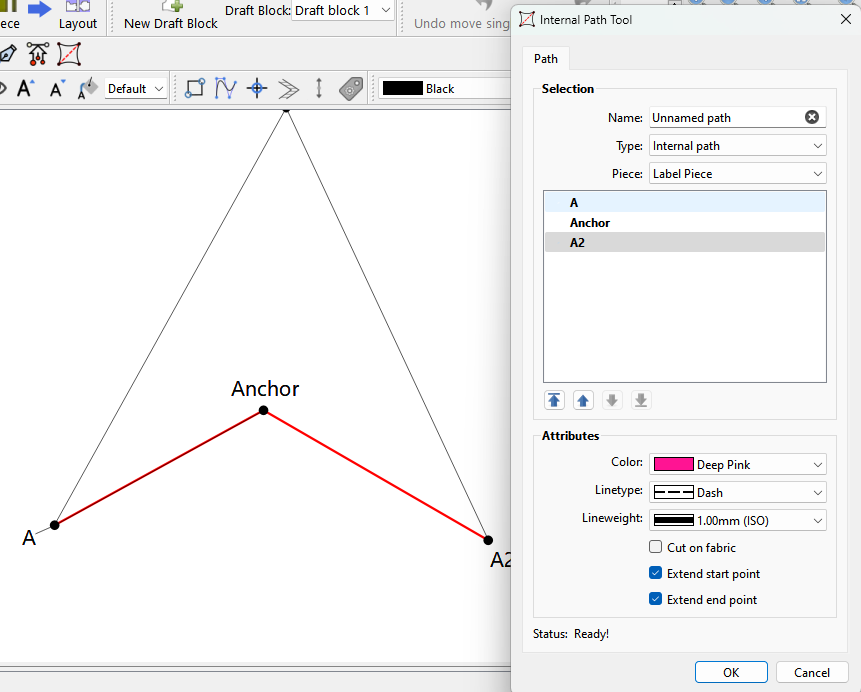
So first you need to create a point that you want to act as an anchor. Here I just drafted a point named Anchor
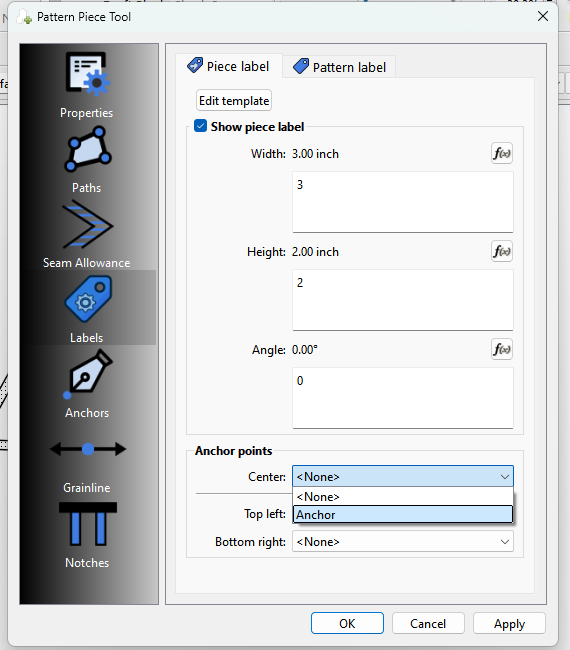
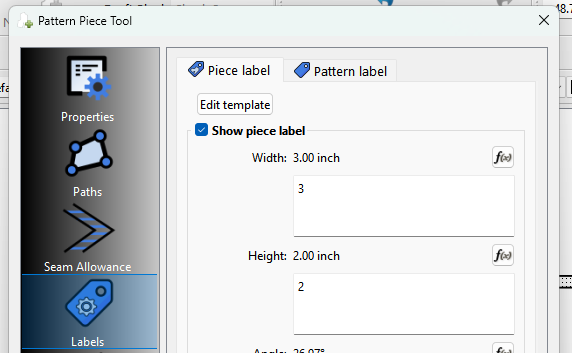
If you now go to Piece Mode and open the properties → Labels of the piece you added the anchor point to… you can select a point for the “Center” anchor:
And Assuming you’ve already created or edited a label template, the label is now anchored to the the Center anchor point. For which you can rotate or resize the label around… but it can’t be moved:
If your anchor point was drafted with a formula, the label will automatically move in relation to any change in patten size.
Currently there are only 2 “labels”… which we refer to as the Pattern Label - which will normally contain global pattern info, and the Piece Label - which will contain info about the piece. Technically there is no differene between the labels, as it really depends on the label template used.
That being said… I’m currently working on a Symbols tool which will allow adding various symbols to pieces like Buttons & Buttonholes… there will also be “On Fold” and “Gather Here” symbols. Since I’m adding text to some of the labels I figured I can just as easily add a “text” only symbol that will allow users to place simple text notes on pattern pieces. The symbols will also function like the grainline and labels and be able to use anchor points.
Hope this helps… Feel free to ask if you have any other questions with the labels.
Thanks Douglas for your reply. This information is super-helpful and I’m going to experiment with it all.
Good to know I can export the layout to AI if I want. I’ll use the native layout option in Seamly first and then try the export to AI option and see which one I like best.
For my first pattern I’m just doing a simple tote bag with only 2 x pieces (bag and handle). My plan was to use that as a learning tool and work my way out from there. I’ll experiment with the label positioning using the different methods, maybe I’ll grade the bag just to see how it affects the positioning.
The symbols would be awesome actually. Probably my next question is about putting marker lines like say for pocket placement, hip marker, or an extra fold line (I did see a post somewhere about fold lines within a seam allowance/hem). But I’m not at that point yet and haven’t even looked for the instructions.
Hearing you about the reference square, we’ve all done it hehe. I’ll give it some thought.
Anyway thanks again for your fast (and very detailed) reply. I’ll put up another post in a few days when I’ve had more time to practice.
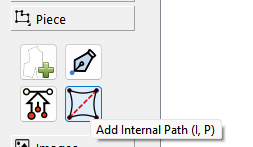
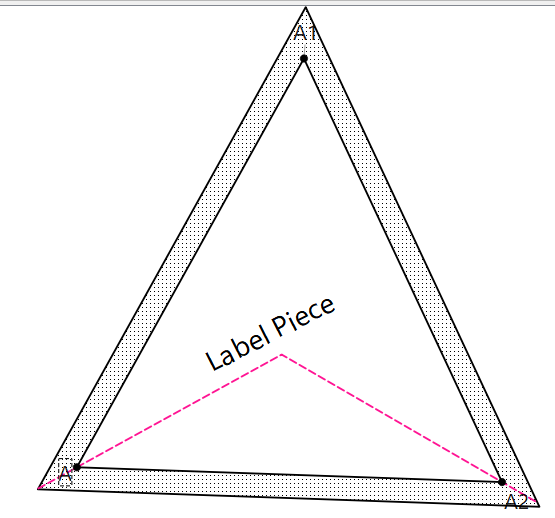
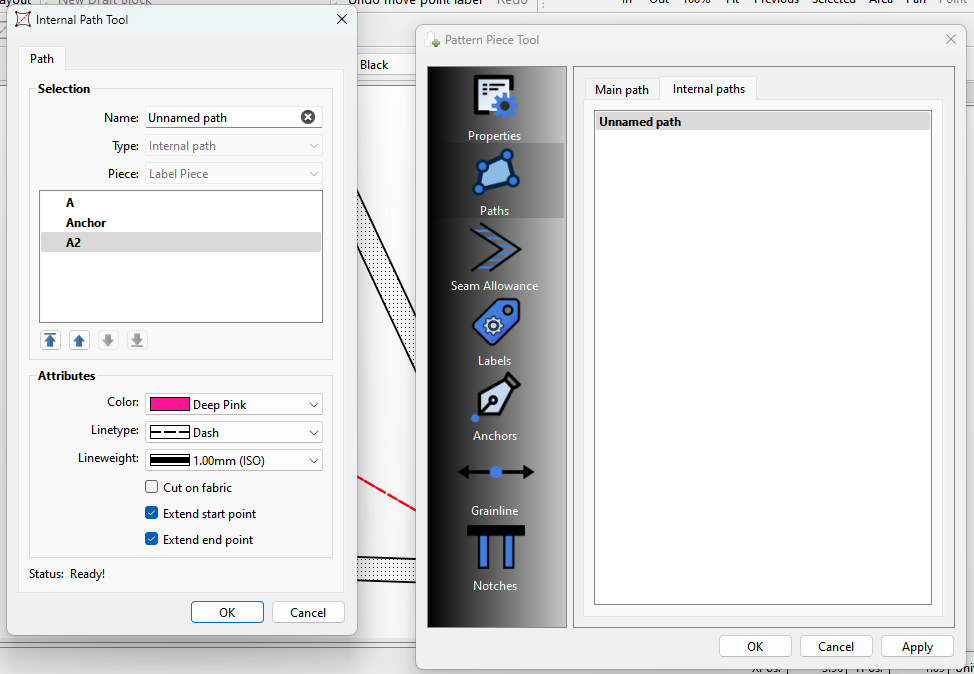
Click the tool.. then select your path just like when creating a piece - with the exeception you don’t have to select points and curves in a clockwise direction.
Note… You can set the pen attributes for iPaths, and in this case I set the option to extend the start and end point… which makes it extend from the seam line (main path) to the cutline.
You can later edit the iPaths by selecting the Piece options->Paths->Internal Paths… and use the right mouse button menu on the path you want to edit.
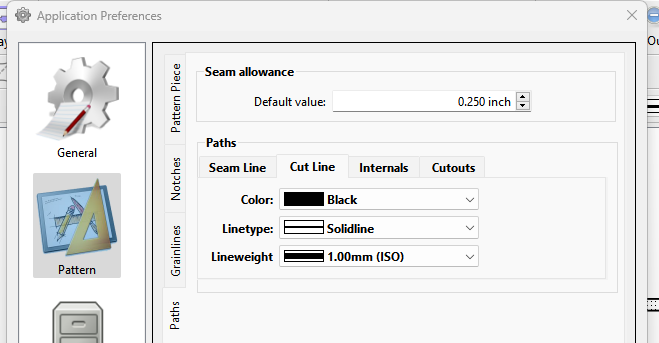
The only other option to iPaths is the “Cut on Fabric”… this treats the internal path as a cutout, and changes the pen to that set in the preferences for the Cut Line pen. This is basically for cutters that are cutting by color… where say if only black lines are cut - a dashed pink will not be cut.