When I import the multisize file into the pattern file It looks wrong. Why? T-Shirt Pattern.sm2d (4.5 KB)
T-Shirt Multisize.smms (951 Bytes) TShirt.smis (1.3 KB)
2 Likes
I don’t have time to look into the details at the moment, but your sleeve is extending out further than the armscye depth, so point A9, not having an intersection point, is defaulting to 0,0
My guess is that the increments on the @Across_Shoulder_Quarter are too much.
![]()
1 Like
I fixed the shoulder measurement.
It skips the point 7 for some reason. Why?
(
T-Shirt Multisize.smms (953 Bytes) T-Shirt Pattern.sm2d (4.5 KB) I created the point 8 with the Point Tool No 1, clicking between A5 and A7.)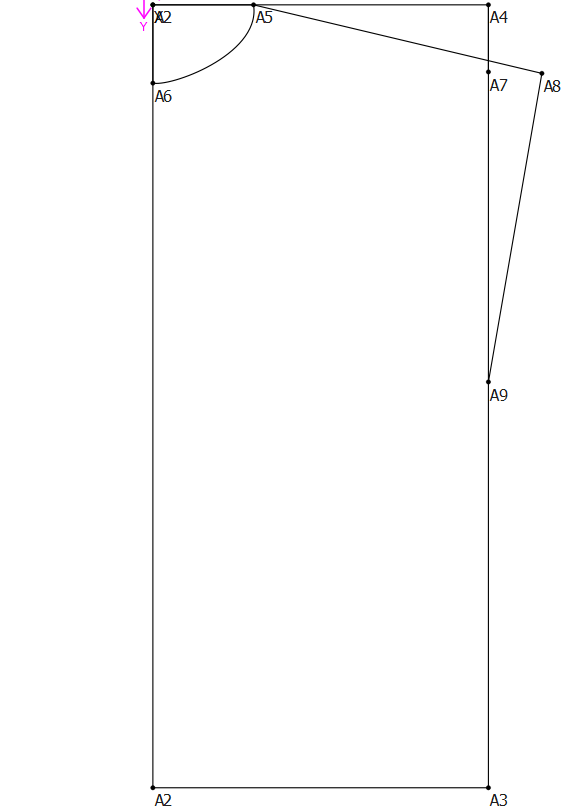
2 Likes
If you want the line A5 to A8 to go through point A7, then you must use the Point - On Line tool:

Click on the tool, then on A5 and then on A7. Enter your formula in the Length box.
This way, it doesn’t matter how you change the size or the measurements, the line will always be anchored to go through point A7.
1 Like
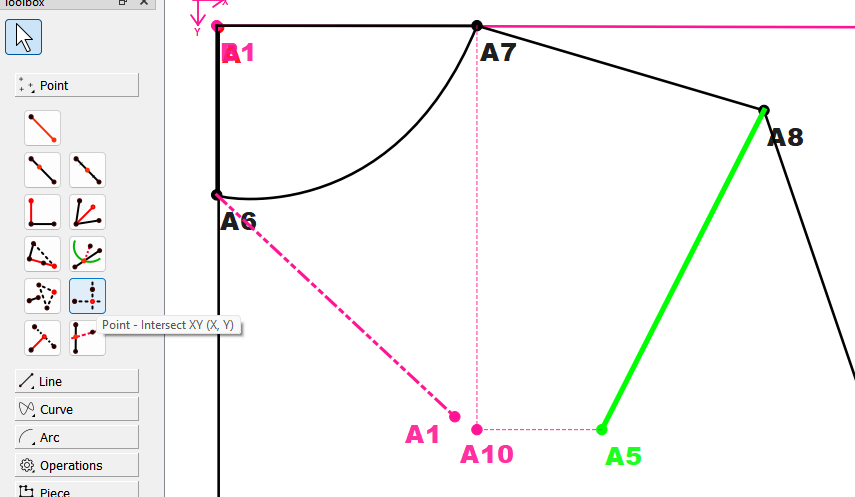
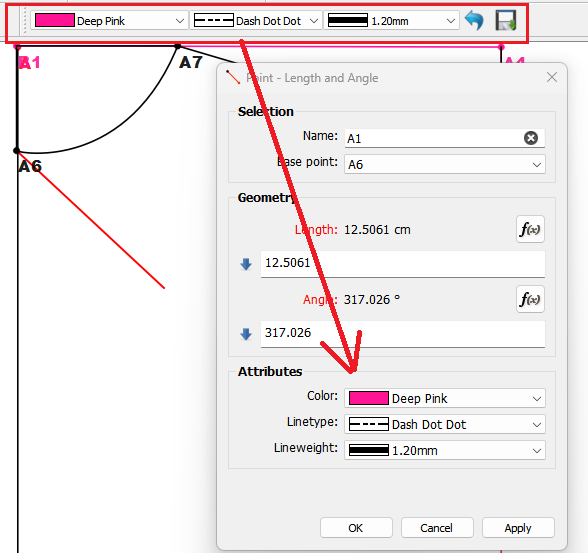
I did what you said however It did not draw the line between A7 and A8 as you see.
Point Tool No 2 (Point - On Line)

???
1 Like
Just change the Line Type.
1 Like
Right… as @Grace said “If you want the line A5 to A8 to go through point A7”… it’s drawing a line from A5 to A8 through A7.
To explain… in mathmatics a line is defined by 2 points and extends infinitly in both directions. The part between the 2 points is a line segment. Just like we previously discussed curve segments. When you use the Point - On Line tool… the line segment is A5_A7… but the line extends past in both directions. So when you give the tool a length greater than the length of A5_A7 the point A8 is created past A7, not on the line segment, but still on the line.
Let me illustrate:
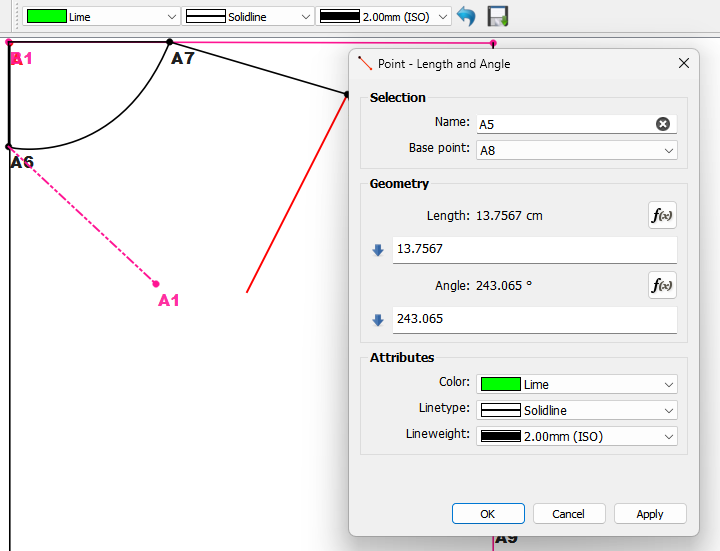
Using the Point - Length and Angle with a length of 5 we create the line (segment) Line_A_A1:
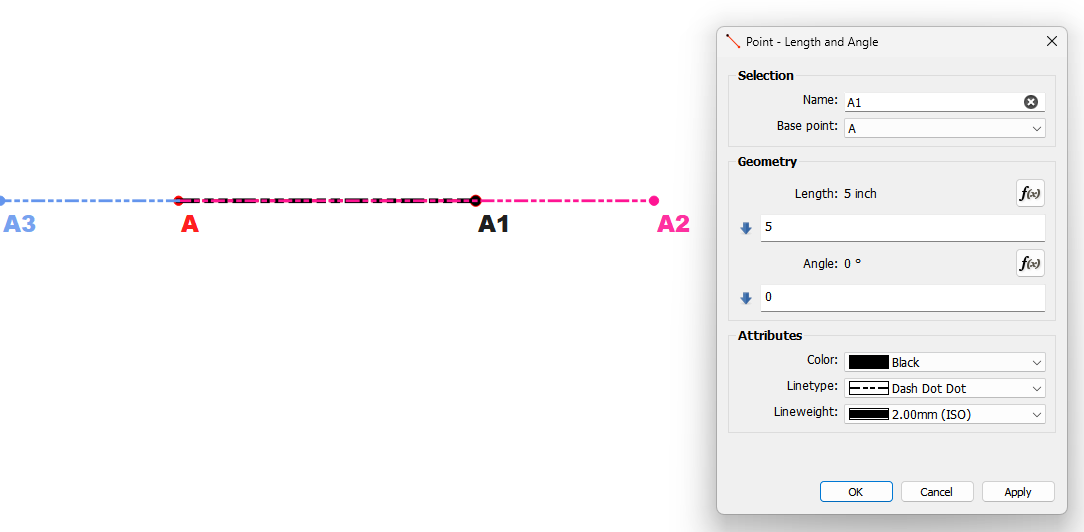
Using the Point - On Line tool with a length of 8 on Line_A_A1 we get point A2:
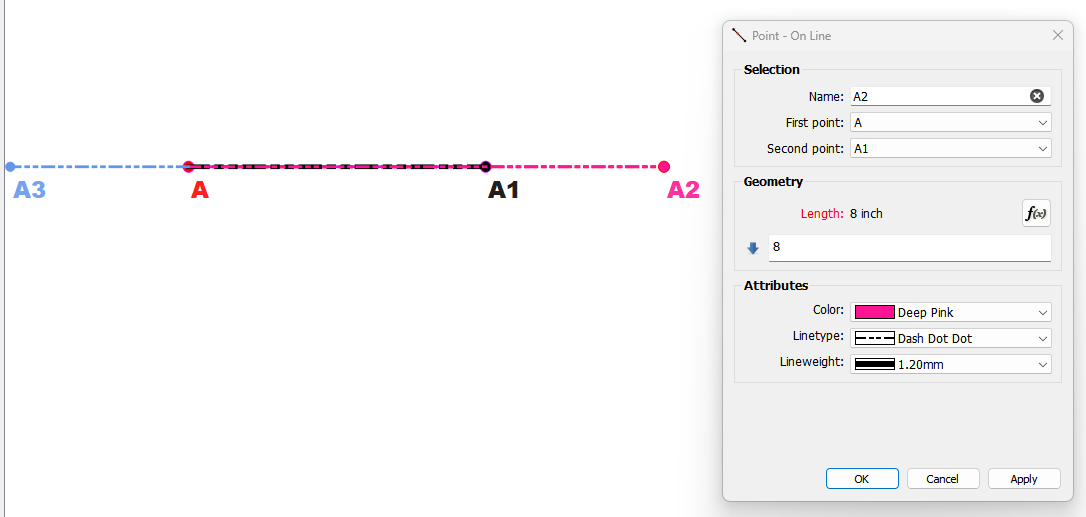
And since the Line_A_A1 really extends in both directions… if we use the Point - On Line tool with a negative 3 we get point A3:

That being said… if for some reason you wanted to only show the Line from A7 to A8 you do something like this:
Set the Line_A_A1 pen to No Pen:

Then use the Point - Length and Angle tool instead and draw the point with length 3, and the angle fx of AngleLine_A_A1:

But, don’t get caught up in all the (straight) lines in Draft mode as they have nothing to do with the actual pattern pieces. They are just contstruction lines to create the points and curves (which are really just a series of points) needed to trace pattern pieces.
2 Likes
I want a line along A5, A7, A8. Not only A7 to A8.
I click A8 and change the Linetype to Soid Line.
However It shows the line thinner.
So why doesn’t It draw the directly like the ones the other lines.
What is the default Pen thickness?
I have to both change the Linetype and the Thickness after drawing It which is tiring.
2 Likes
What ever you set the current pen to in the Pen toolbar:
![]()
When you add a new tool it will default to the current pen:
You can click the Save button to save the current pen as the new default.
![]()
Or click the Restore button ro revert back to the last saved Pen.
![]()
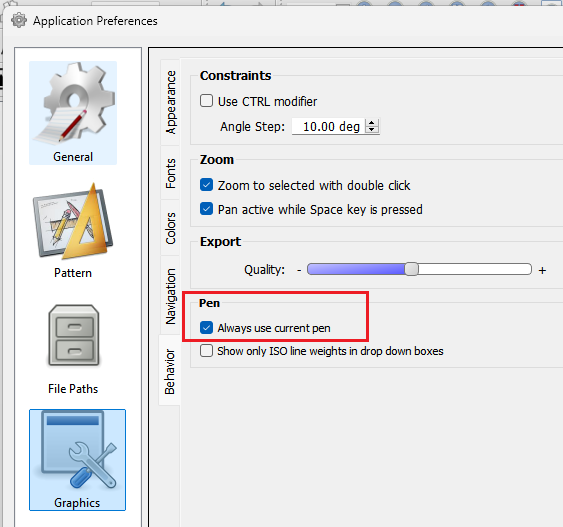
I suggest you also set the Pen pref to always use the current pen… some tools have a builtin Black dashed line - which may confuse you:
2 Likes
Understood.
Some tools use different Pen settings.
Then I set always use the default one.
Thank you very much.
1 Like