I’ve been using Seamly for several years now, and I always have the same question: How can I create smooth and continuous seams for curved hems or armholes?
I never have a polished finish because the curves are different and independent in every pattern pieces (e.g., front and back). This issue is especially noticeable in flared skirts with multiple panels.
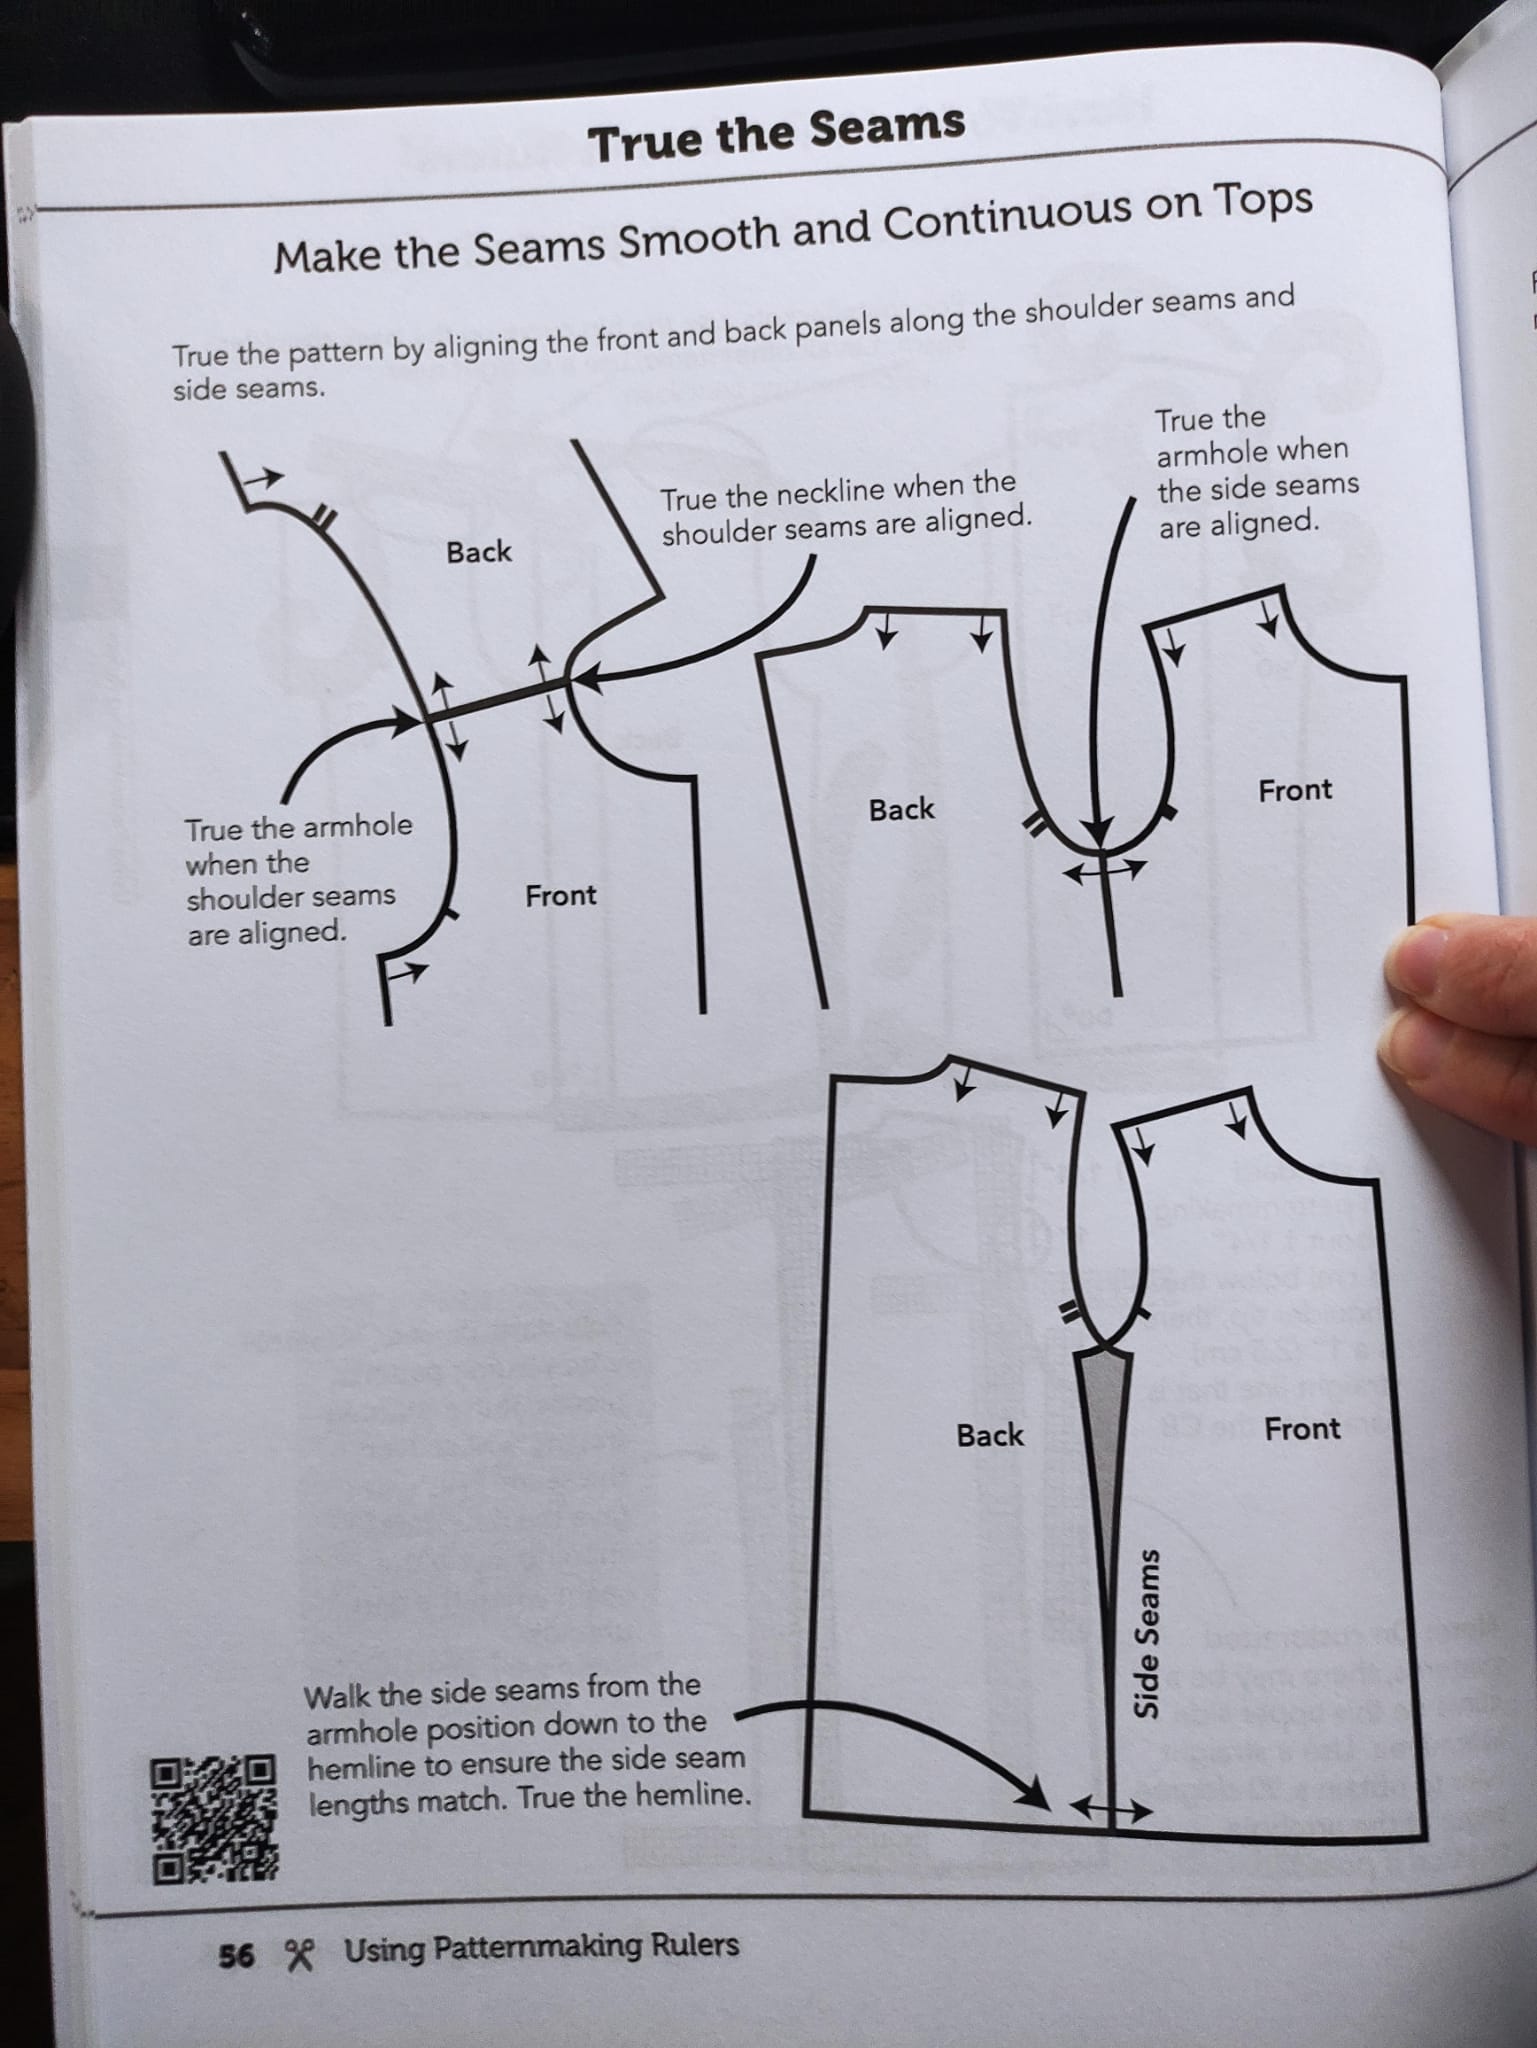
Below is a reference from The Fitting Book by Gina Renee Dunham, which illustrates the seamless curves I’m aiming for:
I know the “Join Two Pieces” tool under the Piece tab can help identify mismatches (like in armholes), but it doesn’t let me redraw or unify curves. Instead, I have to manually tweak each spline section, which rarely gives smooth results.
Am I missing a feature or technique? Flared dresses and skirts are my biggest challenge—the curves always end up uneven.
I did a small tutorial on the armhole curves here.
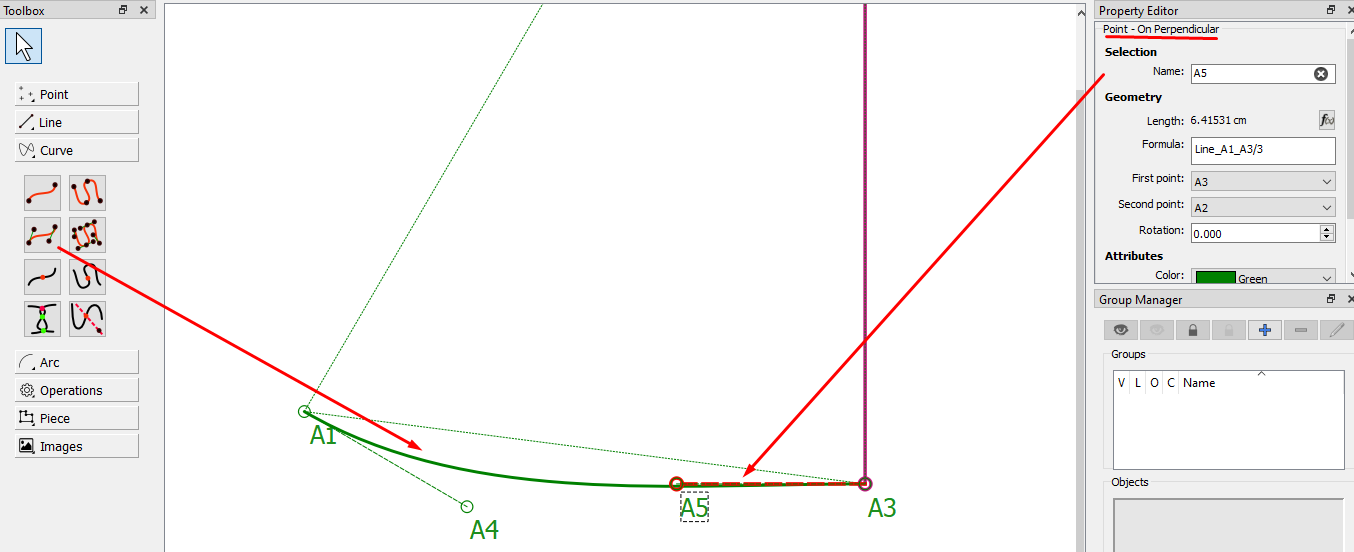
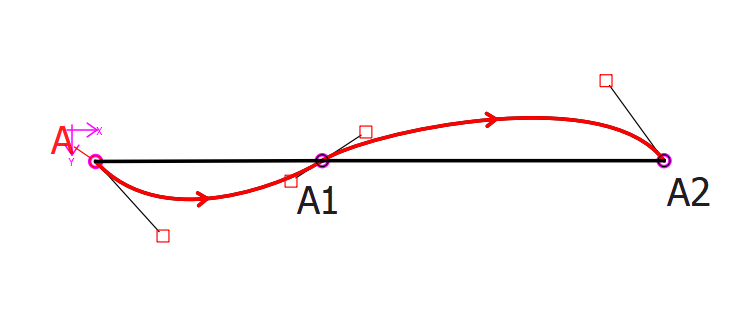
The principal is the same, no matter the distance. Draw a line from point A to point B to get the distance that the curve needs to travel.
Then use the side line or curve handle of each side to create a line from point A or B at 90° to this curve handle at the distance of the connecting line divided by 3.
If you use the Curve - Fixed tool then you can tweak the length of the curve handles without having to open and close the Properties, to get the desired curve. I normally start with /3 but I sometimes use /5 or /7 where a curve meets the centre line.
The thing to remember is that when the curve meets a line, it must do so at a 90° angle so that when a seam is sewn to another seam with a curve, the 2 curves create a straight (180°) line for a short distance before curving and it doesn’t create a valley or a peak.
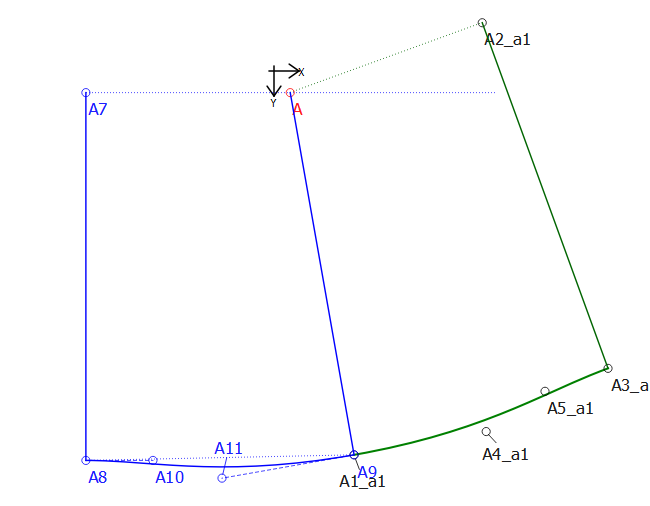
To check your curve, you can rotate the one curve so that the seam lines are lined up between the 2 curves, then you can see the exact effect and tweak the curve handles to adjust the curve instantly.
Here’s my test file so that you can see exactly what I did: Curve Example - d.sm2d (5.7 KB)
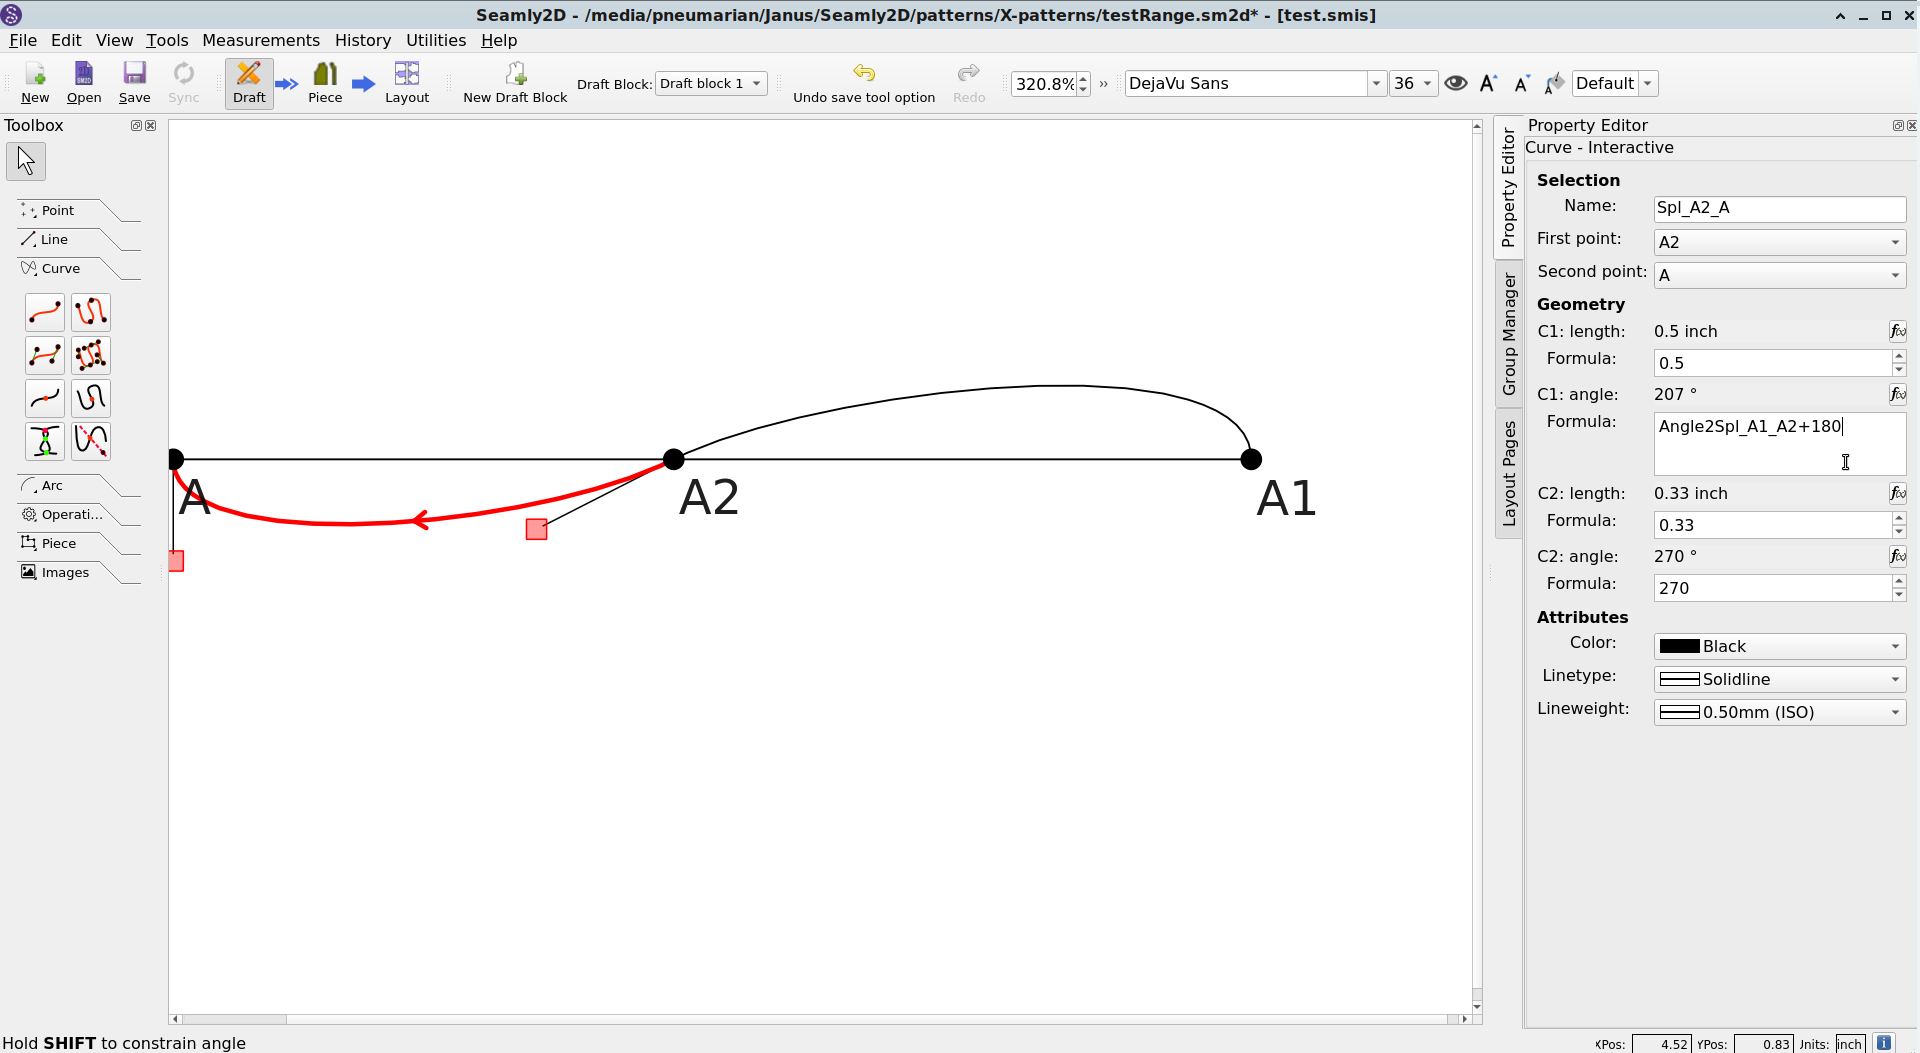
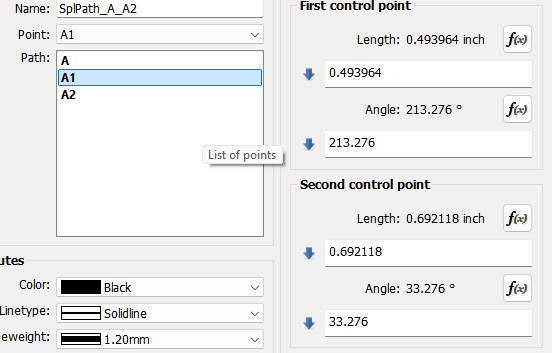
Notice in this screencap how I have set the angle of the first control point of the second curve to a straight line from the second control point of the first curve. That way no matter what happens, the transition from curve to curve will always go smoothly.
Or you can use the Spline tool instead of the Curve tool, where the 1st control point(s) are always 180 degs from the 2nd control point(s) for points in the middle of the spline.
Thank you! I will review everything you have told me and apply it to my next pattern. I never have used the property editor for curves, so I have a lot to learn. If I have any questions, I’ll come back to the conversation