There is a lot of great documentation however I am having difficulties matching up the instructions within the PDF and Windows version of Seamly in order to create a simple 1/4 seam allowance.
the dialog box does not appear after selecting the pattern peice, therefore I do not see the following:
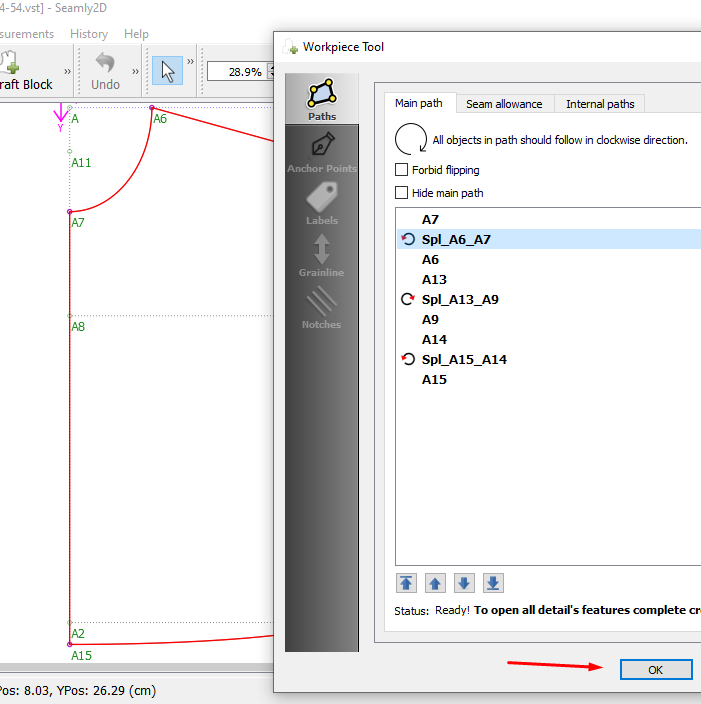
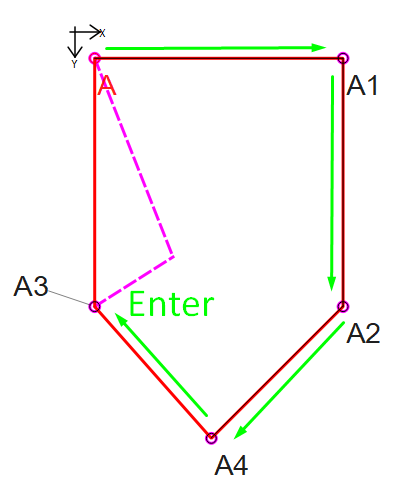
Once you have the whole pattern piece outlined in red, and all the points selected, press enter to accept the selection.
A dialogue box comes up where you may check that you have everything. If you have missed something, don’t worry about it at this point, as we will cover adding points and items when we cover the ‘Insert Node Tool’. At this point, all other options are grayed out so you cannot do anything other than to click on ‘OK’ to accept the selection or ‘Cancel’ to delete the selection and to start.
I’ll redo the PDF manuals once all the latest upgrades have been completed to the program, so I apologize that it’s a few years out of date
What you should do is to select all your points and then hit Enter… A box will pop up which you may select OK, if it isn’t greyed out. If it is greyed out, this means that there’s an error that will need to be correct first, in which case, it’s normally easier to cancel and start again.
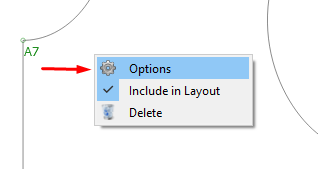
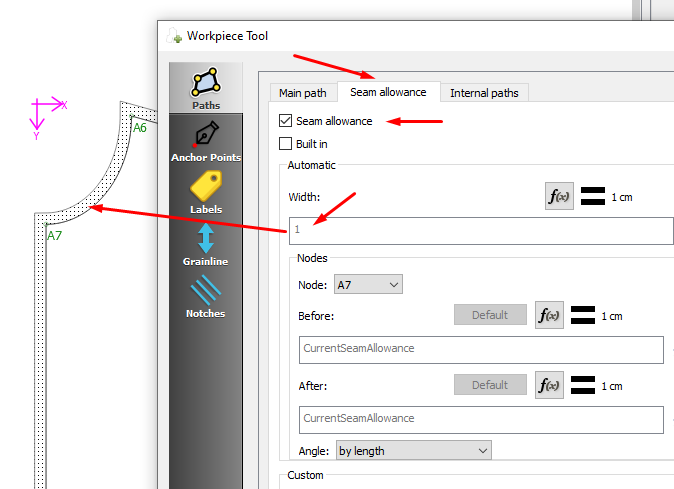
Once you have clicked on OK, change to the Piece mode. Right-click on the pattern piece, select Options from the menu. go to the Seam Allowance tab and make the adjustments that you require:
Hi Grace, thank you for the extremely prompt response! Where I am struggling is as follows:
I have created a rectangle with 5 points (starting + 3 corners + ending point).
I select All 5 points per instructions.
I double check all 5 points are selected
I have attempted several time with 2 ways to select all. First, Cntrl selecting A1 through A5 and also Select all with the mouse dragging over all points.
I hit the enter key - Nothing happens.
On one of my attempts the box did appear. I clicked X as I had to leave my work in progress and now I cannot get it back
Now I could have clicked something to cause the error. So I will attempt to create a new rectangle to ensure I have no errors. THANK YOU
Just to add to what Grace posted… you can choose to just use the default seam allowance ( set in the preferences) for the same allowance all around a pattern piece, or set the seam allowance based on the values “before” and “after” each node (point) in the pattern piece so you can vary the seam allowance on different seams of the piece. For example - if you have a “fold line” you can set the value to zero between the 2 nodes.
As always… the outline path of a piece goes in a clockwise direction when determining the before and after.
Not that it’s applicable to this simple rectangle… a node can be a point or curve or multiple sections of a curve if there are points - such as a notch- on the curve. In the case of a point on a curve, you need to select the 1st curve segment, the point, the next segment… then the end point of the curve. If you fail to include a segment of a curve, don’t fret - you can always insert nodes to a piece and change their order after a piece is created.
BTW, it’s not necessary to hold the shift or Ctrl keys while selecting and dragging won’t work in this case. Just click each node/curve in a clockwise direction.
Yup… that’s only applicable to operational tools, like group, rotate, move, & mirror… or changing the direction of a curve when creating a piece… or constraining an angle with certain tools - all of which are noted in the tooltips in the status bar.