I am currently patterning a loose fitting blouse with a sailor neckline. To make the little sailor scarf, I need to put my front and back pattern piece shoulder seam to shoulder seam. However, I do not know how to do that.
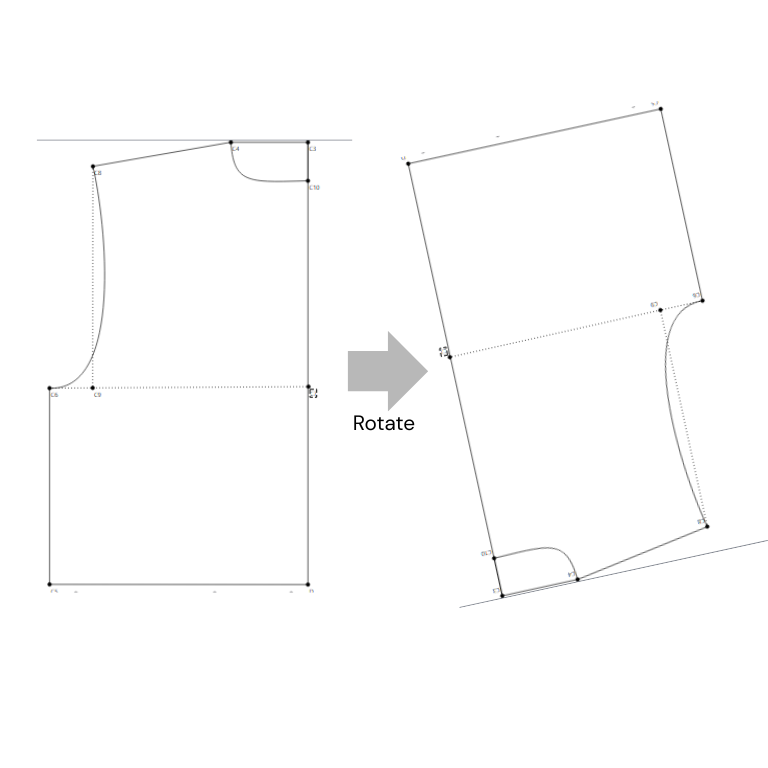
I would like to know how to rotate an entire piece in the “draw” section as shown in the picture. I guess I would need to use the rotate tool, but I have trouble figuring out how it works. Any help would be greatly appreciated
2 „Gefällt mir“
Welcome @Sodi0411
Yes… you will use the Rotate tool.
You can either hold the CTRL key while seletecting the objects (points and curves) to rotate… or just rubber band all the objects you want to rotate (this can be tricky as it may include objects you don’t want to include, and currenttly we can’t edit the objects in an operations tool).
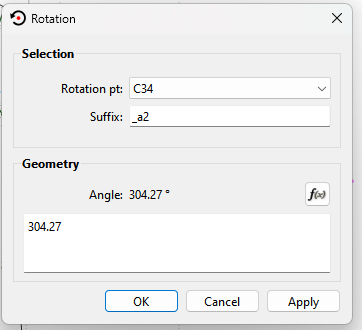
Once you have selected all the objects you want to rotate press Enter… Now select a point which you want to rotate the group around.You can now actively rotate the group. Note the group will only show the points and curves… there will not be any lines connecting the points. If you need the lines you will have to manually add them. Once you click the mouse where you want the rotated group, the dialog will pop up where you can refine the angle - which can be a formula:
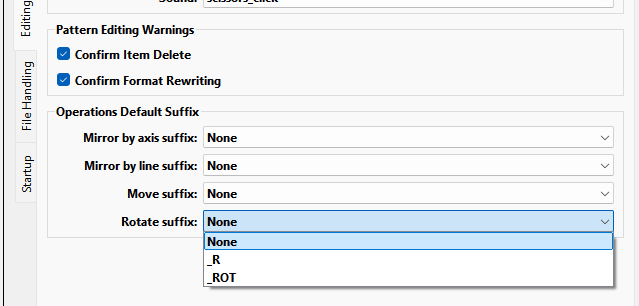
All the rotated points will now be named with the name of the original point + the suffix in the dialog above. I prefer to use the suffix _ROT… so instead of the name of rotated point C12 being C12_a2… it would be C12_ROT. “a2” does not tell me anything… where "_ROT tells me the point has been rotated. You can also set your own default suffixes in the prefs:
It should also be noted you can then use the new rotated points in other tools… or even apply another operation’s tool such as Move - although the Move tool has built rotate option. Moving a rotated point would then produce the new point name C12_a2_a3… or in my case C12_ROT_MOV.
Hope this help.
3 „Gefällt mir“
Thank you very much ! It worked !
2 „Gefällt mir“