Question 1) How to add notches and double notches?
Question 2) How to add notches to the curvy lines?
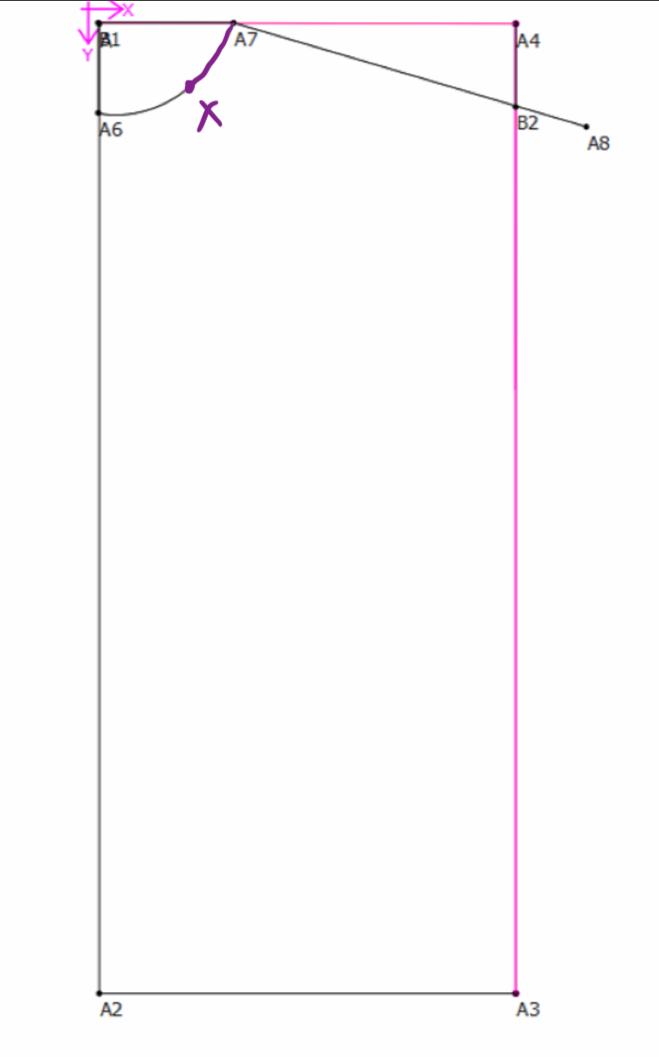
To the curvy neck line on the T-Shirt Pattern
Let’s say from the x cm (the purple line) from the collar point.
Question 1) How to add notches and double notches?
Question 2) How to add notches to the curvy lines?
To the curvy neck line on the T-Shirt Pattern
Let’s say from the x cm (the purple line) from the collar point.
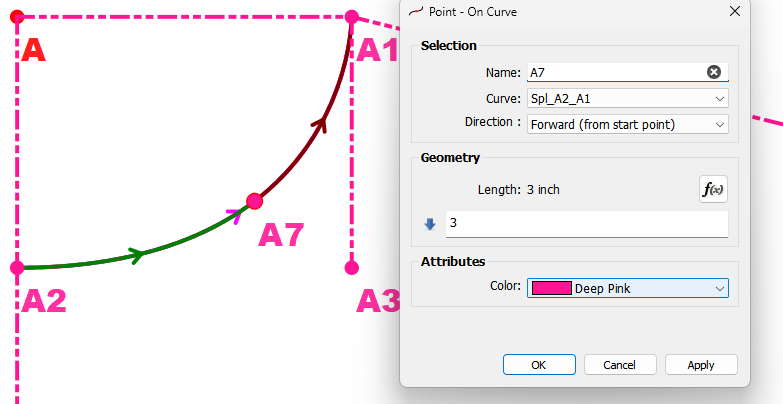
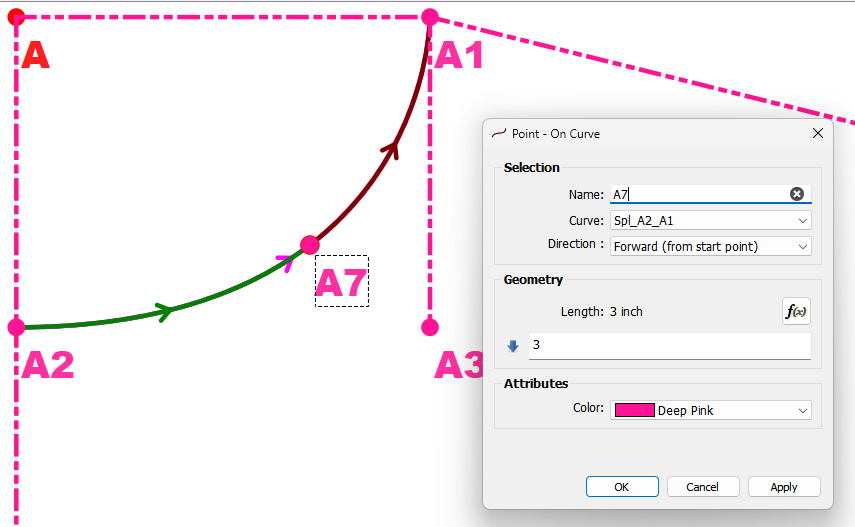
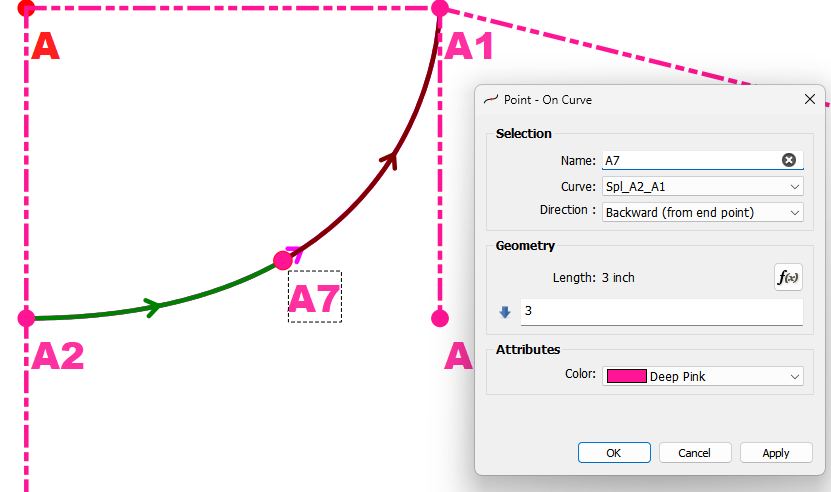
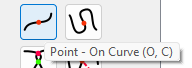
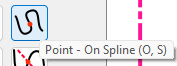
First you need to locate a point on your curve… there are several tools to do that, but the most common ones are the Point - On Curve or the Point - On Spline
So here I’m adding a point 3 inches from point A2 on the curve… A2 is the start point of the curve which you can tell by the arrow direction:
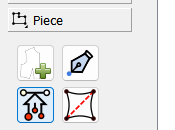
Now… you either need to create a pattern piece including this point, or add the point to an existing piece. Since I already have a piece I will add that point to the main path of the piece using the Insert nodes tool:
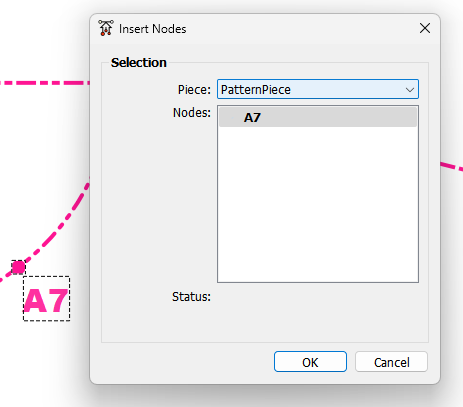
Select the node(s) to add then press enter…and the Insert nodes dialog pops up:
Select a piece to add it to and press OK.
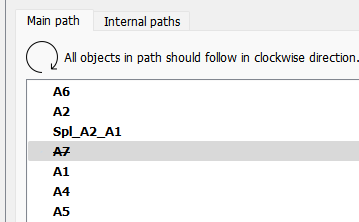
Now go to piece mode and open the piece’s properties and select the Paths tab:
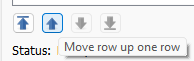
where you wil find the added node(s) at the bottom of the list - excluded from the path (crossed through). We need to move it up to the proper order in the list… you can do this woth the move buttons:
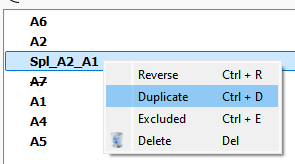
But we’re not done… when you have a point on a curve you need to define the curve (seg), the point, the curve (seg) again. How do we do that? Well we could have added it along with the point, but you can also use the context menu here to just duplicate it:
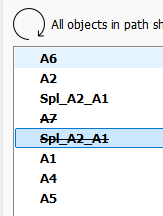
Of course we then need to move it up:
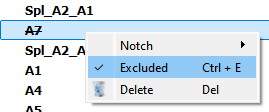
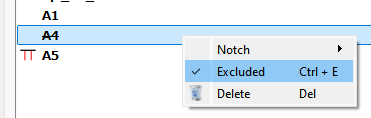
Now we need to include the new curve seg by uncheking Excluded:
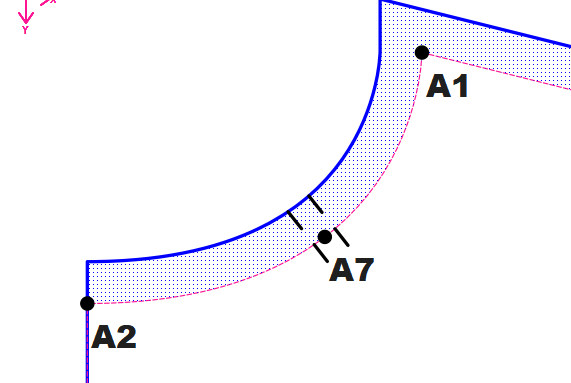
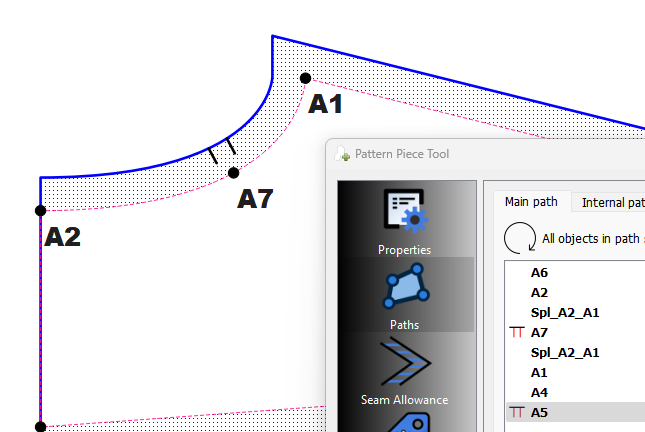
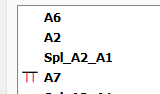
Almost there… we also need to include point A7 - our notch point:
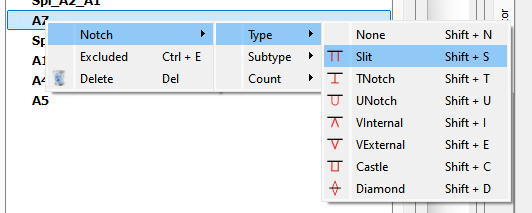
NOW we can make the point a Notch using the context menu… Pick a type:
You can tell it’s a Notch by the
![]() in the 1st col.
in the 1st col.
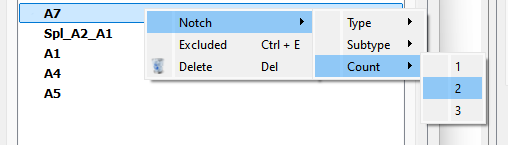
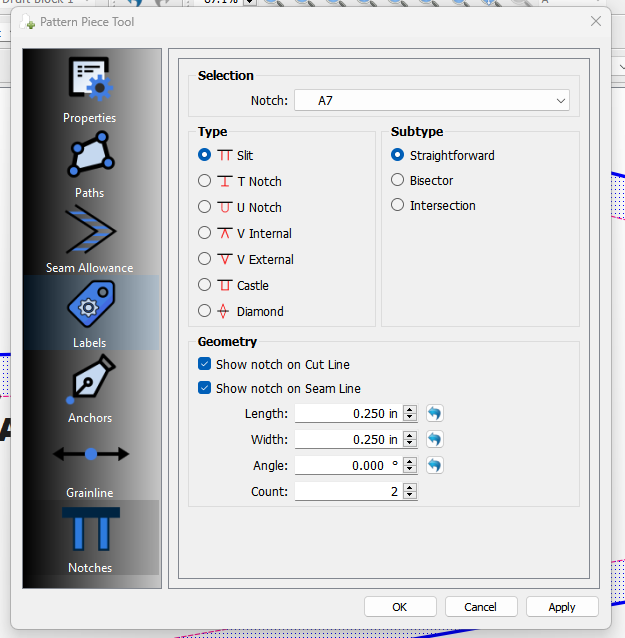
Then pick the count for how many you want 1, 2, or 3:
Click OK and BINGO…A7 is a double notch.
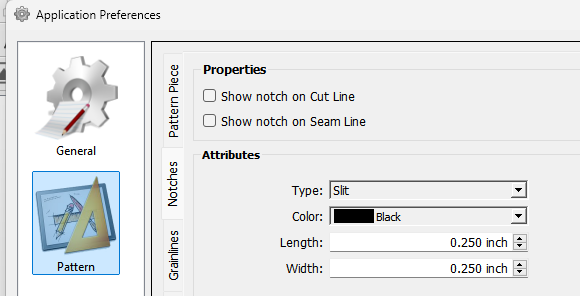
You can set the default preference of new notches in the Preferences:
You can also edit the properties of any notch:
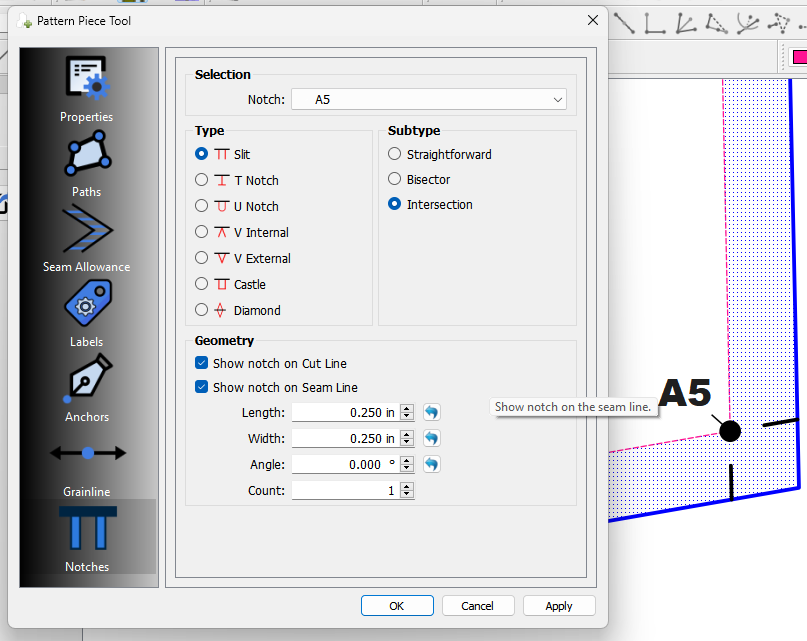
Other note: The Subtype is used for notches on corners:
Intersection:
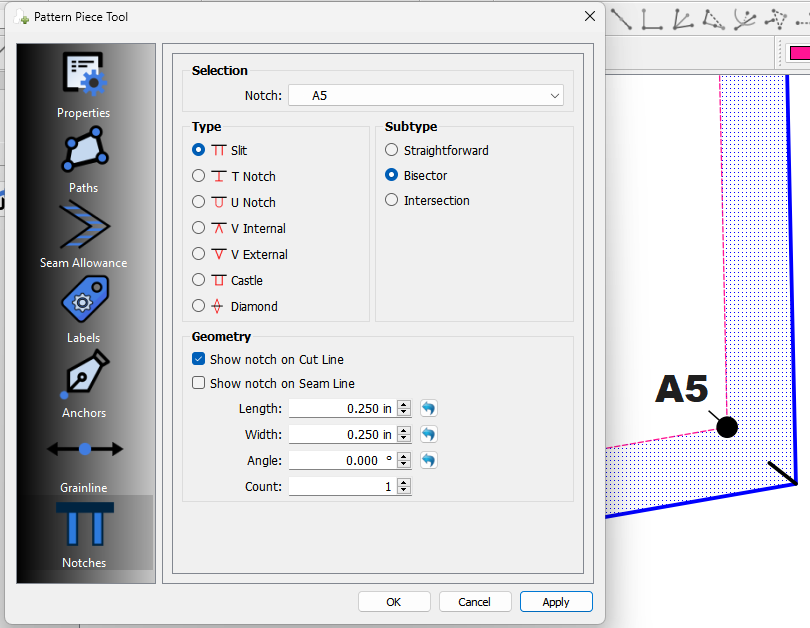
Bisector:
Just a note on that… it depends on which direction the curve was drafted: For example in this case the curve direction goes clockwise from A2 to A1:
If we want it to measure from A1 we simply reverse the direction - Backward (from end point):
Or, if you’re wanting to add notches while tracing, just be sure to include any points used as notches in the trace & if it’s on a curve, select the curve again after.
![]()
I said that - maybe not in so many words - but I figured I’d explain how to add nodes here assuming that @optimusprime93 already had a pattern piece before being asked “How do I add nodes to a piece?” ![]()
Question 1.2.1) At the Piece Mode - Piece Properties - Paths section What does that mean If a node is strikethrough?
Question 1.2.2) So at this part nodes and lines (curves and straight) lines are listed? Right?
Question 1.2.3) What kind of hierarchy are here? What does that mean If we move a node up from the bottom?
Question 1.2.4) What is Curve Seg?
Question 1.2.5) What does that mean If a node is excluded?
It means the node is excluded from the path.
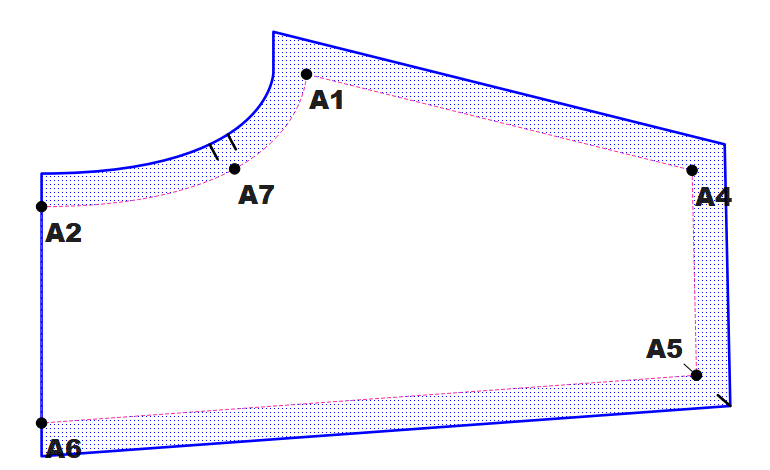
Point A4 included…no strikethrough:
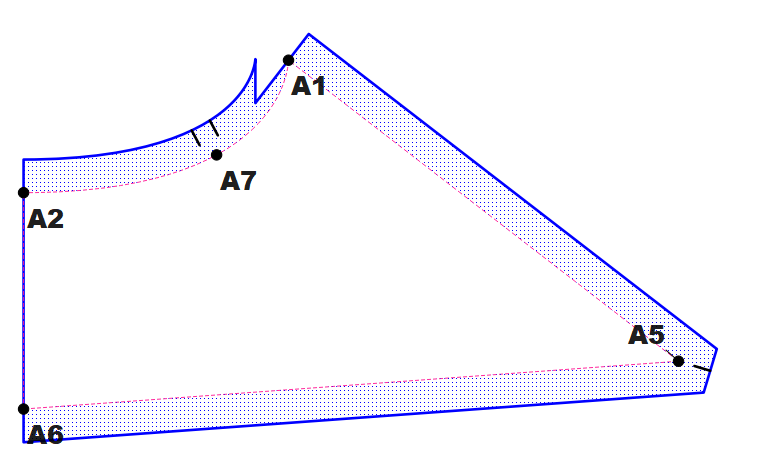
Point A4 excluded - with strikethrough - does not show in the pattern piece:
The main path is just that… it’s the clockwise path the piece traces.The top node is the 1st one you selected when creating the piece, the bottom is the last one you selected… unless of course you have moved nodes around.
The reason why we normally need to move nodes is because when we Insert Nodes
![]() in Draft mode
the app has no way of knowing where to insert the selected node(s) so they are added at the bottom - excluded. You then have to move them up to the proper clockwise order in the Main path list and include them (uncheck the excluded
mark).
in Draft mode
the app has no way of knowing where to insert the selected node(s) so they are added at the bottom - excluded. You then have to move them up to the proper clockwise order in the Main path list and include them (uncheck the excluded
mark).
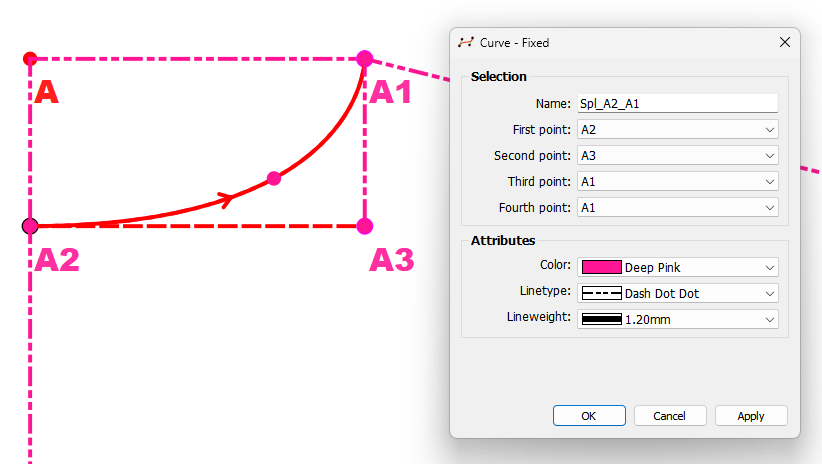
It’s a curve segment. i.e. part of a curve. For example: A2 to A1 is a fixed curve with a variable name Spl_A2_A1:
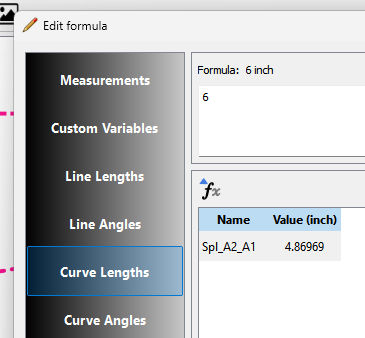
Which you will also be able to use in formulas for it’s length and angles:
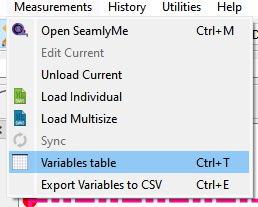
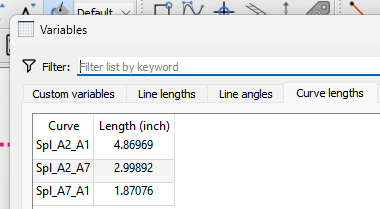
By adding the point A7 on the Curve (from the previous post on notches) we have divided the curve Spl_A1_A2 into 2 segments. Each segment can then also be used in subsequent formulas. Besides the FX Editor, the curve segment lengths can also be found in the Variables Table:
So we also have the curve segments Spl_A2_A7 and Spl_A7_A1
In use in the pattern piece though it just refers to the full curve name. If you have a point on the curve - such as a notch - you have to include the curve, the point and the curve again. So it’s as if you were including seg Spl_A2_A7, point A7, and seg Spl_A7_A1.
If we want it to measure from A1 we simply reverse the direction - Backward (from end point):
Lol, I didn’t see that there. I’ve been calculating the reversed length by saying Spl_A2_A1-3 in order to go backward, guess I know now ![]()
Internally that’s pretty much what the reverse option does.