could someone please guide me how to make a perfectly fitting seam allowance? I need the different pattern pieces to sit perfectly one on another, so that the sewing is as easy as possible. For some pieces, there is a corner here and there that doesn’t fit. I tried to use different choices when configuring the seam allowance in the piece properties, no luck so far; either one piece is longer or the other or the seam allowance is weirdly skewed.
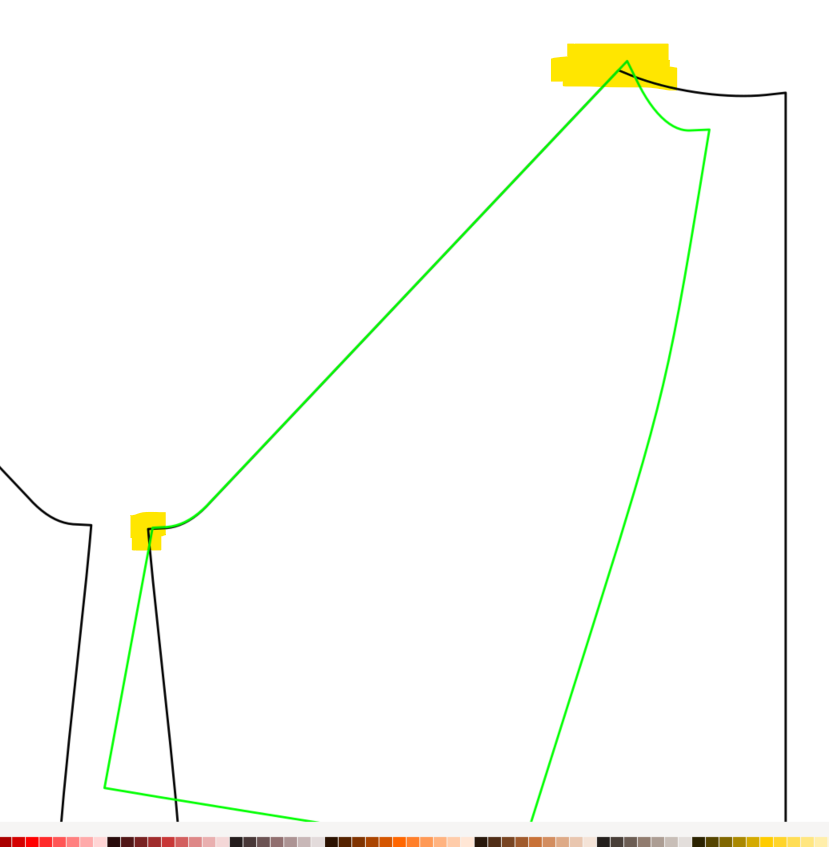
In this specific case, the green piece is a back raglan sleeve and the black one is a back body; although it fits nicely along the sewing line, the seam allowance differs in the corners, which is a bit bothersome during sewing.
For context: What you see here is a SVG export of my pattern, including seam allowance. I then use a laser machine to cut the fabric, so the precision is pretty high and the differences between pieces are clearly visible during sewing.
Well, that’s a relative thing. I’ve been sewing (commerically in the costume industry) for nearly 50 years, so what’s hard for a beginner is probably a piece of cake for me. From my experience though, properly placed notches is going to aid in a better fit than whether or not the ends of seam are off a tad. Especially with a raglan sleeve where you’ve got 2 pieces on the bias that can creep all over the place.
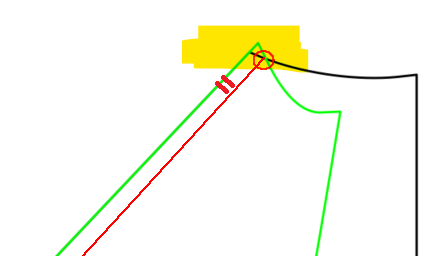
I’m not sure what the issue is? If the seam line is the same length, it doesn’t matter what the length of the cut edge is… as you’re not sewing it there. For example… assuing the SA is included in the pic, you’re sewing the red line… and if notches are used, you can line them up and the seam end is not as critical.
Generally you would clip the seam allowance after stitching. If you have a hard time lining the 2 pieces up, you can play around with the angle of the node corner in the Piece Tool>Seam Allowance. The “intersection” option is about as close as you can get, as currently it won’t clip as close as I noted by the black line at A46.
That being said… if there’s an issue of in sewing because a sleeve and body seam lenght varies, it’s not due to the added seam allowance, but rather in the drafting. You want to make sure the run of each 1/2 of a seam is within tolerance… which until we add a seam check feature, users have worked out various work arounds to compare the seam lengths.
Thanks for the thorough reply @Douglas. What I take from it is that well placed notches beat a perfectly fitting seam allowance.
I’ve played with the Angle: by points intersections as well as the other options in pattern piece properties but nothing did exactly what I wanted. Nevertheless I have a way forward thanks to your advice, thank you!