Hey I’m new and have a general understanding on patterns &grading. I’m trying to figure out the best approach to grading on this software as to my understanding it uses formulas? So with my research I haven’t figured out these formulas or where/how to find them. I basically know ex: size 6 graded up to size 8 would be 2 sizes divided proportionality along the certain lines of the pattern etc(simple wording). SO my question is, for grading is it best to have my measurements and find the closest stock measurement provided and tweak it to mine? Would that keep all the necessary formulas intact which would allow me to plug in the new graded sizes I want? If not do I use my own measurement and then create grading formulas or rules? This seems to be just the application I need but just need someone to super simplify the process please!!! Thank you
Just to comment so you can get a better understanding of what I will be trying to accomplish with Seamly2D. I will be created and drafting my patterns in real life for the most part. Which I hope to be able to recreate on this application, and be able to grade them. So my starting point will be an existing pattern that I want to translate and grade and print. I think once I get that base down I will know enough to be able to do other cool things with custom measurements from other people/clients. Thanks
Hi & welcome @Geanbenjamin
Ok… Firstly, Seamly2D doesn’t really ‘Grade’ patterns, rather, it will ‘Resize’ patterns. So you won’t be able to print a pattern with multiple lines all over showing the different sizes of the same pattern. This you will need to export the pattern to .svg and use Inkscape or something to stack them on top of each other. But you can ‘Resize’ patterns simply by changing the measurement file.
You will notice that you have 2 icons on your desktop after installing Seamly2D - one for Seamly2D and the other for SeamlyME.
SeamlyME is where you go to create your measurement files. You can create as many as you wish, for yourself, your customers, friends - these you will create individual measurement files (.vit). You can also create multisize measurement files (.vst) but I’m not going to say much about them. You may download the manuals, read the wiki, etc. on the nitty-gritty, please.
Once you have your measurement file created, then you may close the SeamlyME program and open the Seamly2D program and create a ‘New’ pattern, save it with a name that will make sense to you.
After saving, go ‘File > Measurements > Load Individual’ and select the measurement file you created and then draft your pattern.
At any point, if you wish to load a different set of measurements, just repeat the process of loading a measurement file. If you wish to save the pattern under a different name, the go ‘File > Save as’ and then you can change things in the pattern to suite the new person.
It’s as easy as that. 
You can also use the measurement file repeatedly like this, just saving it in a different name and editing the measurements. This will ensure that you always have all the codes used in the pattern covered in the measurement file.
" After saving, go ‘File > Measurements > Load Individual’ and select the measurement file you created and then draft your pattern."
Hopefully I will get to it today, so essentially it wont automatically grade for me right? I can just plug in the correct average measurements for the next sizes up and down? (and custom measurements etc) I hope I am understanding this right. And thank you for the response Grace!
@Geanbenjamin, I want to add to what Grace said. Please remember that the individual measurements are stored in a separate file. A xxx.vit file contains measurements for one person. A xxx.vst file contains measurements for a range of sizes. So, while she is correct that Seamly2D will not automatically grade the pattern nor will it automatically print multiple sizes on top of one another, it will deal with a range of sizes.
I have a strong personal preference for using only .vit files and having one per individual.
If you are creating a pattern for an unknown group of people who may need different sizes in a range, it may make more sense to use the multisize files.
Yes, I didn’t explain too much about multisizes, although I love to draft with a multisize measurement file loaded, but it’s a whole new conversation and I was quickly replying to you before work. And you also mentioned that you were creating patterns for customers, so I thought to show you that method first.
I’m busy with a blog & videos that may help you a little bit that I still need to add the link to the wiki, but you will find it at SEAMLY2D TUTORIALS - BURGO METHOD - Home. The videos are on the page.
I will be sure to look into all this as well, thank you!
Hi Grace,
I am new here ![]() I am looking for answer about grading pattern with seamly2D, and I found your answer. Can you explain what is the différence between grading and “resize”?
Thanks
I am looking for answer about grading pattern with seamly2D, and I found your answer. Can you explain what is the différence between grading and “resize”?
Thanks ![]()
Stef
Hi @stephanie.brissa Welcome to Seamly!
Grace (& Douglas) will be around to give a full answer later, but my understanding is that “grading” is drawing out from a drafted pattern of the base size, whereas re-sizing is (in this case electronically) re-drafting the pattern using different measurements. When physically drafting patterns, grading is a lot more fast & easy, whereas switching base measurements for a draft of a different size is more accurate & easy when using software like Seamly.
![]()
Hello and welcome, @stephanie.brissa
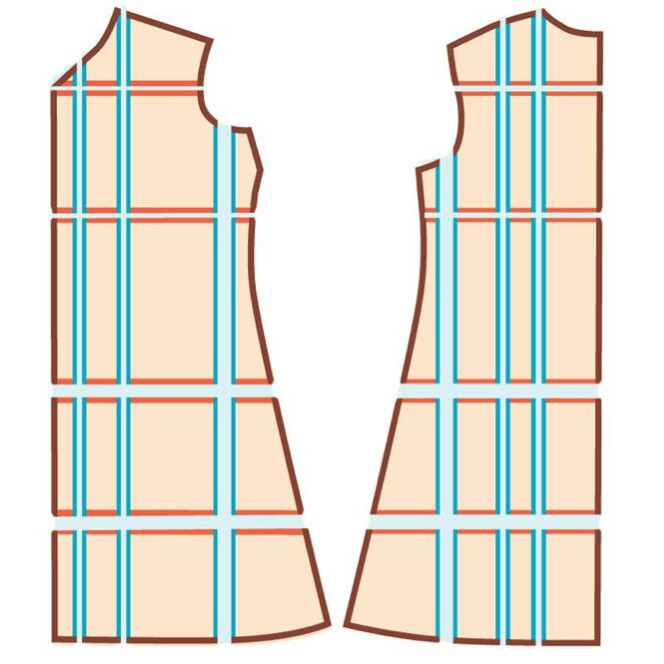
It’s as @Pneumarian has explained. When you grade a pattern, you put points at small distances from existing points and redraft the lines and curves to the new points, this way, You’ll have 2 pattern’s lines in the draft.
The other way is to cut the pattern in certain places and to move the bits apart or overlap them to create the new pattern size.
Here’s an image of a pattern being graded to a larger size:
I’ve added the link to the image, if you’d like to read all about it.
I prefer to work with a multisize measurements file which resizes the pattern automatically when I change the size. Then I save each size to SVG and nest the different size pattern pieces in an external program before saving to PDF.
Grading IS resizing according to a set of grade rules. Multisize measurements are the grade rules. Grading is the process of taking a base size pattern, and then increasing or descreasing the size according to the grade rules. For example… looking at a chart for Misses:
If we take the waist… from size 6 to 10 it “grades” up 1", from 10 - 14 it grades up 1 1/2", from 14 to 24 it grades up 2". You may notice that the rule bust and hips differs. This is what the multisize measurements are for… to set up grade rules according to what body type you want to fit. Unfortunately we’re currently stuck with only centimeter values for size designations.
Thanks a lot, it is more clear for me now ![]()
Hot take Seamly2D parametric design make grading ruler obsolete ![]()
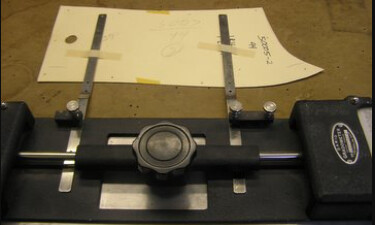
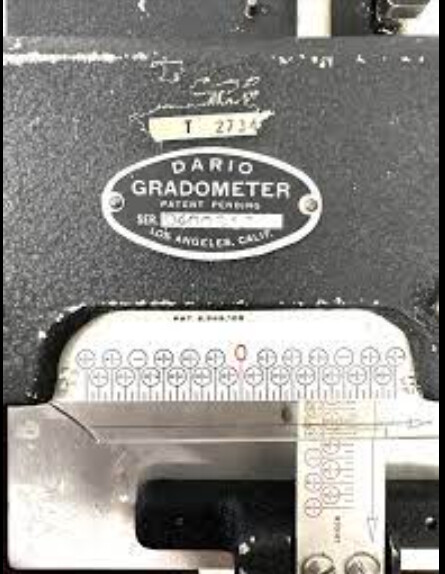
Only if you have the time to draft the pattern in Seamly. As once you have it in the computer you can print out a pattern to what ever size. On the other hand, as was the usual case at my shop… if I needed a pattern in an hour or two so I could cut out a jacket… it was quicker to just get out the paper and grade a pattern by hand or as the case usually was using my Dario Grad-O-Meter. ![]()

What! They have special tool for that, and it is MASSIVE! TIL.
Yeah. They were pretty neat. You clip (or in my case tape as I was missing the clips) a pattern piece on the bars, and by turning the knobs you can move the piece up/dn or in/out to move a grade point. There are 2 rulers (the machines came in either inches or metric) and a set of crosshairs that you can dial in whatever increment for each grade point movement.


