I am revising a fairly complex existing Seamly2D pattern (a blazer) and needed to correct a curve (specifically, a collar curve). The corrected new point has been created, and there are no issues drawing the new curve. However, it seems impossible to delete or modify the old curve due to hidden dependencies. Is there a practical way to identify, correct, and/or remove these dependencies?
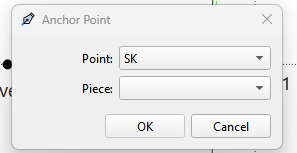
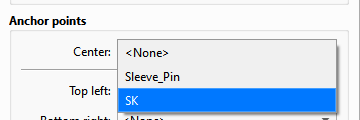
While exploring solutions, the concept of Anchor Points came up as a way to make the new point selectable for modifying the existing old curve. However, I cannot figure out how to create Anchor Points — in fact, none of my patterns show any Anchor Points in Pieces mode.
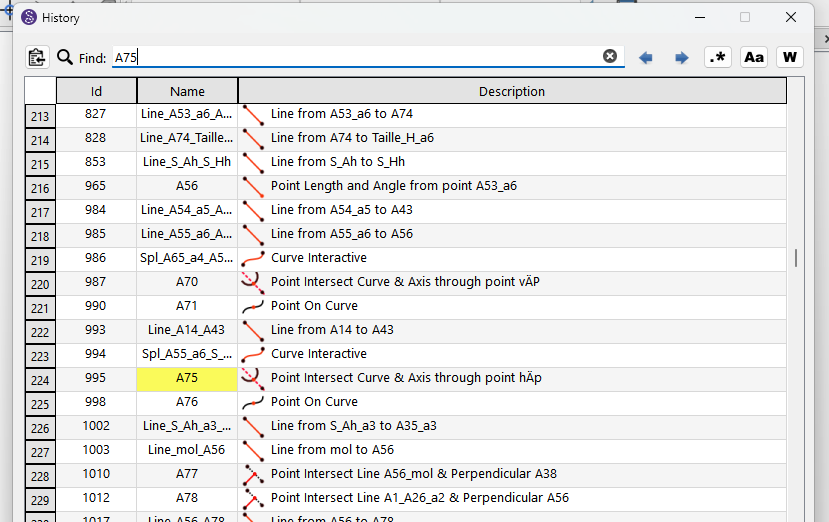
This has been a long standing issue that’s not easy to solve. Besides the actual dependecies where one tool uses another, tool variables can also be referenced in formulas… which has no protection from deletion like the dependencies. The History can help you find some dependencies, but it can get rather complex quick if there are a lot of branches off any given tool… as you have to delete each tool in reverse order until you get back to the tool you want to delete. Then you also have to keep in mind when a tool is used in an Internal Path, a Pattern Piece, or as an Anchor Point… you have to remove those references as well.
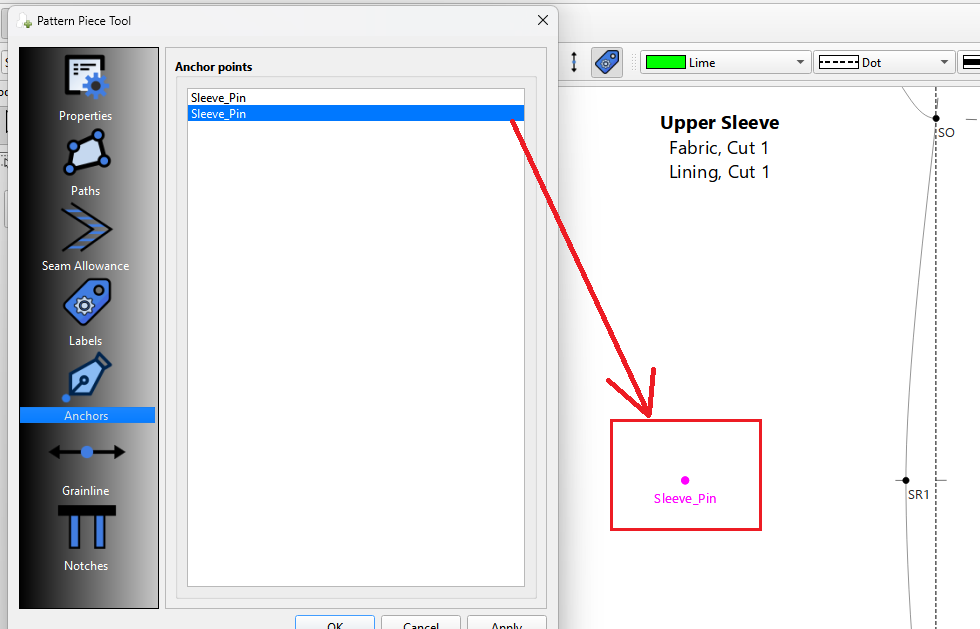
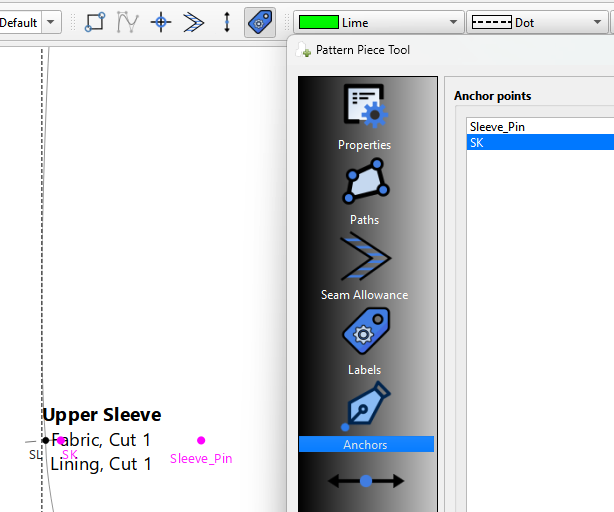
Anchor points don’t normally show in Pattern Pieces. They are specifically a special node type that is simply used as a way to pin or “anchor” a Label or Grainline. They do show in the piece when you select the Anchors tab:
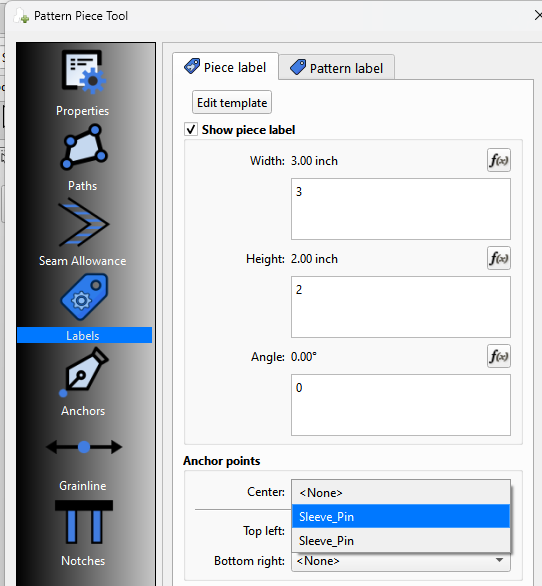
The way to use them - for ex: Anchoring a label to it’s center so it moves with the anchor… which will become apparent once you start creating different sizes of a pattern.
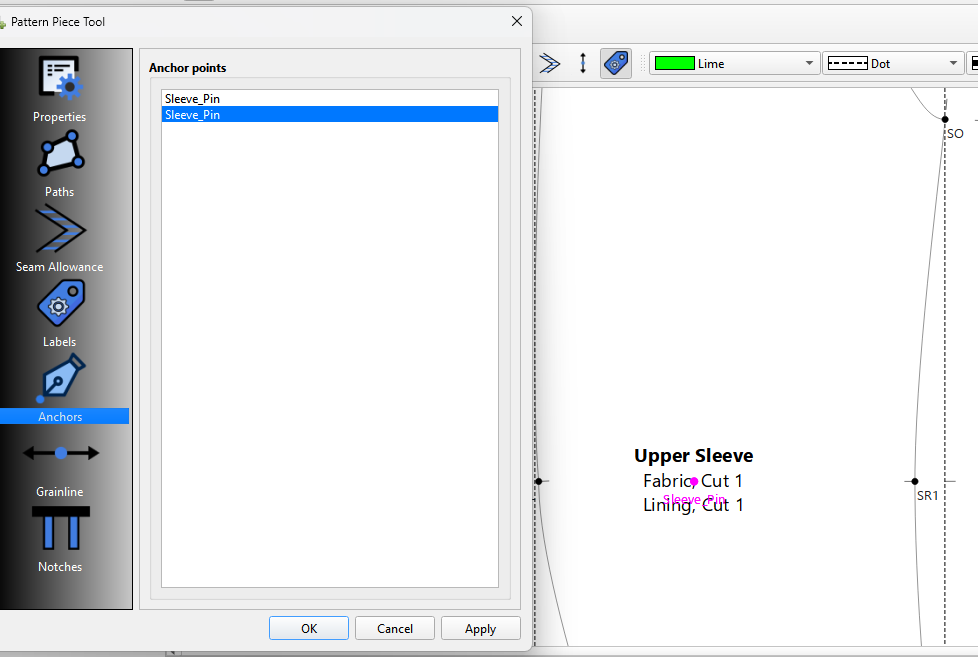
Note: Since labels can not move outside a pattern piece… in this case the label is positioned right to the edge of the piece instead of being centered. Something to keep in mind when you create your anchor points.
True, but exchanging which curve is being used by the pattern piece would have the same effect as re-drawing the curve on a paper draft, which I believe would generally be referred to as modifying a curve.
IMO… that would be modifying the pattern piece. Granted it could be considered changing or swapping a node in the main path, but the curve(s) remain unchanged.
Thanks for your explanations and your time to look at this issue. Looks like this drawback is very deep in the Seamly2D design principles. I will leave the wrong curves as they are in draft mode and will draw new ones one on top which I than use for pieces. Cheers Wolfgang
Not a drawback… it’s just how it works. It’s all because of the formulas. The way it works is each tool has a reference counter, and each time another tool references the tool, it’s counter is incremented. When you delete a tool, all tools referencing it are decremented. Which is why you have to work backwards until you’ve removed all references where the count = 0, at which point you can then delete the tool. The only case where you can remove multiple rerefences are when you delete a pattern piece.
Yup. We’ve all been there. Eventually one learns to plan a pattern ahead and not get stuck with “orphan” tools. You could throw these orphan tool(s) in a group just to hide them. Or give them their own color so you know not to use them.
It sounds like you still have the curves in use for the pieces, & that’s why you can’t delete them in the draft. As long as a piece references it, it is still being used.
Which then means using the Insert Node(s) tool as you suggested… and then editiing the main path to place the new curve node(s) in the proper order and deleting the old one(s). AND in the case where the only reference to the old curve(s) is in a pattern piece… the old curve(s) can be deleted.
deleting it’s painful but that’s the price I am happy to pay for having a graphic environment that creates parametric patterns. Few of the things I learned about deleting:
I often forget about the existence of “pieces”
sometimes I need to restart seamly so I can go on with deleting points
once I was left with a very persistent dart, that was creating a point exactly on a previous point and than …. so, check for double points
You can use new draft blocks for different pieces, but that’s a double edged sword:
history is shorter and more transparent
but you often get cross references between blocks (i.e. sleeve opening or collar circumference etc)
Right… because they’re off on another screen out of mind.
Also like I previously stated you have to remember any Internal Paths or Anchor points. They too needed to be deleted before you can delete the underlying points and or curves.
Again I’ve discussed this ad nauseam… but its more than just the tool dependencies that make deleting or more to the point the idea of “auto deleting” an issue. It’s the formulas.
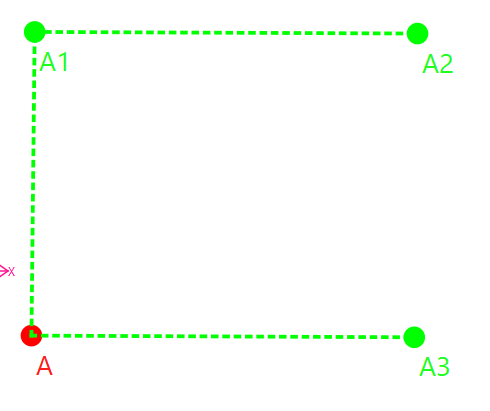
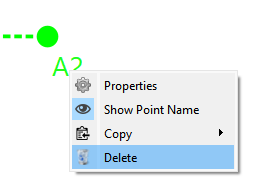
Take this simpe example… where Line_A_A3’s length is LineA1_A2. Since A2 has no tool dependencies we can delete it:
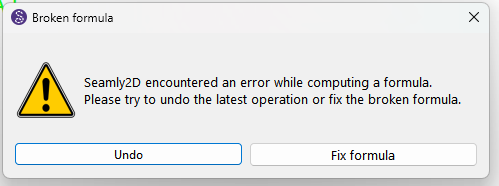
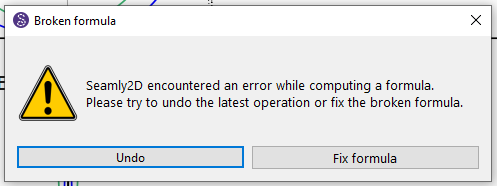
Yes you could fix the formula… but how would you do that “automatically” if say you wanted to automate the deletion process? And this is just 1 broken formula. It’s actually quite easy (code wise) to parse and build a pattern, quite another to deconstruct it.
Did you think of adding the new points BEFORE the curve, using the History? This way, you could have edited the curve tool to the new points and eliminated the need to do any deleting.
Again I hate to harp on the formulas issue. If you used the old curve in a formula… such as length of curve or angle of curve… and then change the curve using a different point you’ve now broken the formula as the curve’s name is based on the points used. Unfortunately editing a tool does not update every instance of the tool’s variables in formulas, and that includes changing a tools name.
My best advice… Accept that it’s a learning process. Develop a Point naming system that works for you. Learn to plan a pattern out before drafting where you won’t have to rename points, won’t have to use the History, and won’t have to delete objects. The analogy to oldtime drafting with pencil on paper is the last tool a draftsman wants to use is the eraser.
I just fix all of those formulas by hand, and I do this a lot.
During my CAD years, I developed the habit of only including the strictly necessary elements in my drawings, giving them predictable names and placing them in predictable layers (groups in Seamly2). I know it’s often borderline insane and takes up a lot of time, but it helps me to get an overview of the pattern and quickly understand everything later on. I am glad that Seamly2d allows these changes, so I don’t have to work inside text editor.
Since I spend most every day with the editor I would just search & replace, but again I just try to avoid the need to rename, insert, or delete so I don’t have to fix formulas. If a tool is only used one in a formula it’s probably no big deal to fix it… it would get rather tedious though if there are dozens of formulas to fix. That being said “smart” fixing the formulas when renaming point names is on the Github issues list of things to do - issue #1348.
Sorry about that. I’ve been following with a half an eye. However, I do use the History insert quite a bit if I missed something earlier on or later decide that I need something.
As for the text editor, I prefer to see what I’m doing in the pattern, so I never use it during my pattern making.
@Grace Can you say more on how you go back in history to add a point, guidelines, etc? I’ve tried clicking on an earlier ID and making the change I want, but it adds it to the end of the list rather than after the earlier ID. Please link me to any posts/documentation on this if it exists on this. thanks!
Note: This example is using the current version of the app. A new release will have an updated History that will render some steps moot.
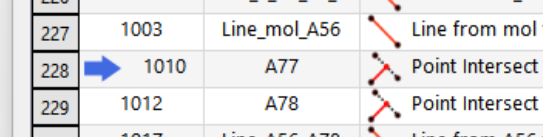
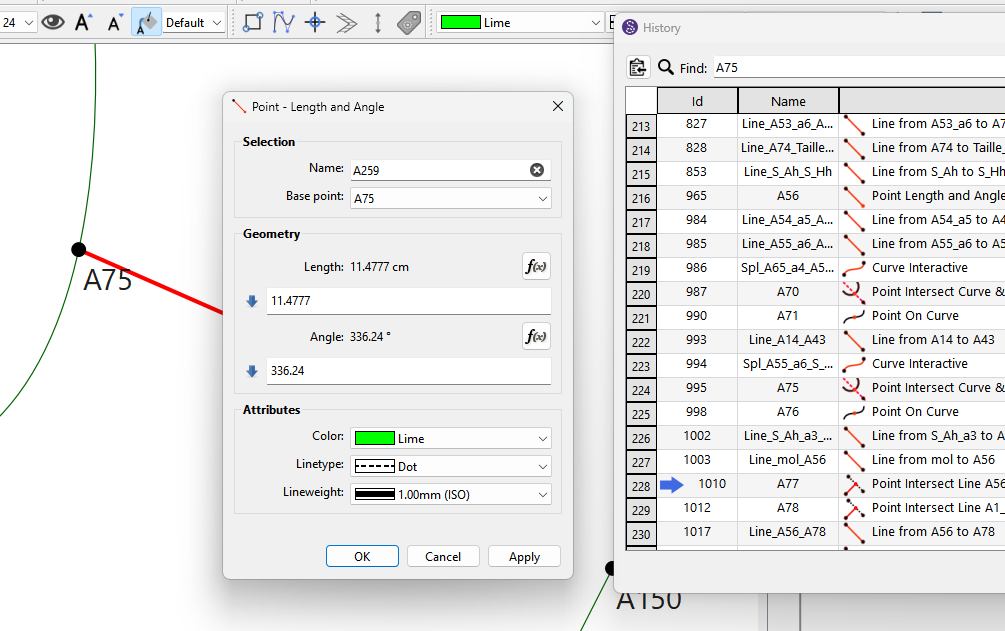
The first thing you have to understand about inserting tools into the History is you can only insert tools after the point tool you will be using. Use the insert with care.
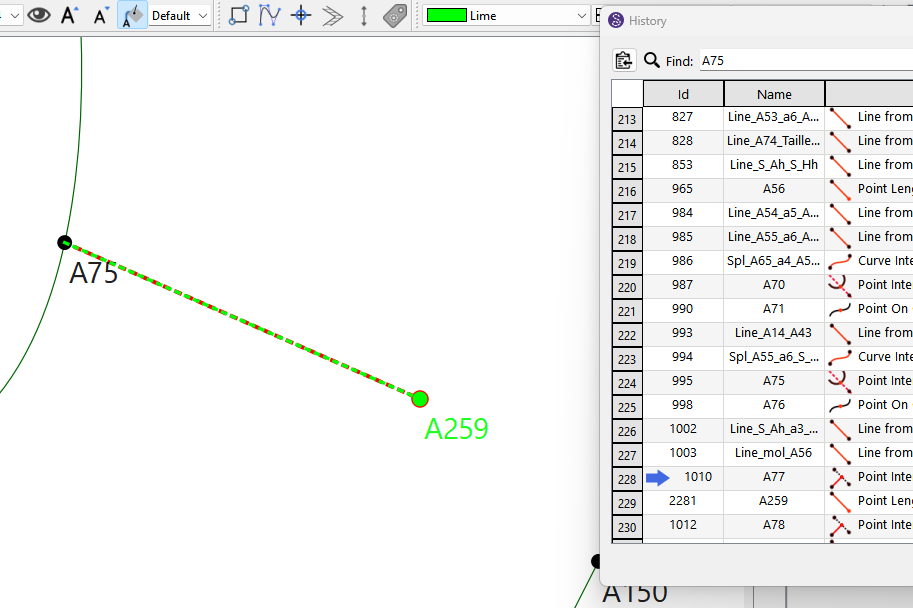
Note: With the updated History it will not be necessary to increment the pointer… it will automatically move to the next row after adding a new tool. Also the pointer will automatically move to the end when the History is closed. You can read about the pending History updates here: