I made my first bodice pattern on Seamly2D. However, when I went to the “Piece” icon and clicked “Add New Pattern Piece” to trace/ select the pattern for printing, I am only able to pick the straight lines. I fail to pick the curves for the neckline and the armhole? What may have gone wrong? Moreover, how can I drag the line that appears after clicking “Add New Pattern Piece” to make selecting points easier? Also, why are other tools in “Piece” options not working, until a piece is created?
2 Likes
Hello Radhika, and welcome to the Seamly forum.
When creating your pattern piece, you click on each point and curve in a clockwise direction, and if the curve is not following the clockwise path (see the arrowhead on the curve line), hold in the shift key while clicking.
If you want to select a point on the curve, then click the curve, the point and then the curve again.
As you click, the point will get a red highlight around it and when you get further around, a red ‘elastic band’ will appear. If you clicked something by mistake, you can click it again to cancel the selection.
When you have selected all the points/curves (end before the 1st point), hit Enter. Give your pattern piece a name & (if everything is fine) click on OK. If the OK is greyed out, there’s a problem, in which case, you can either cancel & start again, or check that you don’t have any curves that need to be reversed or points selected in the incorrect order - these can be edited in the Path tab.
You can now go to Piece Mode and admire your pattern piece.
Once you have your pattern piece created, you can add Internal Paths and Anchor Points.
3 Likes
And just to add to what @Grace said… don’t worry if you missed a point or curve (node) while creating a pattern piece - you can always add them later to an existing piece.
Using the Insert Node tool…
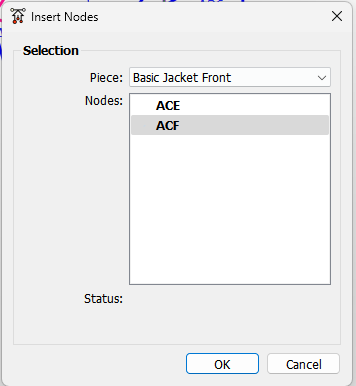
 select the point or curve nodes you want to add press Enter. The Insert Nodes dialog pops up where it shows the nodes you selected and a choice of which Piece to add the nodes to:
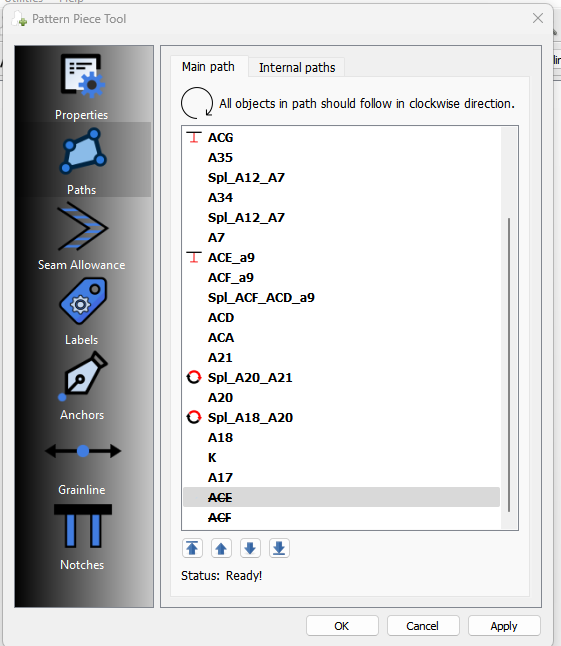
You can then go to Piece mode, open the Piece properties, select Paths->Main Path where the inserted nodes appear in the path list at the bottom crossed out (excluded) from the path. You can now use the up/dn arrow tools or drag the nodes into their proper clockwise order.
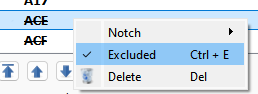
Then using the right mouse button you can uncheck the “Excluded” item.
Conversely if you slected a wrong point when creating a piece, you can always delete the wrong point and insert a correct point.
Notes:
In the path list a point node displays the
icon. This indicates the point is designated as a notch.
If a curve node displays the
icon, it indicates the curve is reversed so all it’s (internal) points go clockwise in the path.
3 Likes
Thank you so much for your input @Grace. I really appreciate this. I’m so glad for this forum.
1 Like
@Douglas I really appreciate your feedback. I am learning a lot from you guys. Thank you.
1 Like