I’ve been working with a few older patterns again and have come across something with the notches that I have to ask if it can be improved easily, please. So let me explain…
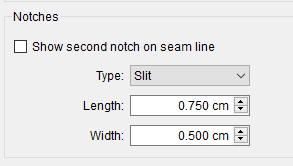
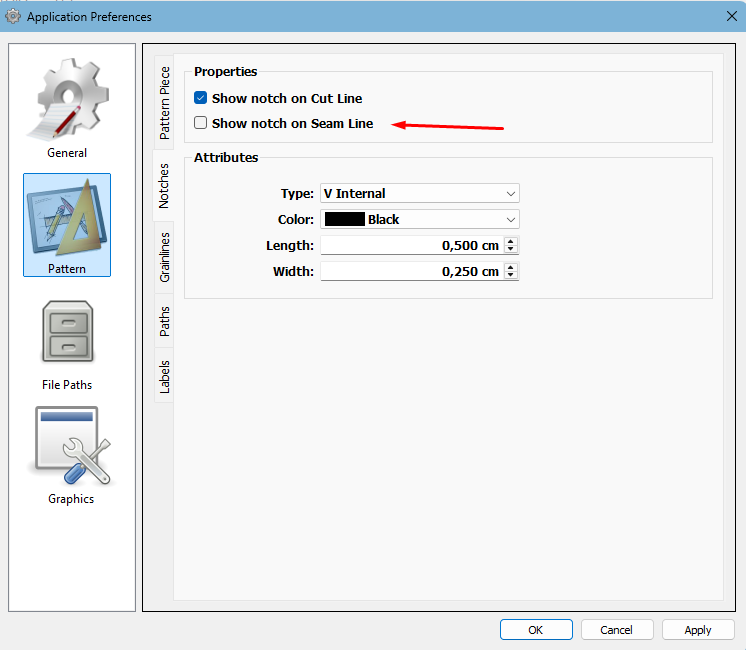
I have my app preferences - Notches - set to length 0.75cm and width 0.50cm. But when I open an old pattern these are automatically set to 0.25cm.
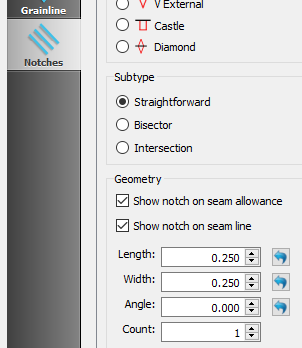
I have to go into each and every pattern panel and click the little blue arrow next to each and every notch to set them to the app default. Is it not possible to have a button that will change these throughout the pattern to change them all to the default?
And then…
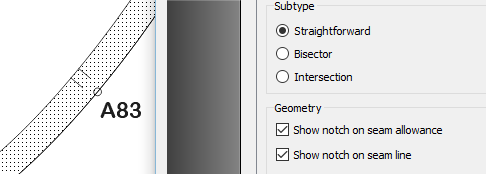
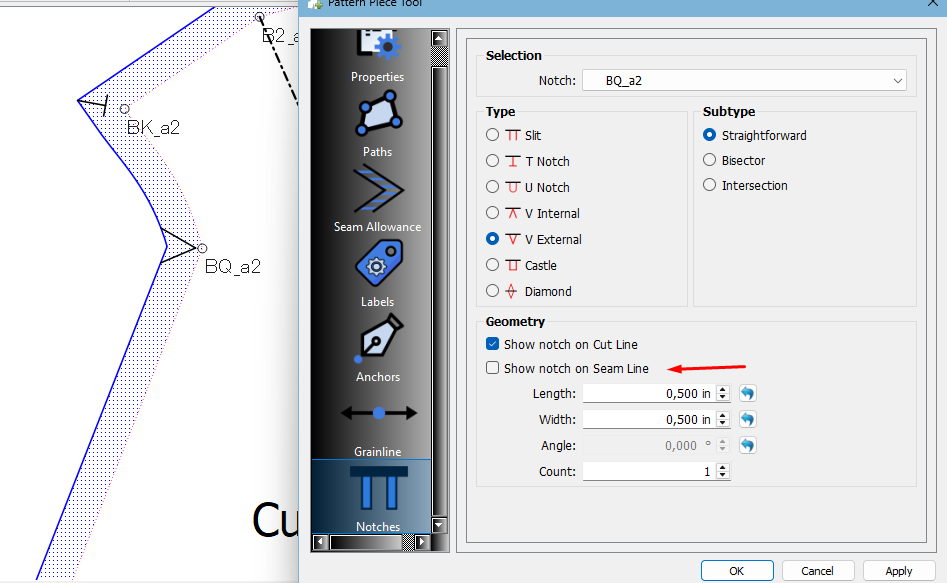
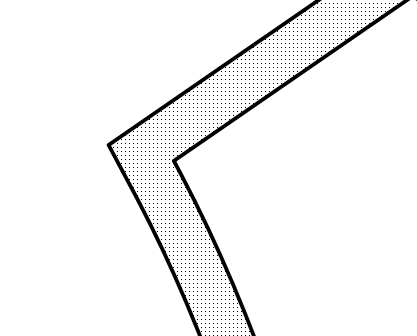
Although I have the checkbox at “Show notch on Seam Line” ticked, it doesn’t do this in my version of Seamly - OS: Windows 64bit:
I’m sure I can figure something out. I’m sure it has to do with the default currently only works with a new notch, and not loading / converting an older ver pattern. It probably would make most sense to set the notches to the default settings when converting the pattern. Keep in mind that “passmarks” had no length and width… so off the top of my head when a pattern is being converted - the length and width values are being set to a hardcoded .250 - or a 1/4 inch. If so this is an easy fix… just need to replace the .250 with the default setting values.
It would be possible to add a button somewhere (and menu item) to reset all the notch geometry, not exactly sure where to put such a button.
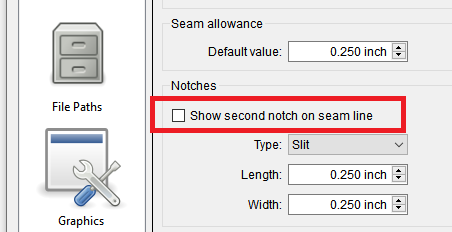
This has been brought up several times… you also have to set the “Show second notch on seam line” in the pattern preferences.
It’s a legacy thing… something that I can probably get rid of as there is no need to have 2 checks. Or what would make more sense is the Show second notch pref setting should be the default setting for a new notch… which can be overridden per notch - just like the type, length & width.
Which then brings up the question - if there’s a global replace for the length and width - should we not also have the same for Type and Show second notch? So here’s an idea… what about a Notch Manager… where a dialog displays a table of all the notches with the Notch Id, Show Second, Type, length & Width values… We could have a “Replace All” button that resets all the values to the defaults in the pref settings… as well as separate replace buttons for each property. By putting the data in a table it’s all in one easy to view form where you could globally replace, then tweak any individual notches.
I really don’t see the point of this because it’s the last place anyone would look for it. But yes, now I remember… I think it should only be in set in the pattern options.
That will be wonderful, thank you
I’d think it would go in the Edit menu along with the Undo & Redo and it could be called Notch reset. The only thing that’s bothering me with this is that it may reset the quantity of notches at a place to 1, perhaps we should call it “Notch Length & Distance Reset”.
That shouldn’t be an issue. The way any replace would work is to parse the pattern looking for example the notch length, and reset the value to the default set in the prefs. The number of notches would not change unless parsing for that element tag. I don’t see any use in replacing the number of notch as generally the default will be one. BTW… that was probably the trickiest part figurong out the conversion from the old pattern to the new - that is the oneSlit, twoSlit, threeSlit to notchType = Slit, notchNumber = n.
I must say that you’ve done a brilliant job on the notches. And perhaps I’m just lazy, but it was a very time-consuming exercise to adjust them manually. One gets lost going in & out of pattern panels when there are many pieces to the pattern.
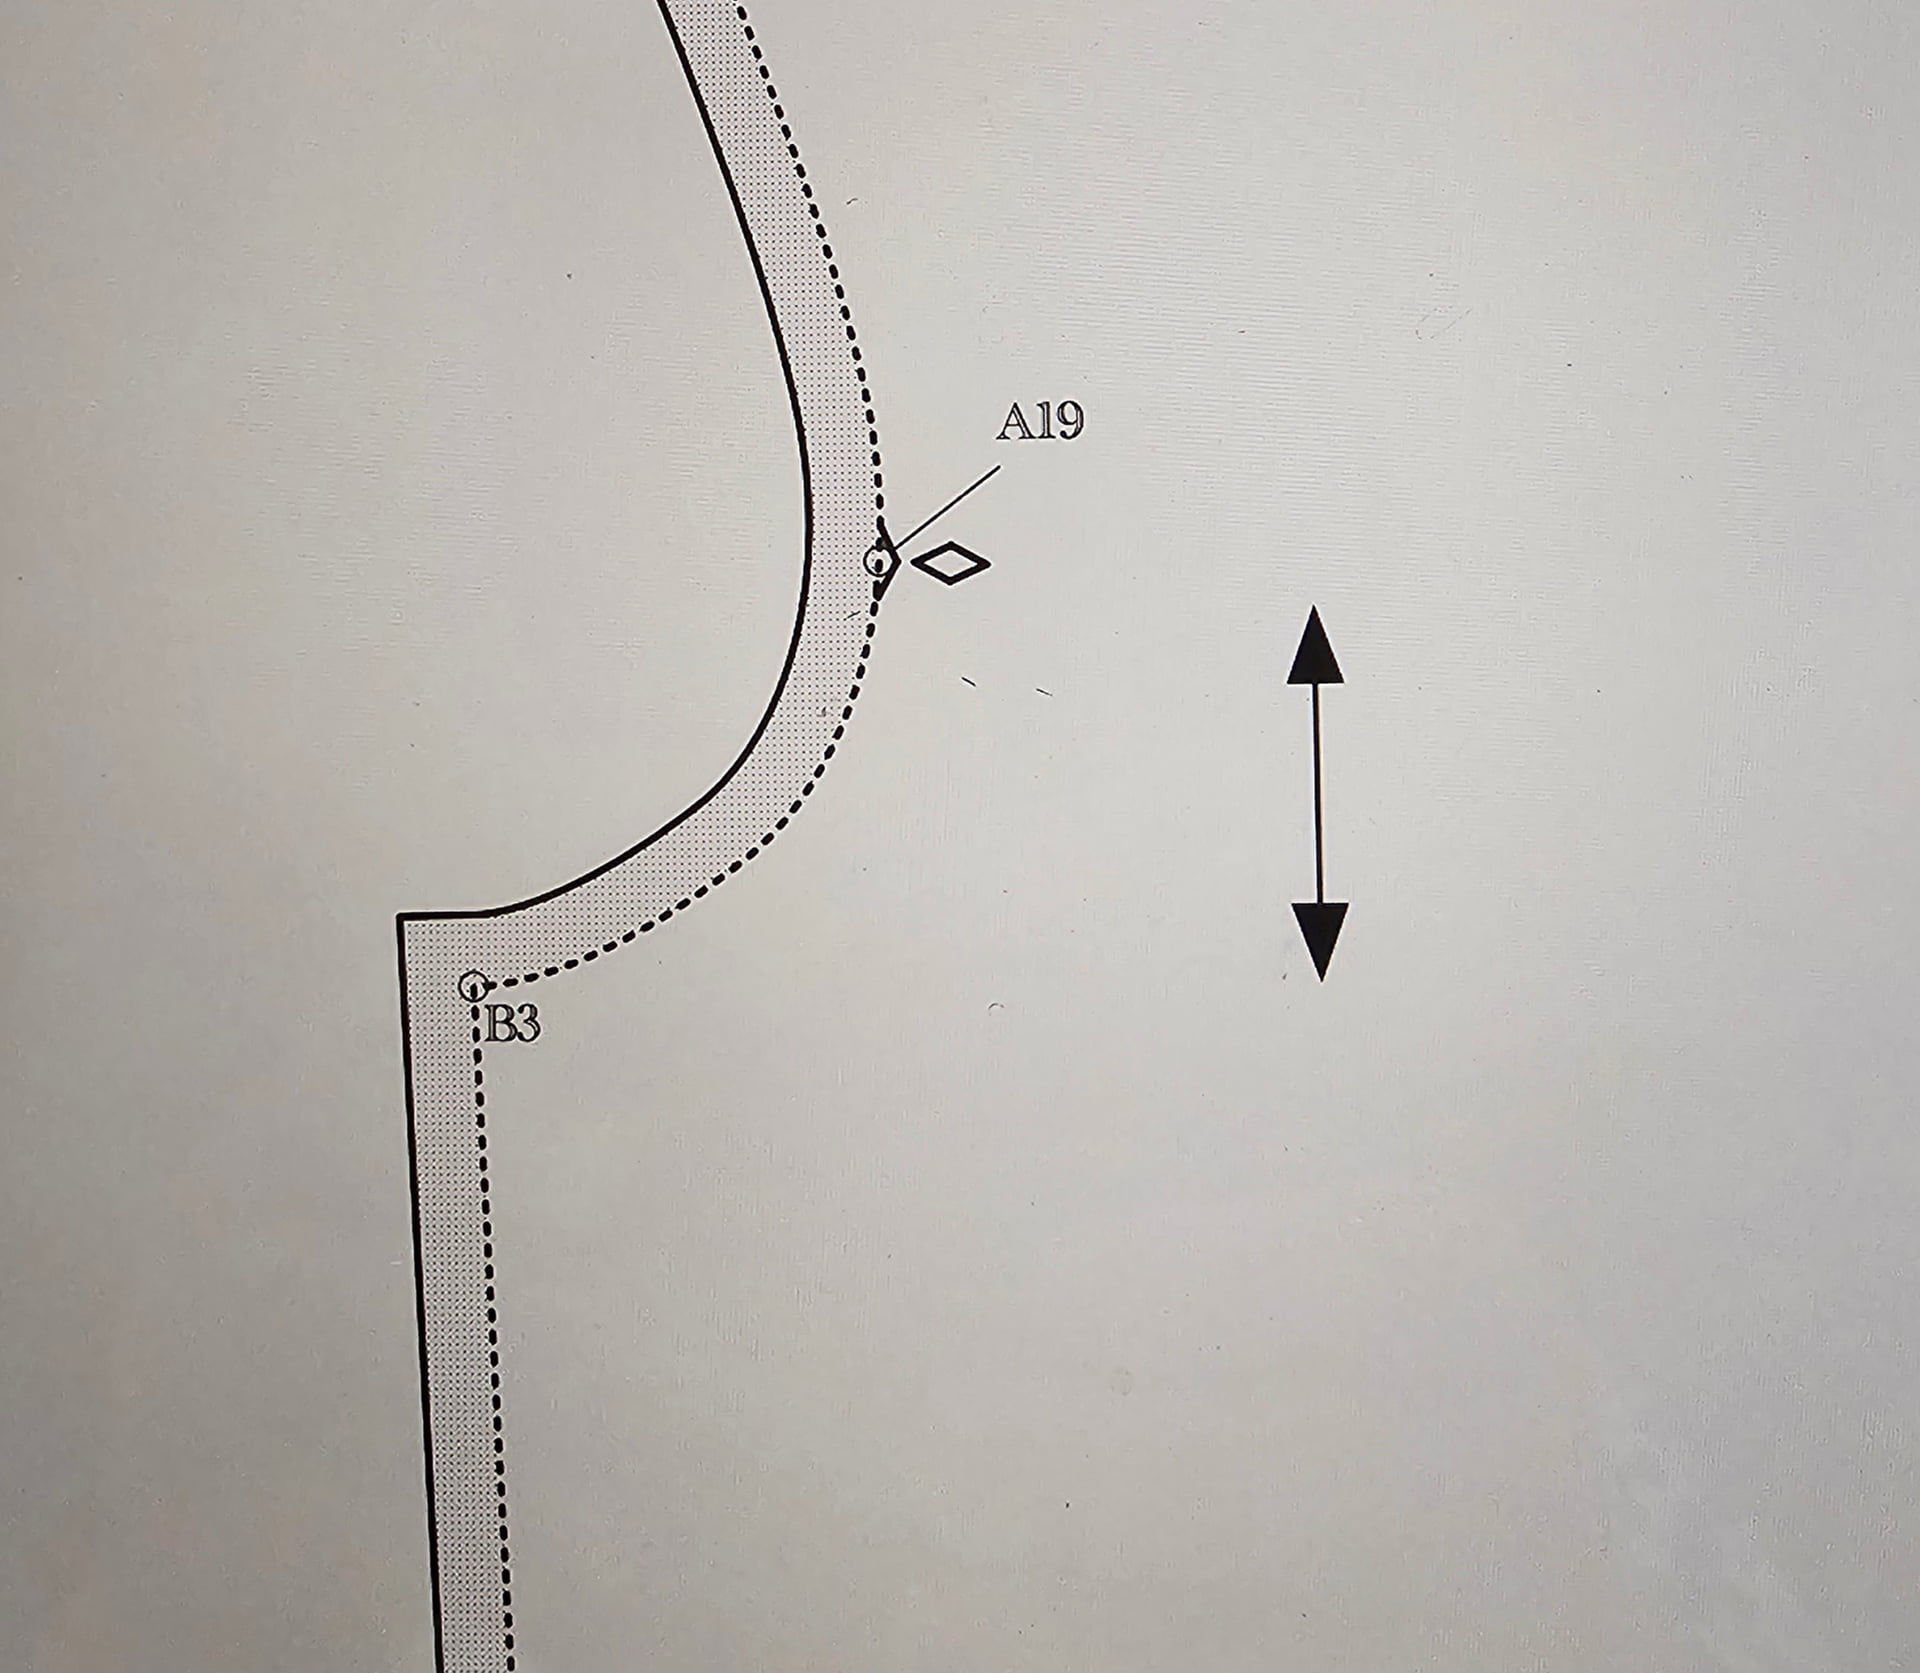
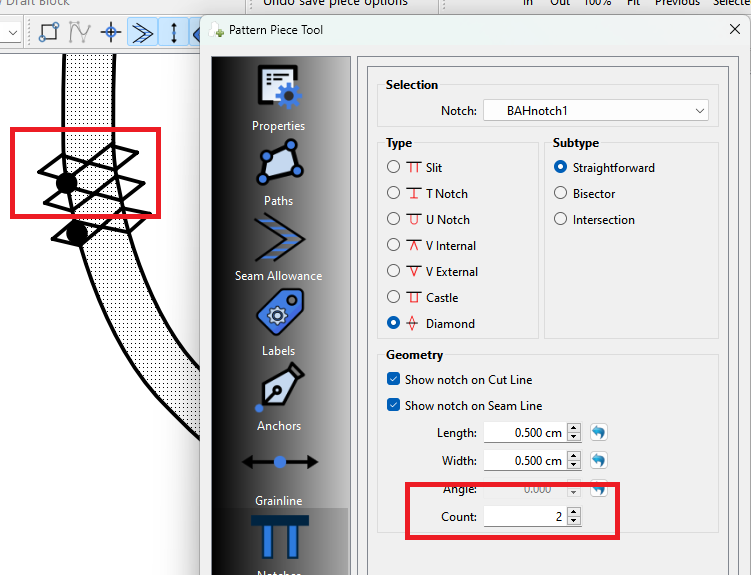
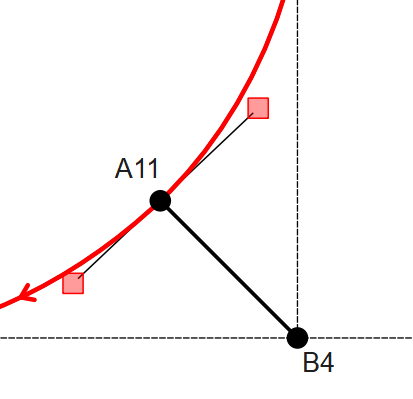
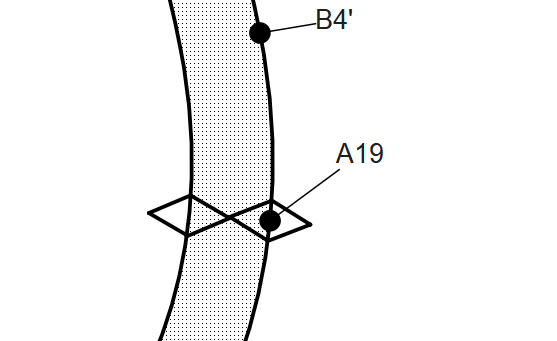
Hi Douglas! I went over the topic on notches and see that you’re the star! I have a bit of a problem with my notch on a curve/spline. The 2 diamonds notch are place on the sewing line and on the body of the pattern. Ive redone the pattern piece a few times and still , I get the same result.
Open the pattern preferences and go down to Notches on the left. Select the node that the notch is attached to and remove the checkmark at “Show notch on Seamline”.
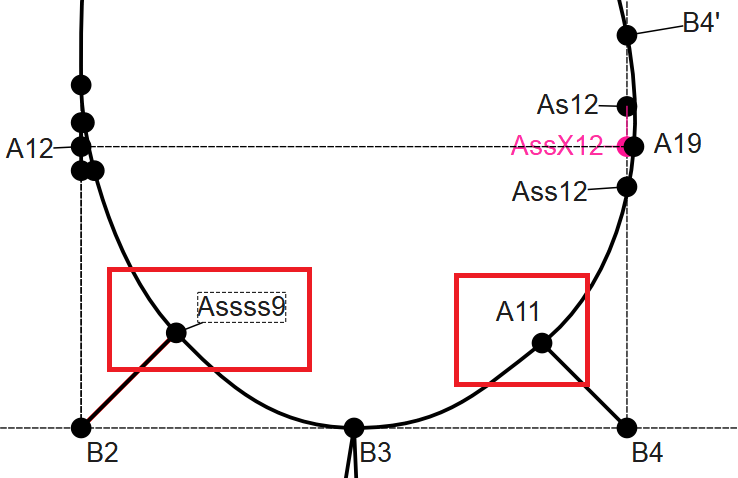
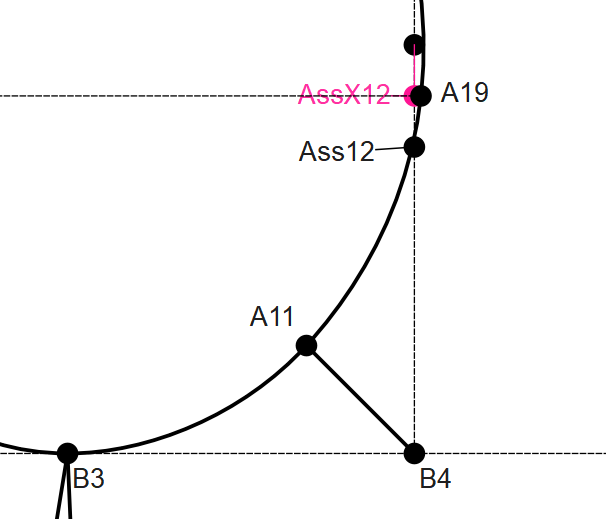
Until I see the pattern I"m just quessing there’s something off with the curve - like the control points. Or sometimes the start point or ending node of the main path can have an odd effect - rotating the order can often fix this issue.
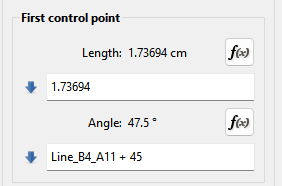
Thank you so much Douglas!! I normally wouldn’t have entered a formula and just manually moved the control points. Now I see the problem (and the solution!).