Yesterday, I installed the latest Seamly2D from Flatpak on my Acer Spin 714 Chromebook+ and I’m having a problem with both SVG and PDF formats using either the Seamly2D export or print commands. Seems like I’ve tried 40 different combinations but the output is consistently around 50% too large. The x,y scales are slightly different and simply printing at 75% scale doesn’t fix the issue either, as the output is still too big. I’ve printed standard and tiled PDFs directly from Seamly2D and exported PDF files and printed using ChromeOS Gallery and Adobe Acrobat apps, and I’ve opened the exported SVG in Inkscape but see the same issue in all visual and printing tests. I also printed an exported PDF from my iPad Mini and had the same result. Just to note, the scale issue was present before I installed my printer in the Linux container, so my guess it’s not a problem with my printer driver. I’ve made sure that my Chromebook has all the latest updates and I updated/upgraded Linux before installing Seamly2D and checked again today.
Hello and welcome to the Seamly2D forum, @ldelarch
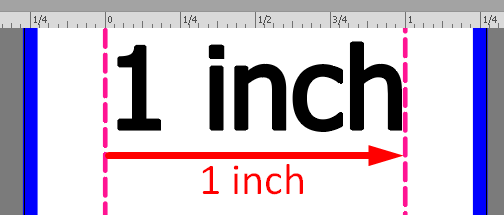
I opened your file and exported my own PDF and SVG files to check your pattern and I noticed that you have the seam line hidden, so I made it visible and exported my own PDF and SVG files. The PDF does give the 1 inch square perfectly:
I opened the SVG in Illustrator and also found that the it exactly measured 1 inch between the seam lines:
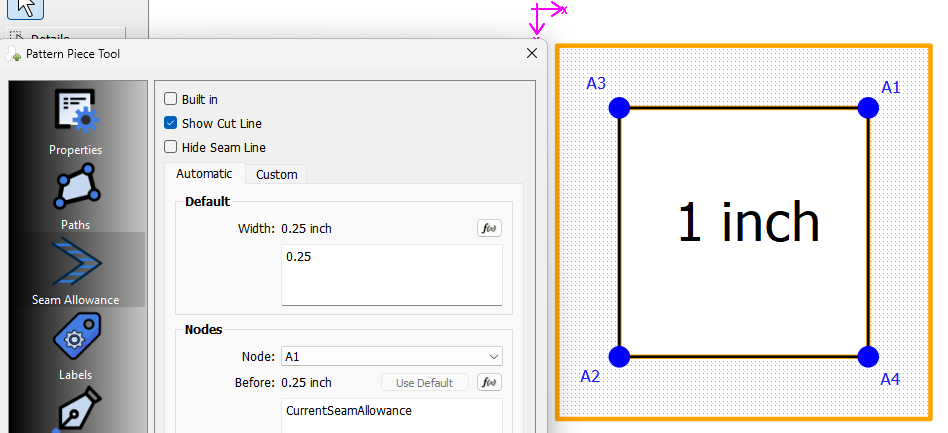
I suggest that you also turn on the visiblity of the seam lines and then check your measurements. I see that you have a quarter inch seam allowance which will affect the measurement and make the 1" seem to be 1.5", which accounts for the ‘50% too large’.
Hmmm… that’s a good point. The pieces in a layout will include the seam allowance. The idea is if you add a “test square”, don’t add seam allowance to it, so it’s going to print at what the length is in the formulas.
@Grace Thanks for finding my error, that makes sense to me now! I think I didn’t read the checkbox closely and assumed that I was turning off the seam allowance.
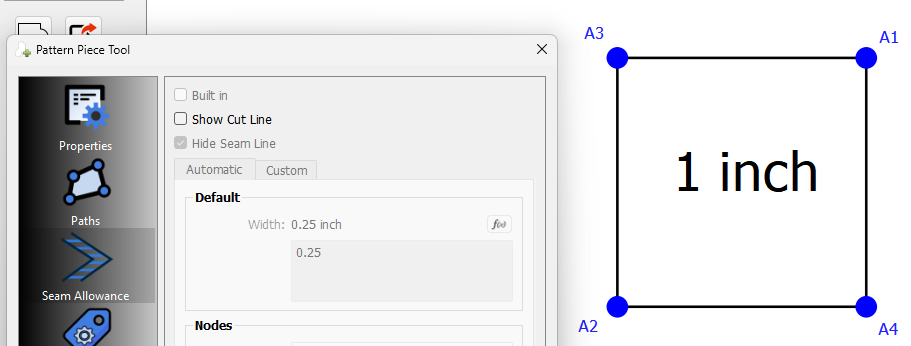
Let me help explain the checkboxes… The black “Seam line” is the path that is the path you drew, and added as a Pattern piece. The orange “Cut line” is the path that is the seam line plus the seam allowance. Note the Seam line is not hidden.
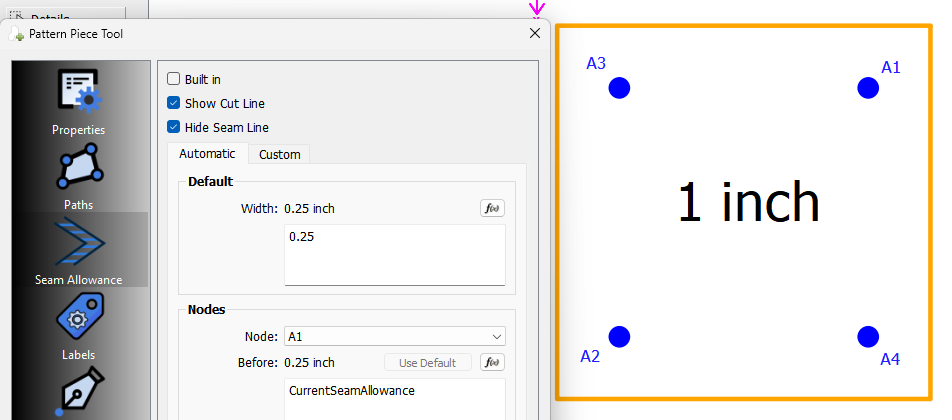
What you could do is hide the Seam line and show the cut line… so now the SA and cutline are not added to the layout piece. Other options are to use a Zero SA OR to Check the “Built in” box which will indicate that the piece was drafted with the SA included.
 pattern_scale_test_layout_standardPDF.pdf (2.3 KB)