Hi! First day using Seamly2D. I think I’ve just about managed to get a viable pattern going, and now want to export it as a PDF so I can take it to the printers and have it printed. I’m planning on using the tiled pdf export function so I can see whether it’ll be cheaper to print as two A0s or three A1s (with some taping necessary). Because I don’t know which yet, I just want the layout function to put everything in one enormous canvas - and then I can compare that against various options.
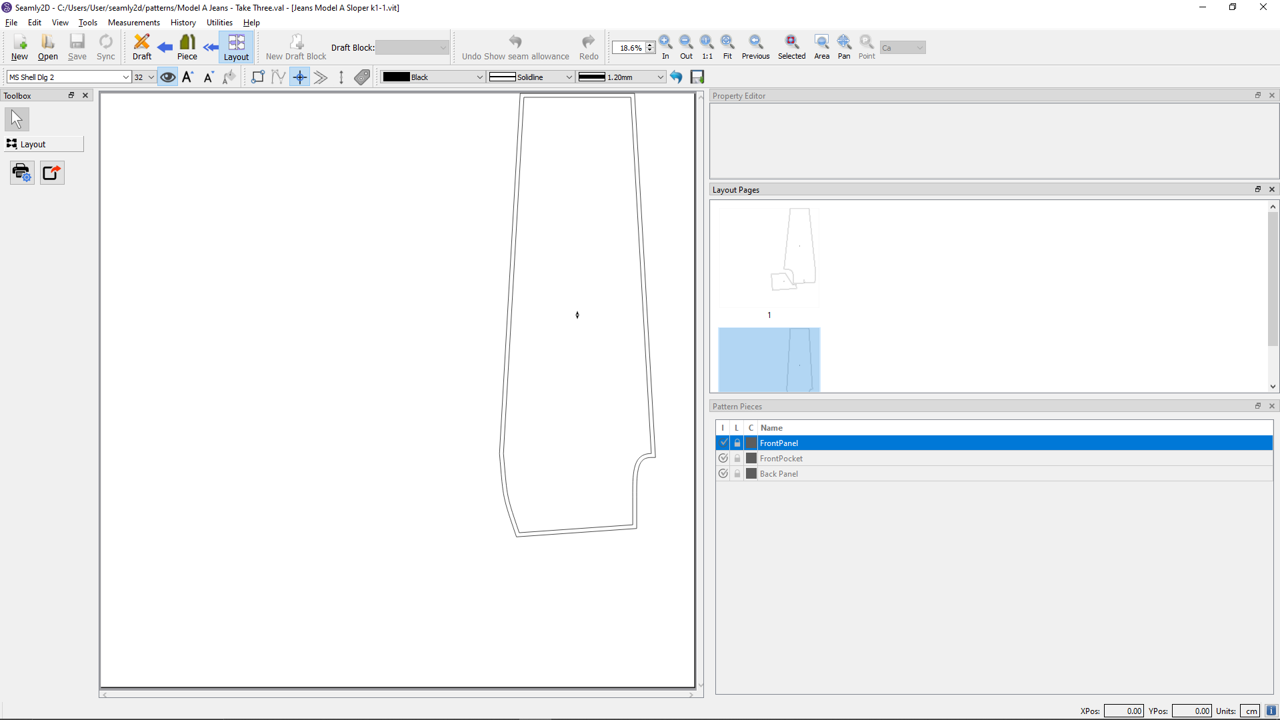
But the layout tab insists on separating the pieces out over more pages than is necessary! As you can see there is plenty of room in the large 150*150 canvas to place the other leg piece, but it doesn’t want to. Even weirder - it wasn’t doing this on a previous version of the pattern!
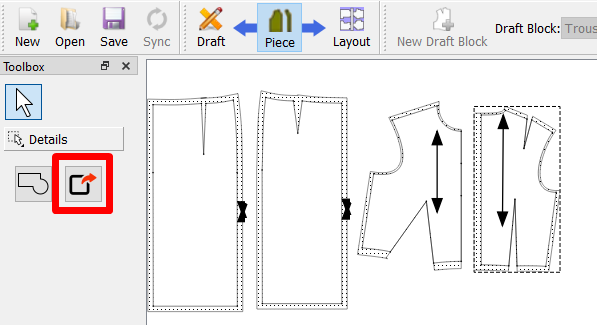
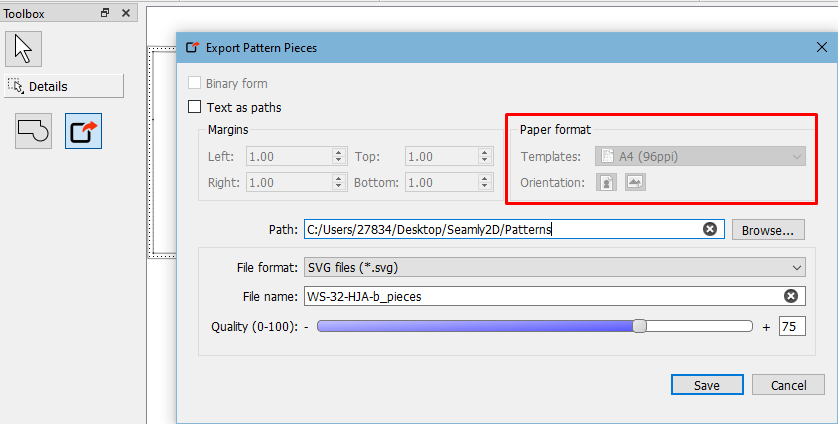
I’d do this from Piece mode. Lay the pieces out as close to each other and you wish and fit the pieces to an acceptable appearance, then do the export directly from there using this tool:
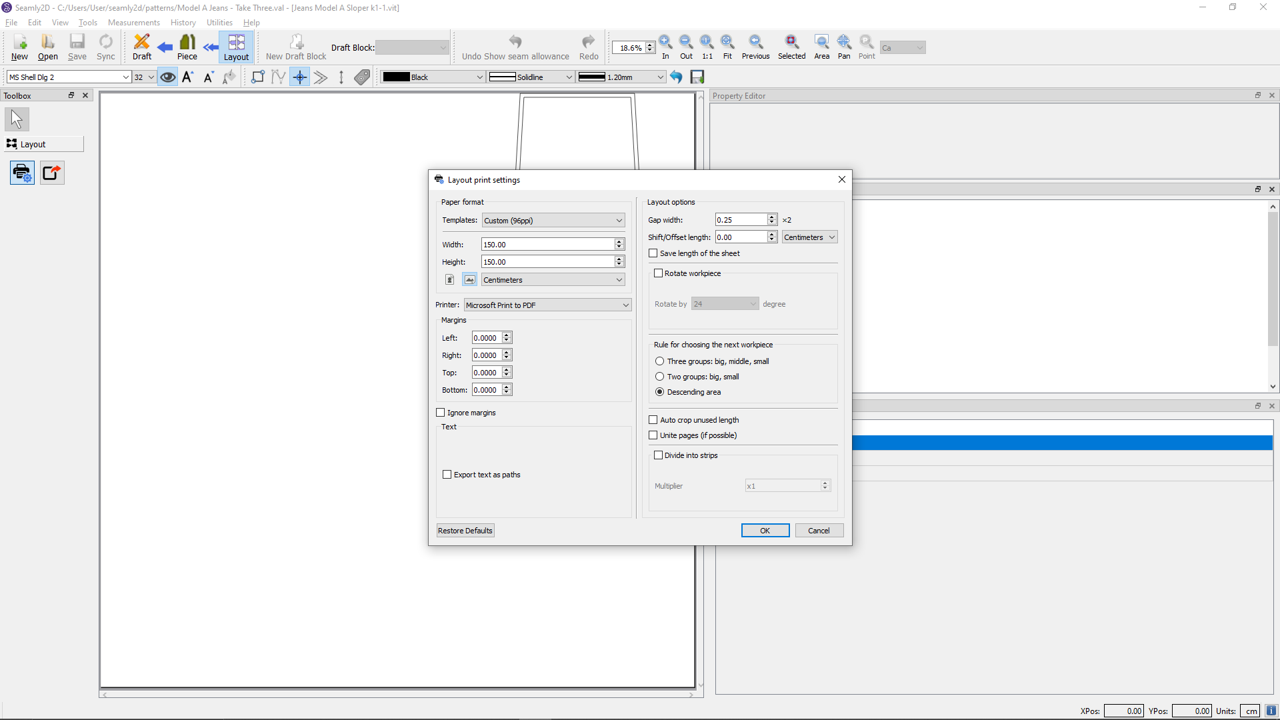
Ooops! It seems that icon is greyed out I believe there’s somewhere on your computer where you can change this setting in the printer defaults, but I don’t want to change mine
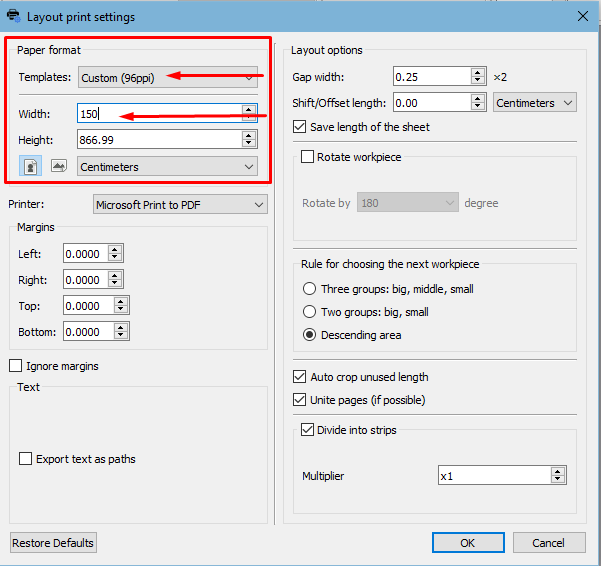
The other option in Layout mode is to change the paper width to custom and then enter an amount that you think will fit both pieces:
This is what I used to do before we had the option of exporting directly from the Piece mode.
In addition to what @Grace said, you could try randomly changing Layout settings. It’s a bit hit-&-miss, which is why Grace doesn’t do it anymore, but at times has suitable results. Maybe with a Custom paper size, like 84cm x 179cm, which I believe would fit three A1 which is smaller than two A0 by about 60cm, if I did my maths right.
It’s greyed out because only the “tiled PDF” export uses the paper size. Any of the other formats will export at the size of the bounding box of all the pattern pieces.
If PDF is selected, then the bounding box of all the pieces will be tiled at the paper size selected.
Which can be way quicker if one is used to laying out pattern pieces to make a marker. It’s also why I know @Grace wants to be able to rotate pieces in Piece mode, where you can fit pieces even tighter together.
Which by the way… that’s what the “Gap” setting is for. It’s how close the layout engine will place pieces.
That’s what I would do… figure out a custom size based on multiples of 8.5 x 11. You get better at it the more you make layouts, but it can still be hit and miss. It was much easier once we figured out how to use the vinyl cutter to plot at the shop.
Something you may also consider. See if a printer in your area has a plotter to print the patterns, in which case you would use a “roll” paper size. May not be cost effective for small patterns, but with larger patterns it will save a lot of time taping tiled PDF’S together.