It’s been almost a month that I am learning seamly, It’s an amazing and very accurate software. During my learning journey I came up with few questions. I will be very thankful if anyone can answer my questions.
What are variables, what are they used for?
Should ease be added through formula or it can be added manually?
In which situations adding manual measurements won’t hurt? Any examples?
Should all the curves and lines be drawn CW or ACW? or its personal choice?
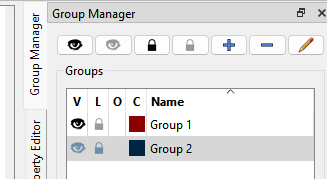
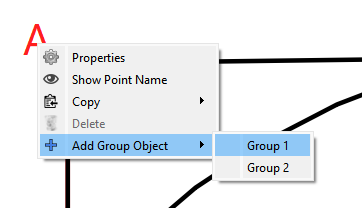
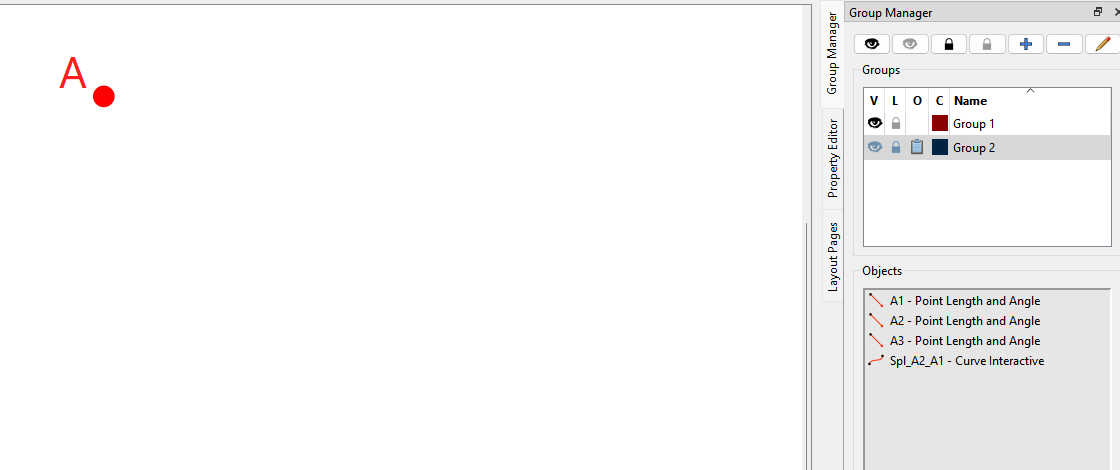
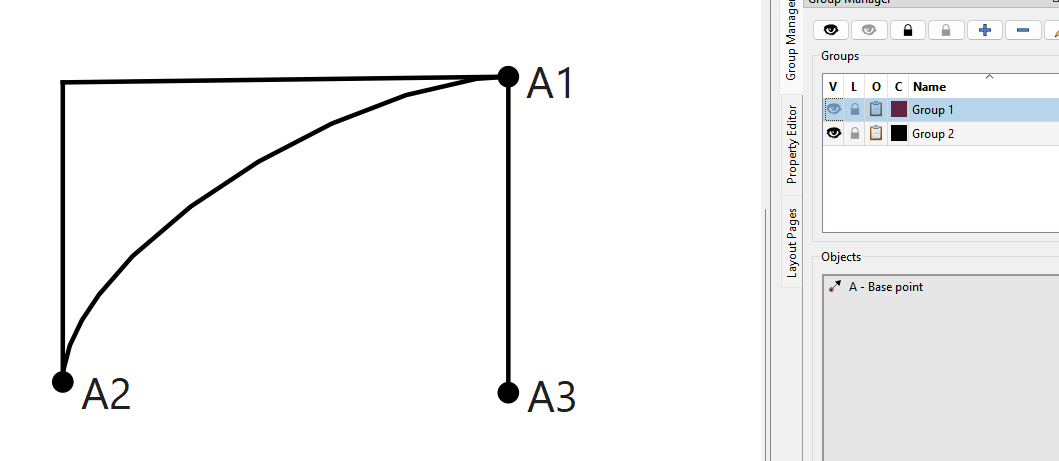
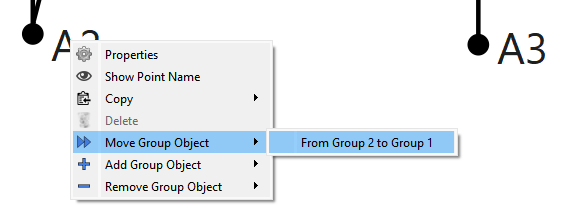
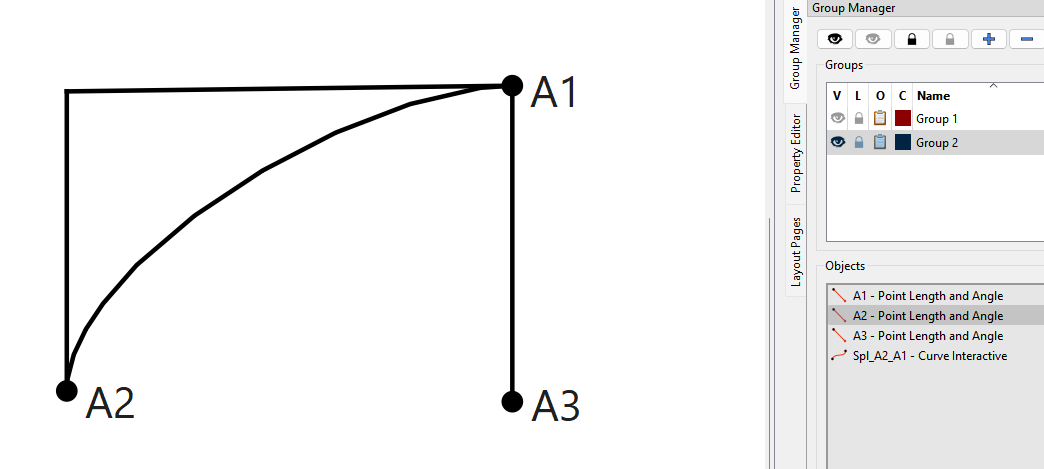
Sometimes if I add a point or line, it automatically goes to the hidden group, Is there any solution to this?
Is there any way you can formulize the curve length i.e. waist side to hip side?
What are the standard seam allowances in US? Currently I am adding 2cm side seam, 1.5cm shoulder, 5cm at straight hem (4cm fold, 1cm allowance), 1cm everywhere else.
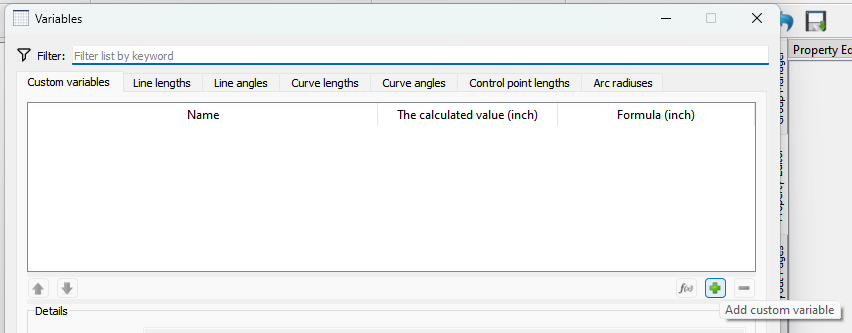
There’s basically 2 types of variables ( 3 if you include “measurements”). There are Length and Angle variables created by the tools, and Custom variables create by the user. Variables are stored in the pattern file, unlike measurements which are stored in measurement files.
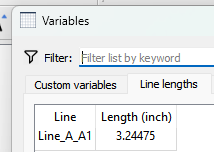
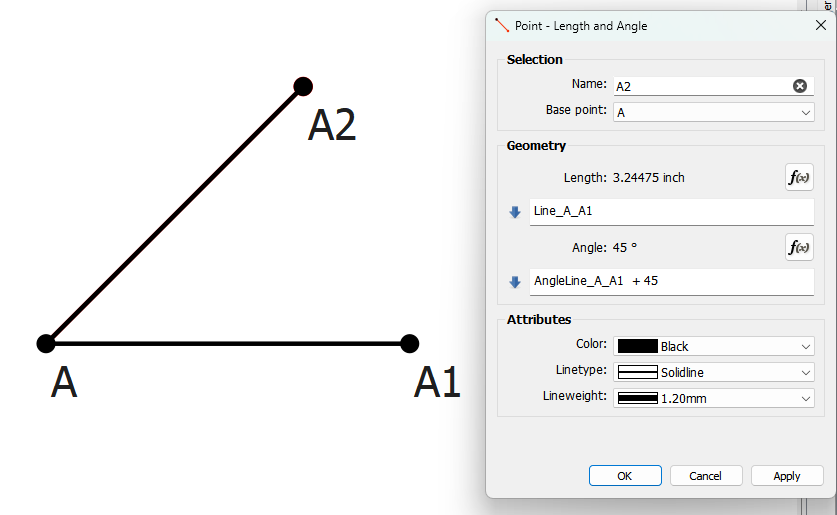
Let’s take the simple point A1, which creates a line length and angle variable:
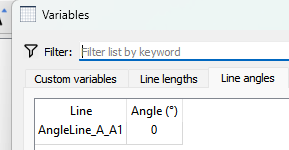
The length is designated by “Line_” followed by the 1st and second points… thus Line_A_A1. The angle is designated by “AngleLine_”. follwed by the points… AngleLine_A_A1. If we look at the Variables table we can see the line variables and the values:
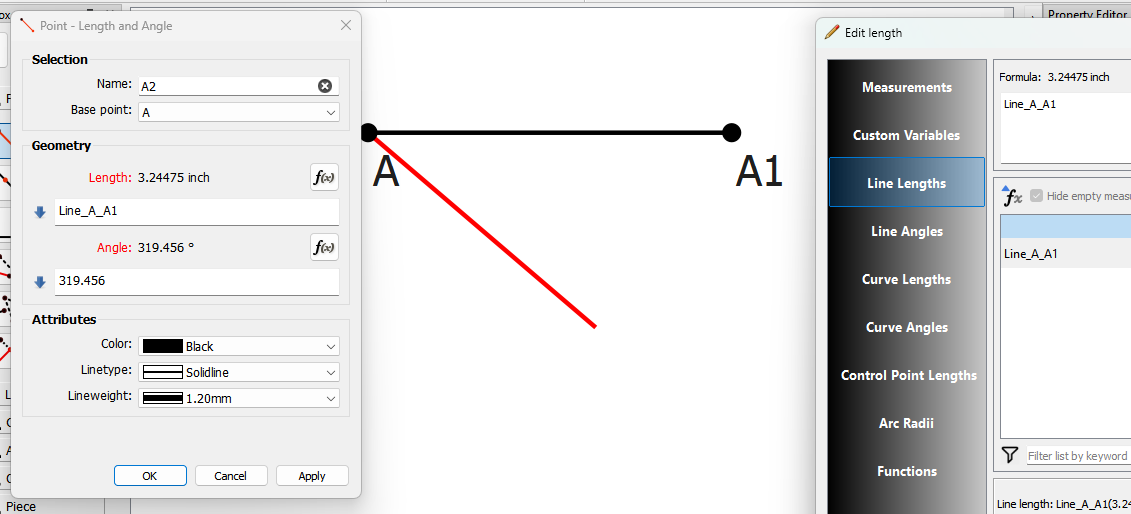
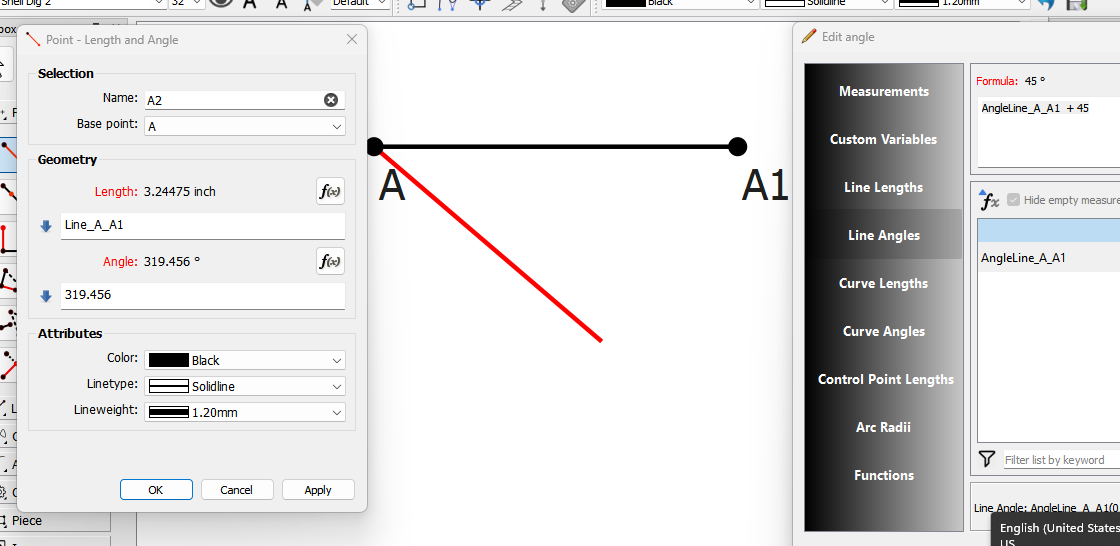
Now you can use those variables in formulas. For example let’s draw another Point - Length & Angle using those variables… using the FX editor let’s set the length of A2 to the length of Line_A_A1:
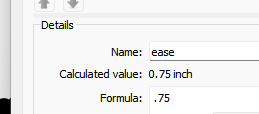
So now the length of Line_A_A2 is .75 longer than Line_A_A1. If you hada buch of formulas with “ease” youmcan change the value of the variable ease without having to change every formula. You can also use if / then / else syntax in the formulas to dynamical change the ease, but that’s beyond the scope here.
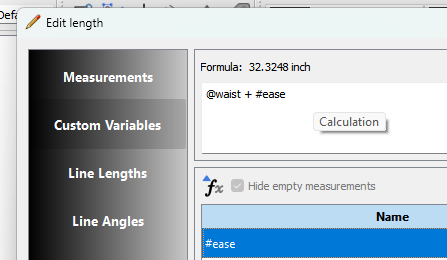
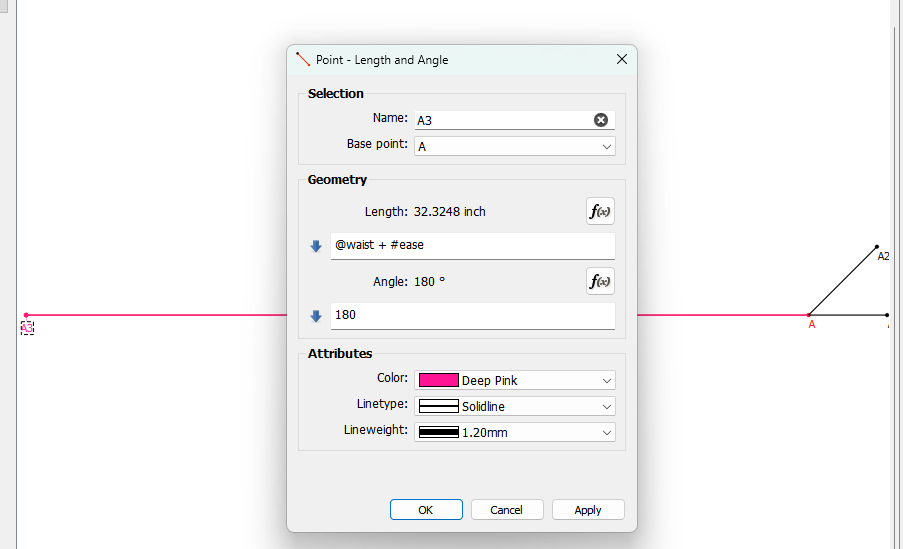
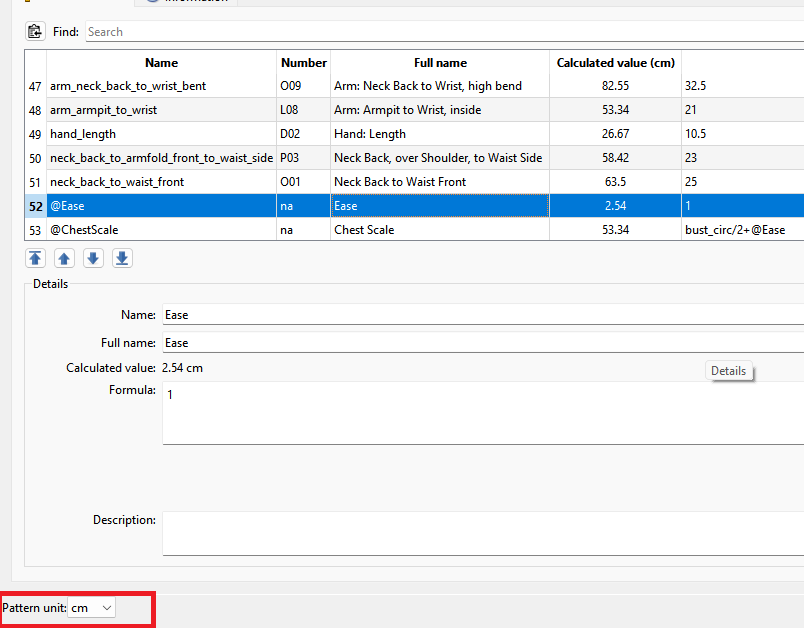
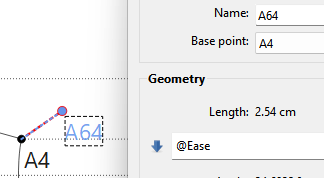
Third case… measurements + a custom variable. Let’s create point A3 with the @waist measurement + #ease:
IMO… while you could create a custom “ease” measurement, it should be added as a Custom Variable as it’s a function of the pattern, not the person.
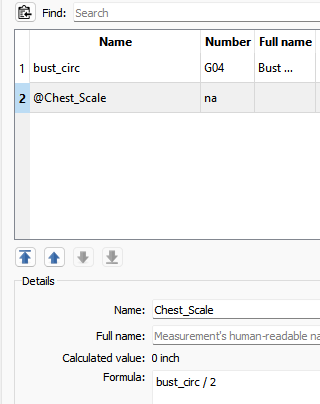
Not sure what you mean by manual measurments? Custom measurments can be useful when it’s measurement related and you can simplify a formula. For example… many pattern systems work with half measurements as you only draft half a pattern, but you take full measurements. So often I will use something like @Chest_Scale with a formula half of the bust_circ:
So if a draft calls for 1/6 the chest scale I can use @Chest_Scale / 6 instead of bust_circ / 2 / 6 or bust_circ / 12.
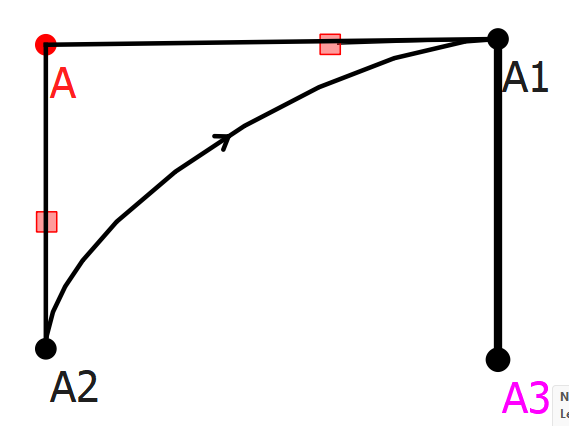
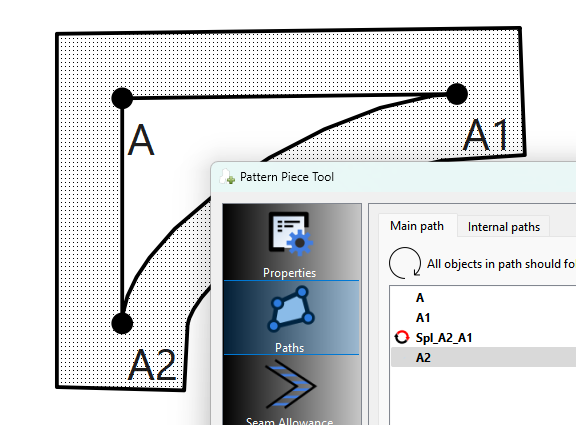
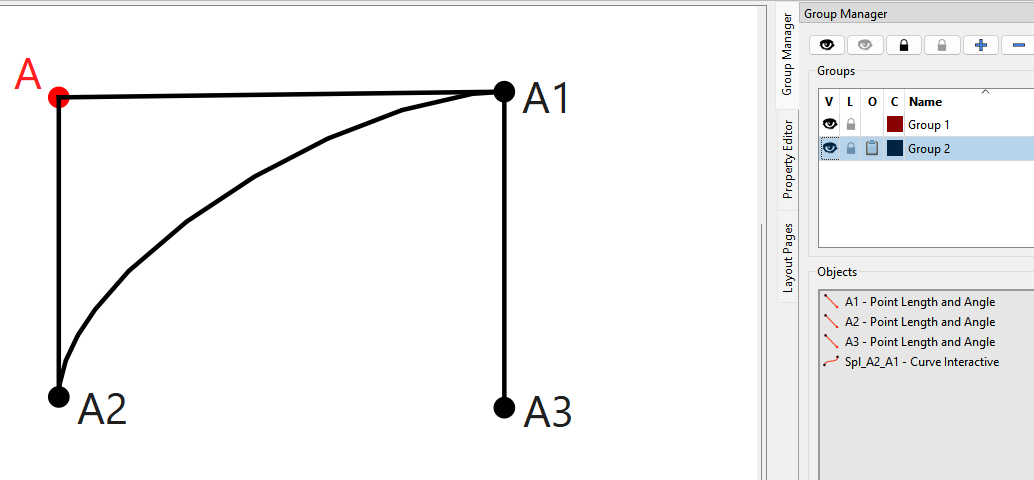
When possible… CW. But that is not always possible in which case a curve may need to be reversed- which in most cases will happen automatically. Let’s take this example:
Need to be more specific… everything can be formulized… except making a curve a specific length. There is a near infinite number of start and end point positions, and control point length & angle possibilities, many of which will produce the same length as others, but with a differing shape.
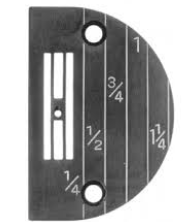
We use inches… and it all depends. Commercial patterns (like Butterrick, Simplicity, etc) will use 5/8" on most seams. Industrial machines and patterns however use increments of 1/4 inches… where 1/2" is the standard seam size size, 1/4 inch for things like collars and pocket flaps. Cutting and then sewing patterns with 5/8" SA on industrial machines is a PITA as the throat plates are marked in 1/4" increments, and most attachments are again in incrmenets of 1/4"
Wearing ease is fairly universal. Anything else, it depends on how narrow of a group you want to be patterning for. Generally, you want to use the measurements file entries for maximum flexibility.
Thank you for explaining everything in such detail. You’ve really clarified my core understanding of variables and how to use custom variables effectively.
As I’m still learning the concepts of this amazing software and pattern drafting, this is something new for me. If you could explain it, I’d really appreciate it.
If you’re working in cm, then do everything in cm, including the seam allowances. Just mention that your seam allowance is in cm. You can’t switch your patterns between Imperial & metric because 1 inch in metric is about 2.54 cm but 1 cm in Imperial is 0.3937 inches and if you have + 1cm in a formula in a pattern & switch to Imperial, that + 1 will become 2.54cm.
Not that it’s possible to easily change the pattern from one to the other.
Your USA clients will understand if you put a note in the instructions.
Depends on what the client is getting… are they getting the Seamly2D file or a layout export such as PDF? Since the pattern file is drafted in the given units, you would want the pattern in what ever units the client uses. On the other hand if you’re just providing a PDF, you can still work in cm, but for SA’s just use what ever cm values are close to 1/4", 1/2", 5/8" etc… so something .6 cm, , 1.25 cm, 1.6cm. Then note to the client what the allowances are in inches.
where now if the waist is < 24 number of darts = 0. If the waist >= 24 AND < 30 then the number of darts = 1. If the waist >=30 then the number of darts = 2.
Other uses may be adapting pocket size to the size of jacket, allowing extra SA for larger sizes.
Thank you so much for the detailed explanation! It really makes sense and clicks in my head conceptually. I haven’t reached this level of practice yet, but I’m definitely saving this in my notes for the future. I appreciate you taking the time to explain it so clearly. Thanks again!