i’m trying to figure out how to draw a line perpendicular to a curve.
basically how to draw line d4-d8 without eyeballing it.
dain jacket.val (30.4 KB) dain 090823.vit (2.0 KB)
i’m trying to figure out how to draw a line perpendicular to a curve.
basically how to draw line d4-d8 without eyeballing it.
dain jacket.val (30.4 KB) dain 090823.vit (2.0 KB)
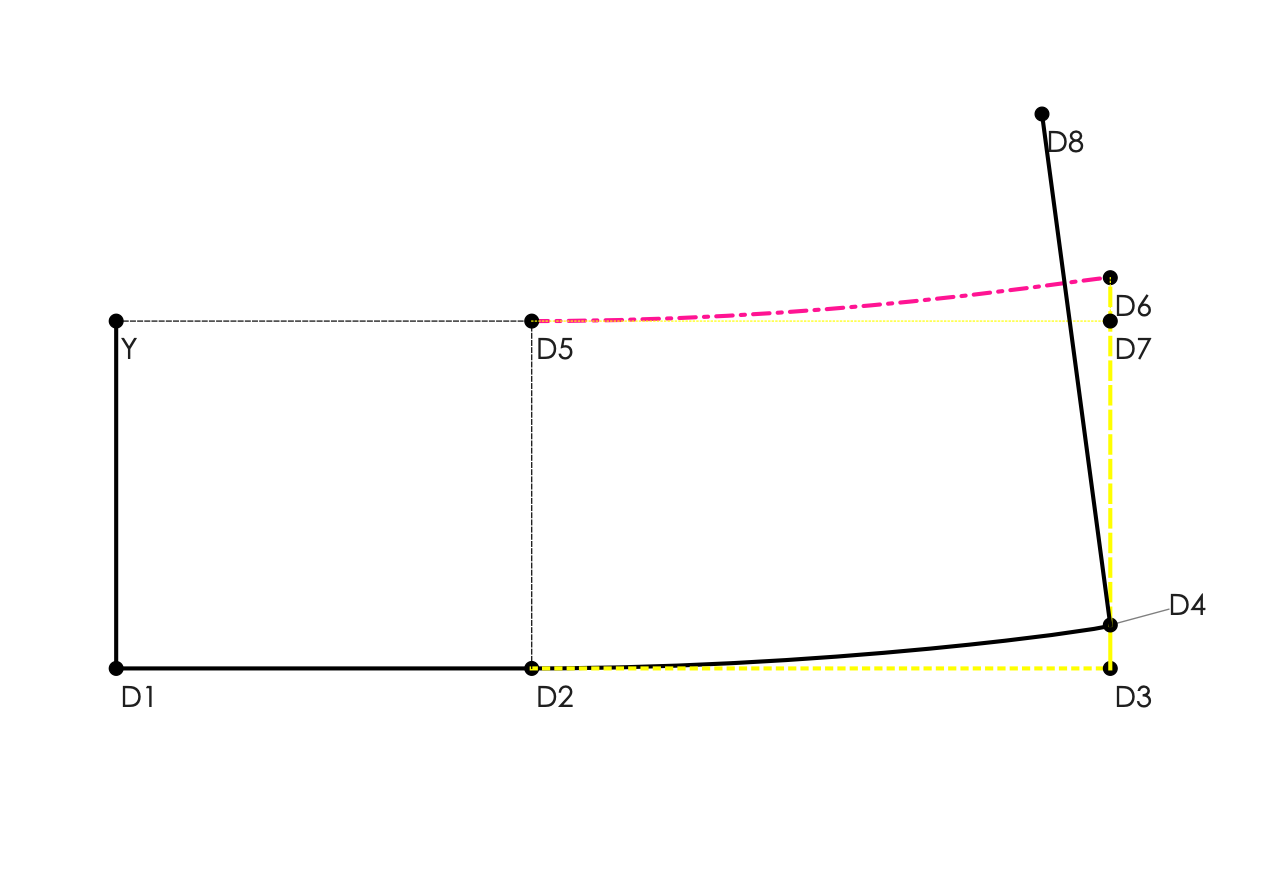
The control point at the end of curve D2_D4 is pointing beyond D4. It needs to be pointing back along the line, both for your seam allowances to not be wonky later, & to be the angle which D8 is perpendicular to. I set it to 196 degrees, so that the curve would follow as close a line to what was already there as I could easily figure. However, something closer to 188 would put D8 in a similar position to where it had been. I changed the formula for the angle of point D8 to Angle2Spl_D2_D4-90
IMO, the main question is what you want to use as your formulae for your control point angles. One option would be to have had a line run from D4 to D2 to use as your control point angle, which wouldn’t be quite right, but it may be close enough for anything.
Here’s the .val with my changes: dain jacket.val (30.4 KB)
I hope this was sufficiently enlightening. If any (all?) questions remain, please do ask them, & somebody should be around to answer. Happy drafting!
![]()
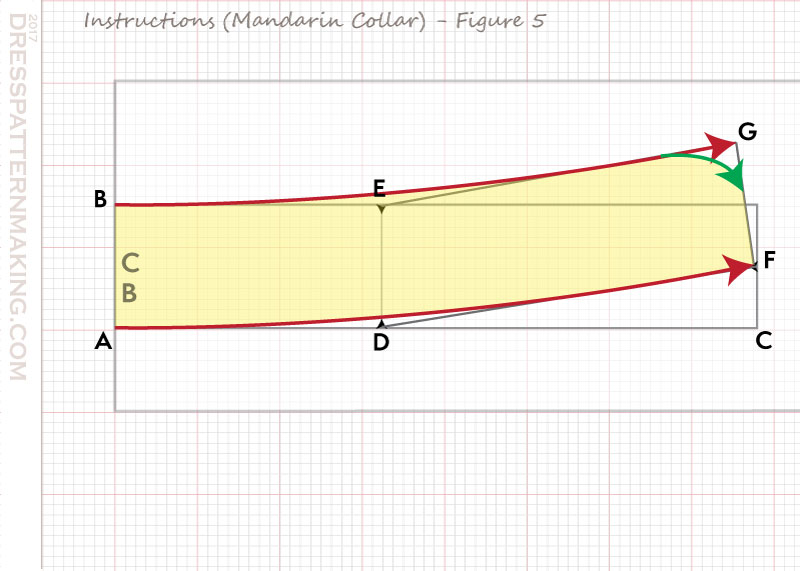
I played arond with the pattern as well… I know I’ve done collars like this before - just can’t recall how I did it.
That being said… what is really needed is to have access to the Control Point Angles, as well as the lengths. That way it would be simple to just make the Line_D4_D8 perpendicuar to the control point angle at D4.
Yeah, that’s what Angle2Spl_D2_D4 is. However, it was at angle 0, which is not apropos. Speaking of which, @emilyli the control point on D6 of curve Spl_D5_D6 should probably be something other than 180 too, I’m guessing the same as Angle2Spl_D2_D4.
![]()
Doh.
Not neccesarily… it may be close,but since the top of the collar is shorter, the angle should be different at the top corner.
That being said though… and maybe why I couldn’t think how to do this is… are necks are not built this way. You neck measurement is going to be smaller than neck base measurment, so the front edge should be angled, not squared off. If it’s squared it’s either going to gap at the top, or it’s going to dig into your throat. The taller the collar the less you want the front edge sqaure.
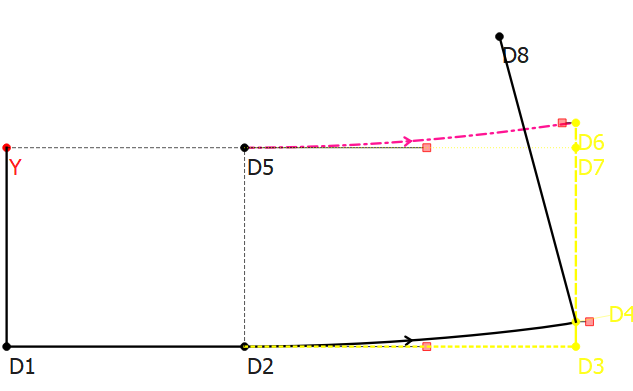
And having that been said… the real issue IMO here is that the curve should go from D1 to D4 and Y to D?. D2 and D5 should not be part of the curve. Should look more like this:
And as you can see the angle of Line D to F is easily asscertained.
thanks for catching that i had the control point the wrong way. i was zoomed too far out.
yes, i was thinking that i could get the angle from the spline but it just says 0.
now i can’t seem to even add a line without it crashing.
The spline angles are the angle of the control point, so yes - since your control point was at 0 degs, so is the spline angle.
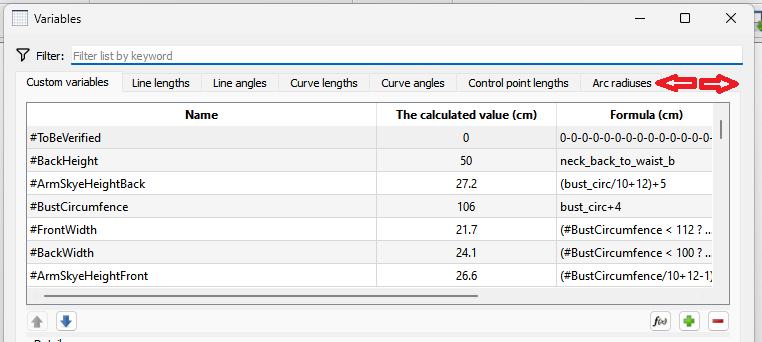
Maybe we should change the term Curve Angle to Control Point Angle in the Variables table?
Yes, I think that changing Curve Angle to Control Point Angle would provide clarity.
As an aside, I wonder if the reduced width that “Ctrl. Pt. Angle/Length” would take would be worth the slight(?) loss of clarity.
![]()
I think it’s worth it… although not sure how that affects the translations?
I took a look at the variables Table, and I don’t think Tab space is an issue to change Curve angles to Control point angles. Using “Ctrl” though does cause an issue with tanslating… “Ctrl” is the standard abbreviation for the control key, but how does that translate to “Control Point”? I have changed labels in dialogs from things like Point one: to Point 1: to save space, but it’s not something that would affect a translation. By nature abbreviations can be hard to translate. Something in the meaning is bound to get lost.
In fact I dont even like abbreviations in the code except for very common ones like “min” or “max” or “html”. I’ve had to fix things like pPath… where it referred to a printer path or a piece path. It’s not like we need to save a few bytes here or there… just write the full name out - like printerPath and piecePath.
This is the dialog at it’s minimum width. Here you can see there is still tab space available.