Hello everyone. i have been practicing seamly for almost 2 weeks. my learning is going fine. One problem which i am facing is that i want to add manual measurements in seamlyme multisize file. As i am following Helen Joseph Armstrong book so the difference in measurements across all sizes is not same while SeamlyMe only allow to add a fix number for every size change. Please help
2 Likes
Hello and welcome, @UsamaIlyas_Cheema
Yes, this is a problem. The way that I solved it was to find the average increase over the size range and use that as the increment. So, if your size range is from size 32 to 42, this is 6 sizes. Take the measurement at size 42, minus size 32. Divide the result by 5, which is 6 minus the 1st size, and this value is the average size increase/decrease.
This is good enough for checking if your pattern will resize nicely and for loose fitting garments, but only the 1st size and the last size will actually be correct to HJA.
The other option is to create individual measurement files for each size which can be loaded in when needed.
And the other option is to create multiple multisize files to cover each section where the increments change, so you may have size 32 to 36 in one file, size 36 to 38 in another and size 38 to 42 in another.
It’s totally up to you. Personally, I only use the multisize for drafting and take the person’s measurements and put them into an individual measurement file for custom made garments.
2 Likes
Thankyou so much @Grace for such a detailed reply. So what i have done is i created 3 measurement files for size 38-42, then 44-48 and 50-54 because i figured out the increment stays the same in these sizes.
I created blocks by loading the 38-42 file the base size was 40. Will they work perfect if i load other 2 measurement files?
My second question is i created a bustier pattern by using contour block which i created and when i load the 50-54 file it’s bust curves deshape. Do i have to refine them manually or is there any other way?
My 3rd question is the truing tool doesn’t work fine in every case. Is there another way to true darts?
I am sorry for my bad English ![]() I hope i make sense
I hope i make sense
1 Like
Once you have the formulas entered properly, which takes a bit of work, especially when getting started out, it will work perfectly across sizes.
No, that is the intuitive way to do it, but carving the formulas until they seamlessly adapt to the changing sizes is achievable, & rewarding.
You can use the rotation tool a couple times. Grace or one of the others will probably be by later to tell you haw it can be done.
Happy drafting!
![]()
2 Likes
Yes, if you used formulas for your curves and things.
Here is a tutorial that I wrote on how to do the armhole curves, the same methods can be used for any curves and they will reshape perfectly every time.
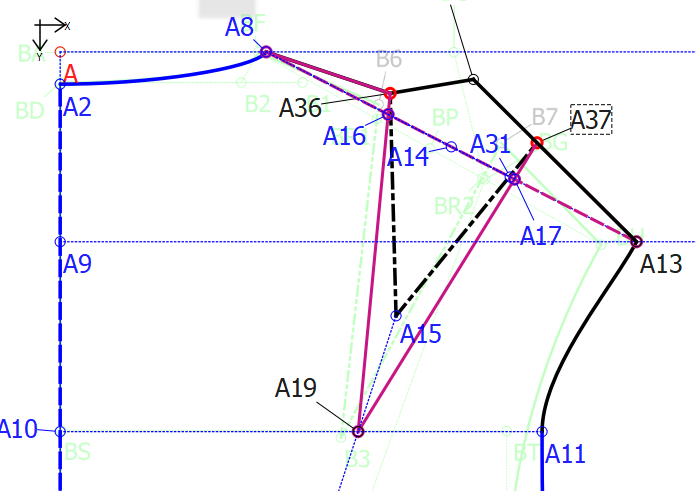
The True Darts tool does work very nicely. What you need to remember is that the real rotation point isn’t at the dart point, but normally quite a distance outside of the dart point.
For instance, the front shoulder dart rotation point is the Bust point but the dart point is normally 1 inch or 2.5cm above the bust point, so when you use the True Dart tool, you must ignore the dart point and use the bust point instead.
All of the darts on the front bodice can be successfully rotated to other areas using the bust point as the centre rotation point.
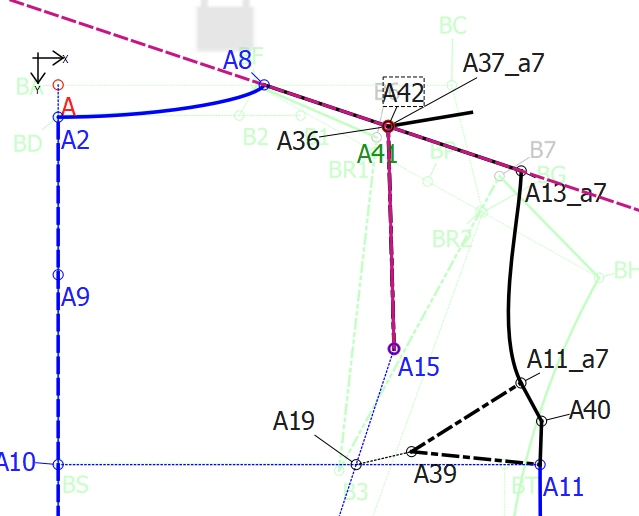
The shoulder dart on the bodice back is a little different. Normally the shoulder dart will be moved to the neck or the armhole, so if you create a point on the across back line, in a line from the centre line of the dart, the true dart tool works very well:
With the dart rotated closed and opened at the armhole:
If you use the rotation method on the shoulder darts, the shoulder tip point will reposition so that it isn’t in the correct position any more, making the armhole height too low or too high, like this:
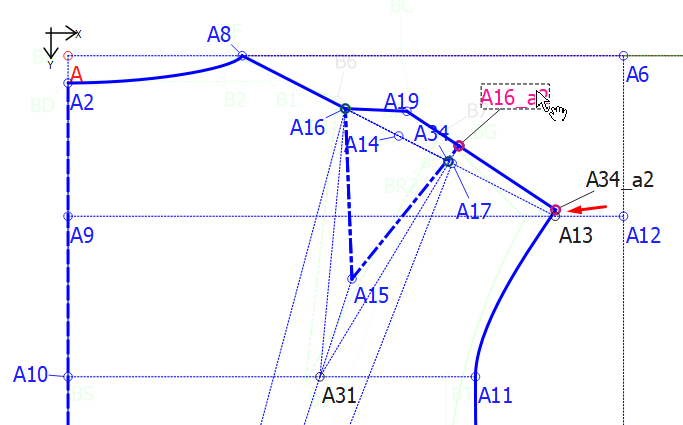
To get this difference to be so little, I had to use a rotation point at the centre waist, so this isn’t really a very good example, but it will give you an idea of how the shoulder tip point can move when changing sizes and rotating points for the shoulder dart.
There are various methods of establishing the waist darts, so, depending on the method used to make them will determine the best way to true them and I very seldom use the True Dart tool for them but I’m sure it will work just as well.
Once again, the bust point is the rotation point for the front bodice and a point on the line at the armpit (at the bottom of the armhole) is normally the rotation point for the back waist darts.
I think this is a lot of information for you to get your head around for now. If you have any questions, please don’t hesitate to ask.
1 Like
Its been almost 20 days that i am working on seamly now the formulas and multisizing started making sense to me but still sometimes i do get stuck.
My learning is in progress i hope someday i will achieve that level ![]()
Thankyou for the detailed reply. Happy Drafting
3 Likes
I read that tutorial but it feels overwhelming at this point. I will go through that in detail and will learn the formulas concept for curves. I had been drafting patterns manually for years but i am totally new to digital pattern and multisizing.
I got it. Thankyou for explaining in detail. Can you please guide me how the true dart tool will work for skirt darts?
2 Likes
Skirt darts are like waist darts on the bodice, just upside down. You don’t need to use the True Dart tool.
Normally you will have a slanted line from the center front/back to the waist side. You mark the centre of the dart and mark the length of the dart downwards to the dart point.
Place a point half of the dart width on highest side and then use the Mirror tool to place a point at the same height on the other side of the dart centre line. Place a line from the dart point to the new points and use the angle of this line in the waist curve formula (+ or - 90°). Only draw the curves between the different sections - center to dart 1, dart 1 to dart 2, dart 2 to side seam.
Here’s a pic of a very old pattern that I made:
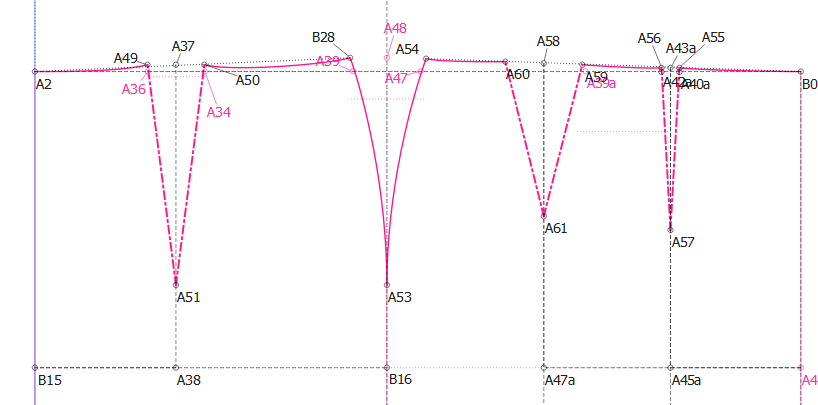
A close-up of one of the darts:
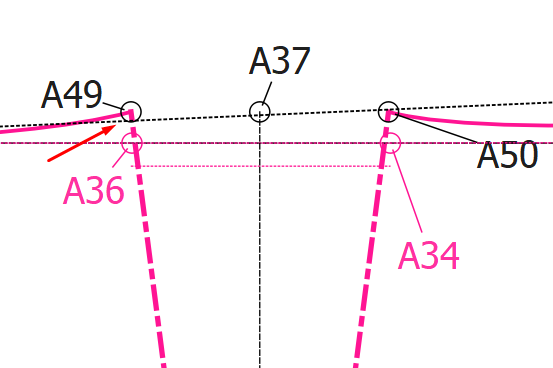
I didn’t use the mirror tool in this one but the principal is the same.
3 Likes
Thats a nice way to true darts. It made my truing alot easier. Previously i was using rotate tool which was very much time consuming and messy. Thankyou
2 Likes