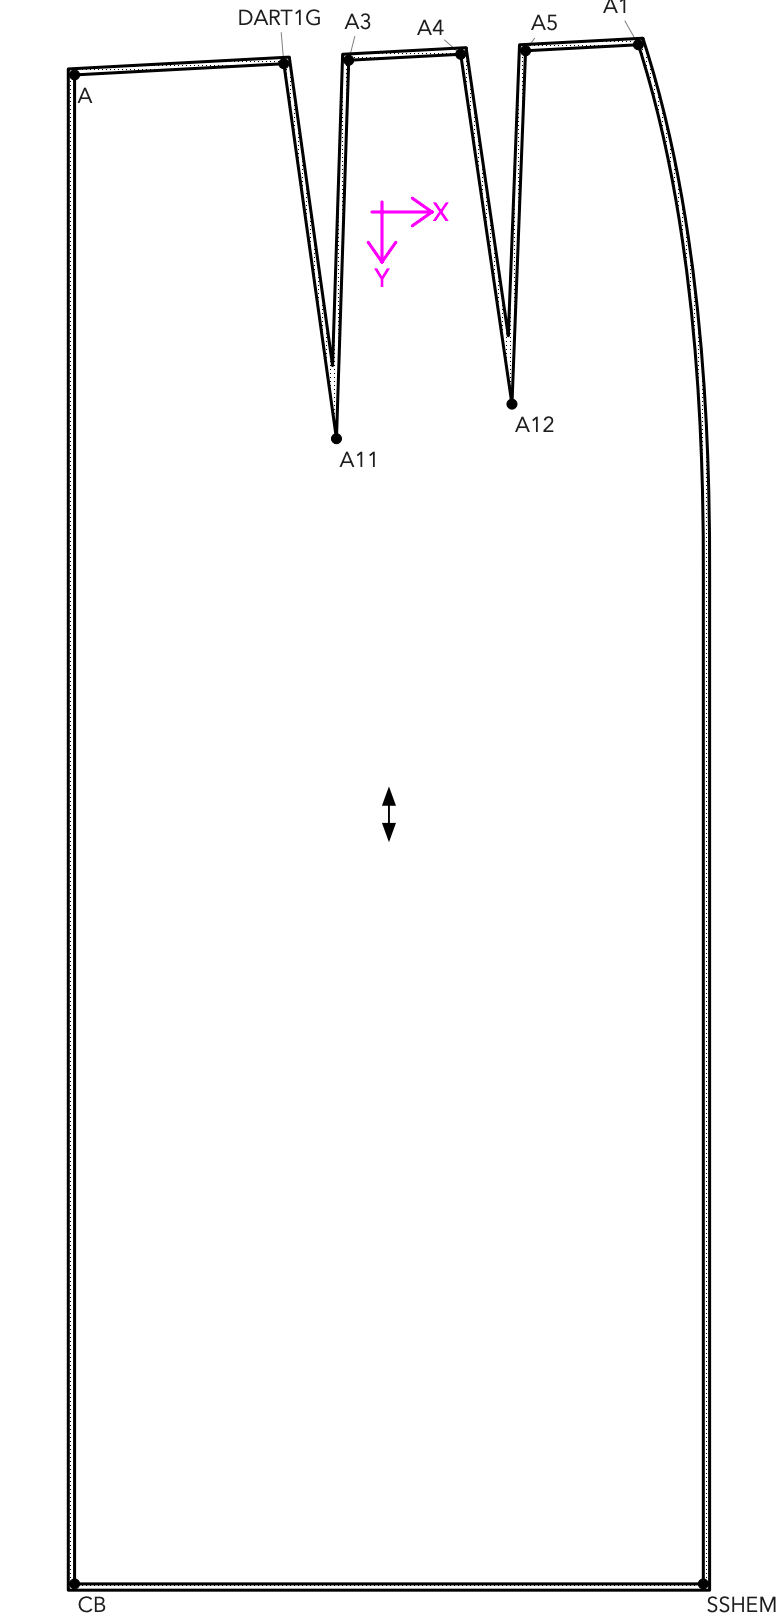
Hi, once I have traced my workpiece and then moved to the PIECE tab - the workpiece has a double line - is this correct - this is my first time tracing!
2 Likes
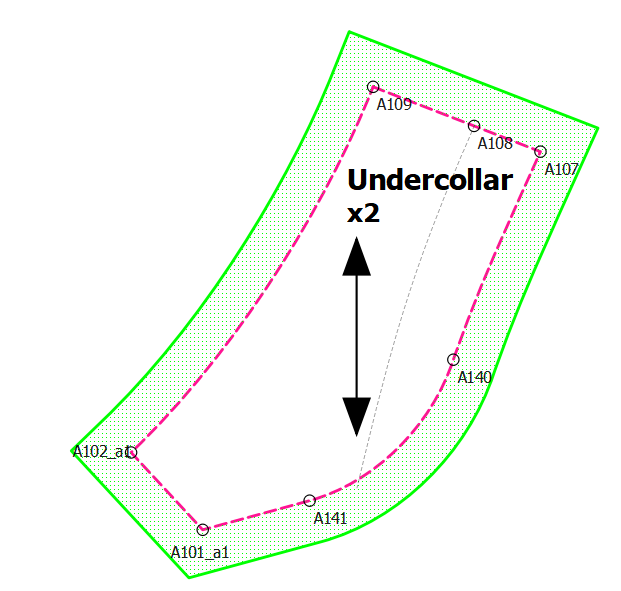
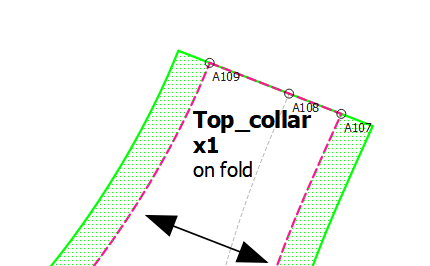
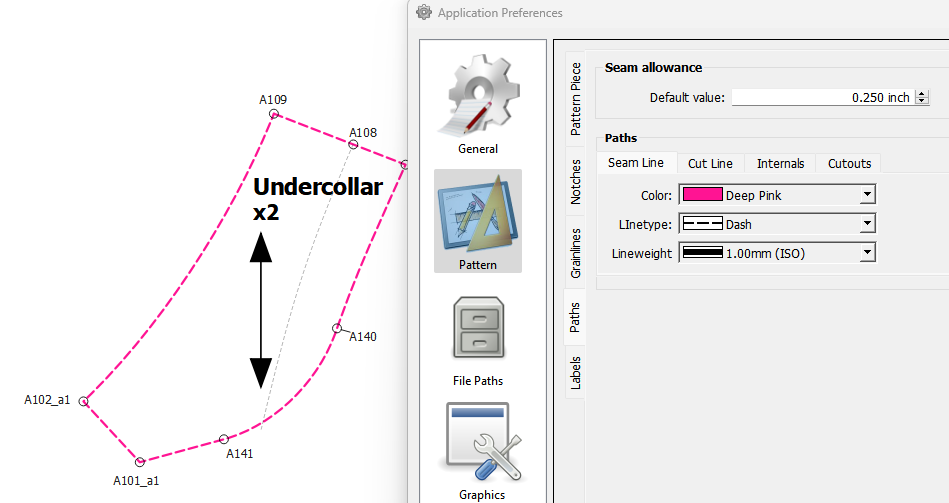
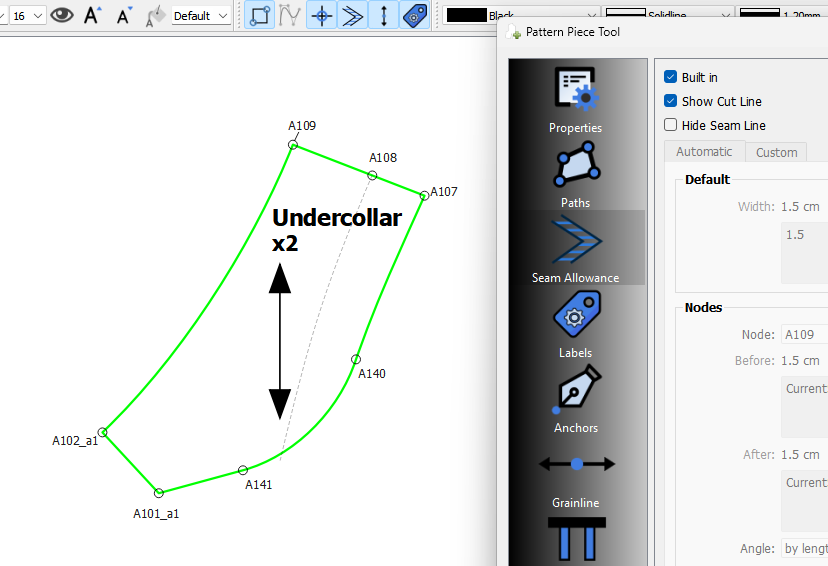
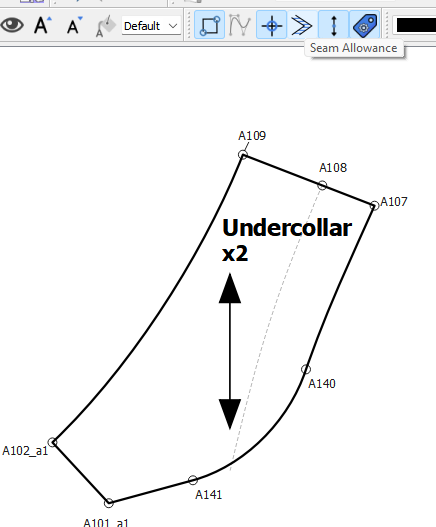
Yes. The line you traced is the “seam line”. The additional line is the cut line with seam allowance added as per how you define the Before and After SA at each node point (the points you selected to crate the piece). For ex… here is a collar piece, where the seam line is in Pink and the added Cut line in greem:
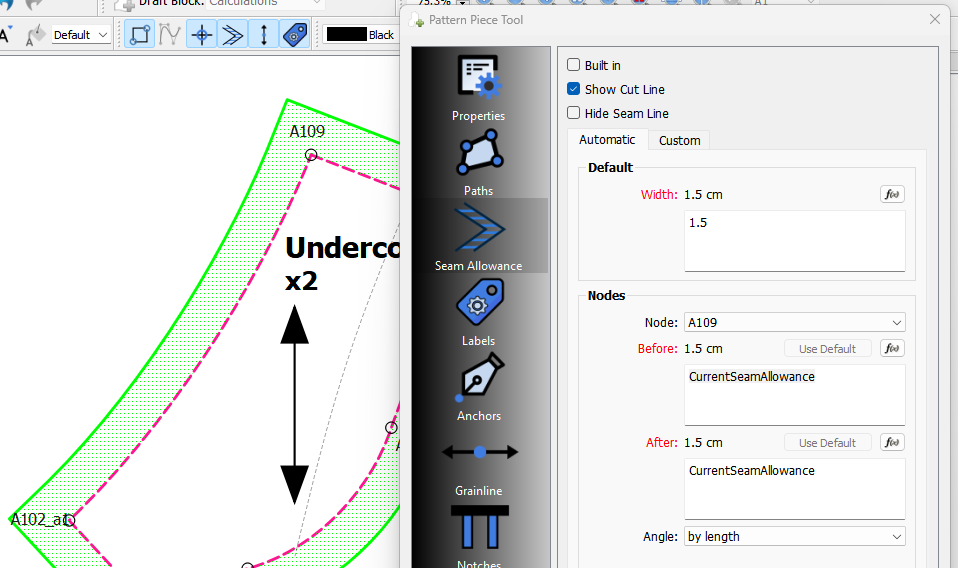
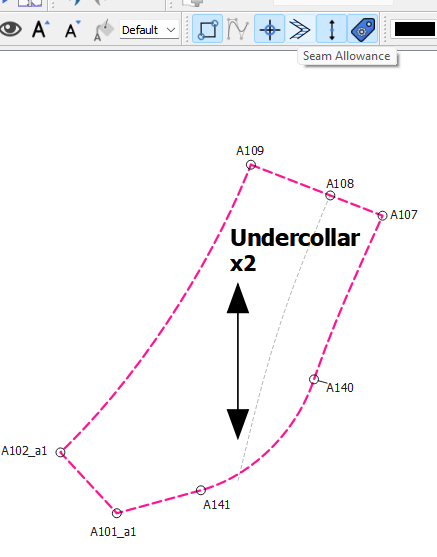
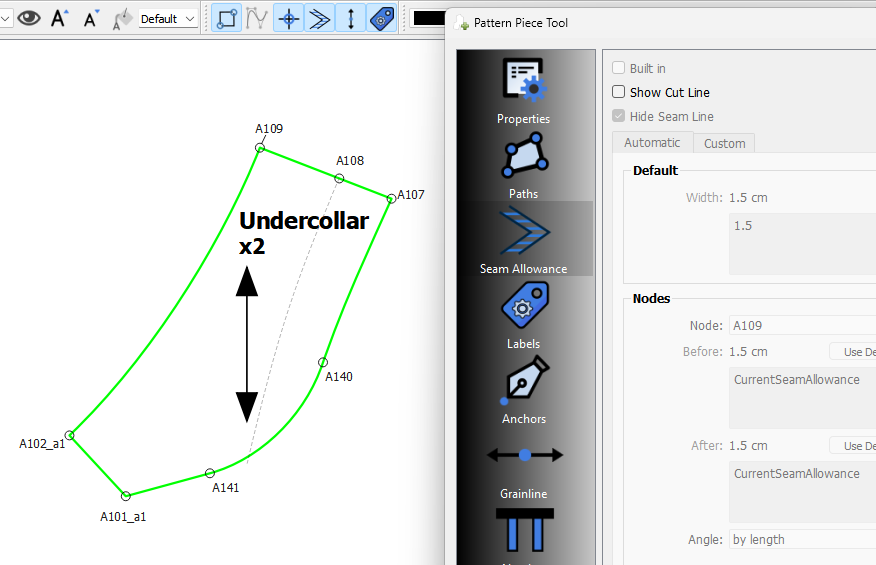
If you open the Pattern Piece properties dialog an select the seam Allowance tab, you will see the SA for Node A109 before is CurrentSeamAllowance (1.5 cm) and the after is CurrentSeamAllowance (1.5 cm).
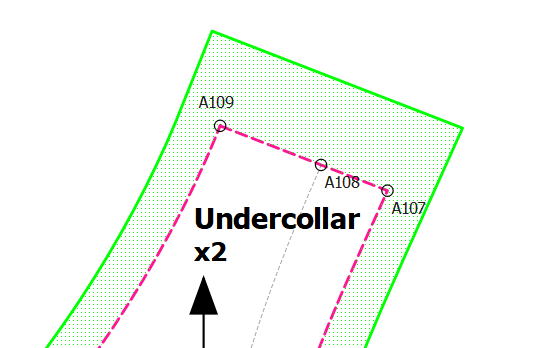
If I change the SA after for A109 to 3, SA Before and After for A108 to 3, and SA before for A107 to 3… the seam allowance is adjusted to:
If you use SA’s of zero (0), you can make an “on fold” piece:
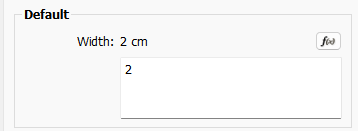
Youcan set the default SA for a given pattern:
So any where you used “CurrentSeamAllowance” it automatically changes all those to use the new value.
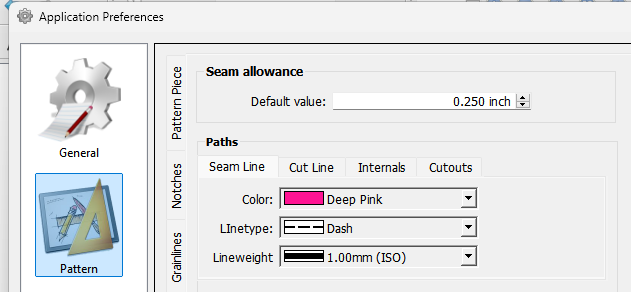
Also you can go into the Application Preferences where you can set the Default - Default “CurrentSeamAllowance”… note my prefs are set is set in inches, the pattern I used showed was in cm.
Hope this helps.
3 Likes
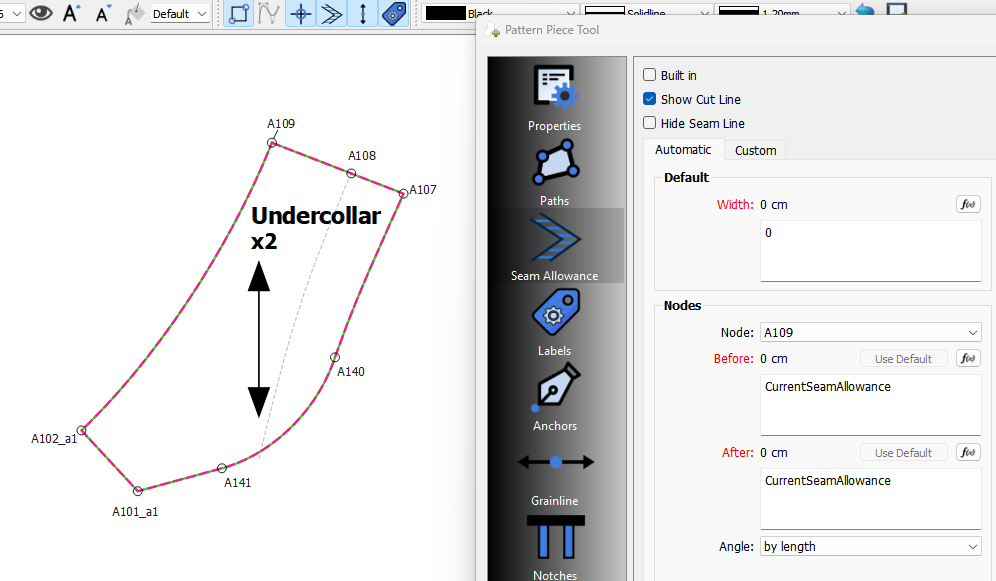
Thank you Douglas, yes it does help. I want my pattern pieces to have no seam allowance so I have set my default value to 0 - can you let me know if this is acceptable to the system. Also can you please tell me the best options to tick to ensure I have no seam allowance added to my pattern pieces. Many thanks for your time.
2 Likes
That’s one way to do it. Or you could just toggle the Seam Allowance off using either the SA button on the View toolbar or from the View menu:

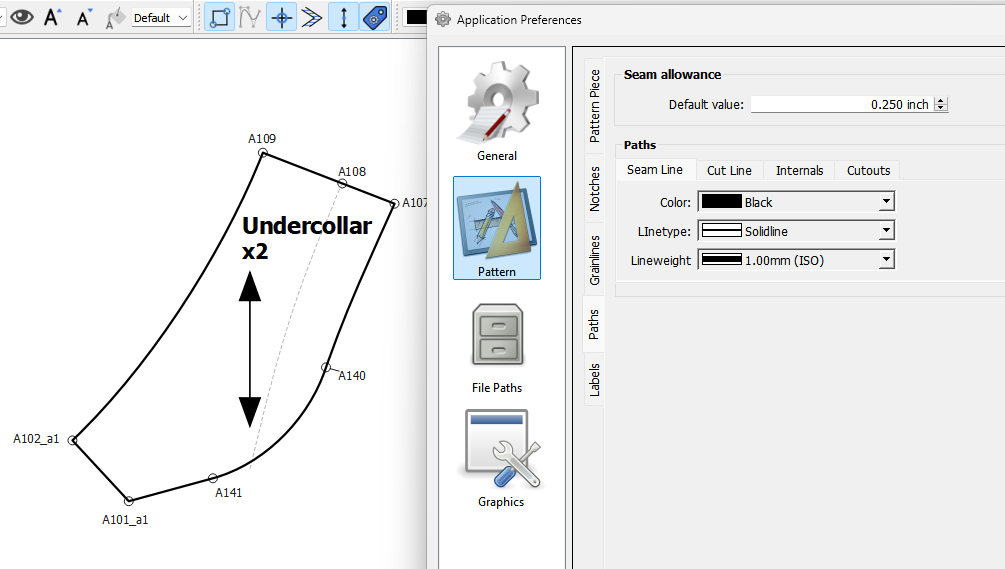
I should note that you can set Pen options for theSeam Line, Cut LIne, Internal Paths, and Cutouts in the Prefs:
Here you can see I have the Seam line set to a pink - dashed line:
Here it is changed to a solid black line.
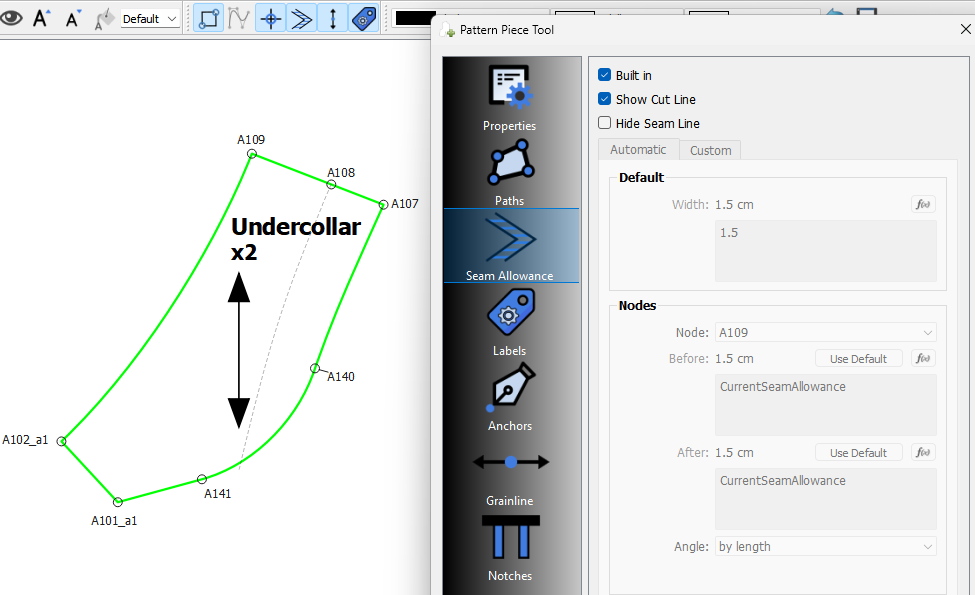
There’s another way… just check the “Built in” box in the Seam allowance tab. This option means the pattern piece already has seam allowance built in, where the path you traced in Draft mode is the Cut line. Currently with this option there is no way to indicate the Seam line.
1 Like
The above short clip shows my confusion - thanks so much for all your help - it is much appreciated!
2 Likes
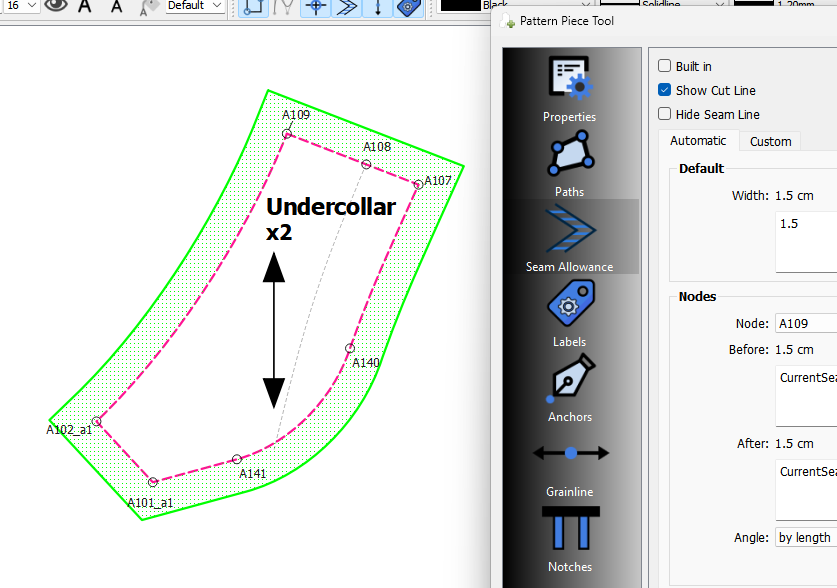
I’ll try and show how each method looks. Currently my seam line is set to a dashed - pink line and the cut line is set to a solid green line.
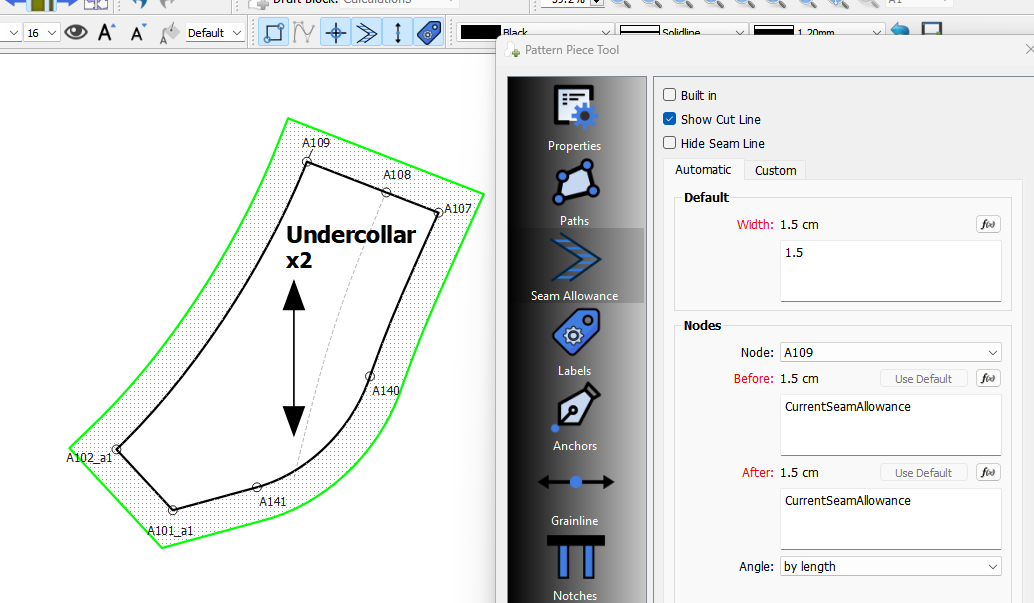
If you just check Show Cutline with a piece having seam allowance you get this:
if you also check Built In… the (pink) seam line now becomes the cutline… that is the main path is now the cutline, not the seam line, there is no seam allowance, and you get this:
If you set the Default for CurrentSeamAllowance, and all your Before and After’s are set to CurrentSeamAllowance… i.e. the piece has 0 seam allowance added, but the main path is still the seam line - as is the cutline now - and you get this:
But you may not want the dashed pink line… so you can change the Seam line pen to something else, such as a solid black line:
The other option is leave the default seam allowance width:
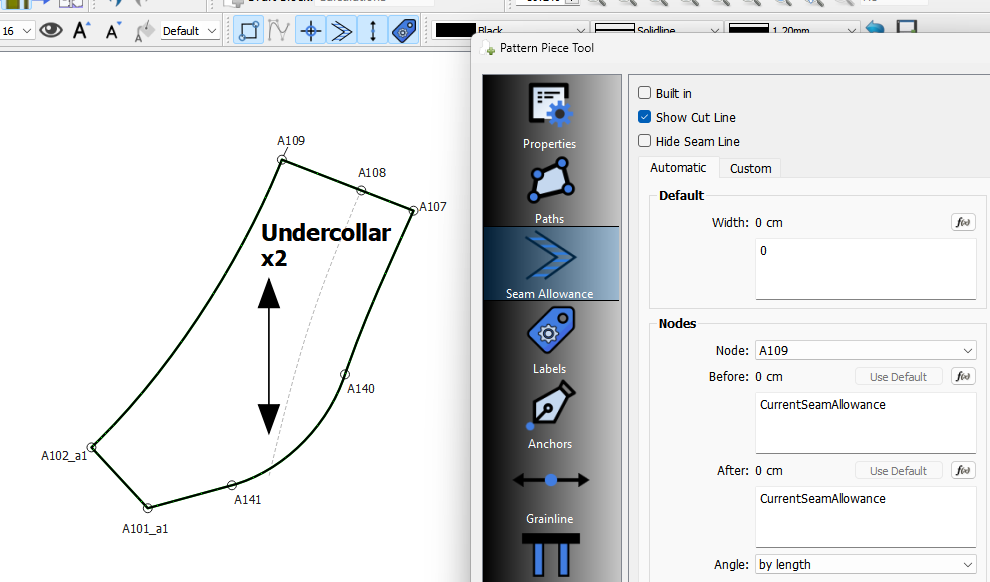
And toggle the seam allowance off… which hides the cutline. The seam line here is still solid black.
Of course there is the option of unchecking all the boxes in the Seam allowance tab, but it just defaults to as if you checked Built in… as we don’t want the piece to disappear completety. And again … the seam line becomes the cutline.
3 Likes