Parametric hat, how to...?

Hey!

Since my last time posting here about a jacket I was patterning was a great success on my part, I thought I’d pick everyones brains about this real life use case “issue” I have.

I have made hats for years and years using an old Soviet/Russian mathematical method (I have no idea what it is called), essentially by drawing side, front and top views of the hat in scale and then cutting them into little squares on a grid and flattening them, much like you do in sheetmetal drafting.

Now that I’ve got a little downtime, I’ve been thinking of transferring few of the basic shapes into a parametric form for Seamly 2D, but I am not sure what’s the best aproach to try and do this.

I’ve essentially got two hat shapes that I need to make parametric.

First one is a typical “military” hat kind of a hat, where you’ve got a roughly oval cylinder (of unequal height back and front) with a bill. The other one is a sort of a Pilotka (Russian side cap) looking fellow.

There are a ton of historical uniforms (military, post office, customs etc.) that use these two basic shapes here with some differences in their shapes.

So I am looking to having a parametric settings for the “military hat”:

  • Head oval length & width
  • Head oval “cubeness”
  • Back & front height
  • Bill width and length

For the sidecap:

  • Head oval length & width
  • Head oval “cubeness”
  • Back & front height

All the other measurements would essentially follow from these.

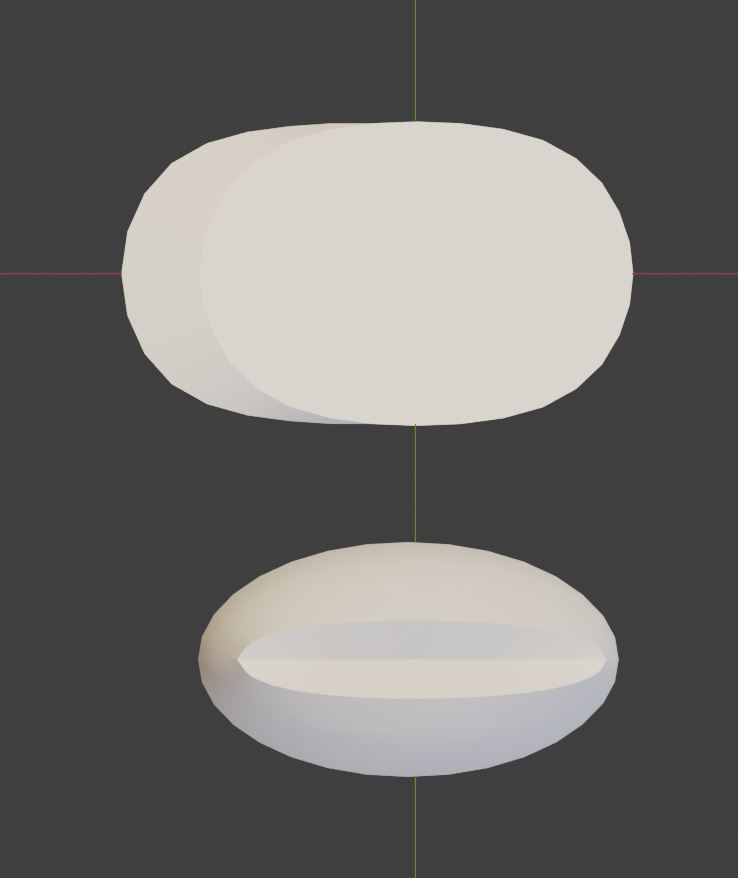
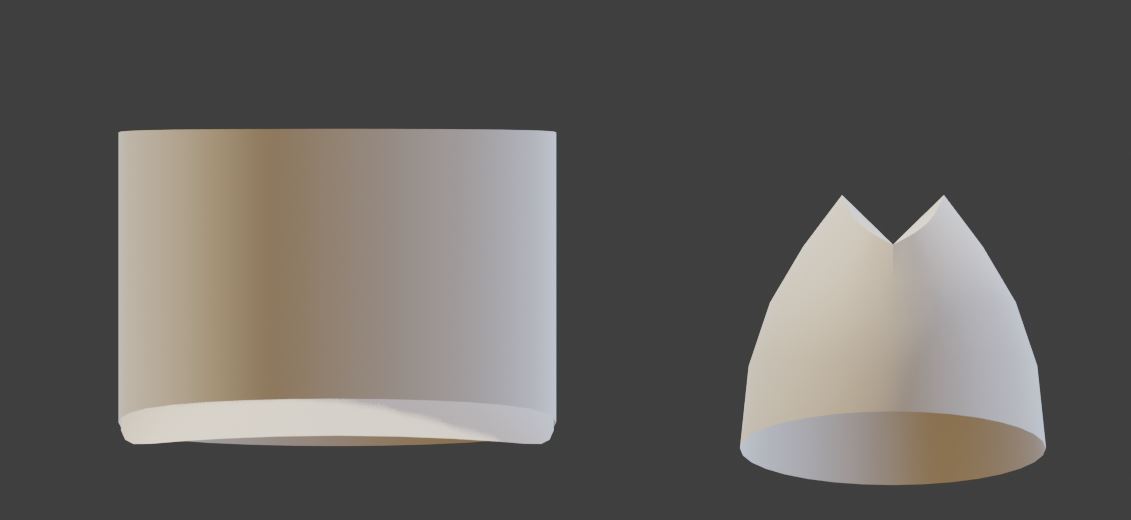
Here’s a few screenshots I took out of Blender of the hats that I roughly modeled just for illustration purposes.
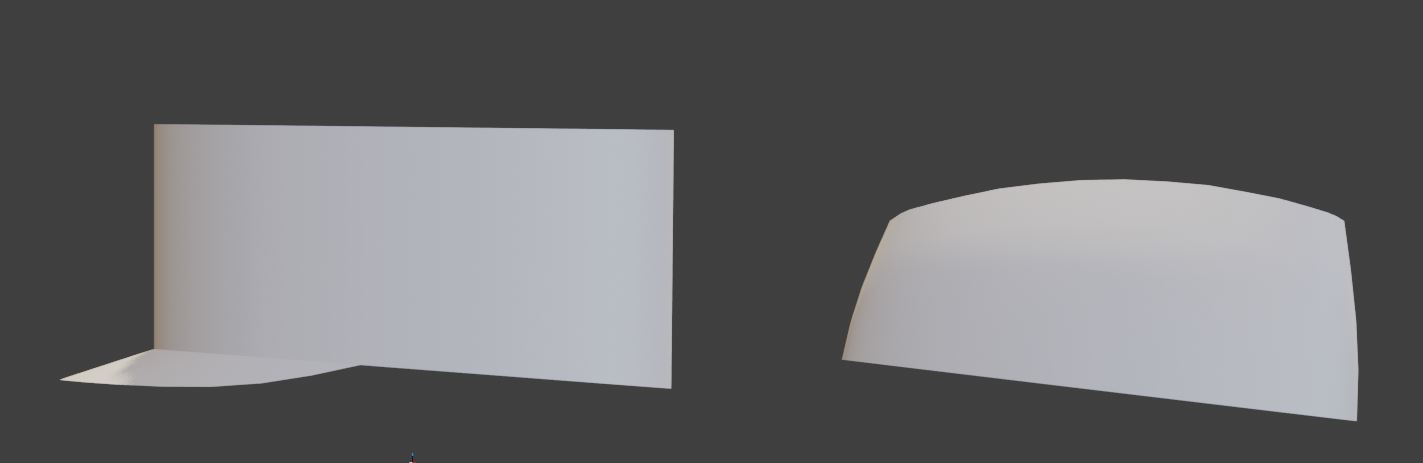
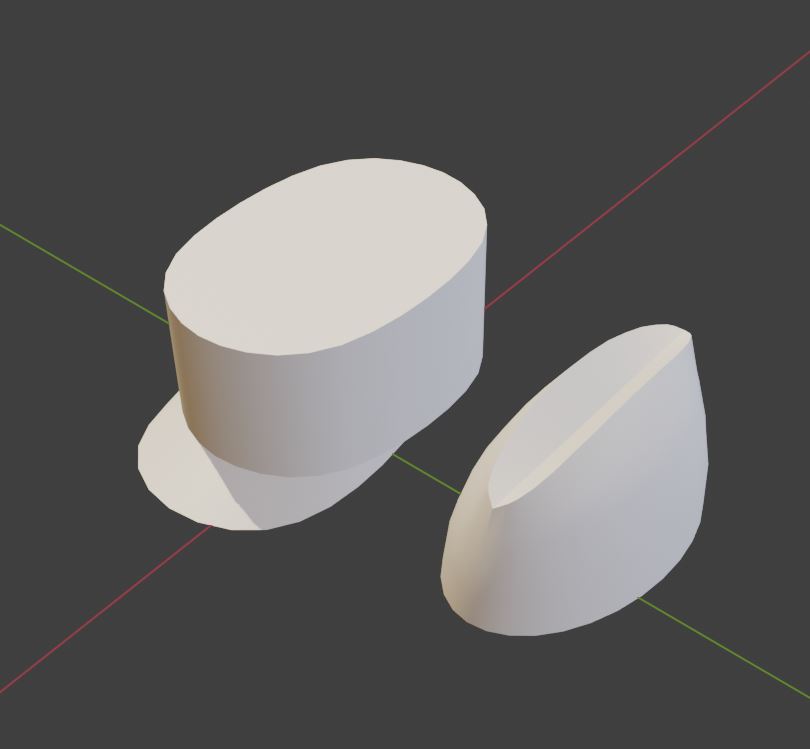
Since the head oval isn’t a perfect oval and the cylinder itself in the military hat is “leaning forward”, you can’t just make the side panels just with two curves, the radius is slightly smaller in the “corners” of the ovals.

I don’t know what else to describe right away off the bat. I am really after any ideas or hints on how to transfer these shapes to parametric 2D and if anyone has done anything remotely similar at some point in time.

Please do ask questions, if there’s anything unclear or mysterious. I am more than happy to explain once I know what people don’t understand what I am after :slight_smile:

Like I said, I’ve used my method for years and I’ve never really seen it used outside Russia - and even where I live this method died out a good 60-70 years ago! I may be the last guy in my country to even think of this method.
Hello, @Lieckio

Looking at your images, it’s kind of hard to precisely imagine the actual measurements of each piece.

I think that your best approach would be to draw the pattern pieces to scale, the way you previously did it and then take the scaled measurements and draft the pattern accordingly. Where you take measurements, create variables for them and put those scaled measurements into the formulas for the variables so that you can scale the pattern larger later when you have all the pattern pieces fitting when you make a paper test of the pattern in scale, before you attempt using fabric.

You could load up the images into Seamly to guide you while drafting in scale.

Let’s first just work on one pattern, I chose Pilotka as it is similar to Titovka we had in Yugoslavia.

as @Grace said, draw a pattern not just a model.

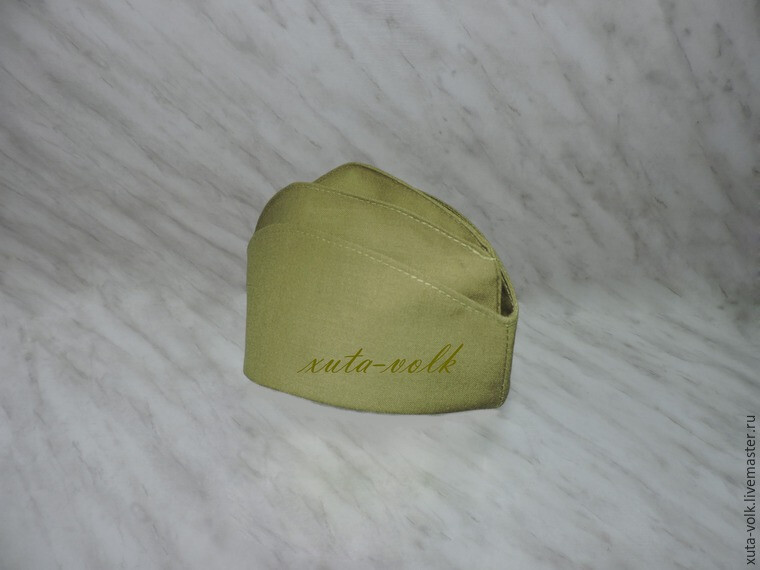
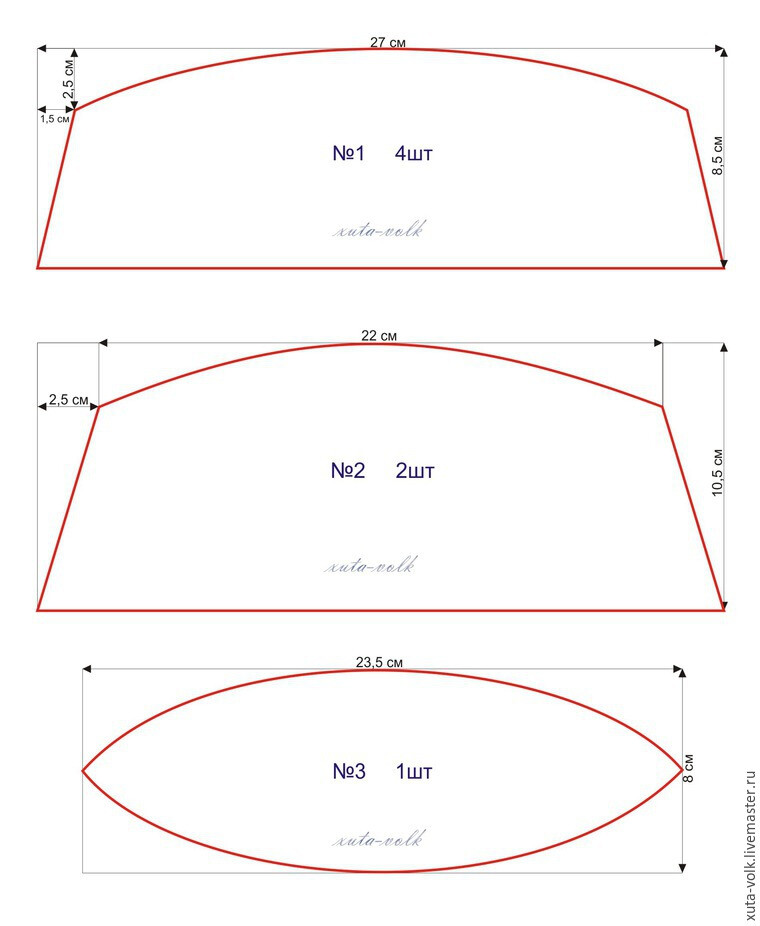
You can take one of the many that exist:

https://www.livemaster.ru/topic/1787153-masterclass-shem-pilotku-k-9-maya?&inside=0&wf=

What you need is only the circumference of the head at the point where the cap sits on the head. Such caps were basically a flat type of garment, that means when they are off the head we can fold them into a flat piece. What gives them the round shape is the shape of the the head.

Height is connected to the circumference. Second piece is i.e. x1,25 high. I guess you need to play a little with the third piece to define a curve that scale nicely.

There are many variations on this type of cap.. like the Scottish Glengarry or the military “side cap” known in the US as a “garrison” hat, 'wedge" cap in Canada, or “field service” cap in the UK.

When I drafted a surgeon style cap a few years back, I used head circumference & ear to ear over the top of the head. Obviously, that’s for an extremely less tailored cap than the military styles you are drafting. If I was doing it, I’d try using head depth & width measurements in addition to those.

Of course, my mathematical intuition is significantly poorer than my spacial intuition.

:unicorn:

I don’t think that’s neccessary as the fold in the top piece is going to adjust for over the top ear to ear. Especially with the cap in the photo as it’s really tall compared to a Glenngarry or garrison cap.

Hey, thank you for the reply!

These were just made for illustration purposes :slight_smile: they are not to scale, missing details and I spent just 5 minutes on them to have something visual for people to hold on to :slight_smile: I’ve sewn over 300 caps this year alone, so it’s not necessarily the drafting that’s the issue… but more along the lines of if there’s a preferred method or a good method to make the patterns as parametric.

I could then adjust / fit my own patterns to the parametric workflow :slight_smile:

Typical Pilotkas are pretty simple, like your sample, where they are just straight and flat pieces. Unfortunately, the types used where I live are not. There’s a bit more shape to them, which makes it all quite annoying.

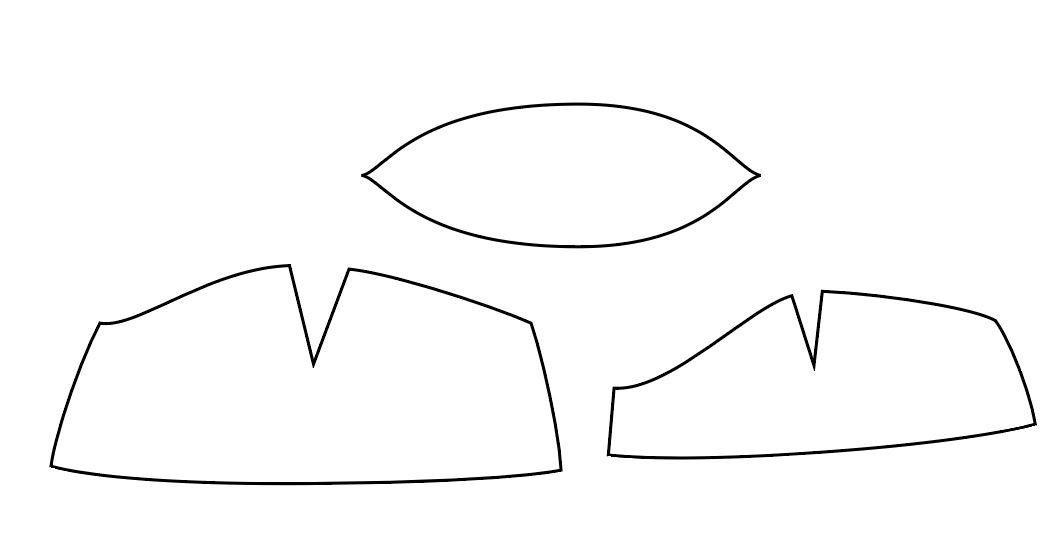
For example, here’s (another) quick and dirty - not to scale - version of a postmans sidecap from early 1920’s I made for a film production. The notches add to the excitement of getting the pattern correct…. :slight_smile:


While I was doing some rough tests, I think I’ll be having problems with having to do all this “backwards” as compared to my usual method. With parametric measurements, I have to start from the end result as a flat pattern and then try to figure out the mathematics of it in 3D space. Usually I just draw the hat in 3D (well, 2D but as complete hats to measure) and go from there.

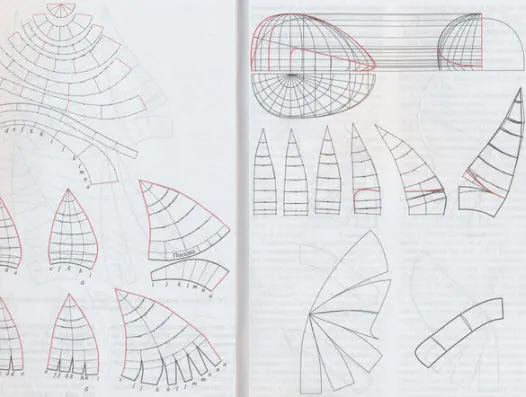
This blog is probably the ongly English website that I’ve ever sene touch on the method I use for hat drafting, so that may explain where I am coming from when it comes to drafting hats by hand.

This image shows the 2D drawing of the hat on the right page, with the “grid lines” from which the side panels etc. are then derived from for the flat pattern. Requires a bit of trigonometry and it’s pretty time consuming as you kinda end up having to manually draft each size, unless you create a ruleset for grading.

But then none of the different versions (post offices, prison, customs etc. etc.) have exactly the same shape and there’s differences in details, so if making a number of different hats in different sizes, you end up having to do A LOT OF trigonometry and manual work.

Hence the dream of getting all this parametric… :slight_smile:


In any case, I’ll probably do a more serious attempt at this later this month, or in August and unless anyone has ideas on how to aproach this, I’ll just smash my head against a wall and try and see if something works.

The starting point will probably have to be head circumference and dividing it into two and going from there to figure out how to get the oval shape of the bottom edge parametric. So that’ll take me some thinking in how to calculate a non-uniform cylinder (tapered or otherwise!) to be flattened…

One of the things that I love about Seamly is that you can do exactly what you are doing in your images. It takes a bit of work, the same way that you do it by hand using a ruler. I (once, many years back) did the same method to create the sleeve cap in Seamly - using the instructions for adding a pipe to a cone in metal-work.

Once you have that drafted in hefty detail, you can use the move & rotate tools to put them all into order to create the different pattern pieces. From there, you can devise a way to do the same thing without having to jump through all the hoops… or you can use the variables to adjust the head circ & height.

Give it a shot at some point. It’s very interesting what you can achieve in Seamly :blush:

Ah, I didn’t even think of just doing the same thing I’ve always done but just inside Seamly.

Might have to give that a shot, seeing as it is… well, familiar territory to me! It’s going to be a fair bit of work, but then again… do it once, enjoy the results in future… :smiley:

And that’s precisely what attracted me to Valentina and subsequently Seamly. While I had access to other applications like Opitex and Wild Ginger they didn’t have the “made to order” capability where I could draft a pattern once, and then apply custom measurements to make a pattern to fit a particular actor. Initially I was going to use Corel draw as the base and write scripts or a plugin to draft patterns until I came across Valentina. The rest is history.