Pattern-Making Advice and Queries
I am currently working from these tutorials on youtube to help me draft my bodice block and sleeve pattern:
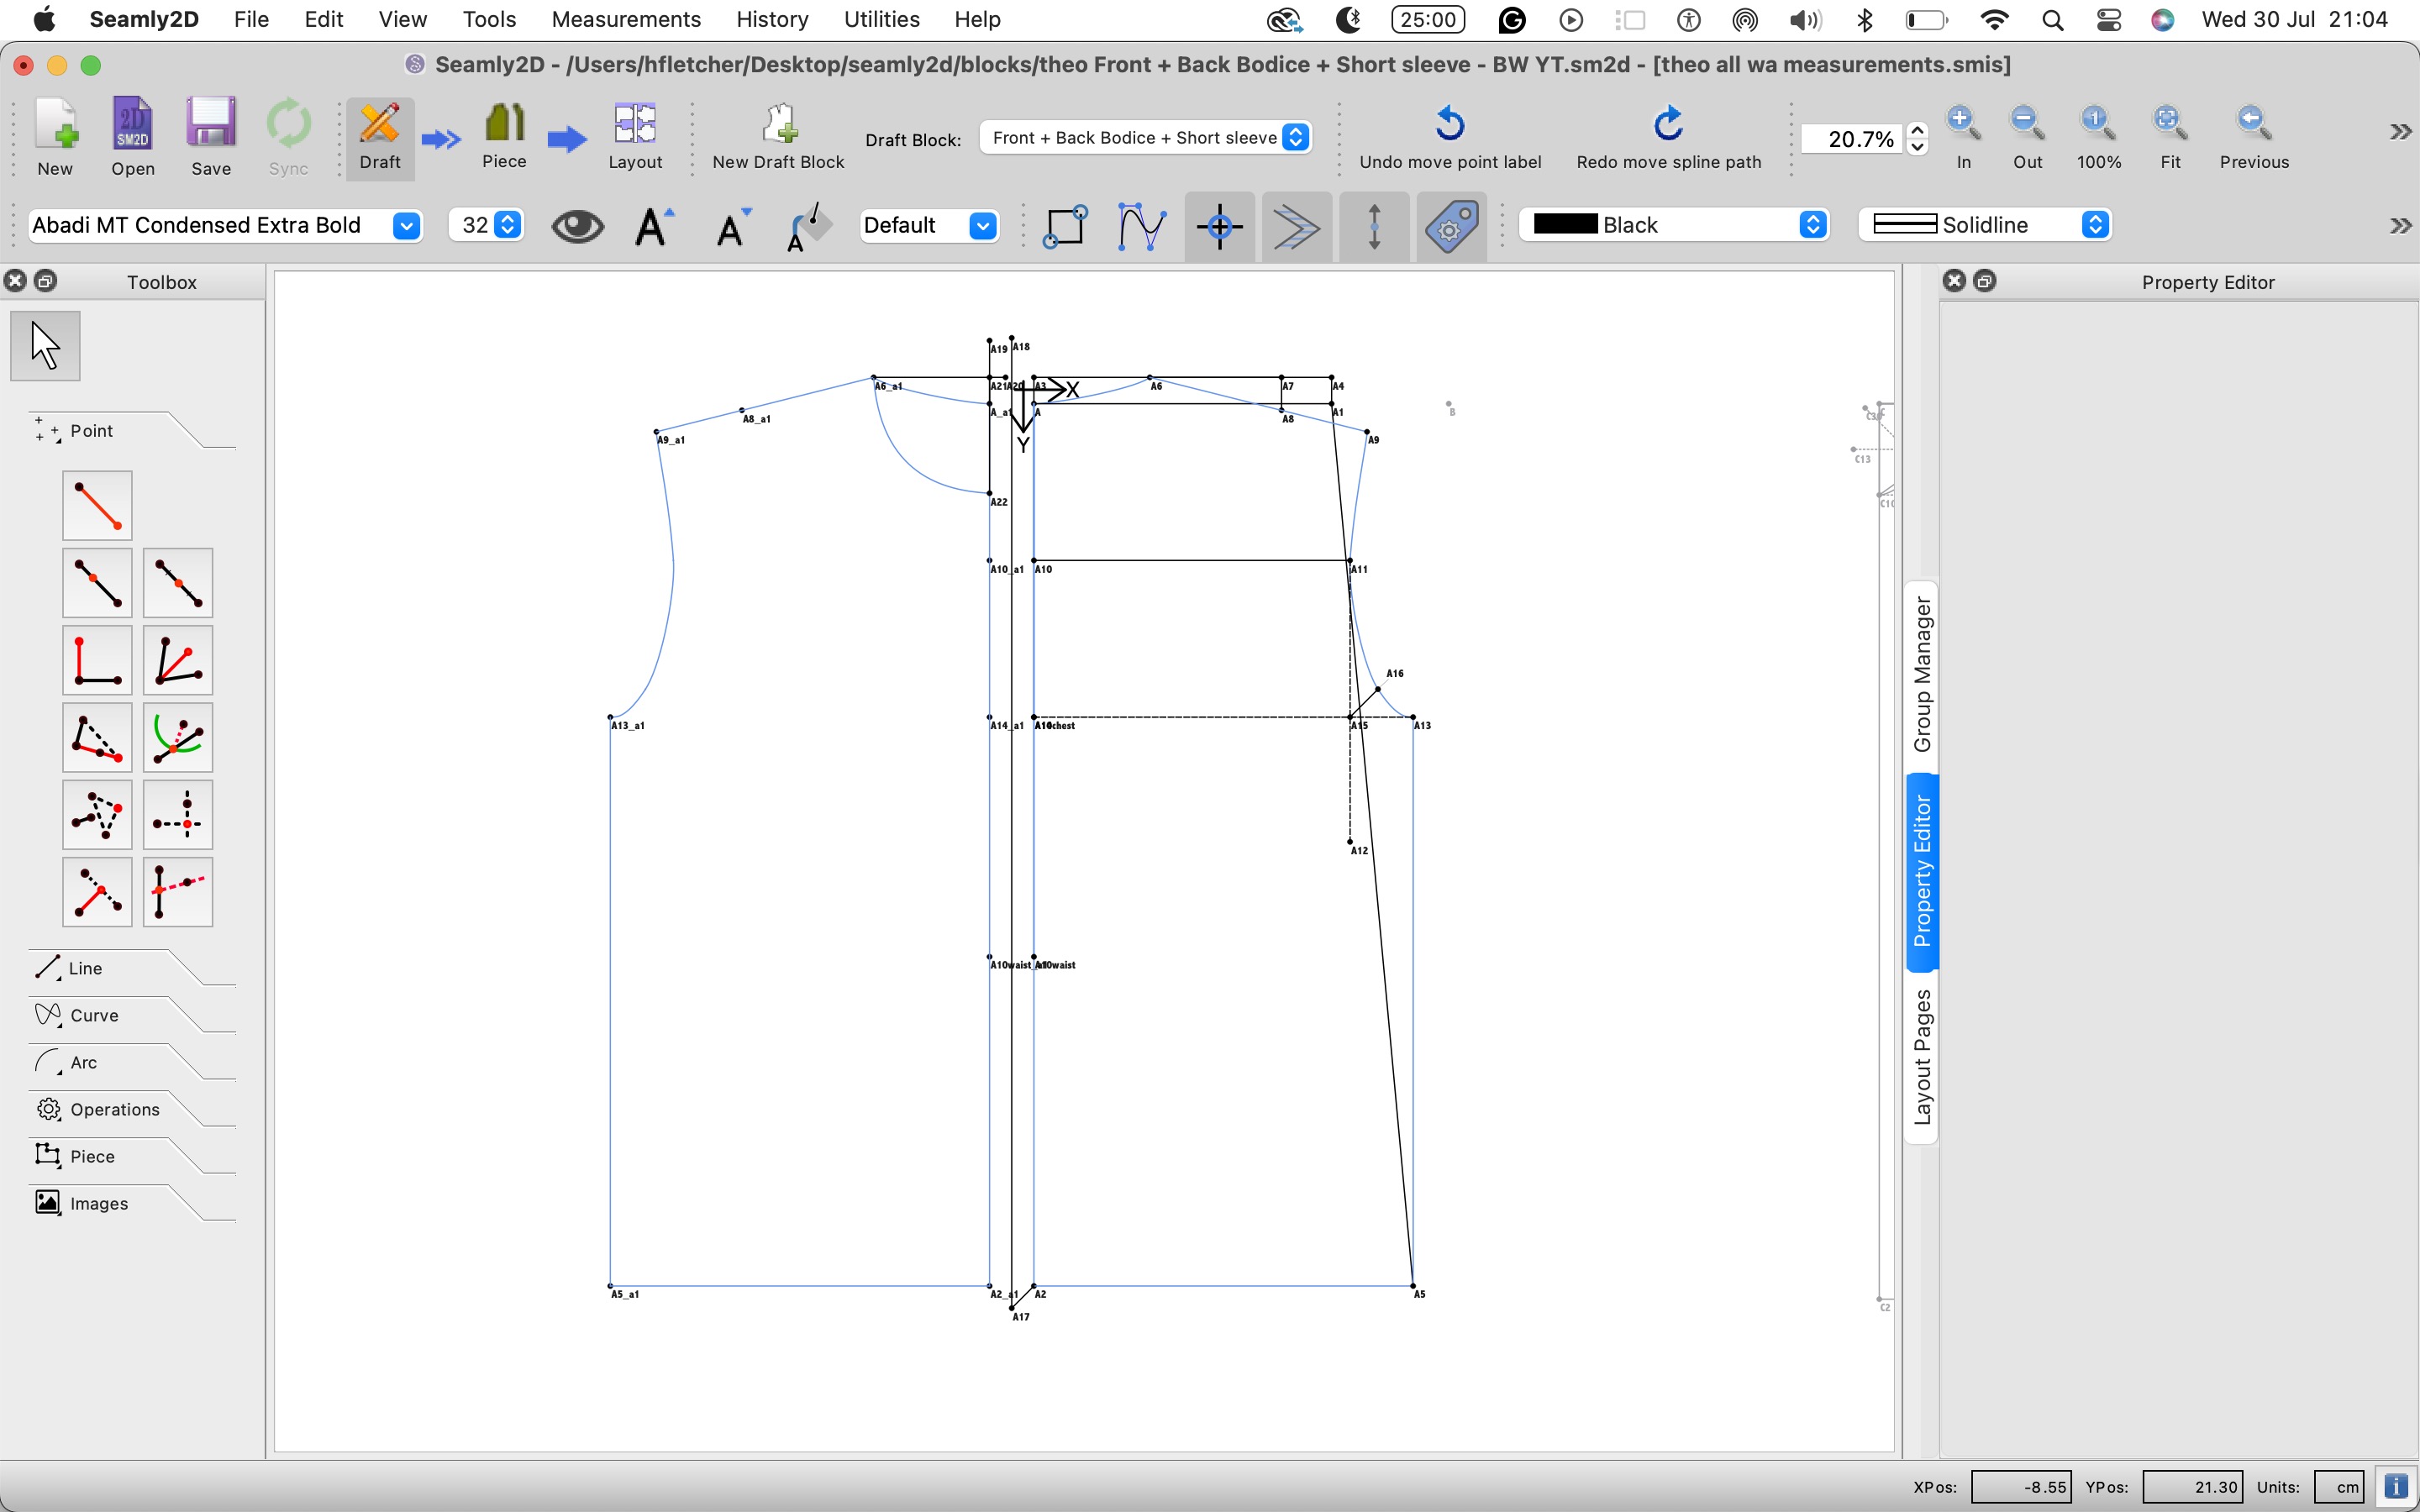
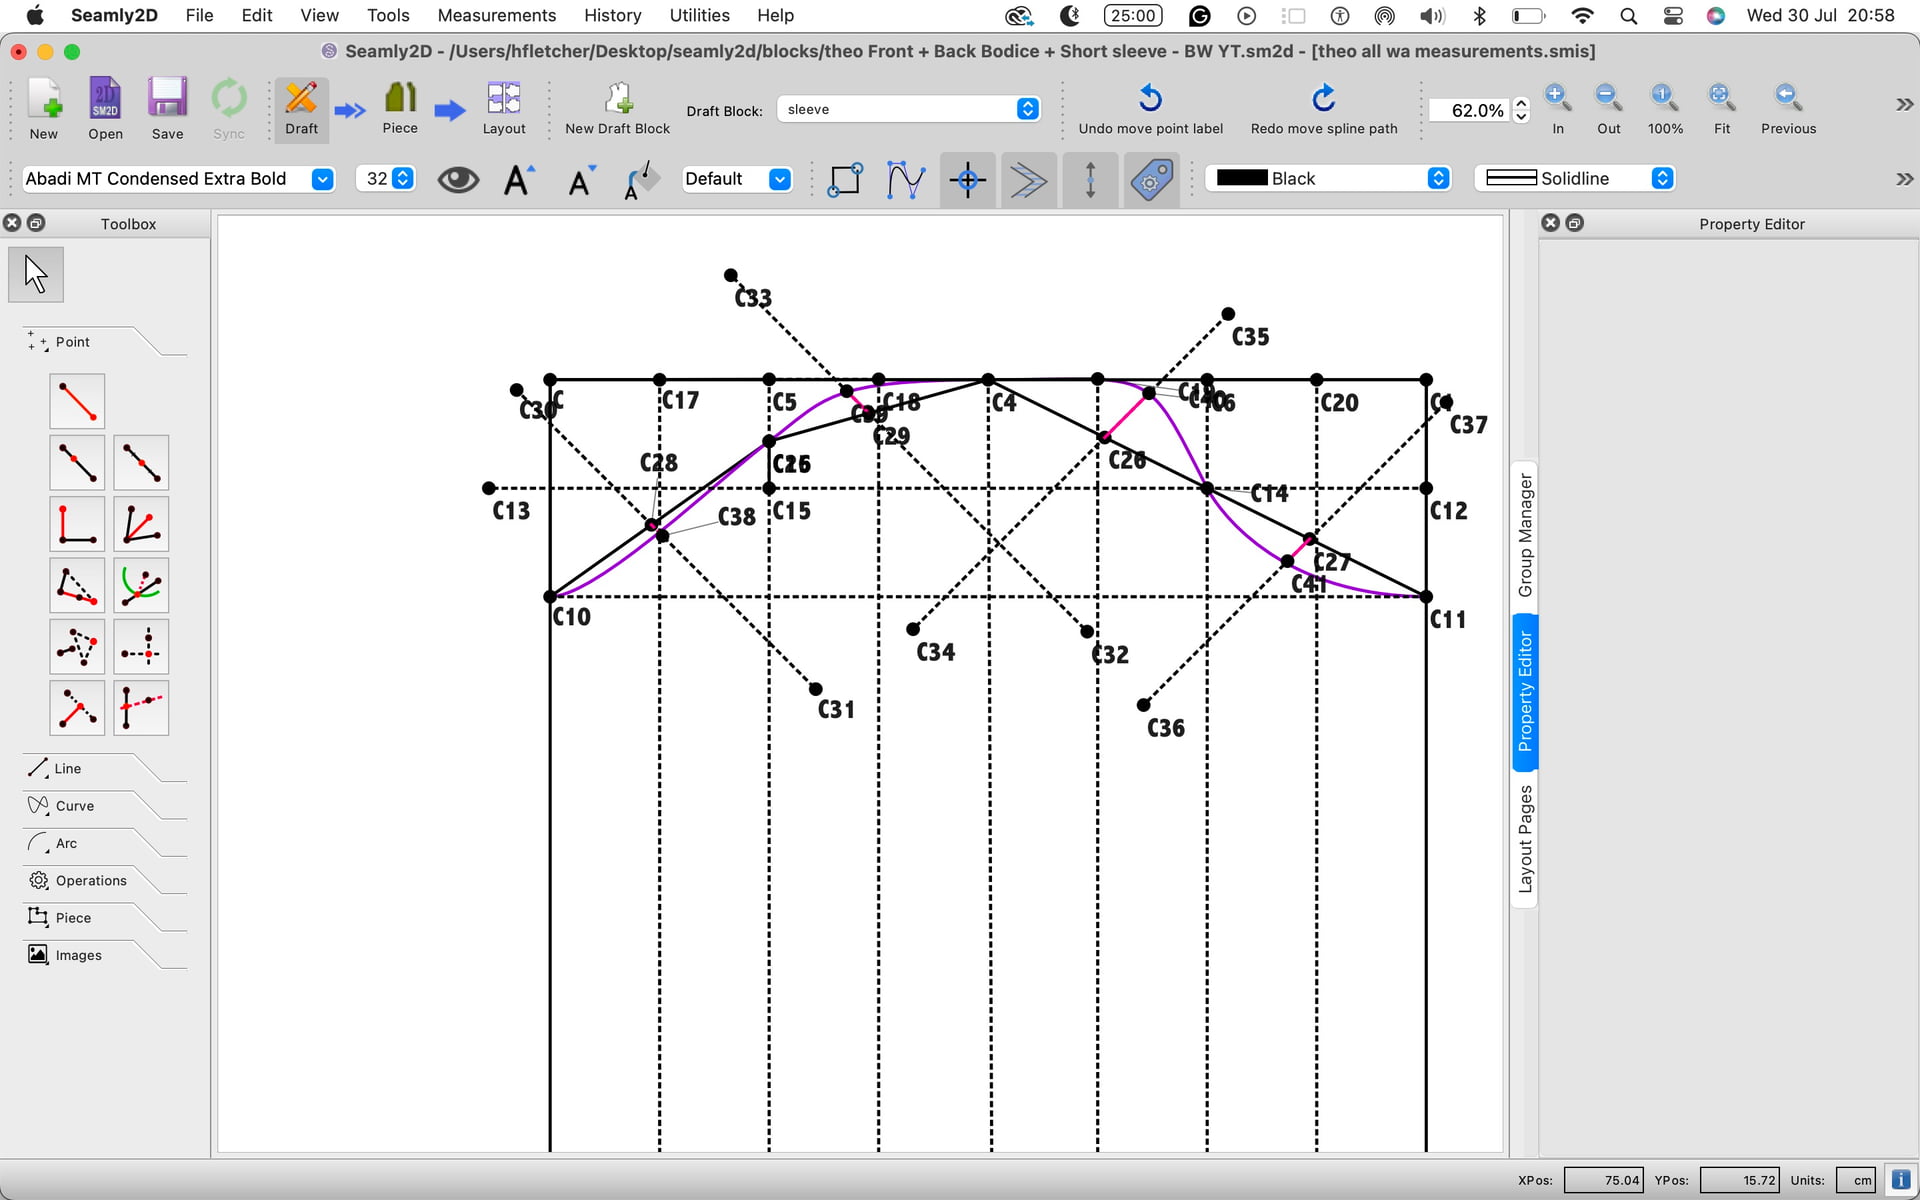
How is this bodice block and sleeve pattern looking? Here is the Seamly2D file or see imgs attached:
theo Front + Back Bodice + Short sleeve - BW YT.sm2d (19.3 KB)
2 Likes
Don’t know… need the measurement file to open.
1 Like
understood, here is the measurements file:
theo all wa measurements.smis (1.9 KB)
2 Likes
Here’s a couple bits of advice off the top of my head:
-
Try to plan out ahead of time the order in whoch tools need tobe drawn. I’ll explain below.
-
Try to draw you curves going clockwise so you don’t have to unnecessarily reverse them. For ex: This curve is going CCW
- Make use of different line type attributes to make it easier to read a pattern. For ex: I made the contsruction lines 70mm and Dotted"
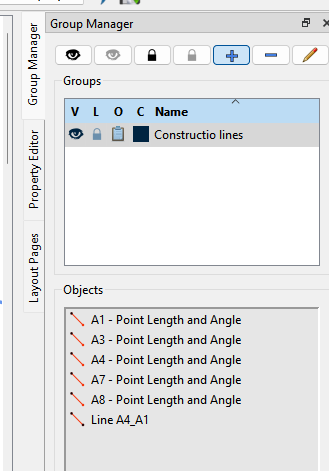
- Make use of the Groups. It will allow you to hide parts of the draft to make it easier to work with a pattern. I put those same construction lines in a Group:

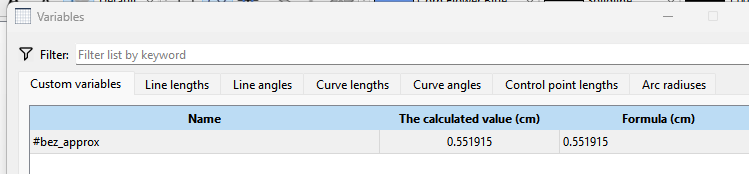
- Formulize the curves. If you want cuves in a pattern to resize correctly the Control Points need to be formulized. My technique is to use a bezier curve approximation constant (0.551915) which I make a custom variable for:
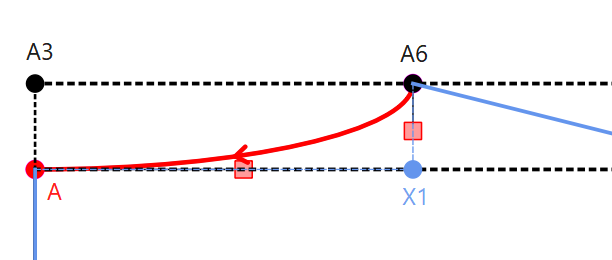
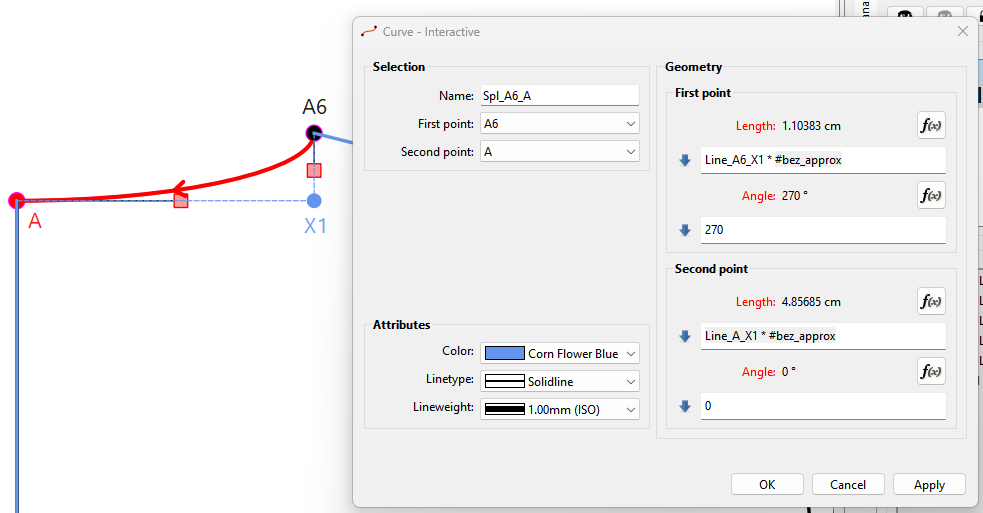
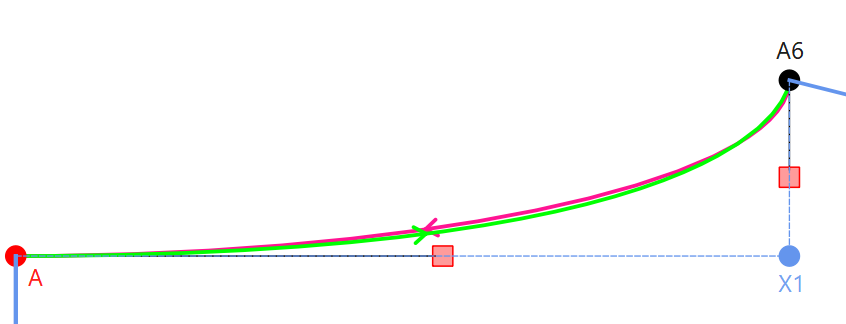
You need a scaffold to get a width and height for the bounding box of the curve. This is where the preplanning comes into play. To illustrate this I had to use the History trick to insert a point into the pattern so it could be used with the curves CP’s. Using the Point - Intersect XY tool I added point X1. Now for the CP point lengrhs I used the width and height values of the box sides to calculate the length of the control points. For CP1 it’s the the length Line_A6_X1 times the #bez_approx constant, and for CP2 the lenght is Line_A_X1 * #bez_approx. Also the angles match the angles of the sides of the box. In this case 270 and 0. This will now produce smooth curves and will rwsize when you chnage measurements.
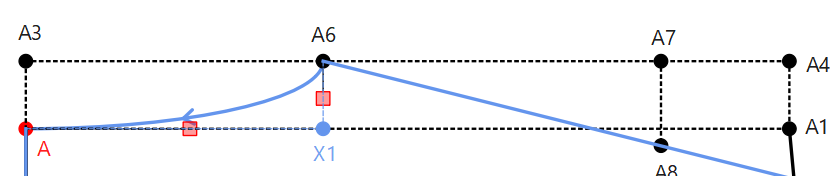
OR - An easier option is to just use the Curve - Fixed:
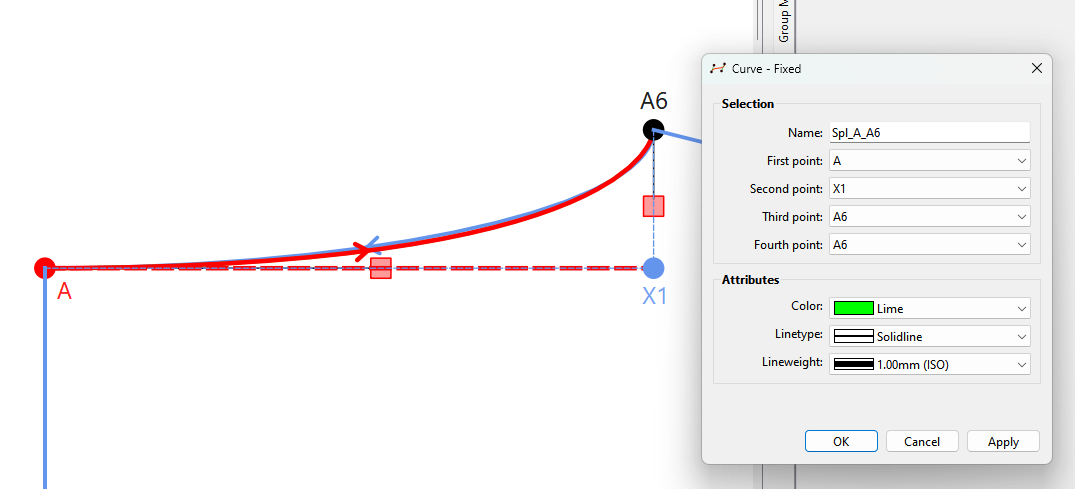
As you can see they both produce nearly identical results… with the exception the Fixed curve is going CW.
That’s all I got for now. Keep up the good work ![]()
2 Likes
Wow, thank you so so much for such a thorough reply to my query. I appreciate your attentiveness greatly, your advice is such a big help! ![]()
I will be referring back to this in order to help me utilise the software more effectively. I can definitely help my patterns appear less cluttered. Also, the curve tool tip is definitely needed!
Will be testing all of these tips out very soon. Thank you!
2 Likes
Your’re welcome. It gave me a chance to test out the Qt6 build some more before releasing it into the wild. ![]()
3 Likes