I am trying to find a way to draw a perpendicular line that allows me to find a point where it meets a curve
On my image, what I need is to draw a an armhole and sleeve block, I can draw it yes, but I need both to be parametric, so according to the book I am following, it requires me draw a line (Shoulder to upper arm measurement) but the location should be going from the armpit line (B9_B26) and up… the problem is that the up should be going to the point where it touches the lines of the armhole (curve going from B26 to B38 and up) and I am struggling to find a way to find that point, I can eyeball it yes, but I need this to be a parametric pattern at the end, so I need to find a way to tell the program to do this, all the tutorials I have found online teach you how to draw the armhole but none of them is parametric and I am stuck here for the last four days. Someone can help me please?
A similar question came up a few years back: Creating point perpendicular to the tangent of a curve?
I feel like there should be a solution using the point on curve tool, but I’ve only hit inconsistent approximations

'I assume the instructions said something along the liners “place square on B26-B29 and draw a line touching the armhole creating a tangent point”.
Which we can’t do in Seamly.
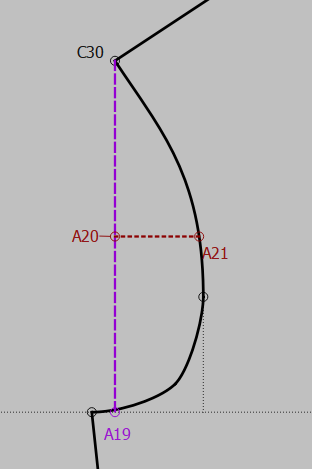
My question is what purpose does the point on the armhole curve? Is it supposed to be approximately be 1/2 the armhole depth? Thats what I did as an example… I used the intersect line and perp,midpoint, and intersect curves an axis to locate point A21:
Thing is I find it odd that the armhole is drawn first… usually we locate the point first (which is like 1/2 of across the front width), then draw the curve through it.
I thought of that too. Question is what proportion of the full length is the point along the curve? If one were to draft that part of the armhole on paper you could figure that out.
Something to do with the length of the curve, the length of the control points, & the angles of the control points. As long as the curve is a fairly consistent shape, it shouldn’t be too hard to get a good approximation by a relation between the control point lengths. But that’s a big IF.
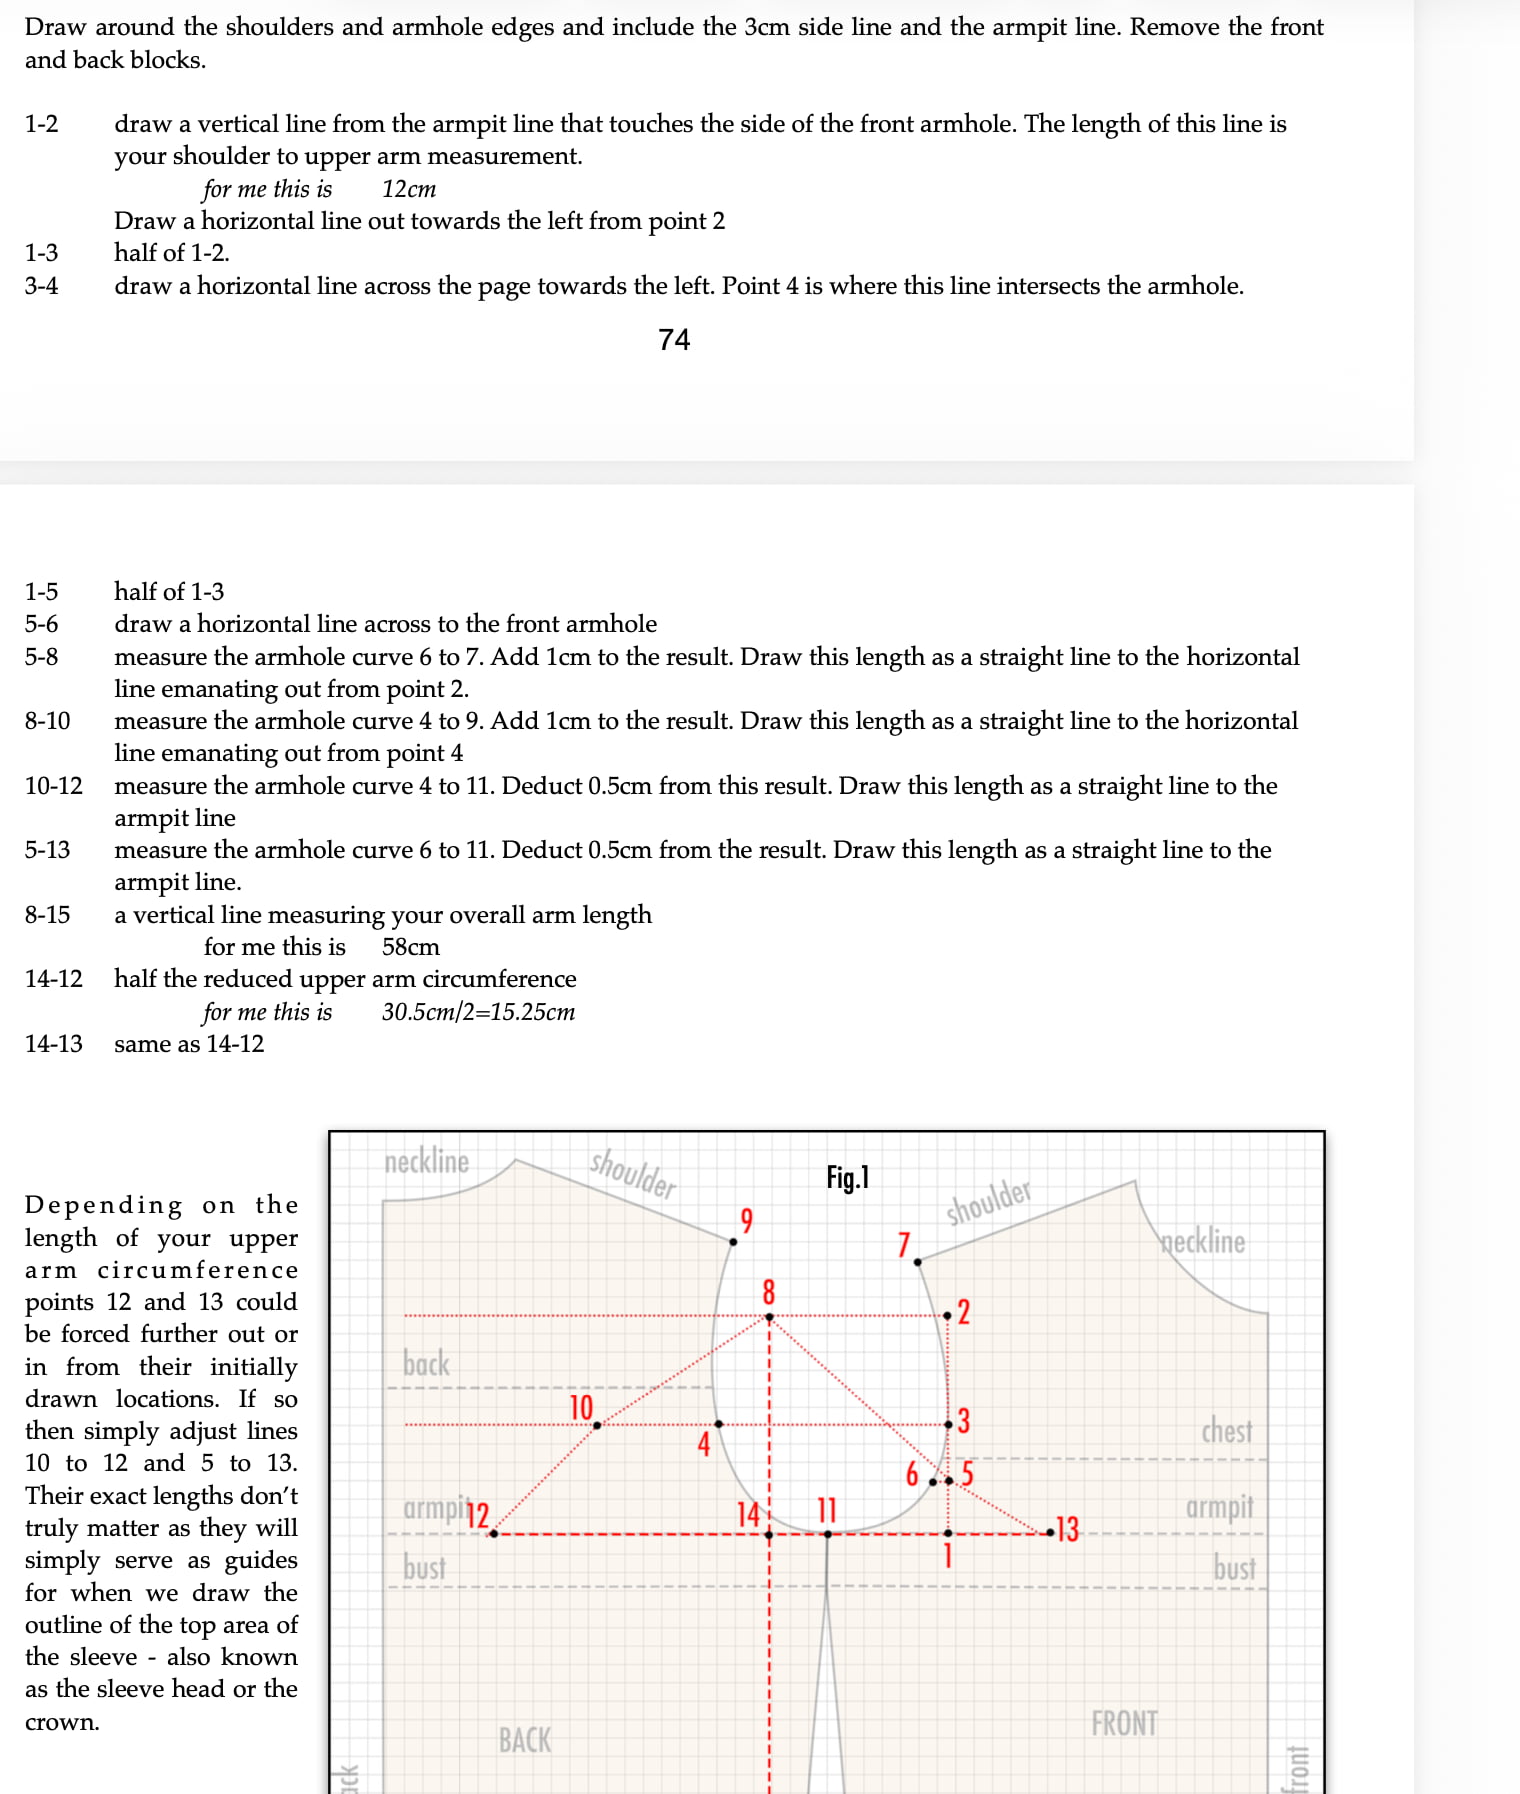

Ok. I don’t have your pattern and I don’t feel like drawing it so bear with me using a similar pattern.
-
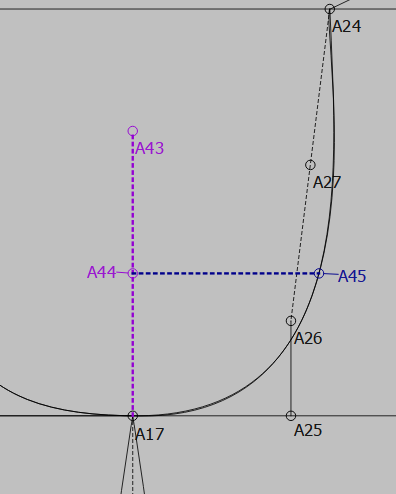
- Draw a line 1-2 (in this case Line_A17_A43) @90degs up at the length of the shoulder to upper arm measurement (12cm).
-
- Use the midpont tool and create A44.
-
- Use the Point - Intersect Curve and Axis to create point A45 (#3)
You now have your point A45 (#3) on the armhole curve as if you found it by drawing a vertical line that “touches” the armhole curve… or more or less as said in 1st reply.
From here you can extend up and down to create points 1, 2, and 5.
Hello, @Maoa2121
The problem is that you need to place point 1 correctly. When you drew the front armhole curve, was there anything in the instructions that said you must go past the across chest point by any amount?
If there isn’t, I’d place point 3 first as a point on the curve at half of the curve length. (I counted the blocks on the curve from point 3 to the armpit and the shoulder and came up with 9 blocks either side of the curve.) Once you have point 3, you can place point 1 & point 2.
PS. Please tell me which pattern making book you’re using 
Right… except 1-2 is located by drafting with pencil and paper by drawing AFTER the armhole is drawn, by “touching” the curve… then 1/2’ng it to get #3. We have no way to do that in Seamly. We have to find #3 first, then locate #1 and #2, then all the rest.
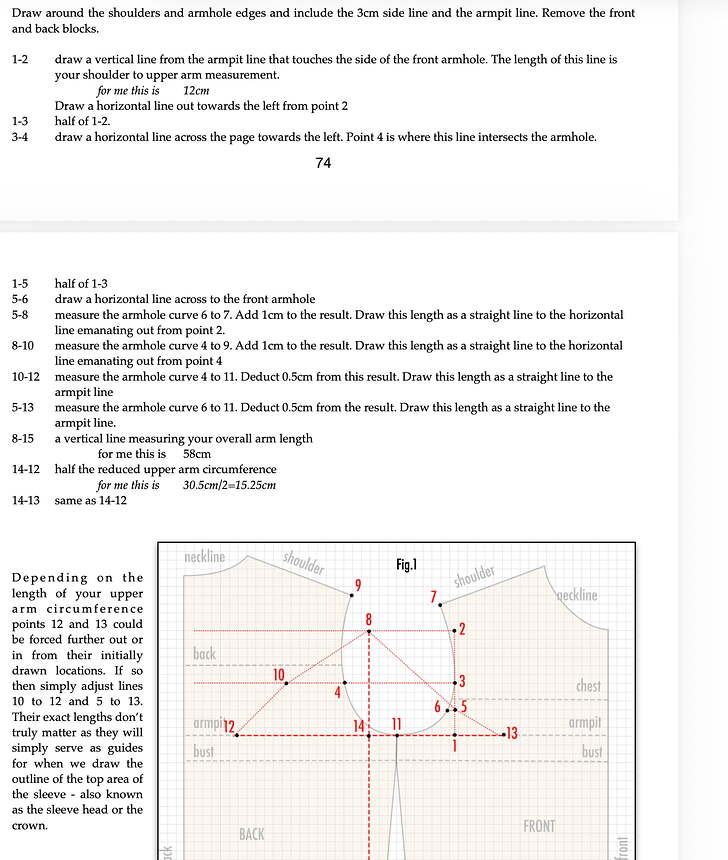
Indie Test.sm2d (10.5 KB)
I did a rough & dirty draft of the bodice according to the blocks in the pattern and then did the instructions on top of my R&D bodice and I think it turns out pretty well. So if you follow what I have onto your correctly drafted pattern, I think you’ll be ok.
Download the image and the pattern into the same folder (preferably a separate folder to where you normally save things so that you can delete it easily later) and then open the pattern and when asked for the image, point to the same folder and the image inside it. After that, you can see the exact steps that I took to draft the sleeve skeleton.