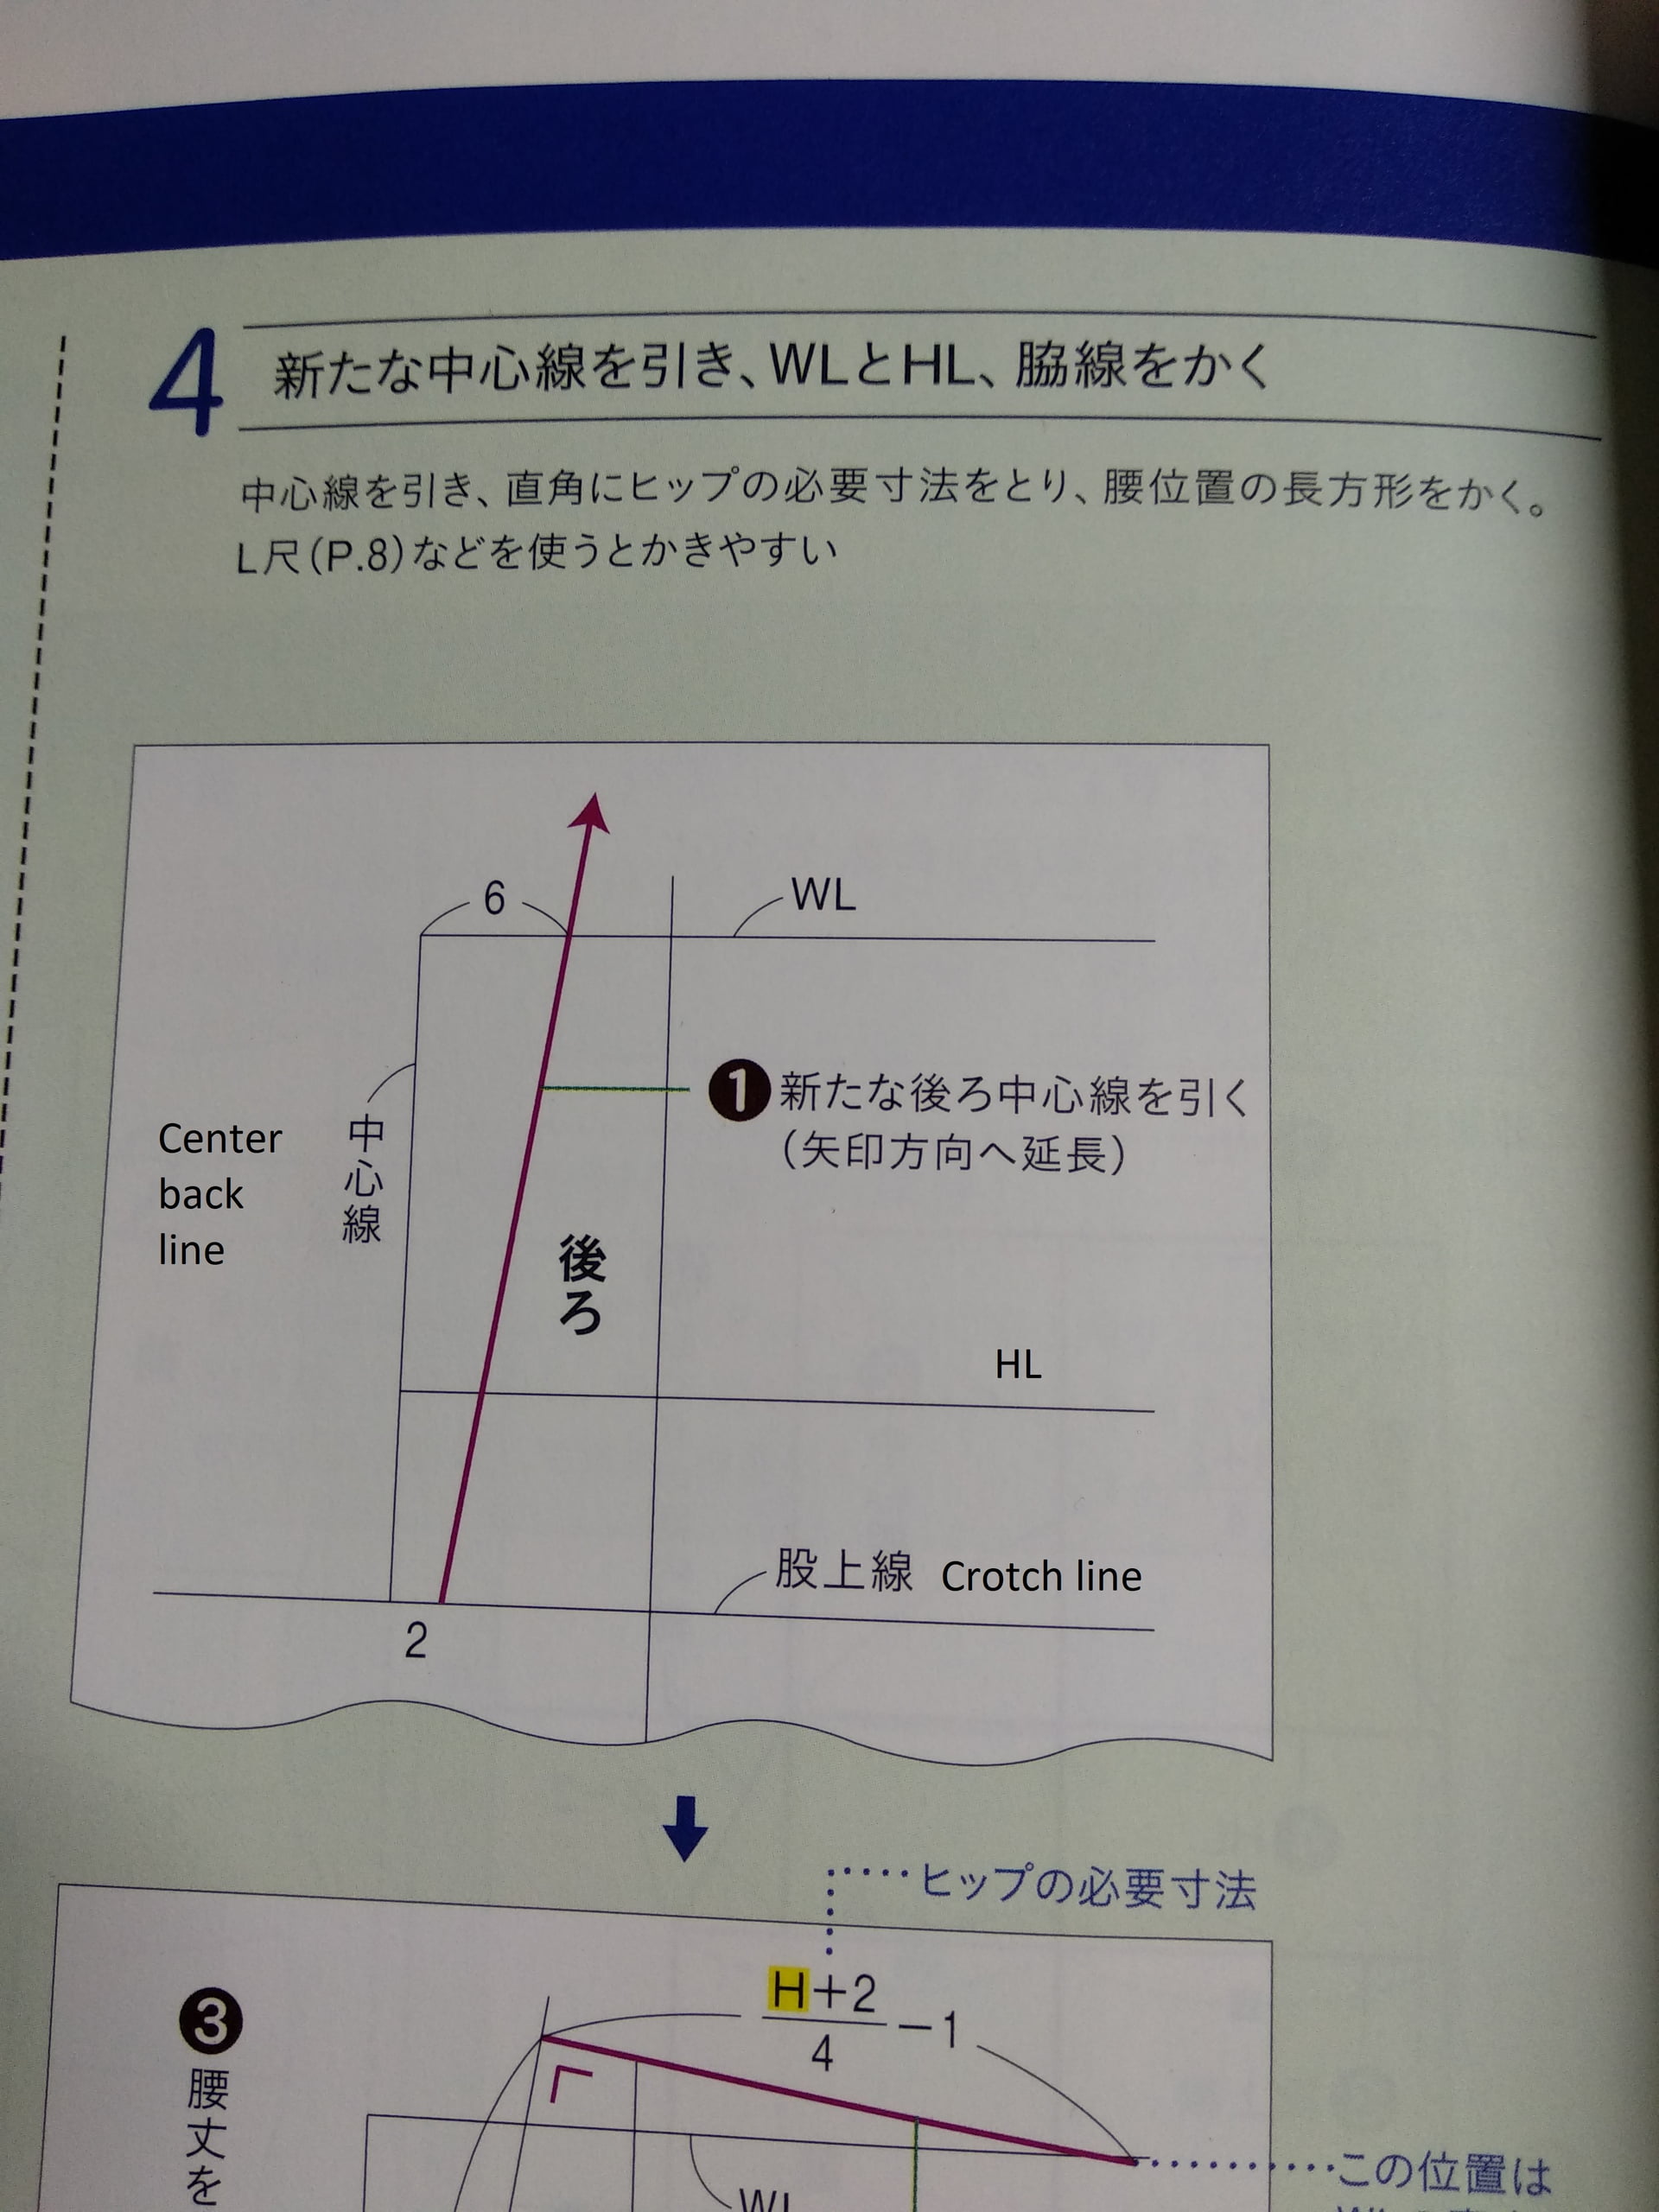
A new Center back line (purple arrow) is drawn by shifting 6cm to the right at the Waist Line (WL) and 2cm right at the Crotch line, connecting these two points.
This next step to draw a new Hip Line (HL) is where I’m not sure how to do on Seamly.
Say my hip line length [(H+2/4)-1] is to be 26.2.
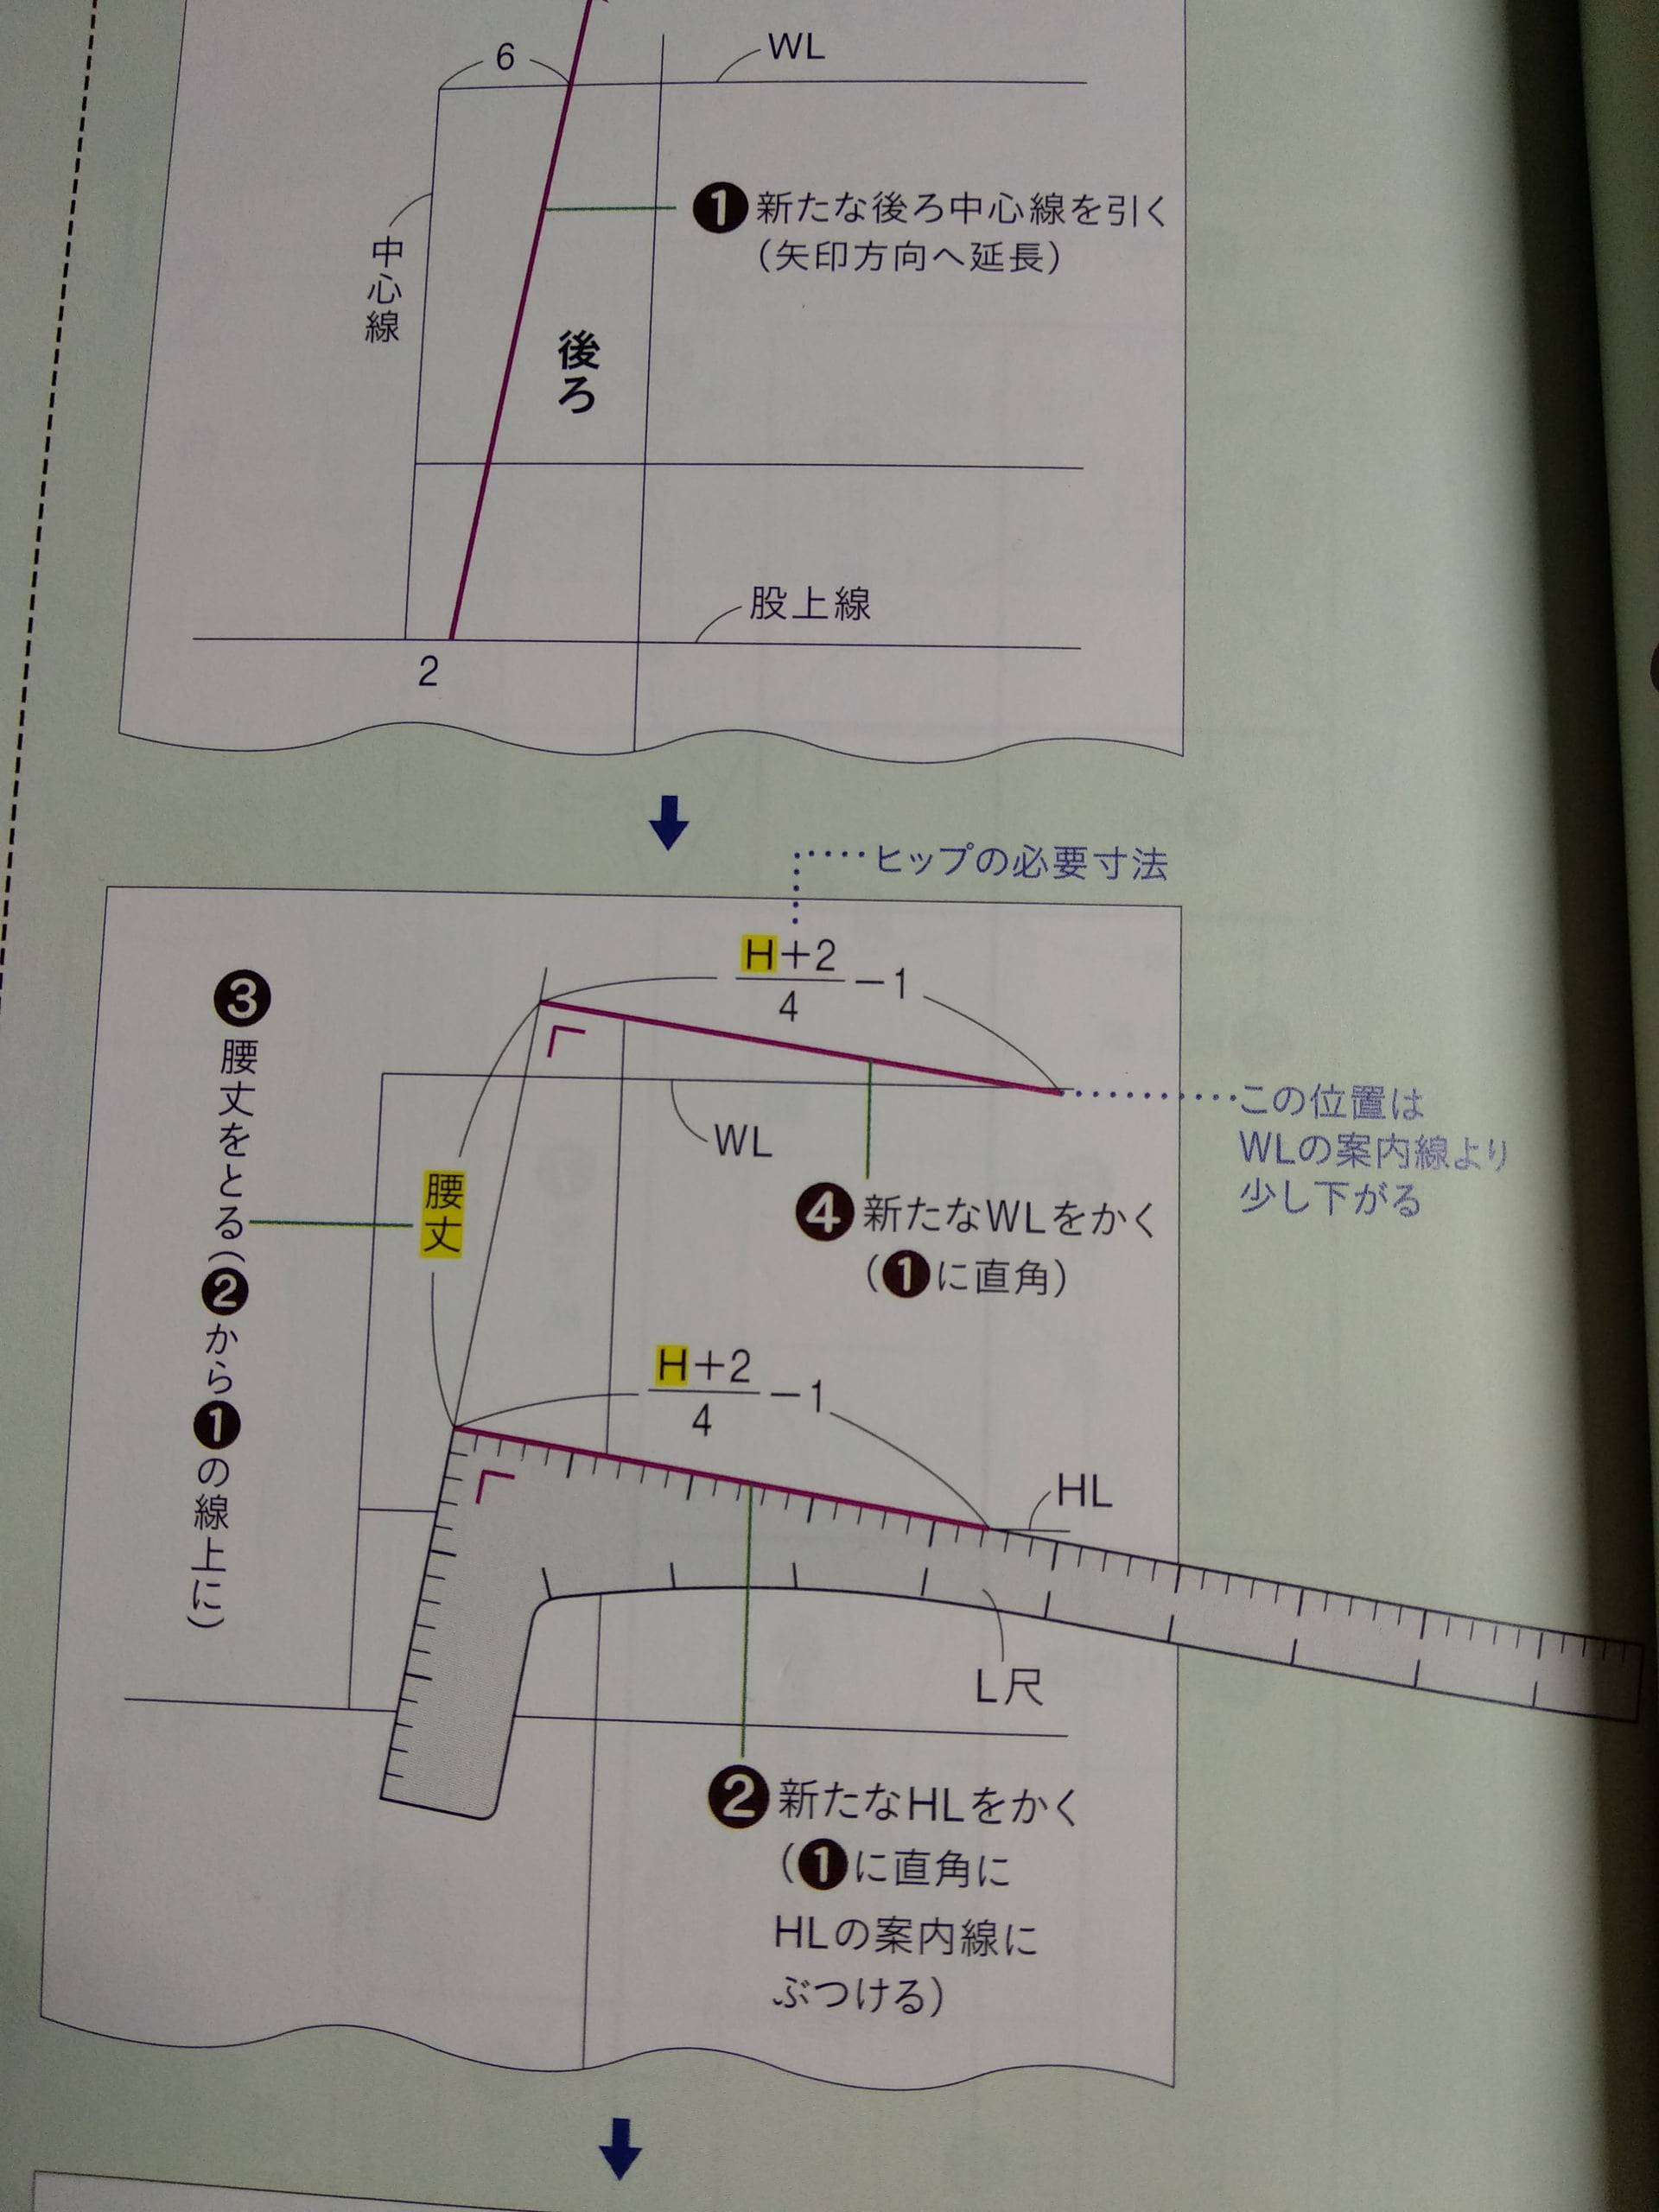
On paper, I’m to use an L ruler to draw a perpendicular line from somewhere along the Center back, intersecting somewhere along HL with a length of 26.2.
How do I do this on Seamly when I have 2 unknown positions?
Ummm… It is possible. But first I need to learn how to read Chinese (I think).
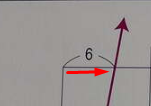
It seems to me that there is a fixed distance of 6 here, but I don’t know if it’s 6cm or what:
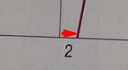
And then, there’s a 2 that could also be 2cm down here:
Once you have this line established, you can add a node on the top line, using the Intersect Arc and Line tool to place a node on the waist line at the correct distance.
A tip is to place an arc from a known point and intersect the arc to position the node.
If you send me your files, I can probably help you a little better, but I’ve mocked up an example of how I read the picture
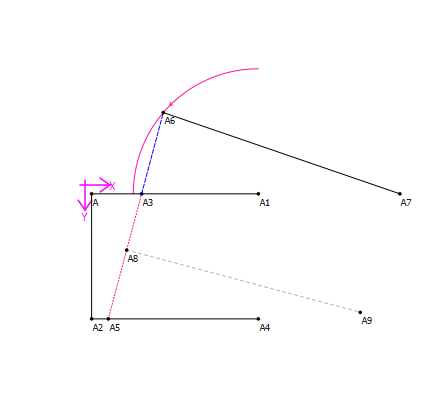
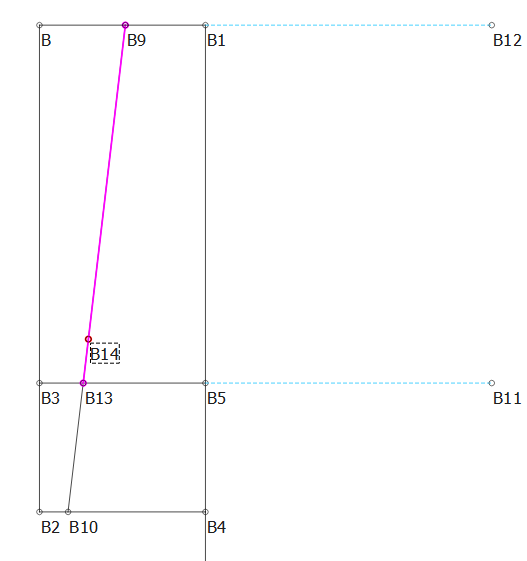
The original Center back line (中心線) [Line B to B2 in my draft] is a vertical perpendicular line from the crotch line (股上線) [Line B2 to B4]. We’re supposed to draw a New Center back line which will be slanted. We do this by first marking 2cm to the right on the crotch line [B10], and 6cm right on the WL [B9] from the original center back line.
Then we connect these two points B10 to B9, extending to above the WL [Line B to B12] to create the new center back line.
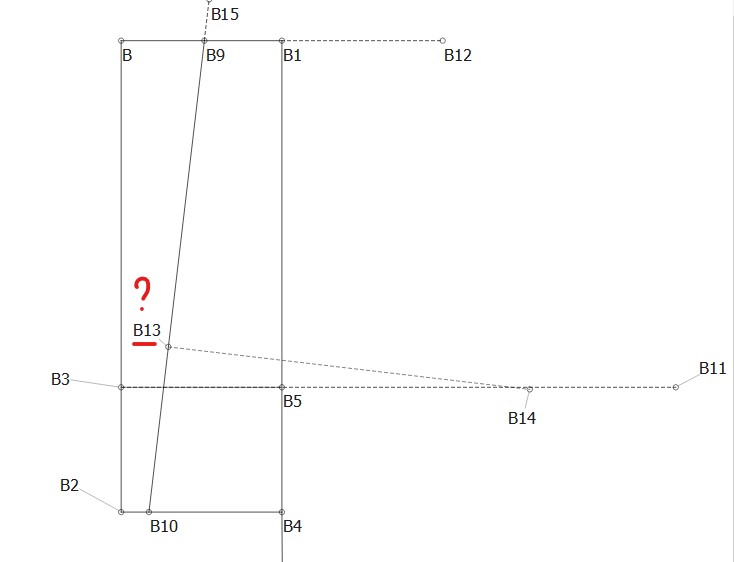
Next, is to draw the new Hip line (HL). The original HL [Line B3 to B11] is perpendicular to the center back line. Since our new center back line is at a slant, we need to draw a new HL perpendicular to this slanted line.
The length of this line is the formula ((Hip+2) /4) -1, which in my case is 26.2cm.
On paper, we’re supposed to use the L ruler, place the base along the new center back line [Line B10 to B9] slightly above the original HL [Line B3 to B11], slide it along the center back line, until we find a perpendicular intersection point along the original HL at 26.2cm.
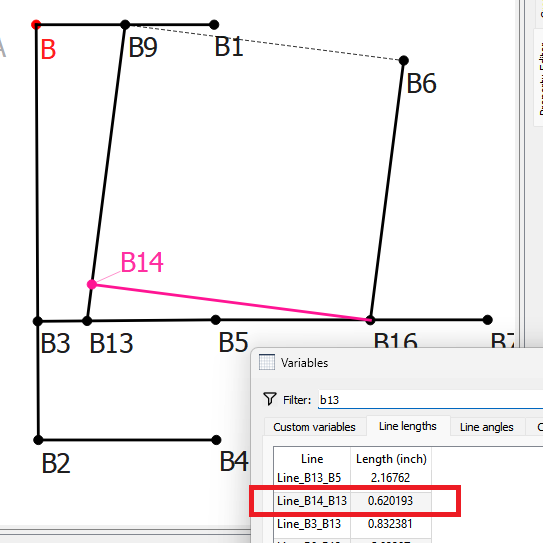
For demonstration purposes, Line B13 to B14 is the supposed new HL. But because the point B13 is not a fixed distance from B10, I do not know how to actually find this point on Seamly without the L ruler.
Two of the lengths were unknown, but all of the angles were known!
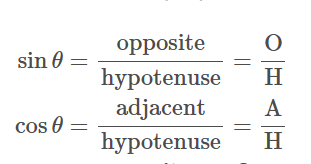
So I just had to look up the trigonometric formula for finding the short side of a right triangle with known angles (many thanks to Triangle Calculator)
I hope what I did is obvious enough to replicate easily!
I have to study up again on this trigonometry but your solution seems legit!
Could you clarify something for me though? I’m not sure where exactly is Angle B9_B10. Is it the blue angle?
No. It’s the angle at B9, starting at 0 ( which is also 360) being the positive X-Axis, going counter clockwise. Which is 180 deg difference than if the line started at B10 instead of B9. Just looking at the diagram it appears to be around 250-260 degs.
That being said… it’s common that you may need the angle as if the line was reversed, so you can just add or subtract 180 from the line angle in the formula.
Of course, that’s great for us understanding how angles work in this context, but not very precise. So I used the angle of B14 B13 B16 by the formula AngleLine_B9_B10-180, & for the angle of B13 B16 B14 I used: 90-(AngleLine_B9_B10-180), since 180-90=90
I still don’t understand… where is the decimal point shifting?
If anything it may be more accurate to use 180.0 or 90.0 to force the type cast to real vs int… but I’d have to check if the math parser works the way it would with c++.
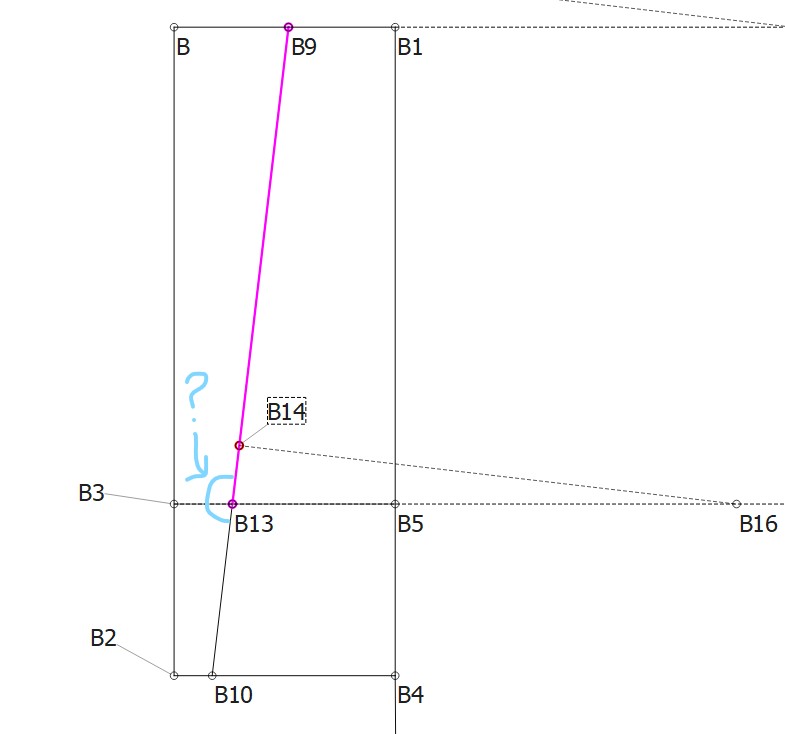
Had I read the original post more closely I’d have a better answer… just use the Point - Intersect Line and Perpendicuar to find point B13.
Select Points B10 and B9 then point B14… it will create point B13 with the line B13_B14 perpendicular to B10_B9
No worries, I was just lazy to write the decimals in my screenshot, but on Seamly everything is precise to their decimals. Pneumarian’s solution worked fine!
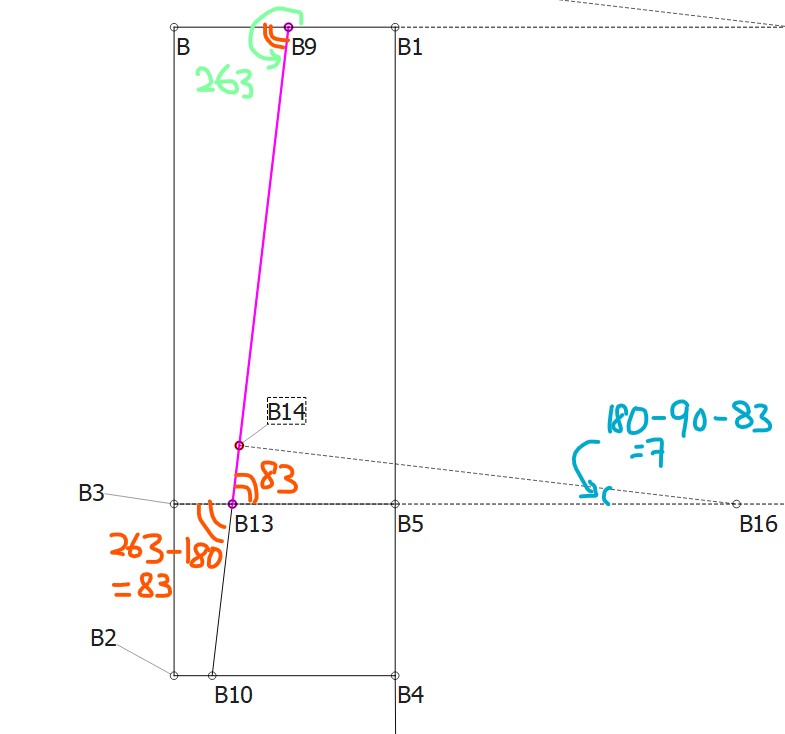
For documentation sake and my future self, I did a more roundabout method with cosD and sinD (since that’s how my brain understood it ). Here are the steps:
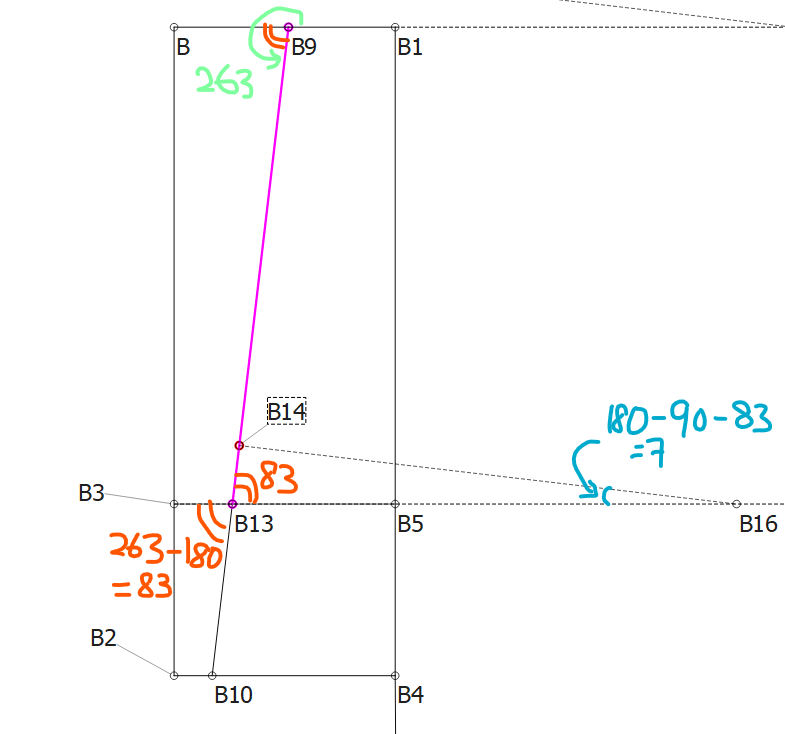
The task is to find the length of Line_B13_B14.
Angle B9_B10 (green) is known. The angle of B13_B10 is the same. Therefore, the angle of B13_B9 is 263-180=83.
B13_B14_B16 forms a right angle triangle. The sum of angles in any triangle is 180. So the blue angle is 180-90-83=7.
opposite = length B13_B14 [call this B]
hypotenuse = length B13_B16 [call this H]
adjacent = length B14_B16 [given as (hip+2)/4-1]
Since adjacent is known (26.2 for this example), I find H first:
cos 7 = 26.2 / H,

H = 26.4
Lastly to find B (Line_B13_B14):
sin 7 = B / 26.4
B = 26.4 * sin 7
B = 3.2
In Seamly, for point B14 I can turn the above calculations into the formula:
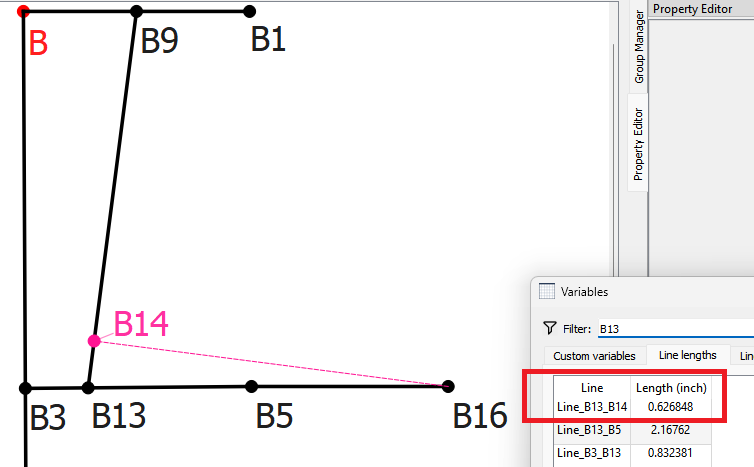
Right… use the Point - Intersect line and perpendicular tool (using points B16, B13 & B9) like I said to create point B14, and you have access to the length variable of Line_B13_B14… there’s no need for any math, no formula, no 180 or 90, and no precision issue. KISS principle. It’s literally 4 mouse clicks.
There might be a little misunderstanding in my initial problem. Line B14_B16 is what we’re supposed to draw on paper using an L ruler. We only have the length of it, but we do not know where point B14 sits on B9_B13, nor where B16 sits on B13_B5. So technically, point B16 does not exist until the final step.
Your solution would have worked if B16 is plotted in the first place.
Hence why we need to find point B14 first. Anyway no worries! The solution works fine.
Sorry if there was any confusion in my initial post! Translating analogue instructions to digital is tricky
Ok… so it just takes a few more steps, but still without any trig math.
First use the Point on Perpendicular tool from B9 to B3 to establish with length of ((H+2)/4)-1 to establish B6. Then using the Point - Intersect Line and Axis tool with the line of B3_B7 and point B6 with an axis angle equal to Line_B13_B9 to establish point B16. Then repeat with same tool with Line_B13_B9 and point B16 with axis angle equalt to Line_B9_B6 to create point B14… and thus line length Line_B14_B13. Trust me… unless the pattern system calls for using trig math to find some point, chances are you won’t have to use trig to find a point in Seamly2D. Can you do it with trig… sure, but then surely you have to think AND you’re going to introduce more “precision” errors… not that errors of 1000ths of an inch will matter in clothing.
BTW… I assume too, that you would then extend LIne_B13_B9 by the length of Line_B13_B14 to get the point above the (extended) top line B_B1… and then a line parallel ro LineB9_B6 to get your other point.