That’s not a plotter… it’s an inkjet. For the adventuresome, I’m sure the ink is still available, and you could refill your own. I do that wth my Cannon printers, where a new cartidge is about $40 each x 6… and about 10 cents to refill a cartidge. That’s how obsurd inkjet costs are.
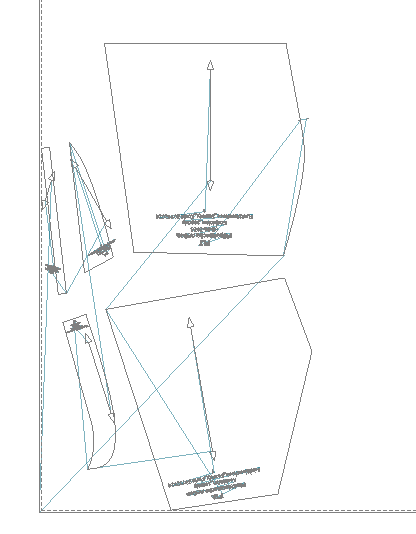
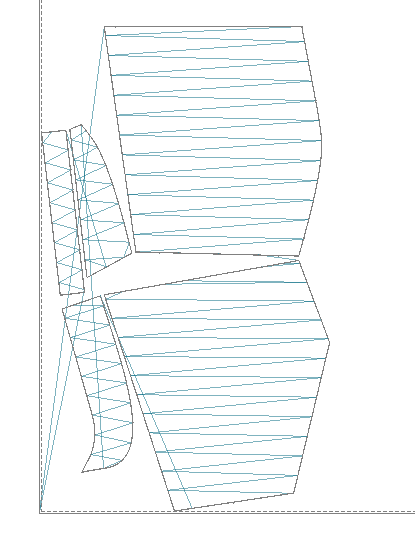
Yes… I’m not sure if this is a function of the cutter software or in the cutter / plotter driver itself? You can change the line color / type in Seamly… this is precisley why I added colors to the layout exports. I was never able to go further with investigating plotting with Seamly since we lost everything in the fire.
the problem is not the ink, but that the printhead dries out and I could not revive any of them. Even the few “new” ones are now already dried out if you open the original package, so I gave up.
And I want to let the plotter cut it, as cutting out the pattern parts with a scissor is also a pain.
Lets see, will get this machine in some days and will try it out then.
Yes & no to this question I used to do a lot of paper work making decor for wedding receptions/invitations/etc. & cake shops (Seamly was very handy in creating the layouts) that involved both cutting out, perforating and pen work, which involves designing something in an external program, importing into Silhouette and then either printing from Silhouette, which printed registration marks, or change the cutting head to a pen of various colours, replacing the cutting head & cutting the perforations first and then the outlines.
The Silhouette Cameo only takes 13" wide paper and works with a cutting mat or 13" x 6 yard length of sticky backed paper/vinyl on a waxy backing. It’s really just a tool for scrapbookers & hobbyists and you need a special cutting head and mat to cut fabric.
No, it won’t unless you have the paper on some sort of sticky mat, because the cut pieces will move, while the cutter is moving the paper in all directions, and jam things up. You need something to keep the pieces in one place while you cut, so the perforations will do this.
I think that it would be best to first do all of the pen work (labels & internal paths) and then do the perforations in a 2nd step. It should be possible to put the pen work into one layer and the outer lines into another - hide the line layer while doing the pen and then hide the pen layer while doing the lines.
I think directly cutting fabric is a nice idea, but not possible with those hobby machines neither the cheap nor the expensive ones.
Your way of doing it is exactly how I plan this, first step draw everything, and cut in the second step.
The plotter I bought has 870mm (~34inch) maximum paper width, that should be fine for normal patterns. If it cuts similar to the Summa, it is very easy to extract the pattern pieces and you end up with a very clear, decent edge.
I have not yet used my 34inch wide Vevor for pattern plotting. However, using it with Inkcut, I did plot out a scrolling desk calendar (if anyone wants a file for June 2025 – June 27, 2026 I’d be happy to share.) It’s been too long since I used it, my house being mis-arranged, so I don’t remember exactly, but I had to flip or rotate the file in Inkcut for it to plot properly. I think it was basically telling it to print out horizontally instead of vertically?
If I’d realized that the plotting width was only 30inches, I probably would have settled for 32inch wide paper instead of seeking out 34inch wide.
Thanks for your insights, very curious how well the whole setup will work. And if flipping or rotating is still needed, as this may have been a bug in Inkcut?
We’ll see.
Can you tell something about the process of setting the origin?
Does it persist over several prints? So can you plot a first file with a pen, then switch to a knife and then plot a second file with the same origin?
Yup. I can relate. With my Canon printers - that I use to print directy on CD / DVD - if I don’t use the printers for awhile the printheads tend to clog and I have to remove them and wash them out. Luckliy they have removeable printheads so I can do that.
In any case… there’s no comparision between printing and plotting. Plotting is WAY faster.
On the other hand cutting is a different story. Cutting vinyl is relatively simple as the vinyl has a paper backing, and you set the cut depth to just cut through the vinyl. There is no paper backing to fabric. A roll type cutter is not going to be able to cut fabric very well or paper for that matter. On the other hand we use to have a flat bed cutter that was mainly designed for cutting tackle twill - like the numbers and letters on sports uniforms. In this case the cutting tray was covered with a double stick adhesive pad that you would stick the tackle twill down to so it doesn’t move. In other words the tray IS the backing. We would use it from time to time to cut other fabrics for appliques, but never any full garments. That in itself could be an adventure as each fabric comes with it’s own issues in setting the knife settings. There’s the amount of pressure, drag, dwell time, do you need to use a 30 or 45 deg blade, do you have to cut twice to get enough depth, etc etc. We would also use it to cut Rhinestone stencil material for making rhinestone appliques.
I definitely feel that you want to experiment with a small, asymmetrical plot to confirm how it’s behaving. I feel like [the origin point] tended to drift around a cm, but I could have just had my settings weird. I need to get my plotter back together with my computer, but there are still too many hurdles, (such as my cutting table covered with detritus) for them to overcome.
Yup. That’s kinda of what our flat be cutter was like… but it was probably 24" x 36".
Which with means with most vinyl cutters you have to swap the pen for the knife at the proper time. Most software that runs the cutter will be able to send stop / start commands… otherwise you have to manually do that. but not something that Seamly can do at the moment. In fact I we can’t directly plot from Seamly.
Kinda of like printing a landscape picture and not rotating it. Been there. In fact I’ve been taking my Seamly weekly notes on the back of recycled misprinted pages.
Can’t recall the last time I’ve heard “detritus” used. I can relate though… I use to have a 6x40 foot cutting table… which was made up of 4 foot sections. Most of the time the available space was about 2 1/2 section worth. The rest… covered with a fusing press, the flat bed cutter & XP desktop, tools, cutting machines, clamps, note books, a 2’x4’ clicker machine pad for punching on, rolls/ bolts of fabric, chalks, pens, pencils, fabric scraps… you name it. It was my desk… that everyone else got to use.
I believe so… but that could be cutter dependent. With the right software you should be able to create a single project with pen & cutter in 1, where you can designate a stop point, so you can swap pen to knife, and then start up again.
The problem you may run into, even if the origin is the same… if you’ve got 10 feet of paper, and the origin is at one end, you print all the way to the end of 10 feet… the paper has roll back to the beginning to then cut. If the machine is not tracking perfectly, the origin may be off when you start to then cut. Or for that matter the stacking order the pieces matters. You don’t want the 1st piece at one end, and the 2nd piece at the other end of 10 feet, with other pieces randomly in between… as the paper has to roll back and forth increasing the potential for creep.
And therein lies the rub…IF you can keep things lined up. Personally I would just plot and then cut the pattern pieces with a sharp utility knide and or rotary cutter on a very large Dritz or Olfa cutting mat. Usually in about 5-10 mins I could cut out a pattern which is probably less time I’d would spend mucking around trying to get the cutter to cut after plotting.
You can certainly manually adjust the origin to be in the same place. The main question is, will the creep be (close enough to) the same on both passes, or will it be too different?
I agree with Douglas, your best value will be in pen-plotting followed by manual blade-cutting – unless the geek-factor of making sure it’s aligned for both passes is valuable to you. I personally expect that the resistances with the blade vs the pen will throw the creep off a bit, & I intend to experiment with it at some point.
I say that I’d just cut it manually after experience tells me sometimes it’s just quicker to do it by hand than trying to get the machine to cooperate. And one of the big things with cutting paper - beleive it or not - is a sharp blade. Otherwise the blade can start tearing the paper instead of cutting.
Manual cut was always a pain, needed nearly an hour for a full pants pattern. So I definetly will try to cut. As said in the beginning, I tried it at a friend with a Summa D60 and it went really well, nice clear cut with even an old knive. So this will hopefully also be able with the cheapo Vevor.
Will keep you updated and make a Youtube tutorial once I am there (hopefully!).
Yikes… in an hour I could cut out a pants pattern, cut the fabric, and have the pants made. Most pants are going to have 8-10 pieces… front, back, waistband, fly, fly facing, back pocket, back pocket welt, side pocket, side pocket welt, and belt loops. The only pattern pieces you generally need to cut anew are the front and back. For the most part all the other pieces are the same, so you can share the fly, waistband, belt loops, and pocket pieces between patterns.
Again… the fastest way to cut paper patterns out is with a large cutting mat, a decent utilty knife, rototary cutter, a straightedge metal ruler, and preferably a French curve metal ruler. And you should have a pair of cheap shears for cutting paper (paper is very abrasive and will dull the edes quickly) - not just scissors. Shears lie flat on the table and are more ergonomic - literally less pain cutting with hears.
This is all scissors for me as German guy, but thank you for the vocabulary upgrade!
Not enough space for cutting with a knife, space is precious here in Munich, where every square meter building area costs a fortune.
The Vevor came today, so I am going to try around now…