Hello, I looked in the forum but didn’t find somethinng related but maybe I missed it.
I wonder if there’s a way to project the points, lines and curves of one draft block as interactible anchor points in another draft block.
Sometimes I wish I could make some derivations from a pattern but drafting on top of it very quickly becomes overcrowded and passed a certain point even I no longer understand what I did.
I wish I could open another draft block and say begin drawing from point A, or click an armpit curve and iterate from it. Is there a way to do that? I couldn’t figure it out.
Also I seen you can inform some XY coordinates to draft block 2 but couldn’t find the coordinates of any point in draft block 1, are they referenced somewhere ?
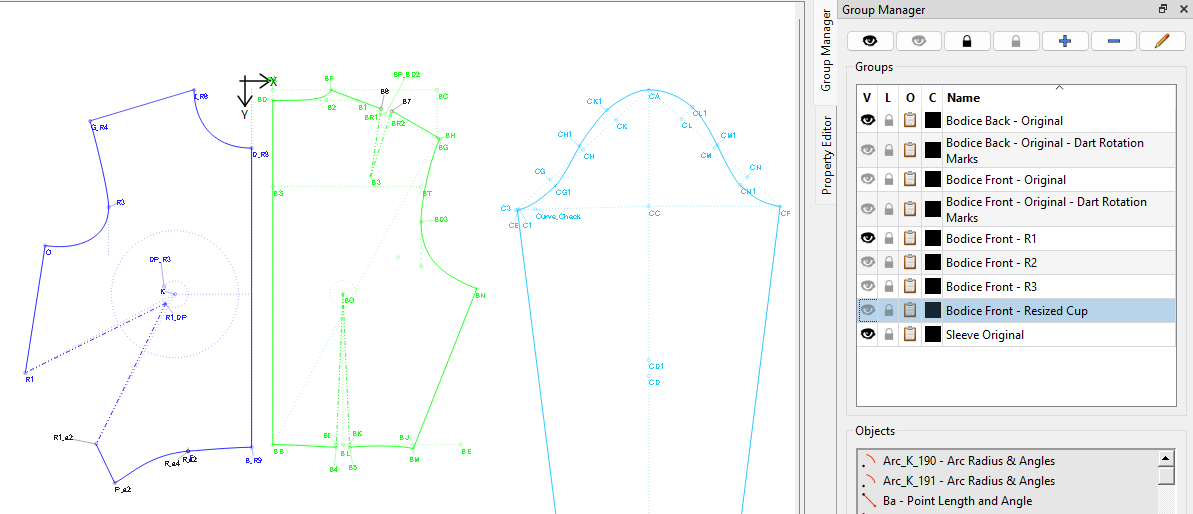
Here, you can see that by opening the eye on the one rotation and closing a few other eyes, I have a clear view of the bodice with a side (semi-French) dart, which wasn’t visible in the previous image:
I also like to upload a sketch of the design I’m working on, to refer to as I work, so that I don’t lose track of what needs to be done.
I always keep a clean basic sloper as the start of each new design with editable Variables for things like wearing and design ease built into the formulas, and I always only use 1 draft board for all of the different parts, which I separate with invisible lines, which I can also adjust, if I wish.
Everyone eventually developes their own methods of working and this is a pretty basic pattern, so I hope that it will give you some idea on how to develop your preferred method.
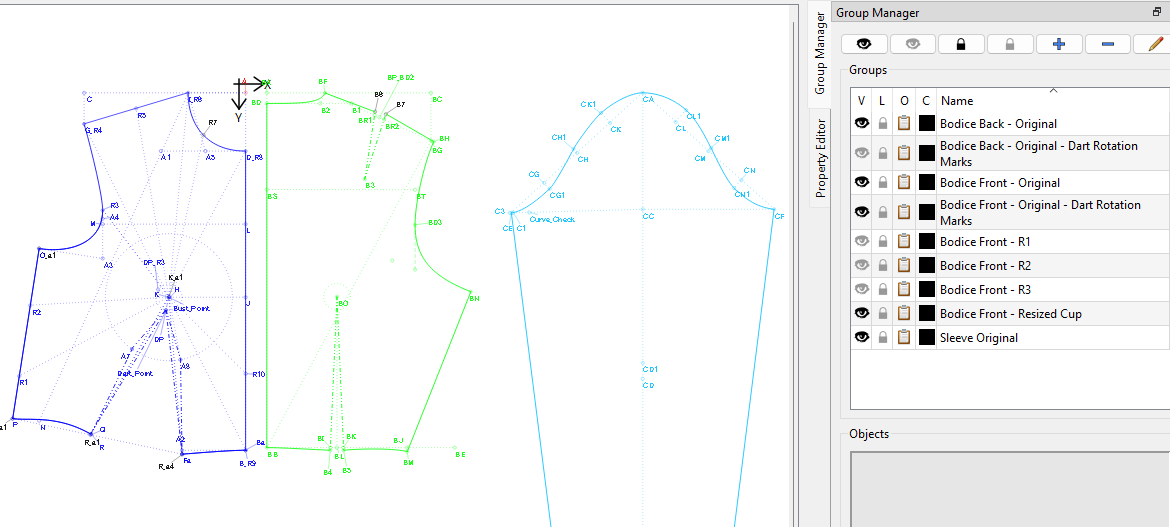
Edit: By keeping all blocks on 1 board, all of the points and curves are available at all times by just making the correct group visible and adding the necessary to the new group.
I’m also used to graphic design and layers. However, with Seamly, I put all of the basic scaffolding (supporting construction items) into a group and the final objects used in the pattern piece into another group. Each pattern piece has a numeric prefix to it’s name, so that all of the different piece groups are grouped together.
@Scholli has the groups down to a fine art and she makes very complex patterns all the time. She did add something to one of the topics about how she does it. I just can’t find it right now.
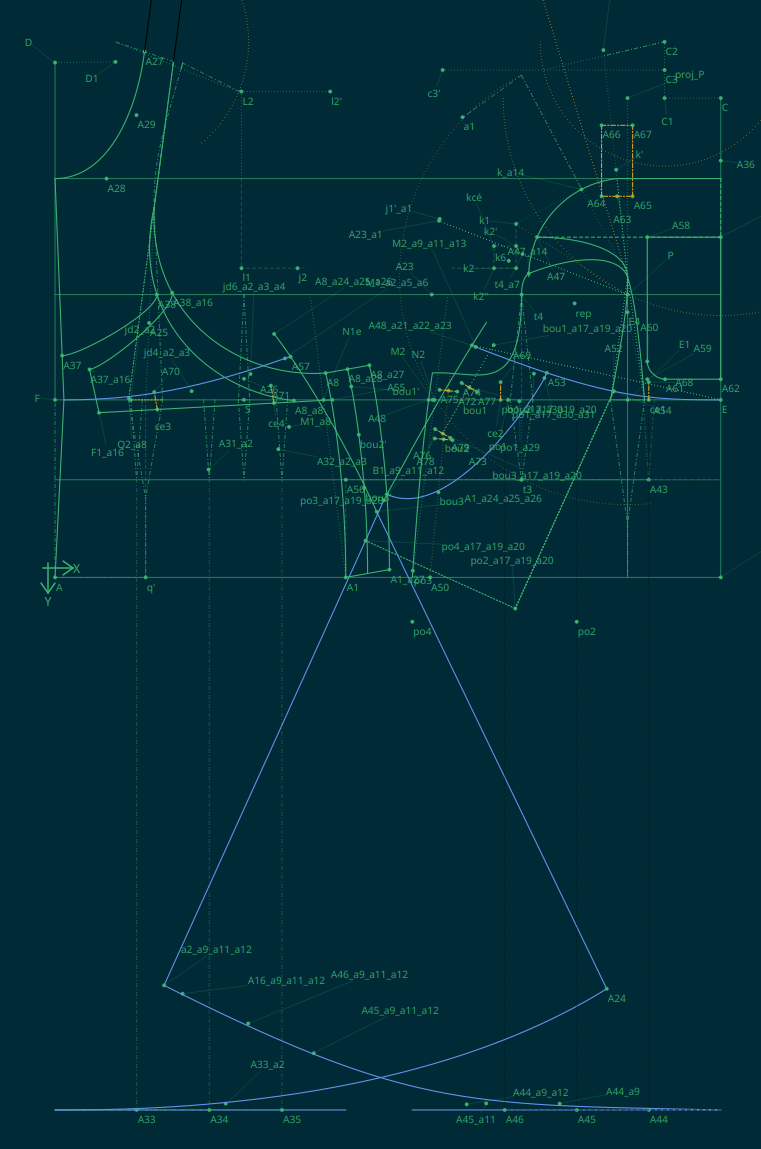
this is my block base and the one I work from… It’s probably super untidy but it works fine
the screenshot is an overall dress and it’s such a mess when there’s an error I don’t know where to begin
(I draw all my patterns so that I can change the measurements and it will adapt, so there’s a lot of errors in the process…)
It looks suspiciously like a star constellation map of some as yet unknown galaxy on that dark background.
I think the 2 skirts could happily reside in 1 group with the construction lines/points.
I’d put everything else into a general group and the Move the piece objects out of the general group into a Front or Back group. This way, you can close the eye on the skirt & general group & stand back to view you pattern pieces objectively without all the noise and decide if there’s a shorter route that can be used to achieve the same result.
The History is now searchable and also gives some info on an objects construction. This makes it much easier to find a point and to edit its details.
Something that I always try to avoid is having 2 objects in the same place. This also adds unnecessary noise and it’s difficult to decide which one to use and/or edit later. You can put these into a separate group to sort out which can go and which need to stay.
I think that’s all that I have for you on this image and keeping the groups down to a minimum. It’s beautifully constructed
Sometimes, it’s very good to create the whole base pattern again. You find better ways to do things with less noise laying around. However, one doesn’t always have the leasure to do this. So, it’s either housekeeping or live with it.
Agreed. I know I have some earlier patterns where I just left some tool objects as orphans rather than redrafting. One gets better here with cleaner patterns by learning when to create certain objects so they are available to other tools later on. Or you learn to not create redundant points as you pointed out previously. I’ve seen this when degugging other user patterns and it can be confusing in the piece path what points are used when there are 2 points at the same spot. Especially when those points are part of a curve.