Hi! I am new to seamly, and creating my first pattern piece I seem to not be able to add seam allowances. Whenever I click on the ‘seam allowance’ tool my piece looks dotted on the inside.
Any help will be apprecciated since I need to hand this in before friday! Thank you so much.
Just from what you’ve written, it seems that you may have some objects out of sequence.
When selecting the points and curves to create the pattern piece, you need to select them in a clock-wise direction, starting with a point and ending with a point.
When selecting curves, 1st select a point that’s attached to the curve and then the curve and then an end point also attached to the curve.
If you want to place a notched point on a curve, then you need to select the start point, the curve, the notch point, the curve again and then the end point before continuing with selecting the rest of the points.
You can open a pattern piece’s Property Editor and move objects around in the Path tab.
If you would like me to check through your pattern, you can send me your pattern and measurements files & I’ll happily have a look.
As @Grace has pointed out there’s probably something wrong in the Main path list of nodes. When the SA fill appears inside the pattern piece it indicates that something caused the piece to flip inside out - which is often a curve that has not been reversed to make it’s points go in a clockwise direction.
If you haven’t aleady figured out the issue, you can attach your pattern w/ any measurements we can have a look and tell you what needs to be fixed.
Thank you for welcoming me, and for your help, Grace!
When you point it out, another series of questions pops up:
how does one know the sequence of the objects?
For instance, in the pattern I’ve created I have points attached to the curves but they’re also points from lines. Do I need to select the start point of the line, then the end point, and then the curve?
Now, narrowing it down, starting and ending with a point, does it need to be the same point with which I started the selecting process?
You can’t select lines. The lines are automatically created between 2 points.
No, you can’t select a point twice, so it’s best to start on a point that has a point before it to end on.
The software has been updated to automatically reverse a curve, however, if you hold the Shift key while selecting it, the curve will be reversed.
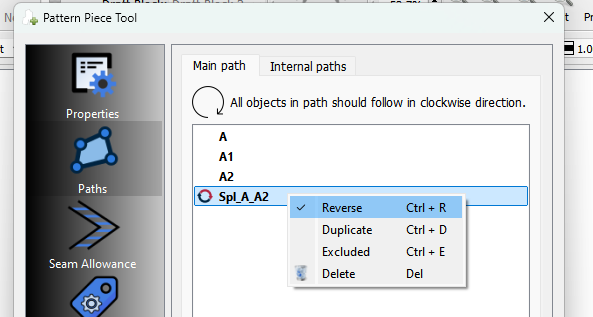
If you want to reverse a curve later on, after the pattern has been created, you can open the Property Editor, go to Paths, right-click on the curve and select Reverse to checkmark it (or to remove the checkmark).
In most cases. Also there are some edge cases where the app will reverse a curve when it shouldn’t, in which case you can hold the CTRL key when selecting to prevent the curve from reversing.
In the Main path list it will display the reverse icon if the curve has been reversed.
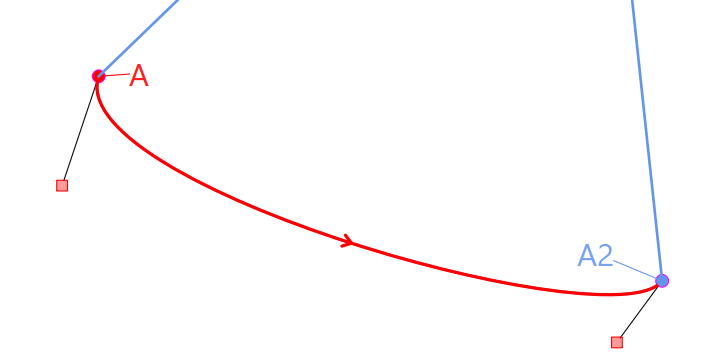
Whether a curve needs to be reversed depends on the context in which you are including the curve in a pattern piece. This piece using the same curve does not need to be reversed as it’s going clockwise in this context.
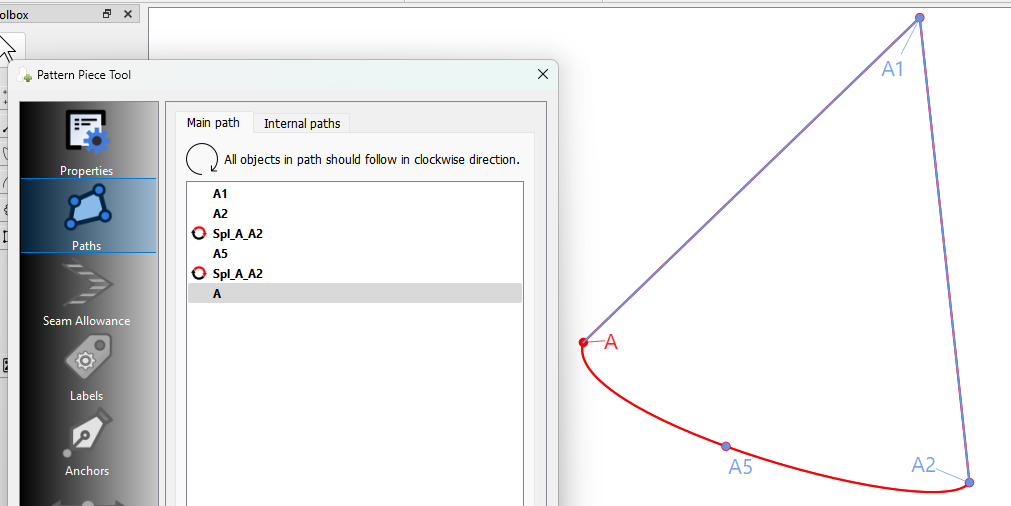
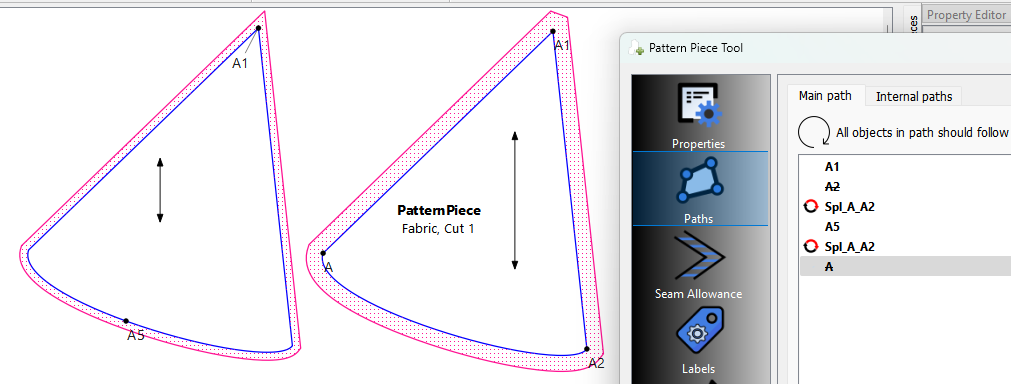
Probably another point that should be made when adding curves to a pattern piece… if you’re including a point on a curve - such as for a notch - you need to select the curve, the point, then the curve again. For ex: If we want to include point A5 it would look like this:
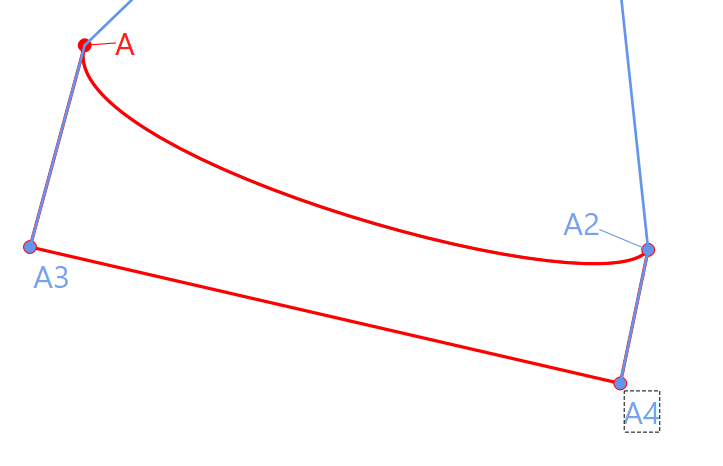
Also, while you don’t neccessarily have to include the starting and ending points of a curve, it’s best to do so as for one it will then display the point node names with the piece. The piece on the left points A2 and A are excluded, but the piece still works, but those points are not displayed.