I’ve been trying out Seamly today and managed to create a size table, and a trouser front block draft with formulae referencing the table. So far so good. Not so good is that I realised the programme wanted two ‘Drafts’ for the front and back which usually I’d trace off the top by hand. Making a new block for the back, I tried renaming the initial block to include ‘front’ using the ‘rename draft’ button which was successful. However, clicking any point on the front draft piece got an error that the point had no reference, and the properties box showed that indeed there was no ‘base point’ for any selected point. The programme then crashed to desktop.
When making blocks that are referenced to another piece, is the only method in the programme to create guidelines and redraw the shared elements across the workspace?
I see a request from 2016 for the ability to rename points to numbers rather than being locked to ‘A’ - very useful if drawing a pattern from a book. Also the ability to rename at least the ‘Human Readable’ part of ‘Known Points’ in SeamlyMe would be useful as my designs use different nomenclature for some parts.
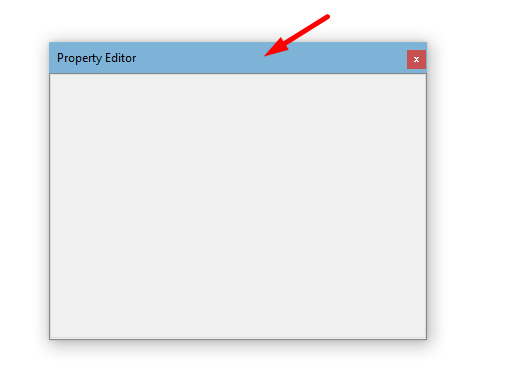
On startup, the ‘Property Editor’ panel and those underneath it are expanded to the left as far as they can go, leaving a thin sliver of workspace. It’s an annoyance to have to resize them all the way to the right every time the programme is opened.
I don’t quite get you here, but normally, if you are copying the front draft to draft the back, this wouldn’t be necessary in the drafting.
I’d suggest that you place the front draft into a group, and name it accordingly, and then use the same draft for the back and place everything used for the back into another group, named accordingly. This way you’ll be able to ‘close the eye’ on the draft piece that you are not working on and only see the piece that you are working on. And you won’t need to use different draft boards, you can do it all on the main board and making use of the shared objects.
Can you tell us which OS you’re working with and which version of Seamly, please? @Douglas will need to know to check what happened here.
Ah! Please see my 1st reply.
Since I do my drafting on one drafting board, I normally just ignore the ‘A’ and focus on the numbers that follow and when the next draft piece starts at 1 again, I normally edit the labels to ‘B’, etc. However there has been some discussion on this much more recently than 2016 (this year), so it is also in the pipeline.
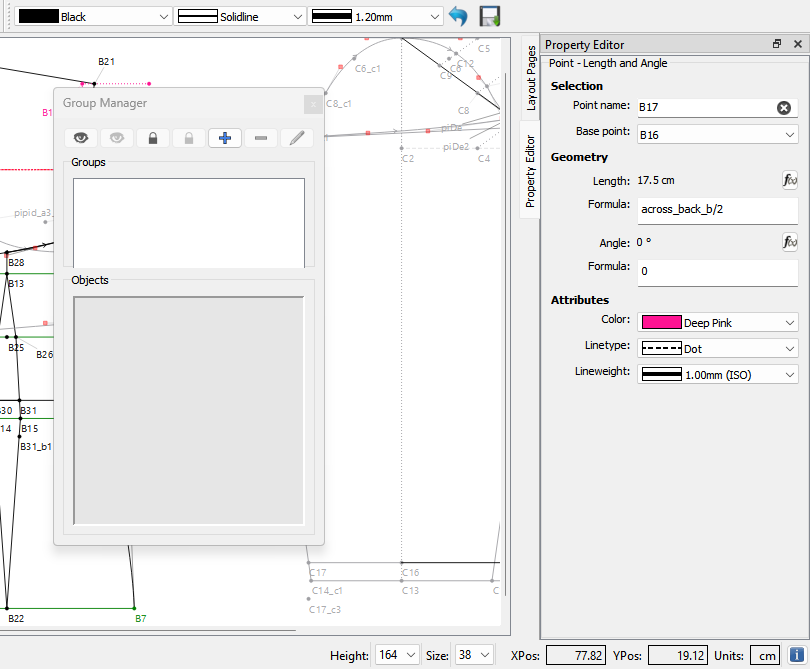
You can complete undock these by dragging the title bar away from the right edge, resize them and place them where ever you please and they should stay there when you close the program and reopen it - at least they do on my OS - Windows 10:
Confirmed. If you save and close the pattern, and reopen it works fine.
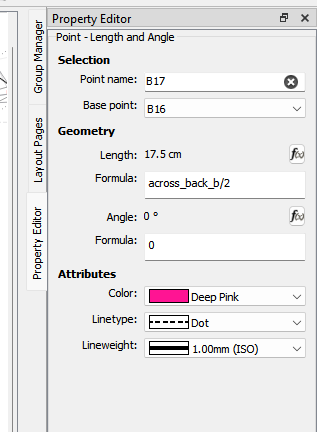
The Properties Editor, Groups Manager, and Layout Pages windows are actually docks that you can float, resize, or dock. Here is the group dock floating and resized, while the Prop Editor and Layouts are docked.
The dock area width can also be resized. You should be able to rearrange the docks to your liking, and the state is saved so it should open as you left it. For ex:
Works on Windows 11 as well - as per the above screencap. I do know the dock wants to expand as wide as it can with a new install.I will have to check the size hints for the dock container… it may be set to “expand”, rather than “preferred”, which would keep it at the default size the form is in Creator. Once you resize the dock area it should be saved on the settings.
I was expecting the panel behaviour to be similar to my expectations from other graphics programmes (I use a lot of CAD and Affinity at the moment), so was frustrated when the arrangement didn’t ‘stick’. However, I’ve tested your advice to save and close and reopen, and now the panels are OK and the error doesn’t occur with the Draft Block point references.
I wonder if the crashes had caused the panel changes not to stick, as the first couple of times I opened the programme, they were always expanded fully to the left and covered the workspace.
On the ‘save’ front, I couldn’t find my file until I went into the preferences and discovered the default save location was buried in my C:/Users folder. I arrange my PCs with various drives in order to avoid having personal data on the C drive. Having the option to select the default save locations during installation would be helpful.
@Grace I will investigate your suggestions for the pattern production now. I was trying to say that if I were hand-drafting, I usually use paper on top of the front block to create the reference points for the back, then separate them for transfer to cardboard. I suppose I’m trying to use the programme as I would if it were a vector graphics programme that mimics the way of working by hand, rather than what Seamly wants which is not immediately intuitive. I use a lot of other open-source programmes so I’m well aware of the enormous amounts of work that goes into them (and how impenetrable a lot of very expensive commercial offerings are, too!)
The rename issue is fixed, so that won’t cause any crashes. I’ve been trying to resolve why with a new install the dock area wants to open really wide. I’m a bit baffled at the moment. It can get really tricky when nesting widgets within widgets within layouts within docks… which is the case with the Groups dock. Somewhere in the chain there’s a property that’s causing that dock to expand the whole dock area. That’s today’s project - fix this issue.
It becomes a tradeoff how much of the prefs to allow a user to set during a new install vs just starting into the app. Redesigning a startup dialog is on the list of things to do.
Solved. Tracked it down to the sizeAdjustPolicy for the table and list in the Groups dock. It was set to adjusttoContents instead of ignore. Not sure why though the dock was expanding when there is no content until a pattern is opened? Strange.
Also in fixing this I figured out how to have the app open with tabbing the right hand docks.
I dragged a marquee around the whole of ‘Block Front’ and created a new group. I deleted the ‘B’ point that was the datum for the unnecessary second draft. I drew the back as I would do it by hand: referencing the back points to the front ones, squaring over etc.
‘Closing the eye’ or locking the group appeared to have no effect. I wonder if I haven’t made this properly. I’ve coloured the lines for the back half of the block in red to distinguish them. I tried selecting all the points making up the draft back and creating a new group, but that also appears to have no effect.
I want to use this file as a block draft I can open and ‘save as’ to make individual patterns, so I hope I can separate the front and back as I would on paper.
Blocks are not pattern pieces, they’re just to establish the points and curves that you will select to make the actual pieces you will work with in Piece mode. The groups are simply there to hide objects that make the work area messy to see as it gets more complex. It’s analogous to placing objects in another layer like you would in a vector drawing app.
You can select any combination of points and curves to make up any number of pattern pieces from a block. What you can’t do though is separate blocks or parts and to save as a new pattern. In other words given your above example… you can’t take and save a new pattern with just the front, and another with just the back. What you can do is place the front part in a group, the back part in a group - for which you can hide either or, or both. You can also create a back pattern piece and a front pattern piece… so that now when you go to Piece mode, you will have 2 separate pattern pieces.
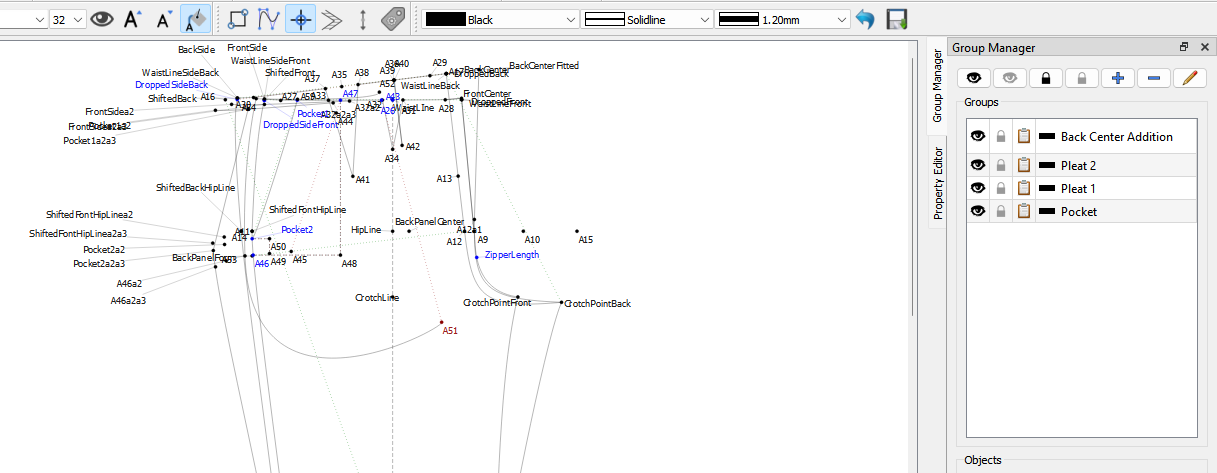
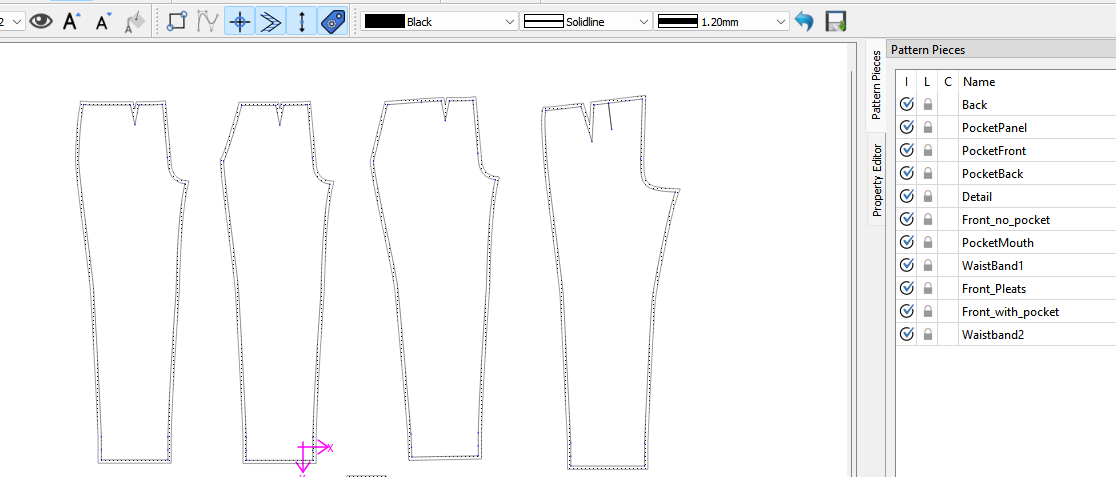
Here’s an example of a trousers block, with 3 different styles no pleats no pockets, 1 pleat and 2 pleats w/pockets - with the pieces in Piece mode. BTW… you may notice how messy it is with all the group objects visible.
Thank you. With only using the drawing tools so far I hadn’t realised the ‘workflow’ to get to ‘piece’ mode. I’ll download the pattern you kindly attached and use your advice to rethink what I’m doing. Getting to grips with how new software is supposed to work is quite strenuous on the brain cells!
I’ve been having a look and the fog might be clearing somewhat. I see now that the pieces I’ve been drawing aren’t ‘pieces’ at all.
I see that on the example you uploaded, the kneeline etc. is done with ‘points on perpendicular’ rather than a point with a line adjusted to dashes. Without a dedicated ‘guideline’ as is common on vector graphics programmes I’ve been a bit confused with the method of making reference points without them becoming part of the pattern piece. On paper, I’d measure out and make a little mark, but the points in the ‘Draft’ don’t have a hierarchy which stymied me for a bit. I now understand these guide points would just not be selected when creating a ‘piece’, correct?
I’m still conceptually struggling with how to make the ‘Draft’ and ‘Piece’ work together. On paper, I would have a block I can trace off to make different styles. I imagined that I could use the combination of SeamlyME and Seamly2D to generate graded blocks, then open it and ‘save as’ to make, as per your example, say a pleated front and non-pleated front trouser in two different files but from the same reference block/measurement file ‘trouser block.val’, say.
However, it looks like the pleat elements are additions in the ‘Draft’ that are not associated with the rest of the trouser measurements. Does a new ‘piece’ get created by selecting the points around the outline while selecting the pleat detail, and another omitting it, creating two ‘pieces’ in the same file one with and one without the pleat?
In this sense, would all my trouser styles be in one file with the relevant parts and sizes selected for printing subsequently?
In some cases there may be several ways of creating a given point. For exaple you can acheive the same “point” by using two Point - Length and Angle tools, or just 1 Point - On Perpendicular.
Yes. In many cases the points and lines you create in a draft block are simply there as construction lines and will not appear in your final pattern pieces. Due to the fact the application is based on a sequential timeline of tools, where each new tool is dependent on previous tools, you have to actually add new points to create construction / guide lines.
A draft block in conjunction with measurments and / or formulas, is simply there to locate your grade points, and define your curves. The lines and curves you see in a draft block are not what you see in a pattern piece. Think of a pattern piece as placing tracing paper over the draft block, and then tracing a piece by selecting points and curve segments to create the piece. Where you can create any number of different pieces from a block.
Many pattern systems I’ve used for mens suits, start with the basic block, and then add to it for a given style. If you create a draft block up to a certain point, you can save that, and use it as a template to create other styles so you’re not always having to create all the basic construction points / lines everytime.
The beauty of Seamly is if you’re drafting it from certain measurements, once you have it drafted, you just need to load a different custom measurement file and it will automatically redraw the blocks and pieces.
In the example (not mine) I posted the pleats / darts are included as points of the main path. I believe this pattern was originally done before the Internal Path tool was added. I would add dart or pleats as an internal path.That is you can define other paths to add to the main piece path (seamline / cutline)… such as break lines, pocket locations, darts,… or pleats.
After you have created a piece you can use this tool insert an internal path to that piece.
Depends on what the pattern is being used for and / or how you prefer to work. You could create a basic block saved as template, and then create each new style from the basic block - saved as it’s own file. OR like on the example you could create several styles within one pattern file. If you were selling patterns, maybe you would want to have several different styles within one pattern. Such as a long and short sleeve blouse, or long and short pants. Which BTW you can use the Internal Path to indicate where to cut the “short” style.
As far as the sizing goes… again that’s where the measurment files come into play. If you want to customize a pattern to different sizes you would draft the pattern using the various measurements in the formulas, which then automatically adjust when you load a different measurement file. I should note that the example pattern is using a combination of the variables table AND a measurement file… I guess in part to simplify the names? For ex: @leg_crotch_to_floor becomes #CrotchHeight. In any case instead of saying in a formula draw a line 83cm from point a to b… you would use #CrotchHeight as a length in the formula. Then the #CrotchHeight value gets replaced by what ever the measurment leg_crotch_to_floor is in the loaded measurment file. In this case 83cm. Use a different measurment file and it could be 80cm. Once you’ve loaded a measurement file, then you can goto the 3rd mode of the app - The Layout Mode - where you can create a print layout to save or print.