I was wondering is someone had tips on how to sew a solid and clean notched collar.
My main question is the way seam allowances should be clipped so that it’s not bulky at the notch point and so that there’s no risk of creating a hole where the seam allowances are clipped.
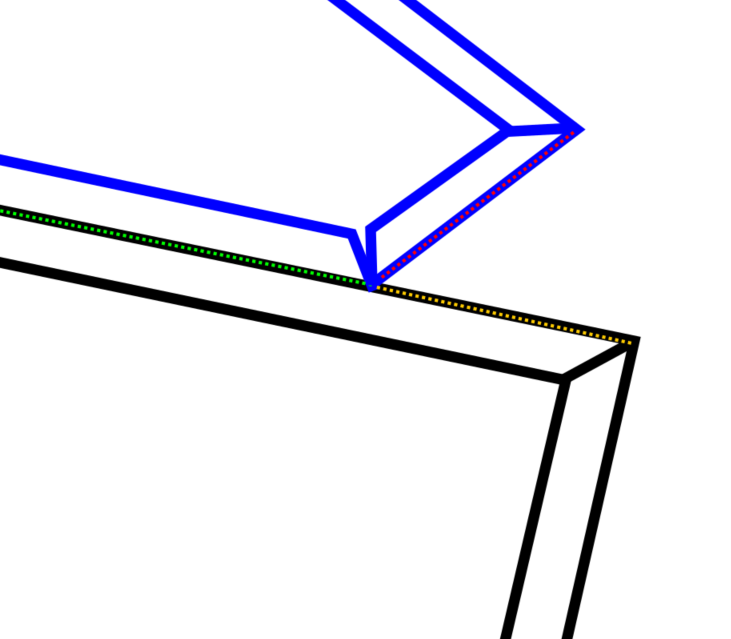
I usually clip my seam allowances like that, with 3 seams meeting at the notch (in purple, green and orange in the image):
I’m worried the collar could rip at the orange line, where the seam allowance is clipped:
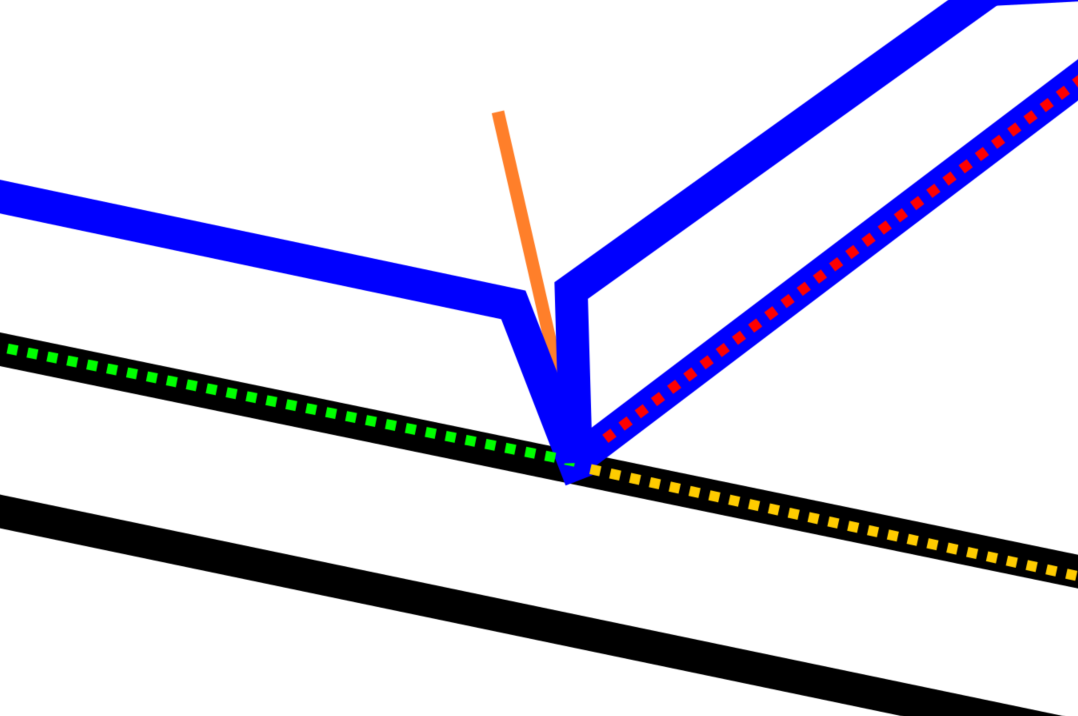
I’m wondering if cutting my collar seam allowance like that, as we usually do for simple right angles, could be a solution (the seam allowance is unfolded in the picture below) :
Yeeesss… It remains a bit of a grey area. @Douglas did do some work on the seam allowances, but he’s still busy with the Layout mode and refining things in that area, so I don’t know what to say.
I normally do mine in Inkscape if it’s for someone else, but if it’s my own pattern, I normally correct it on the pattern when I cut the pattern out of paper & before cutting the fabric.
Perhaps you have some ideas about the software in that area?
Well, normally, the upper collar pattern piece is ever so slightly larger than the lower collar pattern piece (this is so that the stitch line is at the bottom of the completed collar and not at the exact edge) and the seam allowance is, as you show in your image, about 1mm away from the stitch line at the corner and slanted at more than 90° angle so that it sits snug in the corner after turning.
And then there’s the interfacing of the collar where the seam allowance would be very narrow and perhaps even not be included at the corners (but will come really close) to get the clean points.
All of this information should, in actual fact, be included on the paper pattern and be described in the pattern instructions that accompany the paper pattern.
I normally cut the upper, lower and interlining from the same collar pattern piece and trim the seam allowances after I’ve stitched it up and before turning it. The under collar, I normally trim off 1mm on the 3 outer edges, and ease the upper collar to fit the lower while keeping the inner edge matching.
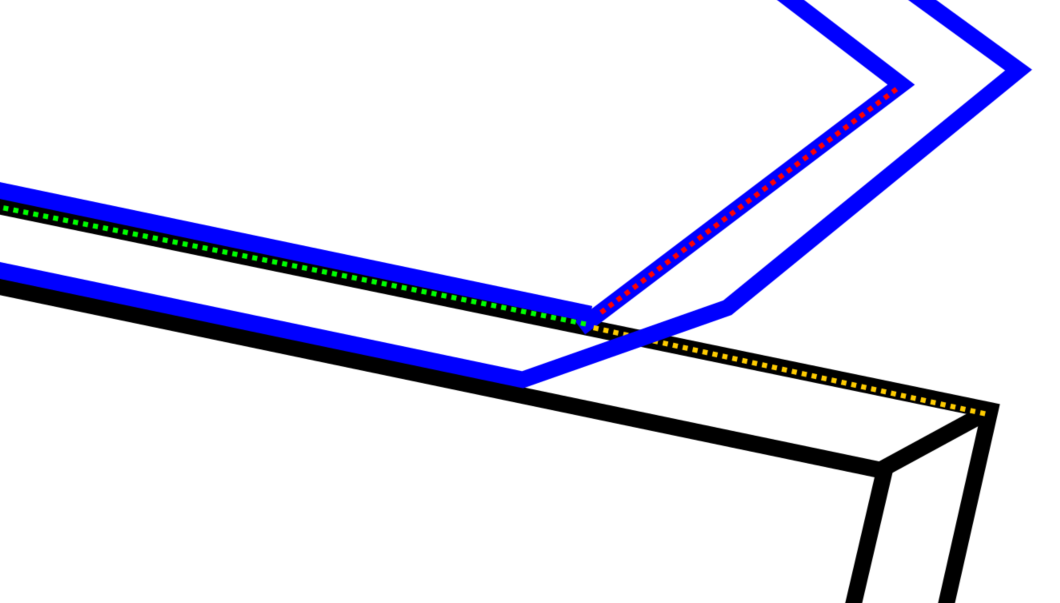
So you think that my 3rd image (the corner of the seam allowance is cut) is better than the fist one (the seam allowance is cut all the way through from the notch point) ?
Would it be possible for to to share a screenshot of only this particular part of a pattern that shows this seam allowance, please?
First it depends on how you sew the collar in. The quick and dirty way is to sew the top and bottom collar pieces together, clip and turn. The sew the collar into between the jacket fabric and lining. This way though leaves all the seam allowances to the jacket side, and does not look as nice. If you have a dozen jackets to make and a week to do it… and they’re going on stage - then it’s acceptable.
Doing it a tailored way you don’t want to cut the collar with the seam allowances already mitired. Sew the collar piece to the jacket piece - matching the dots. Then you can clip it at an angle… but not right up to the stitch at the dot. - lest it pull open. Then press the seam open. You’ll also need to clip the jacket side along the neck seam so it can open up around the curve.
My preferred way is first sew up the collar using either a felt / canvas underside or a 2 piece underside cut on the bias, stiched along the center back, pressed open, and then canvas applied. Canvas is either hand basted on, or done on a blind hem machine. If it’s felt, there is no seam allowance along the neck line of the felt. Then you sew the jacket shell and lining / lapel facing together from dot to dot, leaving the neck open. Clip at lapel notch dot, and turn jacket inside out. Now you can pull the neck opening seam allowance to the outside. Now you can stich the top side of the collar to the lining side of neck opening… going through both fabric and lining. Turn collar and press. Pin or baste felt or underside and hand stitch along the neck line.
Also if you have concerns of the notch at the “dot” pulling open, depending on the fabric you can hand tack on the underside to reinforce the notch. Tacking is even more likely with a peaked lapel and you really have to clip that area.
I know that there was a lot packed in there… I wish my shop wasn’t gone as I could have actually provided you with photos to illustrate.
Thank you very much for those explanations!
The next jacket I’ll work on will be in two weeks (time for the fabric to arrive), I’ll try to mix the methods I’ve learned from books with yours (since, for example, I’m attaching the collar way before I line the jacket), I’ll share with you pictures of the result if I’m not to ashamed of it aha