Here’s a super ease way to do really nice, resizable armhole curves. I’ve put it into a pdf, so please feel free to download it and I’ve done one curve in detail with explanations and left the other for you to do. Feel free to share your results:
I am trying to follow the steps but it is challenging. Whenever I fill in any value for the second control point on the first node of the path the path does something weird. It goes past said first node and then turns around to reach it. Only if the value is zero (or very close to zero) does this not occur but in the PDF file the values of the length of the control points are never zero. This makes it hard to follow the rest of the steps because I don’t know what to do with the length for the control points.
An additionial pain point for me is the use of A6 as a reference point for the angle of control point one of node A3. In my case the front and the back of the bodice are part of one pattern and the seamline between these two is straight (vertical). Would that mean I use a 90 degree angle as my baseline
Attached are two pictures of what I’m talking about and the file I’m using. I don’t expect you to help me that thoroughly but hey, it’s worth a shot.
Regardless of the outcome, thank you for all the help you have provided to me and the community as a whole! Happy Holidays.
Small tip : when you want to draw a curve, click where you want the point to be, keep your mouse pressed and drag it a little bit so you can immediately extend the handle. Doing that you prevent the handle to be at the same place as the point of the spline. You also avoid having the handles reversed
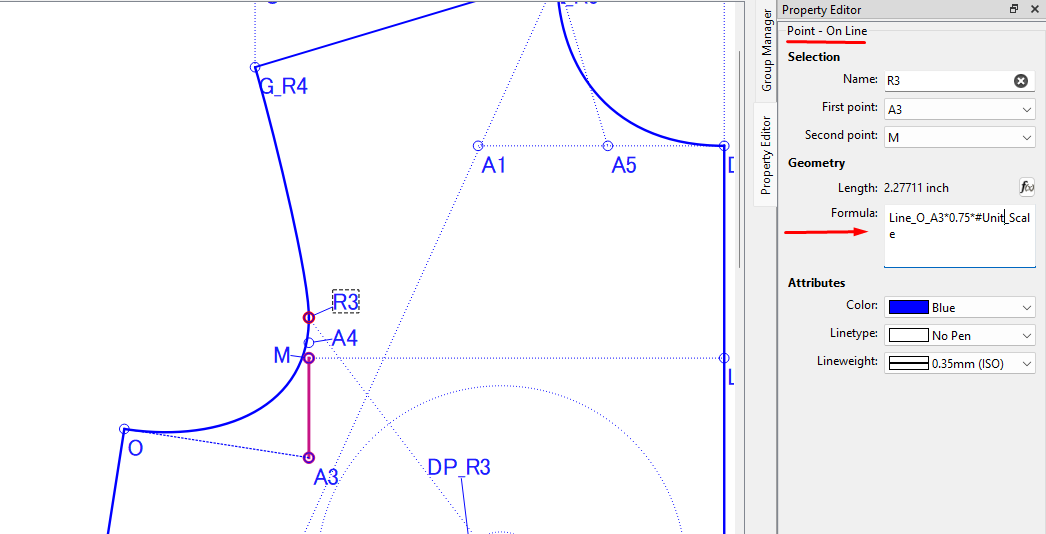
One should be formulizing the control points, so entering the correct length & angle makes dragging curves & control points moot… as well as avoiding reverse handle angles.
If one does not formulize the control points, the pattern will not resize with a change in measurments. Drawing curves by hand is basically only good for the one size of the current measurments.
That being said… holding the SHIFT key while moving a control point will contrain the angle every 45 degs. If the curves are formulized the CP angles are most likely going to be 0, 90, 180, or 270.
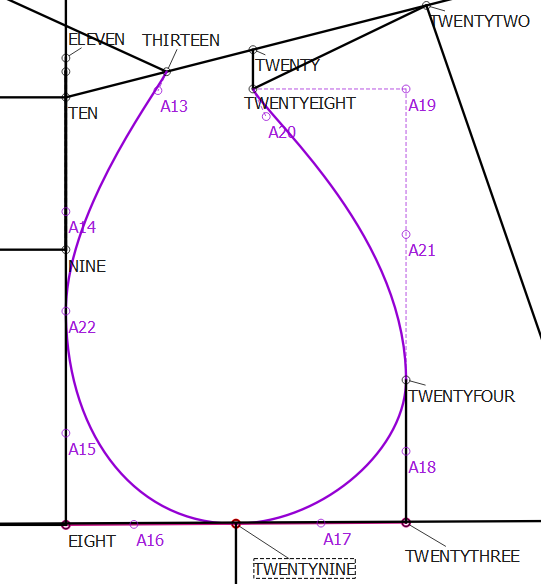
Here I’ve inserted the curve using your preferred method of creating curves and Seamly’s numbering system so that you can see the nodes that I’ve added.
I like to use the shoulder lines as the angle of the 1st & last curve handle angles, but the NINE point is a little high, so I created point A22 and used it instead. It’s important that, when the shoulder seams are sewn together, that the armhole forms a straight line at the shoulder points, otherwise you’ll get a peak that will need trimming to fit in the sleeve neatly.
Another way would be to deduct 10° from both shoulder angles, which will slant the straight line a bit and may also cause fitting discrepancies, however, it’s a design feature that one can use.
@Grace I’m trying your adaptive technique on a bodice block with my personal measurements and I’m stumped:
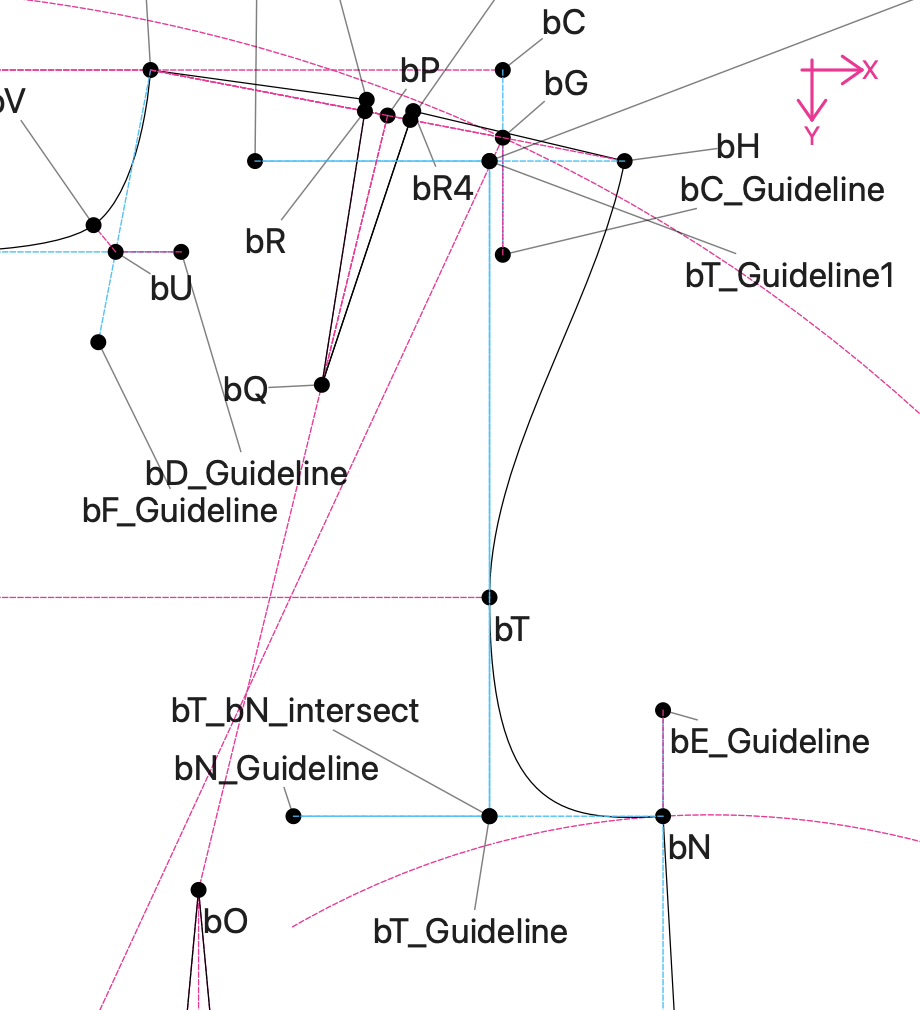
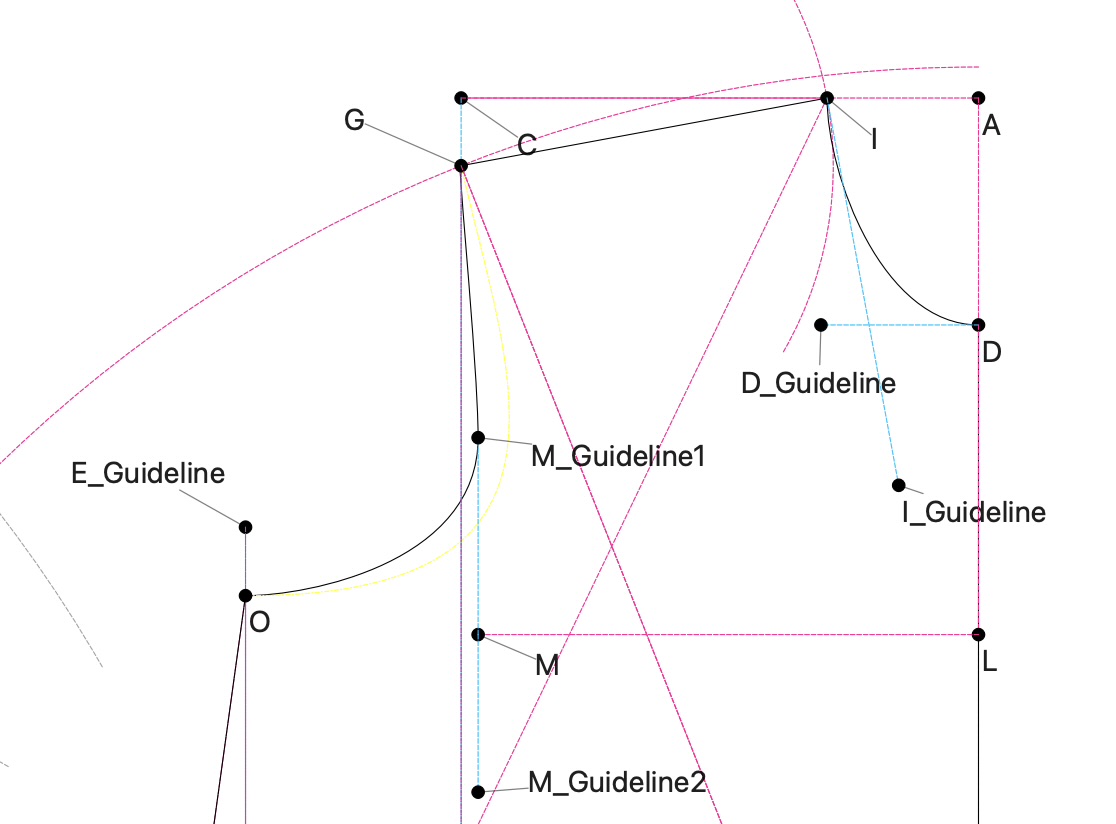
My back bodice has a shoulder dart that is making the arm arc do an S curve. Did I do your technique correctly? Is there something different I need to do on the angles of the middle point (across back is bT) to not be 90 & 270? (I’m sure I’ve overdone the guides and points lol. This is my first Seamly2D file. Tips welcome!)
On the front bodice, my across chest point (M) doesn’t intersect the arm curve. Is this normal? I tried adding a vertical guideline up from the across chest point (M_Guideline1) but the length is hard coded arbitrarily. Do you see what I’m doing wrong on the bodice in general for my across chest to be like this or is a technique on how to achieve a good arm curve in this instance? (The yellow guide is something I tried but can’t delete.)
Pattern file and measurement file attached. thanks in advance!!
When you get that S effect, you can deduct 10 or 15° from the angle at the shoulder tip on the back & add the same to the front. That way, you remove the S and still maintain the shoulder balance of the curve when the seams are sewn. (Whatever your do the one, you do in reverse to the other.)
Point M is a guide to where the across chest measurement goes, so yes, you can place the point for the armhole curve anywhere on that guide line to suite your measurements/body - it’s mostly a hit or miss.
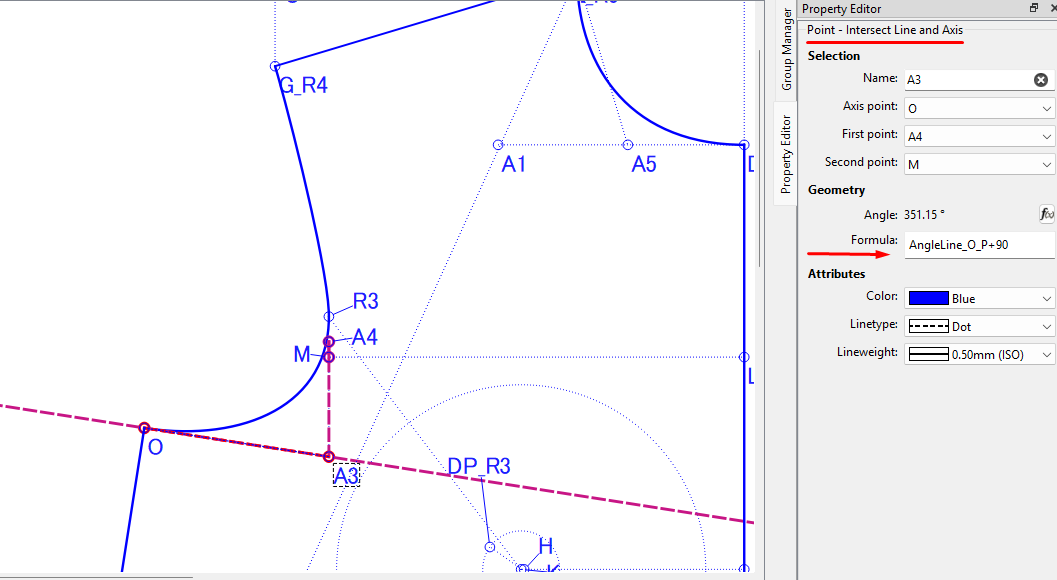
On my HJA pattern, I intersected the M line at 90° to the side seam:
You used the yellow curve in the pattern piece and that’s why you couldn’t delete it I changed it to the new curve and deleted the reference to the yellow one and managed to delete it without any problems.
I see that you didn’t put lines between the different points on the curves so that you can reference them in the length of the curve handles before doing the curves. It’s up to you whether you do them or not, but if load other measurements, the armholes may not resize nicely without them.
Thanks! I didn’t understand how/where to make the lines between points on the Front Bodice since I wasn’t sure if my M-L line was plausible/normal and if my M_Guideline1 point should be placed based from a formula.
Could I or should I place the M_Guideline1 point to be 50% of a Line_M_G?
Does it matter if I draw a line from O to the M guidelines with a right angle at Line_O_P verses a right angle at the M guidelines? (I believe your picture of your pattern shows the right angle at Line_O_P but that’s not what I did on the Back Bodice. Does is matter?)
The attached V5 file has #1 at 50% and #2 at right angles to the vertical M guidelines. Let me know if you think this is a good approach. thanks!