Test issue #306, Improve zoom functions

Continuing the discussion from GUI Improvements:

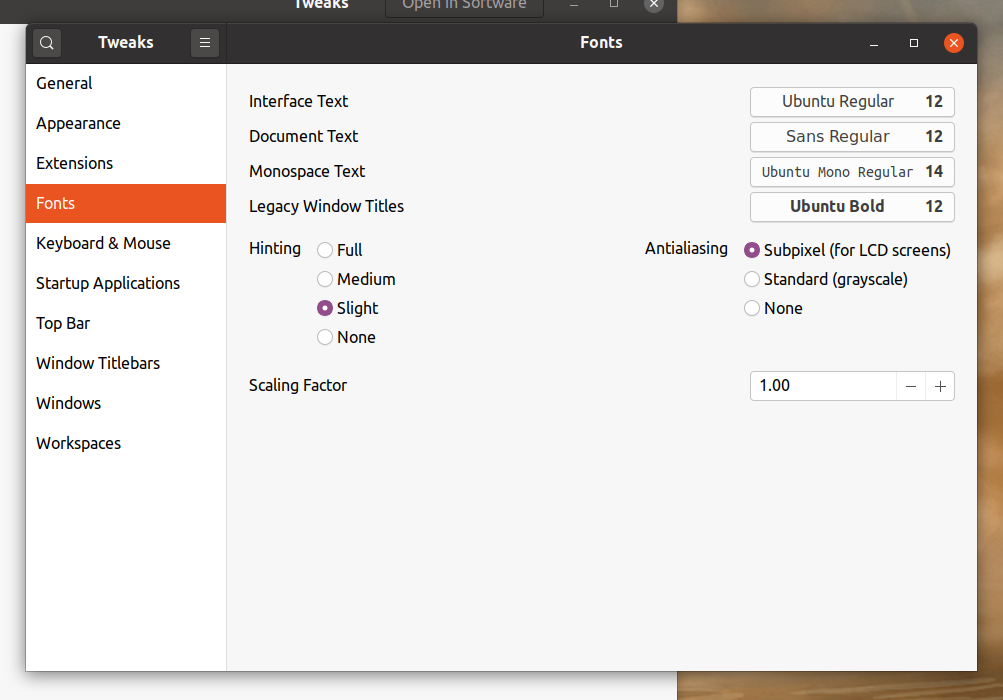
I’m running this test in Ubuntu 20.04.1 LTS

Okay, first things first: What happens when I make a new pattern piece? The new point is near the center of the screen with sufficient room to start working in any direction. very nice.

Subsequent new pieces after drawing some lines are not so well placed, but are still an improvement over previously. B point is way over near the right hand side of the screen when produced after a 10" or 20" circle, but at least it is on the screen!

In the event that no lines are in the draft, switching back & forth between two draft-pieces slowly zooms in closer & closer. Until 6711.3%

Second of all, & I’d call this one a bug: At first my scroll-wheel would only scroll down slowly, regardless of the direction scrolled. After manually setting it to the slowest setting in the Navigation preferences it actually works, & at an actual speed too. I suspect that the default is less than the minimum at this time.

Thirdly, the Zoom-bar:

  • In/Out seems reasonable
  • Zoom 1:1 actually seems to be at about 1:1! Such Wow!
  • Fit fits all the pieces in
  • Selected zooms to the piece selected. Was zooming to the node(s) selected going to be implemented later?
  • Previous toggles between the two latest zoom settings
  • Area rubberbands to a selected area by whichever line it hits first. very good.
  • Pan seems a little weird as a zoom function, but it’s a nifty feature!

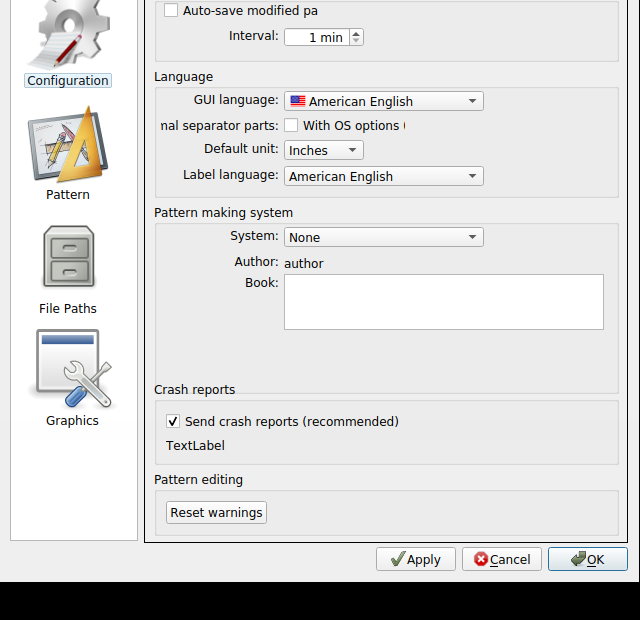
Fourth & lastly, the preferences: I’m loving their menu presence! So yummy! :cookie:

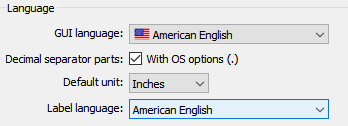
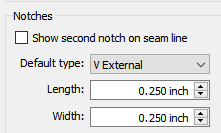
Actually in the preferences dialog, quite a few of the options’ labels aren’t fully showing, eg. “efault type:” of notches, which was previously discussed, & “nal separator parts: With OS options” instead of “Decimal separator parts: With OS options (.)”

Perhaps that’s partly because the preferences dialog is smaller now?

The GUI language flags all being there is nice!

Colors: Zoom Rubberband: Positive/Negative. I don’t get it. However, while trying to figure it out I managed to break Seamly2D! I zoomed in so far that my zoom went to 1.3% & stuck there until I clicked one of the other zoom lenses. After doing that repeatedly, now Seamly2D ices up :flushed: & behaves erratically every time I do that. (Once it “stopped responding” & once it went back to a reasonable zoom level.) But I still don’t understand the Positive/Negative rubberband thing.

I love being able to choose fat scrollbars! I already mentioned the issue I had with the default scroll speed. Getting that fixed was interesting, especially since I got confused with the zoom slider. I have not thought of a satisfactory solution to that issue.

& that’s all for now! Not quite a mirror finish, but definitely shiny!

:unicorn:

If you rubberband down and to the right - positive - it uses that color. If you rubberband up and to the left - negative - it uses that color.

Not sure what determines the placement of a new draft piece’s basepoint. I’ll investigate. What do know is that usually I’d always have to zoom out and search for the basepoint of a new draft piece.

The previous hardcoded default settings were duration 300ms and update interval 40ms. Those are the settings for the mouse wheel - basically telling the mouse to check the wheel for 300ms ever 40ms for movement. The speed is a multiplying factor from 1to10. A 1, along with the 300 & 40 should produce the same results as before. These should only affect the scrolling speed.

It’s there because it’s all tied into tracking the mouse events. Just need to get the pan gesture to work for touch screens.

Sadly you can’t zoom in when in editing forms in Creator… getting harder to see the screen without my glasses on so I might have missed that. I’ll take a look… I’ll be adding more prefs so I can fix any cutoffs.

Yes… once I can determine how to separate the various graphic items that makeup an object… specially in the piece mode. Currently the “selected” in piece mode is the main path. Plus would have to figure out some scale of how close to a node point to zoom… zooming to a point is not very useful as all you get is a circle that fills the window. But personally… I find rubberbanding the exact area I want to zoom to more effective.

By design the “zoom to area” and “pan” should stay selected until you select another tool. Also by previous design there are limits to how far you can zoom in and out without crashing the program.

1 Like

So, it should change colors as I circle around the starting point? That’s definitely not happening.

This is where a simple video would easily explain, but I’ll try again without…

The rubberband box will be (a transparent shade of ) the positive color when the mouse is pressed and first moved in a positive XY direction… and the negative color when moved in a negative direction. It should be noted that Qt is quirky in that the up Y direction is considered negative in value, and down is positive. If you hold the mouse down and move positive, and then reverse going negative - the color won’t change - until the mouse is released and a new rubberband is started. I could change it to flip if the direction is changed while still moving, but this feature was really more of an early exercise in learning the QRubberband class methods than anything else.

1 Like

It would probably make the most sense to just eliminate the different colors sometime. I’m guessing my confusion came through not having steady enough hands without focusing. & while I’m on rubberbanding, “I find rubberbanding the exact area I want to zoom to more effective.” Agreed. I can think of exceptions, but they don’t seem worth it to me.

The scrolling thing is an actual problem though. I hid my config file to check it, & before opening the Preferences & shutting them, it doesn’t matter which direction I’m scrolling, it slowly scrolls down, never up. I don’t even have to do anything with my preferences, just open & okay the dialog, (cancel & X have no effect.) So it won’t be an issue for anyone who adjusts their preferences before doing anything; just those who want to try the defaults before thinking about adjusting them.

Hmmm… I assume you’re saying that if you try running the program without setting the scroll settings it’s not scrolling properly? That would make sense as the program is expecting to see values for the duration, update interval & speed… and if you don’t open & save the prefs those values are going to be zero.

Easy fix… I didn’t put any default values in the GraphicsViewZoom class member initialization list for those settings. Doh.

Going back to this one… I took a look and there is no problem on the Windows build…

lang notches

Is there something different going on with a Linux build? Like does Linux allow you to override the form font size? If the font is a larger size it’s going to clip the text in the label. Can you post some screen caps?

2 Likes

Here are the screenshots that I think you’re talking about, (definitely the first)

PrefTextBroke

1 Like

The screencaps confirmed what I suspected,… the the font size is larger on the Linux build. Without getting into the weeds of Windows / Linux and the forms & fonts… I think I’ve struck a balance in the dialog layouts between the Windows and Linux vers.

BTW… I finally installed Ubuntu on a USB drive so I can see what the other side is doing. :slight_smile:

Also the scrolling speed is fixed.

2 Likes

Another issue brought me back to this issue… does Linux allow to set a scale for the display of 100%, 125%, or 150% like windows does, and if so by chance are you using a larger scale factor? This would explain the larger font and elided button / label text.

2 Likes

Agreed, this isn’t really a code issue. It’s a desktop issue. Fractional scaling in Linux distros is a mess whether they use X11 (xorg) or Wayland. It becomes obvious that fractional scaling is an issue when dealing with HiDPI monitors, however this is an issue that’s been around for some time. The best “fix” may be to provide Linux users with a desktop icon for their distribution of the Seamly2D/ME appimage which sets the scale for running Seamly with an environment variable.

2 Likes

There’s a very good chance that that is something going on on my computers. I don’t remember where all I poked around while getting my computers set up, but I do like a larger form factor when it doesn’t mess up my layouts.

1 Like

I’m vaguely aware of the HiDPI issues, but it’s also the (Windows) font scaling that is something I didn’t think of being concerned with. Agreed it’s a desktop issue, but something that can be dealt with now knowing that text may be scaled to 150% by the user.

To me though as an engineer and pattern maker it’s so counter intuitive that a design has to scale within it’s limits. It’s like designing a house floor plan and you’re constrained by the outer walls, but you have no idea how big each room may be… or drafting a size 8 dress that may also need to fit a size 16. :slight_smile:

2 Likes

That is the sort of program we’re working on here, right? :grinning_face_with_smiling_eyes:

:unicorn:

1 Like

Yes, but not a size 16 that fits in the same space as a size 8. Just like you can’t fit a 11pt font text in the same space as 8pt… well you can, but then it gets elided. :slight_smile:

At least now I can expect to allow at least 150% of the space text is taking up in case a user changes the display scale - at least with Windows.

3 Likes