First off, Happy New Year to all ‘here’ …
Next:
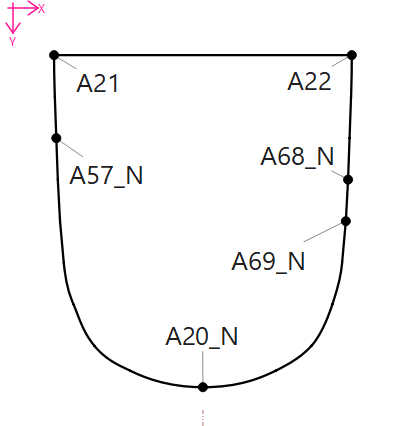
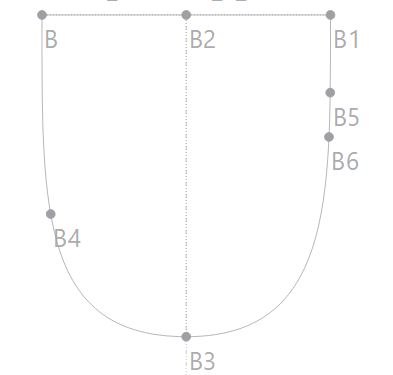
with the above (simplified) draft, I am trying to create a ‘piece’ with this vector, consisting of 2 curves : A22 → A20_N, A20_N → A21 and the line A21 → A22.
This is simple enough and functions ok, but, I need to include the curve nodes (clockwise order A68_N, A69_N, A20_N and A57_N) for positioning notches on the ‘piece’.
My ‘issue’ occurs when I try to include all of these objects (working clockwise) in the creation of the pattern piece, and the created object does not reflect what I am attempting to create.
Note: I do not need all at one time for a single garment, but this object should function as a master template for differing constructions with mating pieces at different notches.
Thanks in advance for any/all suggestions / tips / tricks
Best regards,
David D.
PS: I found not specific help in the online docs / wiki ..
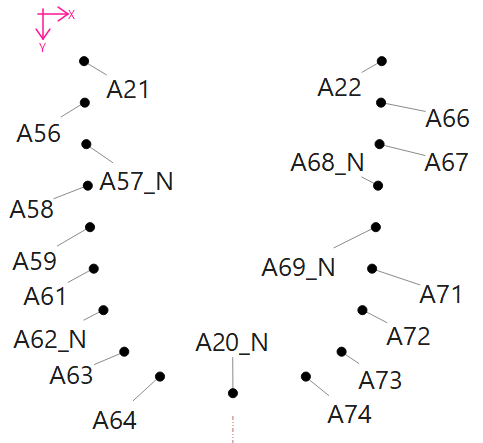
PPS: For ‘full disclosure’, here is the base node scaffold for the creation of the curves :
Hallo @DavidDeb dir auch noch ein frohes neues Jahr. Kannst du mir mal die Datei schicken? Ich glaube du hast zu umständlich gedacht……Brauchst du nur die Punkte 68_N 69_N und 57_N?
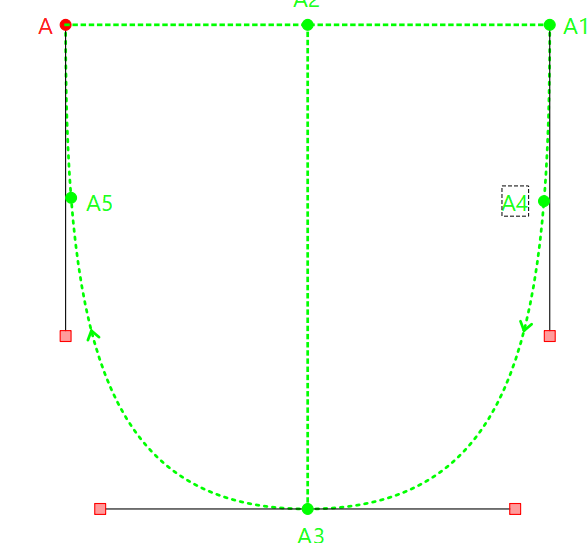
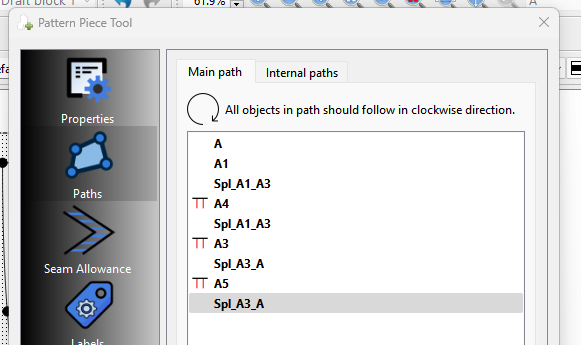
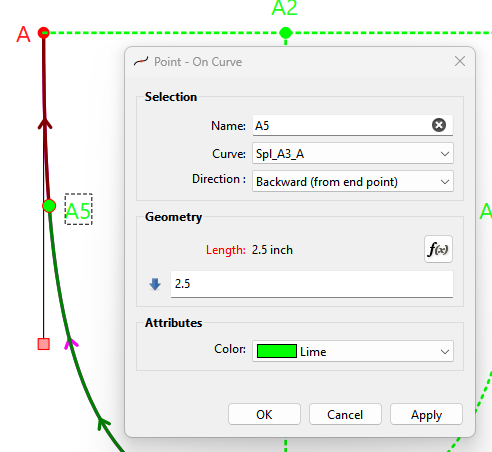
You also have to reverse any curves drafted going counterclockwise. I always try to draft the curves clockwise, which means you have change the direction for ex for the notch point… like point A5 to match the length of A4:
thanks for the pointers, I actually created the base of this draft prior to having any real experience with this application, or ‘vector’ graphics at all, I think I will go back to the drawing board (literally) and create a new simplified version.
Thereafter I shall retry, using your instructions, and respond.
Hi @Douglas / @Scholli I realise (now) that I could have avoided such a complex construction method.
However, there was method to my madness, the intention was to construct a framework that could be proportionately adjusted in multiple axes (plural of axis) by altering a single or at most two variables.
This worked very well, but did make ‘Piece’ generation more difficult.
DE Version:
Mir ist (jetzt) klar, dass ich auf diese komplexe Konstruktionsmethode hätte verzichten können.
Dennoch steckte System dahinter: Ich wollte ein Gerüst entwickeln, das sich in mehreren Achsen proportional anpassen lässt, indem man eine oder maximal zwei Variablen verändert.
Das hat sehr gut funktionierte, erschwerte aber die Generierung der einzelnen Teile.
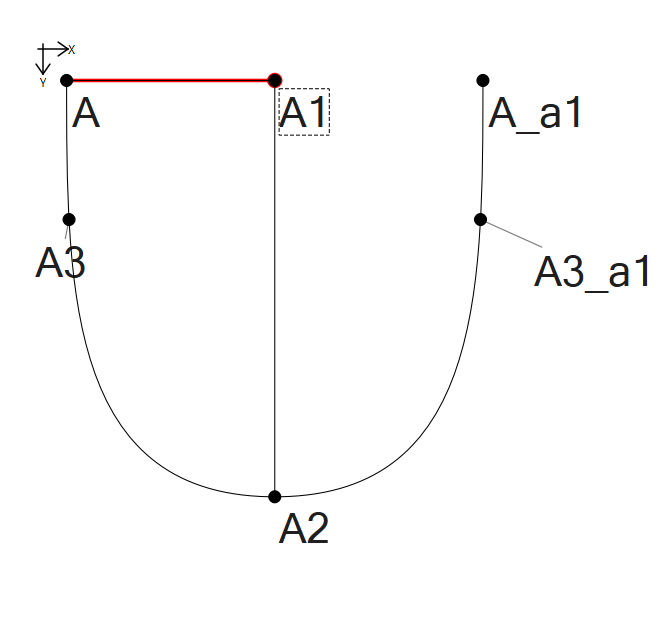
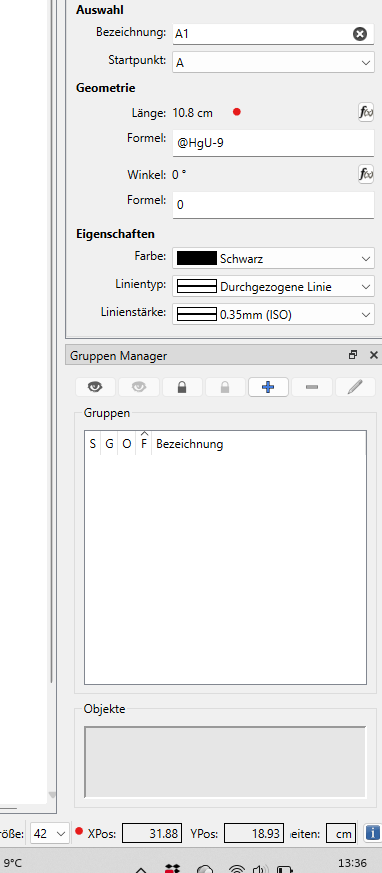
Du legst die Punkte fest, indem du sie mit Formeln hinterlegst
A1 = Taschenbreite eine fixe Zahl
A2 = die Taschentiefe Formel: Linie_A_A1*2
A3 = ein Punkt auf der Kurve Formel: Linie_A1_A2/3 oder Spl_A2_A/3
Änderst du jetzt den Punkt A1, ändern sich automatisch auch Punkt A2 und A3. Da ich die Hälfte der Tasche gespiegelt habe, musst du nur einen Punkt ändern.
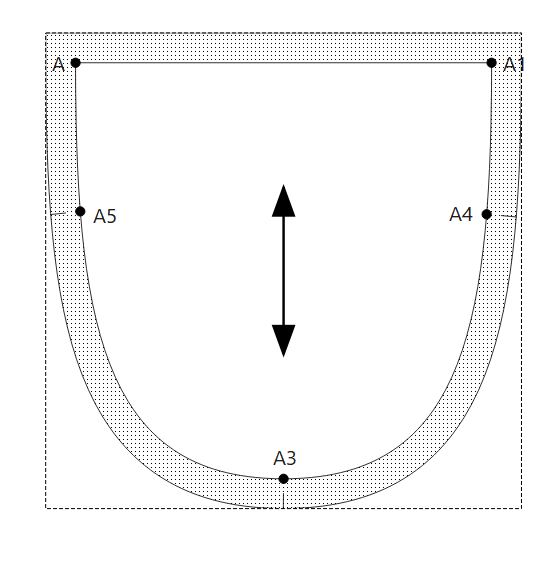
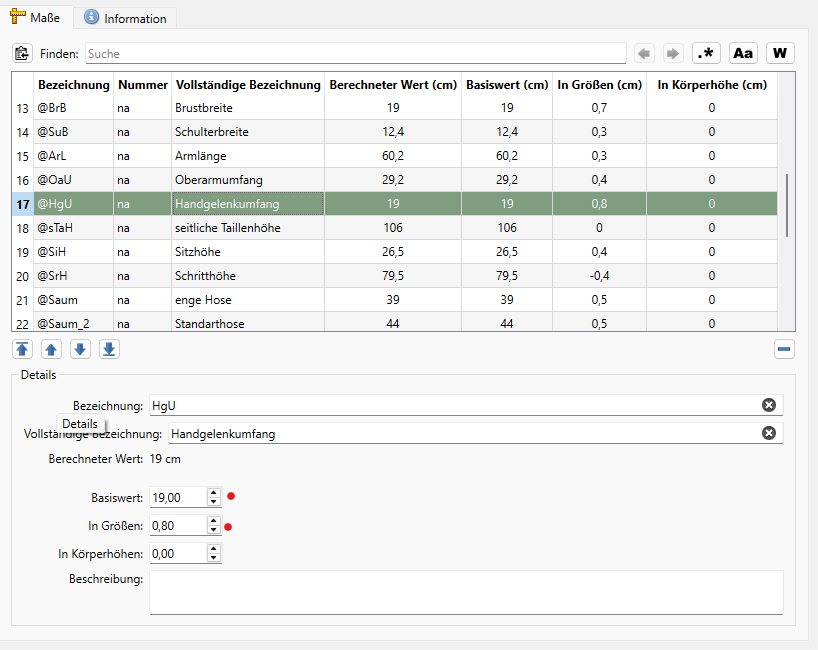
Ich habe hier eine Tasche gezeichnet. Wenn ich mit einem Mehrgrößenschnitt abreite, muss sich auch die Taschenbreite für die einzelnen Größen ändern. Auch dann arbeitest du schon an dem ersten Punkt mit einer Formel. Ich würde hier die Sprungbeträge für den Handgelenkumfang nehmen
Um auf eine Taschenbreite von 10 cm zukommen, muss ich@HgUvon @HgU 9 cm abziehen, da mein Basiswert bei Gr. 40 bei 19 cm liegt. Der Sprungwert liegt bei 0,8 cm pro Größe. Ändere ich jetzt die Größe in 42 verändert sich auch die Breite der Tasche automatisch um 0,8 cm auf 10,8 cm.
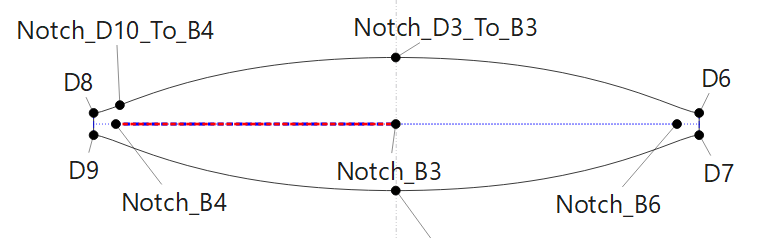
…which should mate to the first one at the nodes (notches) at Notch_D10_To_B4 → B4 and Notch_D3_To_B3 → B3 … but at this point I ran into a ‘Thought Process’ crash, which I must get straight prior to proceeding.
Issue:
The line Notch_B3 → Notch_B4 represents the curve length B3 → B4 in the top image, and I think I tripped here in assuming that the notch position / spacing for Notch_D3_To_B3 and Notch_D10_To_B4 has to be the same.
In spite of that I also have the impulse to make Notch_D10_To_B4 vertically above “Notch_B4“!
**
I have ‘second guessed’ myself to an intellectual system crash, and would appreciate a pointer here!**
I hope I have expressed myself clearly and not made the issue too complex
Wo soll den D8 landen. Du musst immer dafür sorgen, dass die Linien, die aneinander kommen die gleiche Länge haben. Sehe ich das richtig, das die Kurven jeweils aneinander gehören?
Die lange von B3 nach B4 und die Länge von B3 nach B6 sind im obigen Bild unterschiedlich lang. Im unteren Bild sehen sie aber nahezu gleich aus.
Hi, D8 ist vorerst egal, nur ein Konstruktionshilfe, und ‘Ja’ die kurven (Naht Linien) gehören aneinander.
“Die lange von B3 nach B4 und die Länge von B3 nach B6 sind im obigen Bild unterschiedlich lang. Im unteren Bild sehen sie aber nahezu gleich aus.“
Die zwei punkten (Notch_B4 & Notch_B6) sollen, vom “Notch_B3” aus gesehen, tatsächlich unterschiedlich weit weg stehen - ein Fehler meinerseites leider. Danke für den Hinweis
Can be accomplished by formulizing the control points. You could either create a width & height variable or measurement, and formulize the control points based on the width & height. This pretty much applies to any curve - such as armholes - that you want to resize correctly.
The other option is to use fixed curves, but in this case your pocket had a shape you won’t get with a fixed curve.