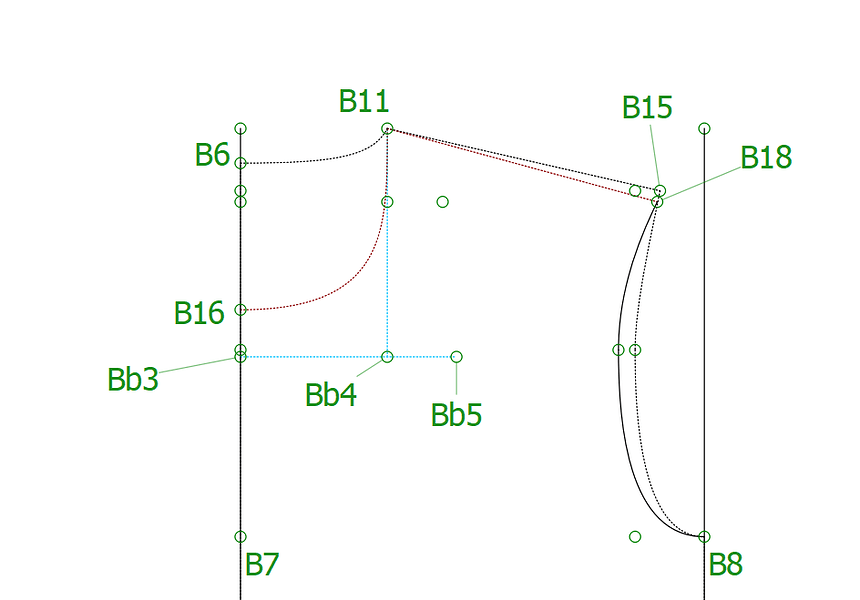
bonjour, j’ai besoin de placer un point sur une perpendiculaire à Bb3-Bb5 (partant de Bb5) et dont le point d’arrivée est situé sur B11-B18. Je n’arrive pas à trouver l’outil adéquat. Quelqu’un saurait m’aider ?
You don’t say where this line must start from on the line Bb3-Bb5, so I’ve taken it from Bb5 and used the **Intersect Point of Line & Axis. Once you have picked up the tool, first click the 1st point on the line where the new node must come & then the 2nd point on the line. Select the point where the perpendicular line must start from and set the angle to 90°. Hit Enter:
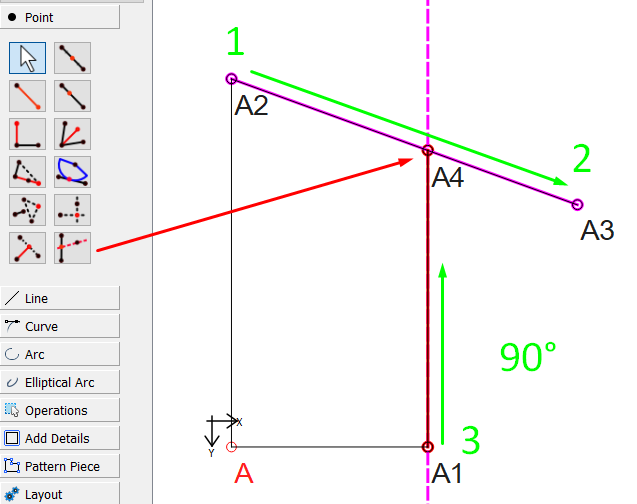
But yes, I said Bb5 was the starting point.
I thank you a lot, that’s exactly what I was attemping to do, I was wrong though in using this tool : I first selected Bb5 then Bb3 and afterward I selected B11 to B18. That was not clear to me which one was the line and which one was the axis… I’ll try this tomorrow if I have time to work on this project (so much to try, so little time to do it…)
Thanks a lot, it worked like a charm. Now then, I have another problem.
Here’s how it looks
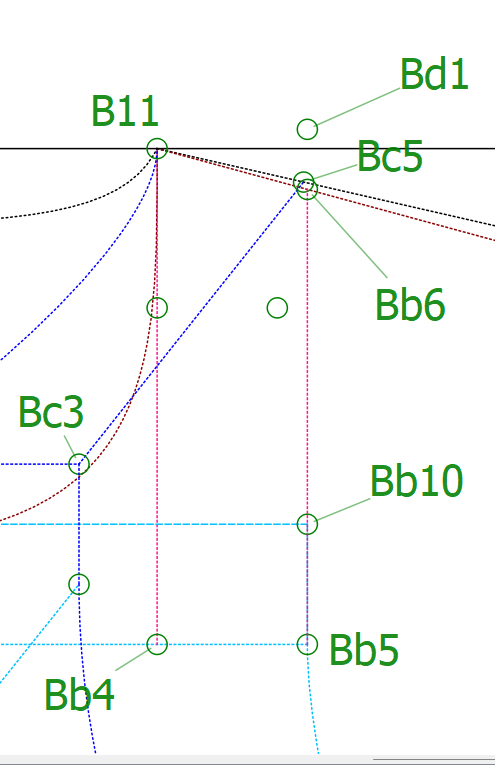 I have a polygon (Bb5-Bb4-B11-Bb6).
I have to mirror vertically that polygon so that B11 keeps its position and Bb6 go to Bd1 position.
How do I do that ?
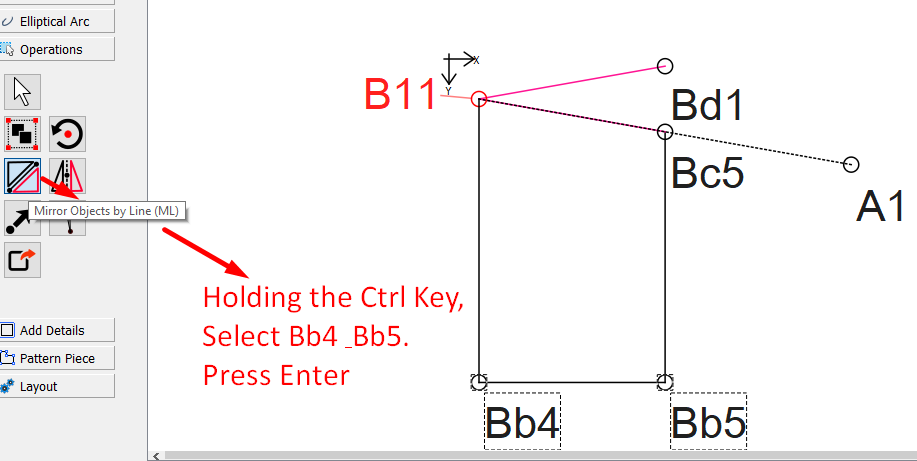
I think you will need to first mirror the 2 nodes along the line B11-Bc5 using the Mirror Objects by Line tool. Draw in 2 lines from B11 to Bc5 & Bd1:
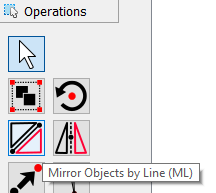
And then use the Rotate tool to rotate the new nodes by the formula of the angles of the line B11_Bd1 minus (-) B11_Bc5.
So it will be done in 2 steps, rather than one.
I’m sorry, I can’t understand. I have a polygon B11-Bb6-Bb5-Bb4. What I must achieve is : B11 keeps it position : its the pivot point. Bb6 will have to take Bd1 position and the whole polygon will so find its final position. I tried selecting the node themself but could’nt achieve that, I tried to select the 4 segments of the polygon, I couldn’t neither. How am I to rotate something I can’t select ? I order to make one continuous strap, I have to put the front part along the back part of the strap, if it makes sense (and afterward, extend it a bit to accomodate the buckles, but that doesn’t bother me)
Select a Mirror tool… while holding the Ctrl key select your points B11, Bb6, Bb5, and Bb4… hit return this creates the group of source objects. Depending on which Mirror tool you can mirror the group by a line (defined by 2 points) or an axis (horizontal or vertical). If you mirror along the line or axis that B11 is on you should end up with a destination group with B11 being duplicated on itself. Now you can select the Rotate tool then the 4 destination points, and rotate them about B11. The angle being the angle of B11 to Bd1. I suggest to first create a line between B11 and Bd1 so you have a line to reference in the rotate-> angle formula.
That being said… there’s an easier way… using the Point at distance and angle… just extend points from B11 and Bb6 with lengths of B11 to Bb4 and Bb6 to Bb5 respectively, and perpendicular to the angle from B11 to Bd1. This has the benefit of showing the lines, which a Mirror and/ rotate won’t.
Actually there’s an even easier tool… the one that creates a point at a length perpendicular to 2 points. Just use B11 and Bd1 as the 2 points, and the lengths as previously mentioned. One of them will need the angle flipped 180 degs.
Sorry for my simple example.
Here I have created the 2 lines from B11 which I will use later to rotate the piece:
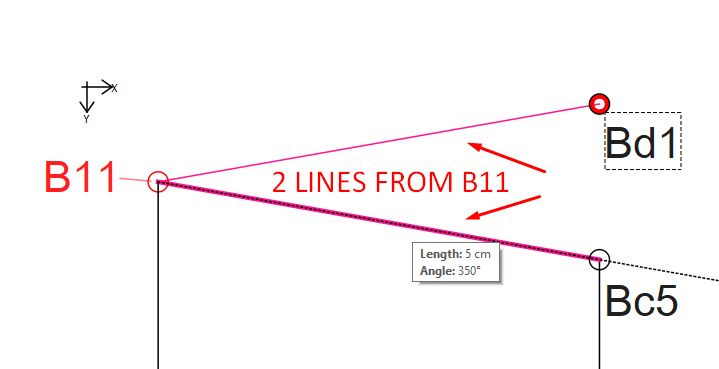
Take the Mirror Opjects by Line tool and select Bb4 and Bb5 while holding down the Ctrl key and then click Enter:
Then click on B11 & then Bc5:
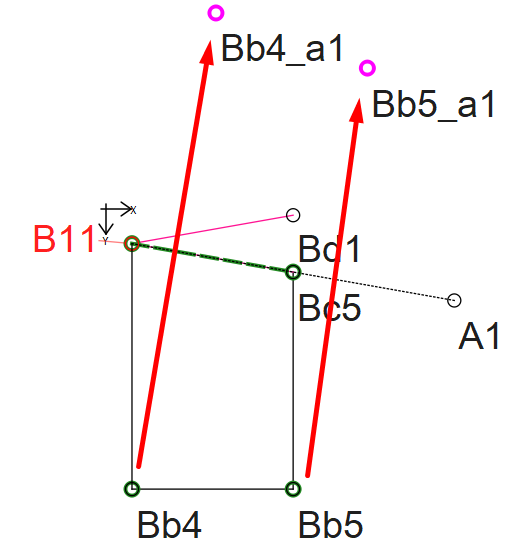
This will duplicate the 2 nodes in a mirrored position relative to the line B11_Bc5.
Next, you will need to rotate those 2 points from B11 so that Bc5 rests on top of Bc1.
Pick up the Rotate Selected Objects tool and select Bd1, Bb4_a1 and Bb5_a1 while holding down the Ctrl Key. Hit enter:
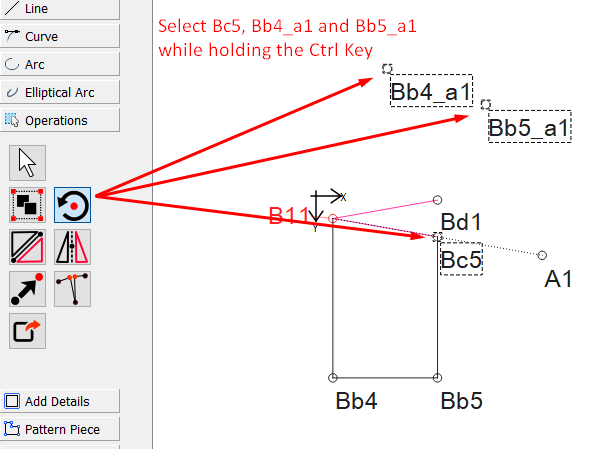
Select B11 as the rotation point. In the screen that pops up, use the formula to deduct the angle from B11 to Bc5 from the angle of B11 to Bd1:
You will notice that Bc5_A2 is now on top of Bd1, or it will be in a line from B11 going through Bd1.
Now you can draw in the lines to complete the picture:
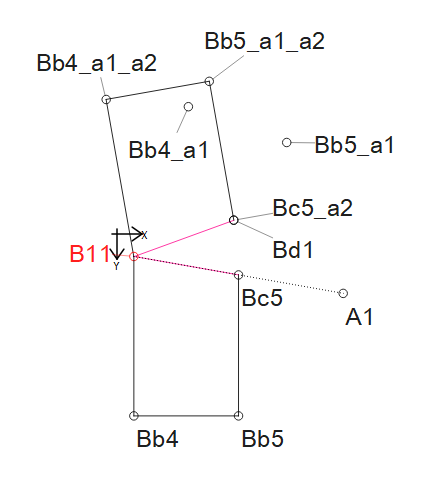
If you adjust the angle of Bd1, the polygon will adjust automatically. 
I hope that this makes it more clear.
I much appreciate your help. I’ll have time this week-end to take a deeper plunge into thoses solutions. I’ll let you know which one I choose and how it ended.
I thank you a lot for your help 
