Topic surrounding Winifred Aldrich: Metric Pattern Cutting For Menswear
2 Likes
To start off this topic…
I’m a beginner at pattern drafting and have been understanding by watching youtube videos and books along the way. I’ve been drafting my first bodice block as per my own measurements using the WA menswear book.
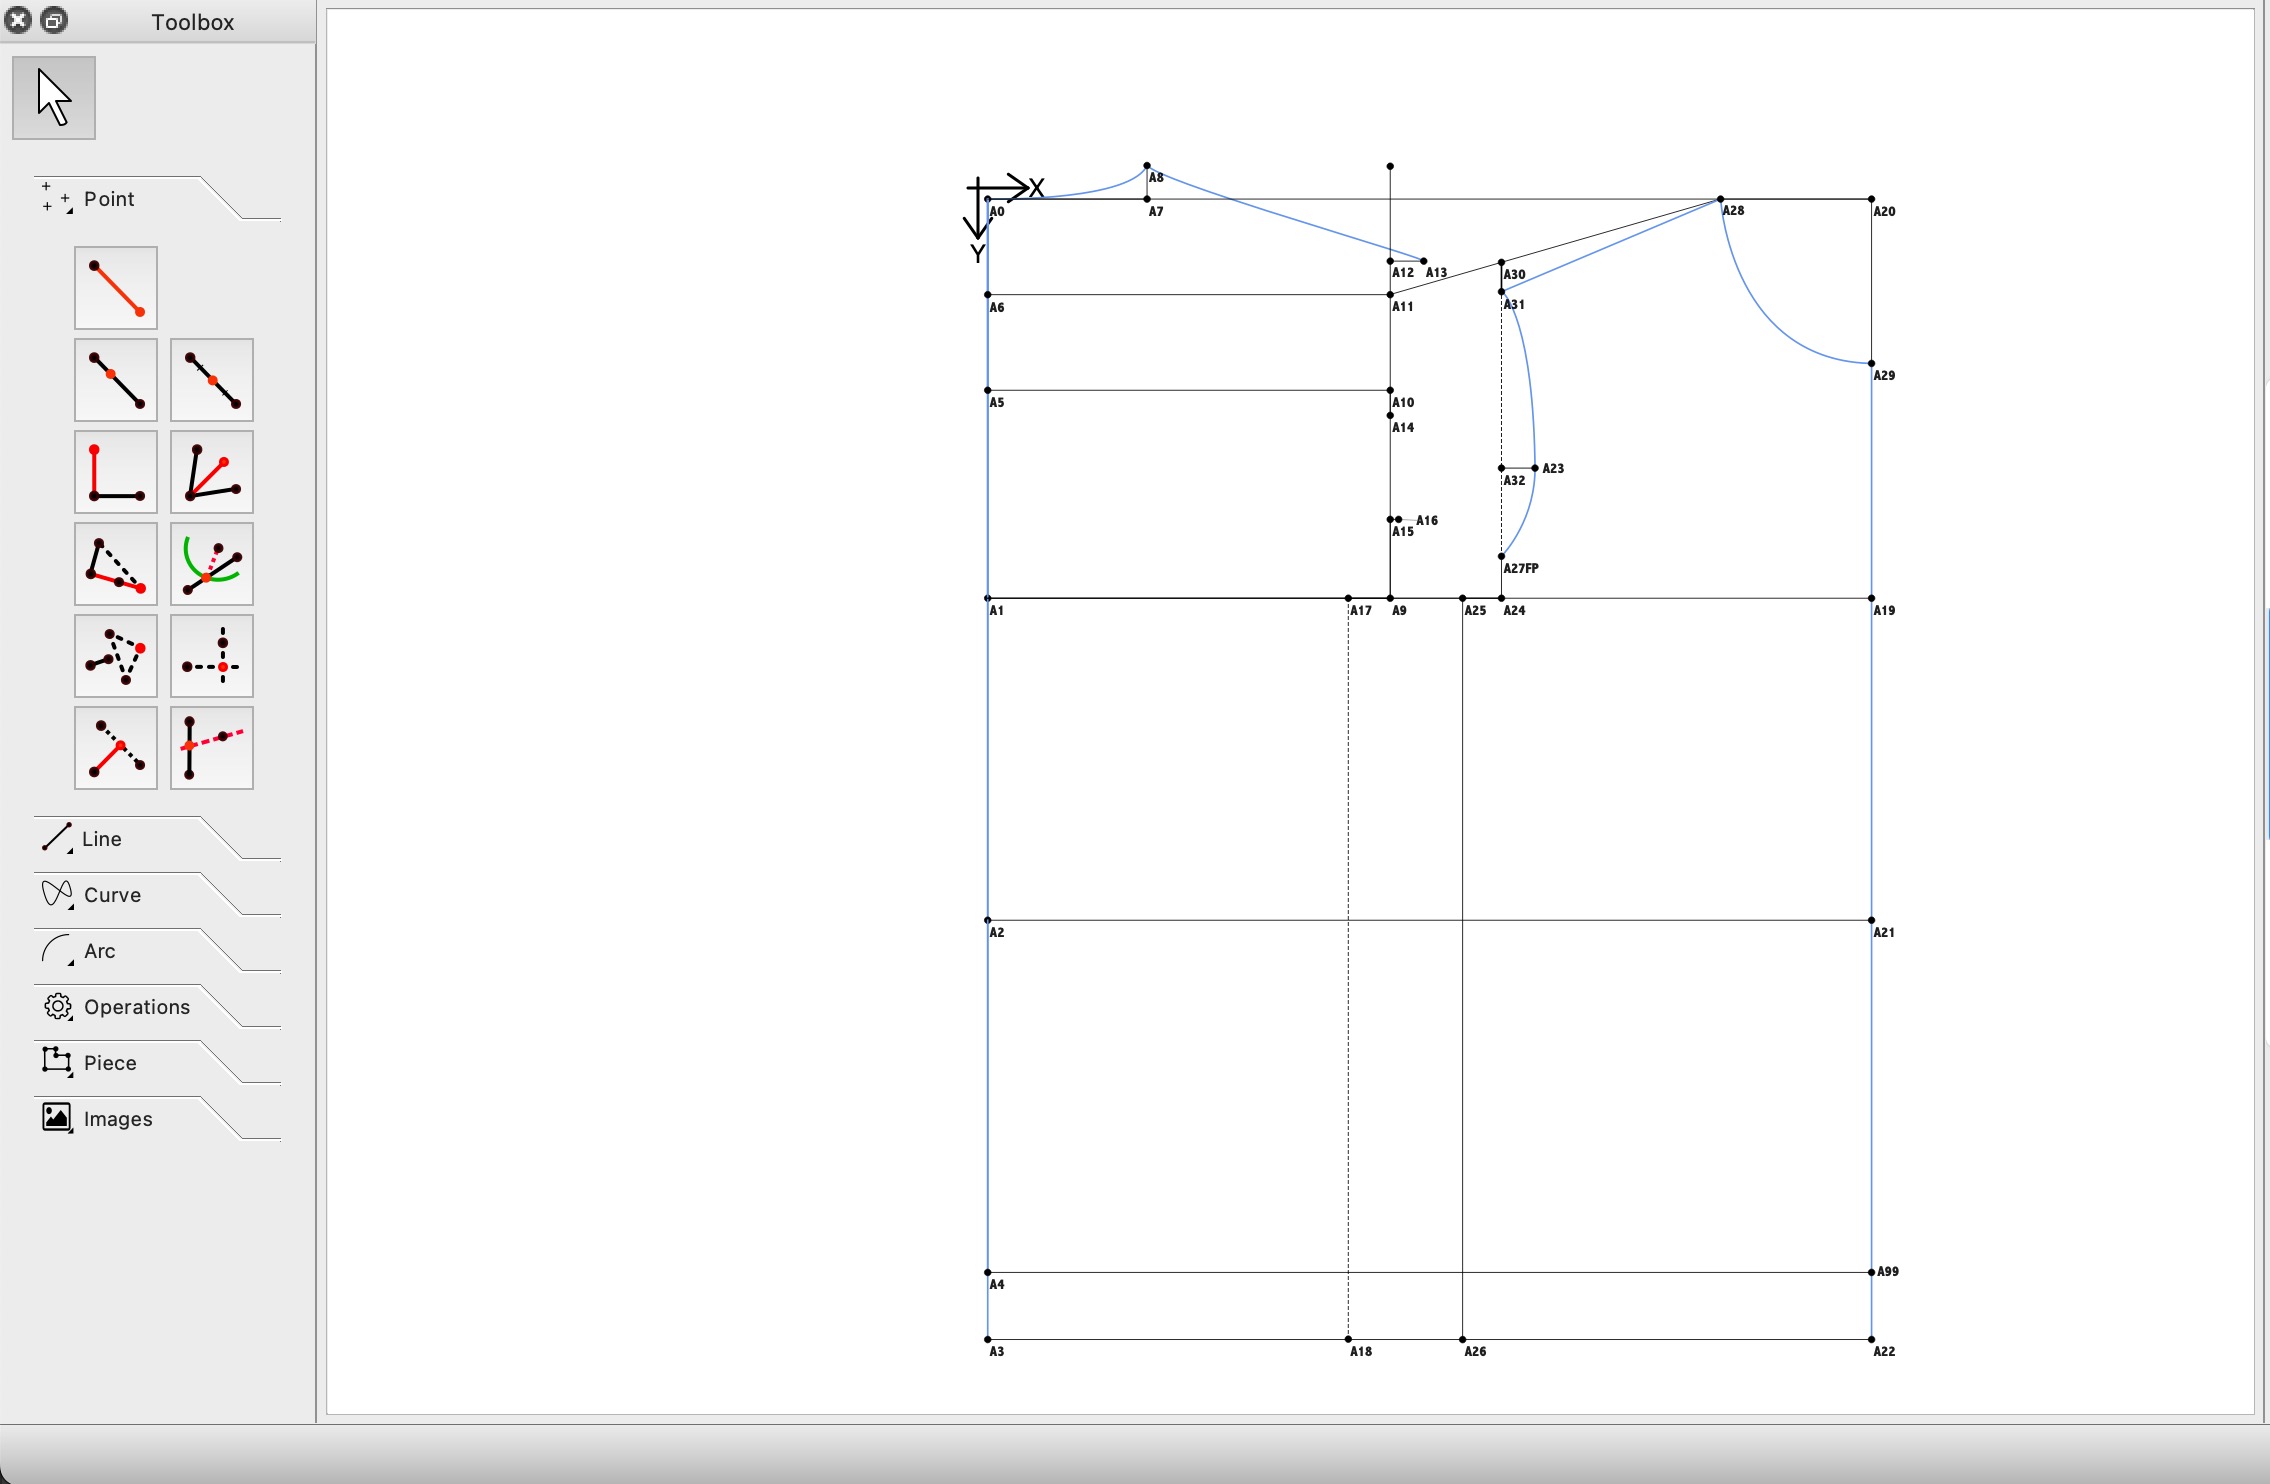
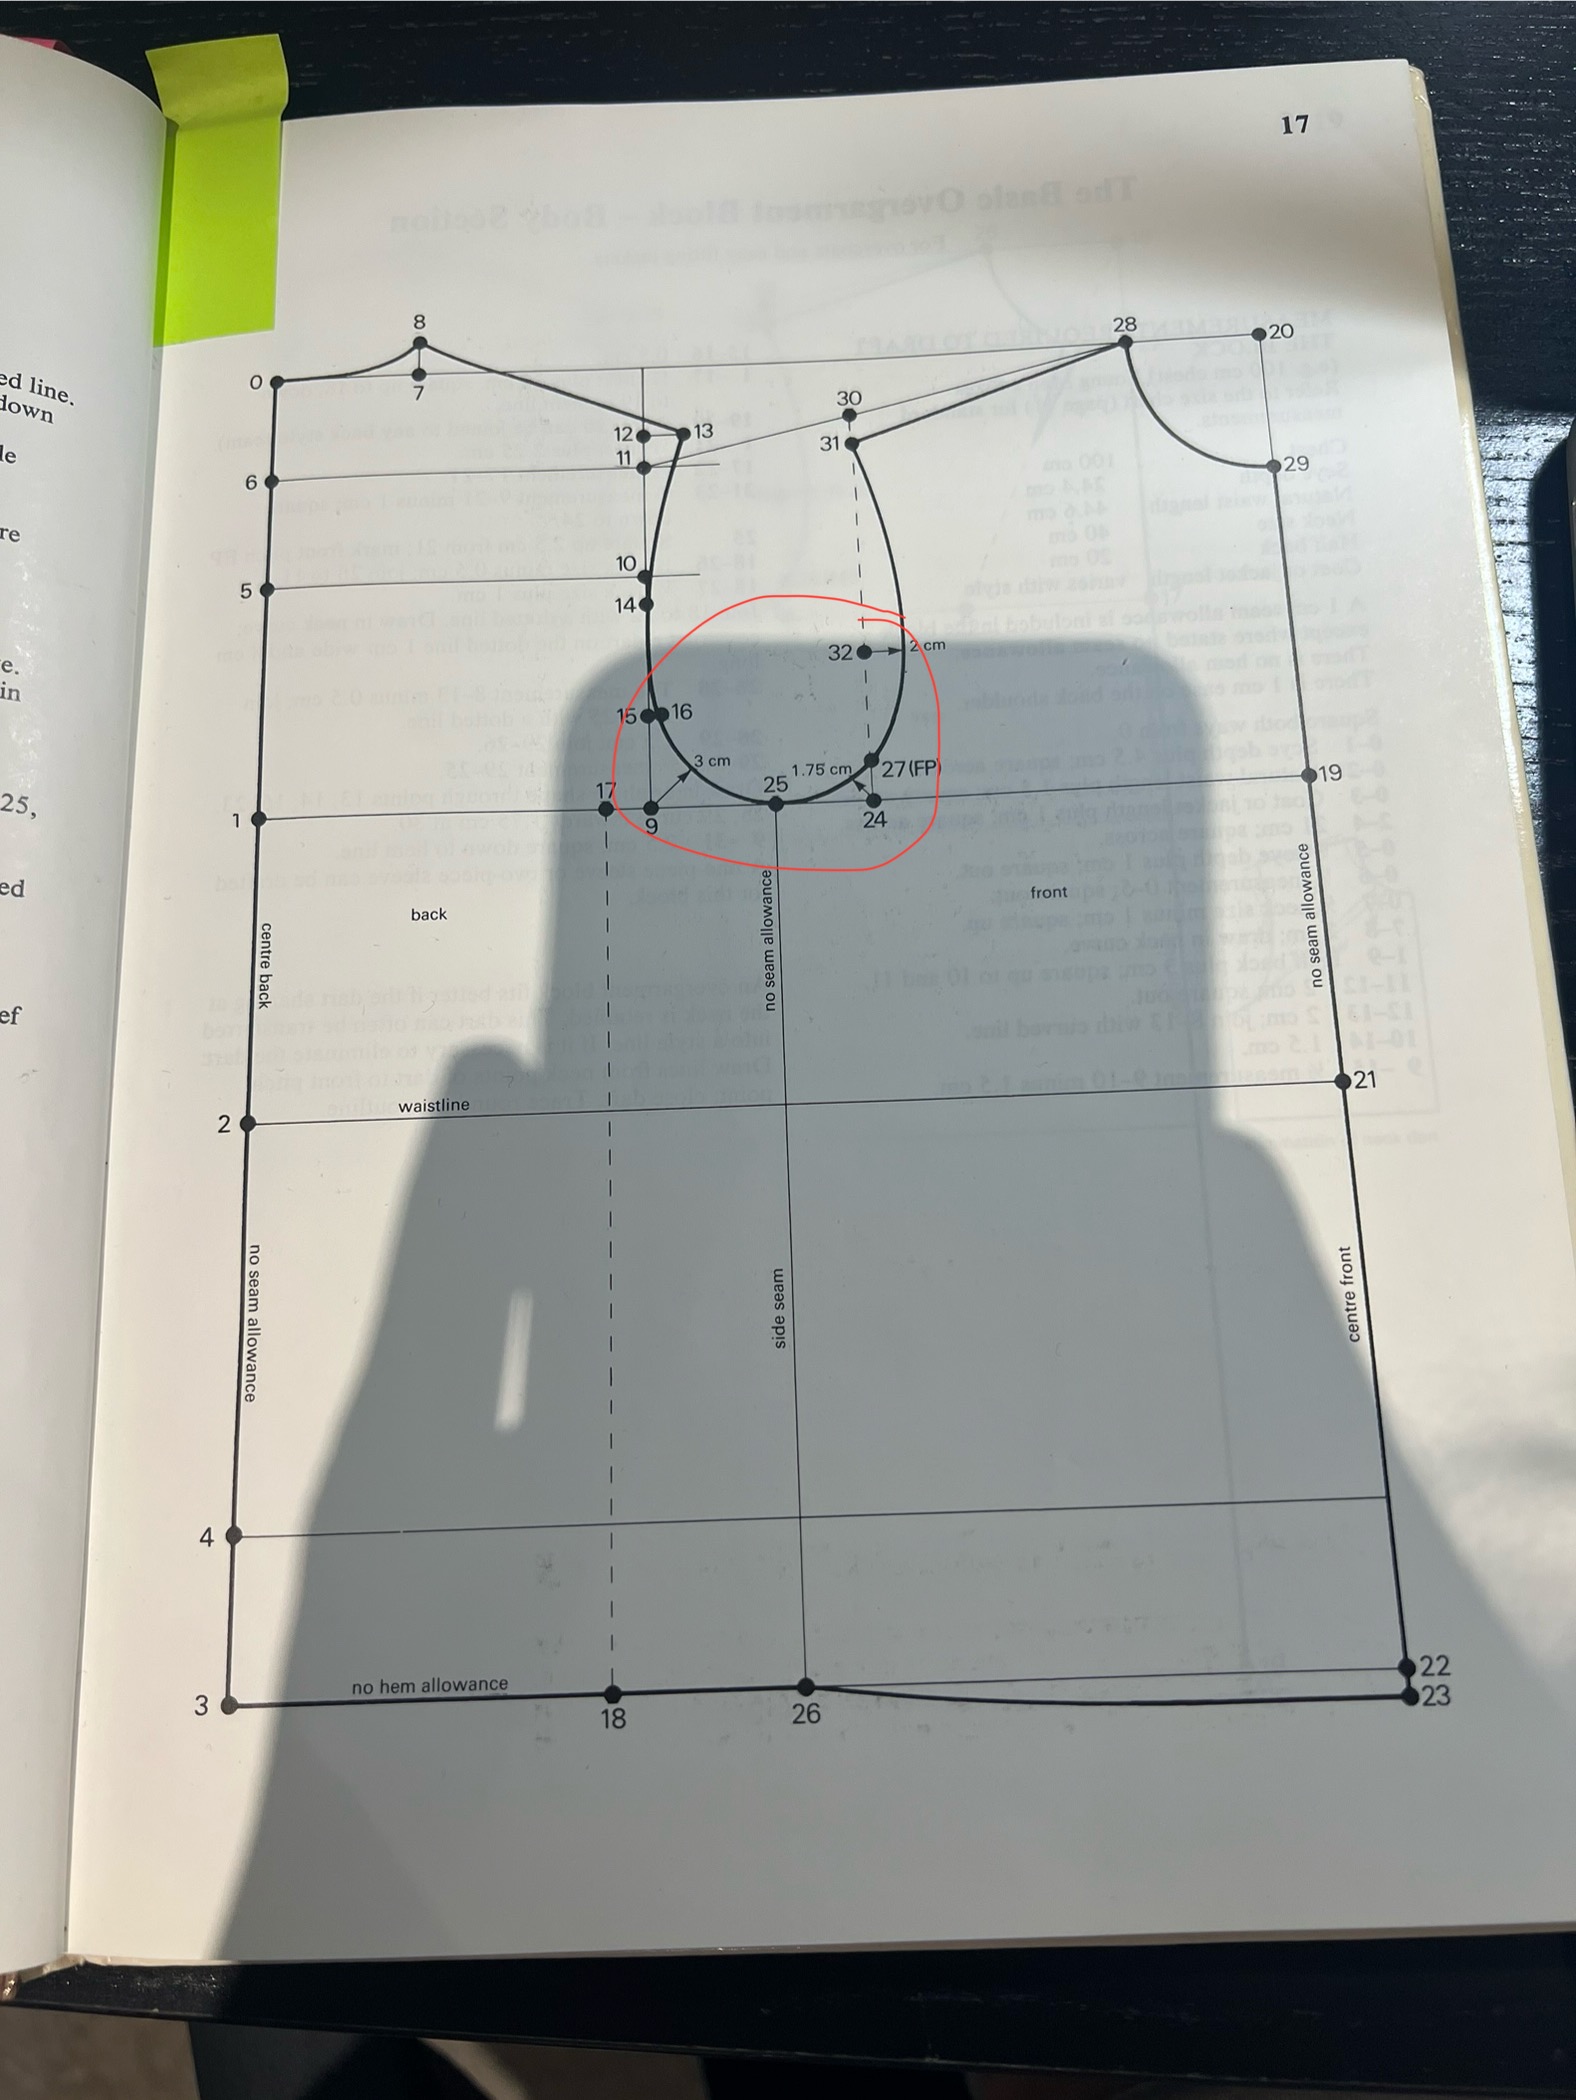
I’ve tried it 3 separate times now, and each time this curve in the centre has me stumped (see images attached of the book and my WIP bodice block).
I’m pretty sure I’m following the directions in the book perfectly. I’m finding it hard to diagnose the problem and wondered if anyone could offer their expertise?
Thank you in advance :))
1 Like
I’d have to see the actual instructions, and measurments, but I can tell just by looking that A17, A9, and A24 look like they are not in the right place. The armhole looks too narrow. If you look up the length of the shoulder A31 to A28… it’s probably too long.
Just a thought… check to make sure the pattern and measurements are in the same units.
2 Likes
You need to create a point using the Point on Bisector tool that is 1.75cm way from A24 (I normally use a Z label for these extra points). Draw your curve from A31, through A23, A27, this new point and end at A25.
Once you’ve done that, then you can adjust the curve handle at A27 to make the transition smoother.
2 Likes
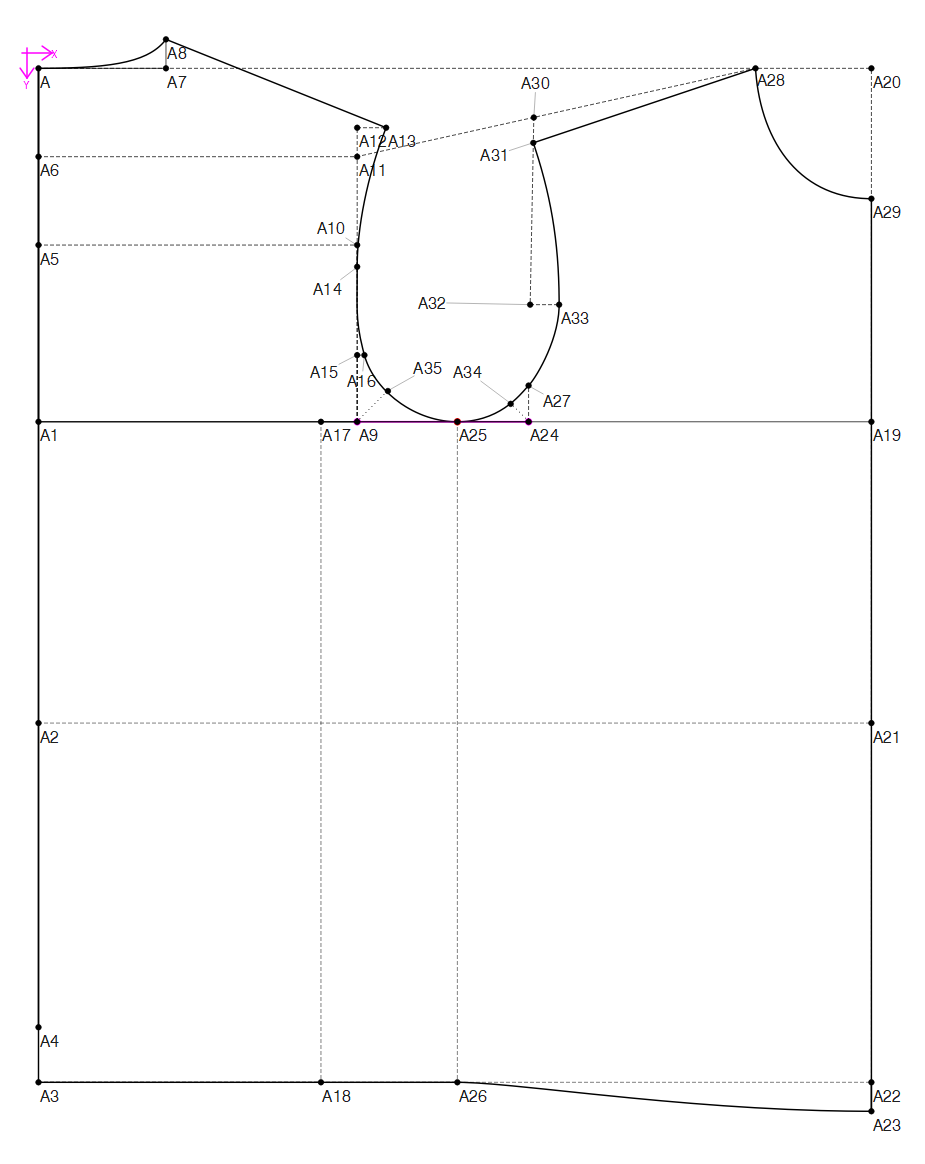
I checked my book Metric Pattern Cutting for Menswear, “Basic Jacket Block” from “Classic and casual overgarment Block” and I got this:
-
I used the measurements from the book
-
I am attaching the pattern file and my measurement file for this I did fast. The names in the measurements file are according to Seamly naming. Two measurements are in the variables, the jacket lenght and the “half back” which is calculated as “back/2”

-
I didn’t use points A34 and A35 in the curve as there are enough points to draw the “interactive spine” But i draw those points so one can check the spline. I hope you know how to manipulate such a spline through “properties”.
4)I think your problem come from using your body measurements and not the measurements from the book.
Two years ago I started with Aldrich book, but didn’t come far. Her books omit many informations, there are some naming mistakes (even with 5th edition) and naming mismatches. You need to do a lot of research to understand what she meant. I think this are books for the students who can ask their teacher how to follow them. The rules in the book are based on measurements sets that are already adapted proportionality, although ideally. Bringing your own measurements in mostly doesn’t work well as those proportions are not.
Now I am working with Mueller and Sohn books, which are have more (German) engineering written rules and you can see how the partial measurement are taken and calculated. But books are more expensive, more complicated, not all books are translated into English (but I do speak German so for me is fine). There is still a lot that I need to learn ![]()
WA MPCfM Basic Jacket Block.sm2d (10.0 KB)
WA Male Size 100.smis (723 Bytes)
4 Likes
Wow!!
Thank you so much for this answer and feedback, so kind!
I will probably refrain from using my own measurements for this basic bodice then, as its only for a simple tshirt. Will just adjust a basic bodice block for now.
Thank you so much again!!!
4 Likes
I also use the book measurements when working from a particular pattern system because then my pattern actually looks like theirs in the diagrams. Once I’m done, I put in the individual’s measurements and ‘fix’ anything that goes out-of-whack.
I also like to use a multisize measurements chart so that I can check the resizing (to an extent) while I work.
Something to remember with Aldrich Menswear is that the seam allowances are built in, so don’t add extra seam allowance when printing your pattern pieces, or don’t add the extra + 0.5cm (could be a different amount) that’s tacked onto most instructions.
3 Likes
This! it’s a breeze in seamly2d to change the measurement file. And as you draw the pattern you know where to add some ease.
3 Likes