Hi, Seamly2D community. I am a new user trying to fight myself into the software. I am Peter, a 66-year old amateur sewist living in Antwerp, Belgium. I am a scientist (marine ecology) working at Delft University of Technology and the institute Deltares in Delft, The Netherlands. Sewing is my way of relaxing in the evening. I came to Seamly2D because I am desperate at the lack of good commercial patterns for menswear, especially the tailored garments such as jackets and suits. I hope to develop enough skills to once draft my own patterns and make something just outside of the Burda catalogue. It does not seem easy, but since I started up the program last week I just completed my first block, based on Aldrich. I still have to make a ‘piece’ out of it, etc., and after all that I will not have anything original, but it will come. Hope to have a good time pattern drafting!
Welcome Peter.
You’re in the right place. 
When you get stuck, and I’m sure you will - as we all have - please feel free to ask for help. Someone here will be glad to help.
Thanks, Douglas. In fact, I have already posted my first question. But I have to say, until now my experience was quite good! A few years ago I had a go at Valentina, but I gave up because the software was extremely unstable. Nothing of that until now - a big improvement!
Welcome Peter, and have a lot of fun construction your own fashion 
Willkommen Peter,
deine gestellte Frage habe ich gerade gelesen und sie wurde ja auch schon beantwortet. Ich wünsche dir viel Spaß beim Ausprobieren, es ist gerade am Anfang eine Herausforderung, die es sich aber lohnt anzunehmen. Es gibt keine Frage, die es nicht wert ist gestellt zu werden und das schöne ist, man bekommt hier immer geholfen.
Viel Spaß beim Ankommen
Thanks, @Moniqua und Danke schon, @Scholli. Eine Herausforderung, bestimmt, aber es macht Spass ! Peter
Hello and welcome to the Seamly2D forum.
Yes, I also ‘cut my teeth’ on Aldrich, but the women’s book  , I then went on to the children’s & men’s books. Her methods are very easily translated into the Seamly pattern software for people just starting out, and can be manipulated into very nice designs.
Some tips… measure twice, cut once. The magic is in the measurements. If they’re wrong, the garment will be wrong. Once you have your basic pattern created in Seamly, do make a test garment so that you can see what it looks like on you, and make any adjustments to the basic pattern before designing something more complicated from it and keep the basic pattern intact for future designing - save the file under a new name and do the designs on the new file. This way, you don’t have to re-create the wheel each time you think of something that you’d like to create.
But, most of all, have fun!
Yeah… especially when the fabric costs $150 US per yard. I did 2 chair covers for a family member last year… I measured and checked the cut layout about 10 times before cutting. LOL
An even better tip… it almost got me with the reindeer suits last week - Make sure to flip the pattern if you’re not cutting on the fold! Been there, done that.
Also along those lines are on 1 way fabrics DON’T Y flip pieces (top to bottom) just because the pieces fit in better. Been there, done that too.


 You’re really funny, @Douglas
Hi Grace, Sure, the program is a lot of fun. Building a complete block takes some time and patience, but I just completed the first one, pieces and layout and all. I just had a small problem with the seam allowance, but that is a detail I can correct afterwards in Inkscape. I include the files here. Curious what an expert thinks of it. And yes, the roll of muslin is waiting. I am used to sew from commercial patterns, but I always start with a muslin if the fabric is expensive. I spoiled an expensive piece of silk once, it will not happen again… First I will alter Aldrich to the design I want to make - a new adventure coming! Peter aldrich_jacket_block.val (101,4 KB) measurements_Peter.vit (813 Bytes)
Could you elaborate on what the problem is / was?
Maybe there is something I can suggest, or maybe fix in the application. Short of doing some sort of nesting which we can’t currently do in Seamly2D, one shouldn’t have to resort to Inkscape.
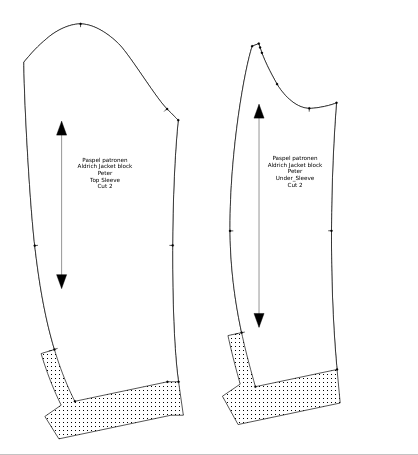 You can see it here. The standard seam allowance is 0, as allowances are included in the basic pattern. There must, however, be 6cm allowance for the hem of the sleeves, and 2,5 cm allowance for the vent. At the transition point, the 6cm allowance continues for some time. I have tried the different options for the node involved, but none of them corrects the problem.
I’ll play around when I get home later, and see what I come up with.
![]()
![]()
![]() Not at all expert, still learning… The eternal student.
Not at all expert, still learning… The eternal student.
Your pattern looks beautiful. I can see that you have really taken the time to be very accurate in implementing the instructions in the book, which is an excellent starting point and will create a sound basic pattern for you to design on later. Very well done!
There is one thing that I would like to point out to you that will make your pattern even more sound… and this is on the subject of curves. I see that you have been tweeking the handles and angles to achieve the appearance in the book, which is great, but when you change the measurement file to a larger or smaller size, you will need to tweek them all again, because your pattern will become very funny looking. This can also happen if you add extra wearing ease (tolerance) in places.
The way to get the curves to resize smoothly is to use formulas relating to actual lines and directions in the pattern itself. There are various topics on this and @KeithFromCanada wrote a good tutorial in the wiki on the subject.
You may need to add some extra nodes and lines get the formulas needed… please remember to use the History to create them directly before the curves so that they will be available to just edit the lengths and angles of the curve handles. (Please make a backup of your file before using the History, because it’s very easy to forget that you’re not positioned at the end of the list when you close it to continue with something later in the list.)
You will also find some topics on using the History in the forum.
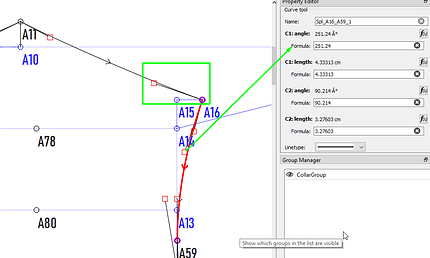
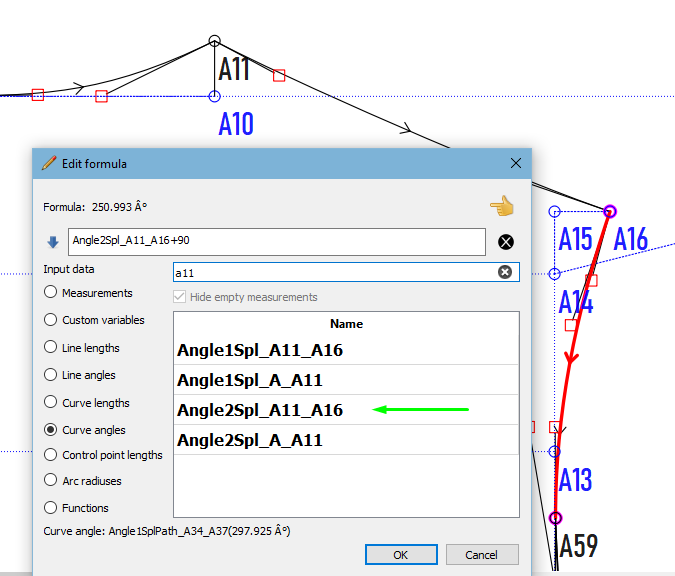
An example of a formula would be to use the 2nd handle’s angle of the curve A11-A16 to direct the 1st handle of curve A16-A13 adding 90° to create the needed 90° corner here:
So the formula would be: Angle2Spl_A11_A16+90
![]() This isn’t necessary if you are only ever going to use the same size chart and ease, (or convert this jacket into an overcoat) - but it’s good to get used to early on when using Seamly if you’re going to make clothing for others besides yourself.
This isn’t necessary if you are only ever going to use the same size chart and ease, (or convert this jacket into an overcoat) - but it’s good to get used to early on when using Seamly if you’re going to make clothing for others besides yourself.
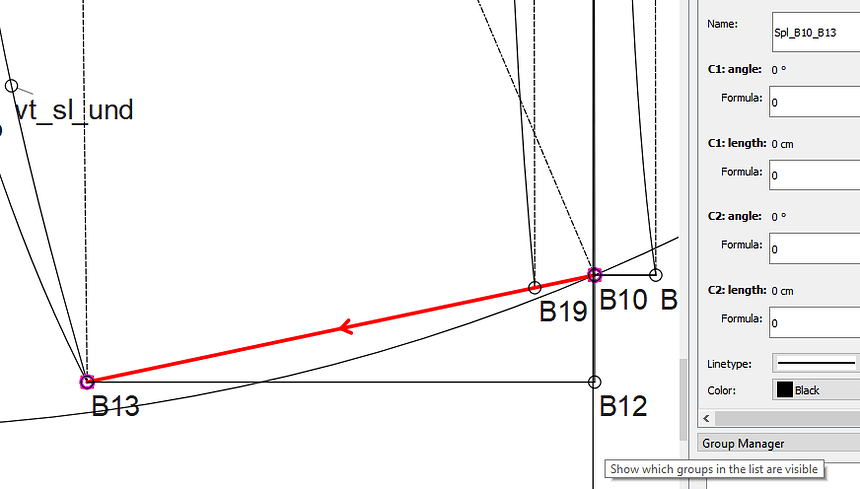
Ok… I took a look at the pattern, and it’s as I thought. There’s an issue with using 0 degs and 0 le gth for the control points of the curve between B13 and B10.
It makes no sense for a curve as in essense it makes it a straight line… sort of. Since the length & angle of the control points affect the results of the SA’s, they have to be correct.
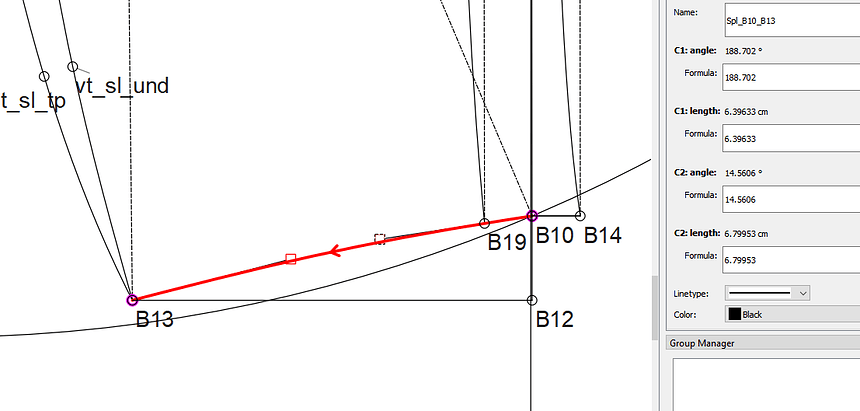
By roughly adjusting the control points the SA works correctly.
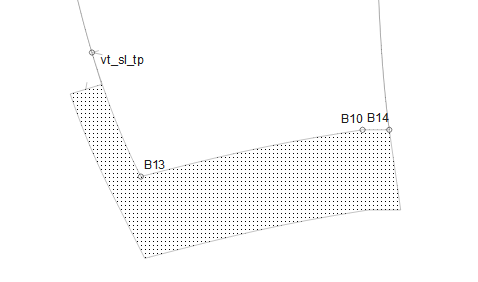
With that being said I also would think the hem line of the upper sleeve should go from B13 to B14… and not include point B10. It’s causing a kink in the hem line.
And yes… @Grace is absolutely correct on formulizing the control points so a pattern will correctly resize with different neasurement files - which is a moot point if one is just making a pattern for themselves.
Thanks for the tip, @Grace. I had seen in the video that it was possible, but I was refraining from using it as it is a lot of work, and I had no insight in how to do it properly. I will study the material in the Wiki. I will also study the History, because that is still a mystery to me.
Thanks @Douglas ! This not only gives me insight in the seam allowances matters, but I can now also understand why there is a line tool in the first place. That seemed odd to me, as a line is just a curve without curvature, so I started wondering if that entire ‘Line’ tab could not also be suppressed. I guess in the code it makes a difference, because when the angle of the handles is zero, the length of the handles is undetermined and you easily run into all kinds of ‘if’ statements to keep it working. Anyway, I now have the clue to correct my seam allowance and that makes me very happy, as it was the last item to solve. Apart of course from the formulized handles. I hope with better understanding I can do that properly in the future. Peter
Please don’t hesitate to ask, we are all very willing to assist. The history is a bit like time-travel. If you open a pattern file in a code editor like Notepad++, you will notice that it is an xml file that stores each instruction in the order that it was created. As such, the software reads in the same order. So, if you are editing something on line 50, the software will only give options up to line 50, it won’t see anything after line 50. The History allows you to insert items before line 50, so that they also become options in the formulas.
So it’s really a bit of magic that I use all the time. ![]()
As for the curves… You can use existing lines & curve for their lengths and angles - I do it all the time, too.
Another advantage of using a formula is that once the formula is in, you can’t accidentally move the curve handle while you’re scrolling around your pattern.
Ah, very good! Much easier than Ctrl-Z back to the point where you made a mistake, and redo everything thereafter! I was already missing such a feature! I am busy reading the theory on the formulas - very didactic text!
Just make sure to make a backup of the pattern before trying to insert into the history.
The line tool exists so you can create an object that has a length and angle between two points, so you can use those variables in other formulas. Or… sometimes I just use a line to complete the contour of a block, even though you don’t need the line to complete the path of a piece. It’s automatically assumed to draw a straight line between two node points. That’s also why you can’t select lines when creating a piece - you don’t need it.
That being said… with your sleeve pattern, I would just make the path go A19, A13 for the under sleeve, and A14, A13 for the upper… that will make straight lines for the hem. You don’t need the curves.
With that said… if you want the sleeve pattern to be totally correct - since currently we don’t have a hem foldout tool… I would draft the vent and foldout into the pattern using the mirror by line tool… something like:
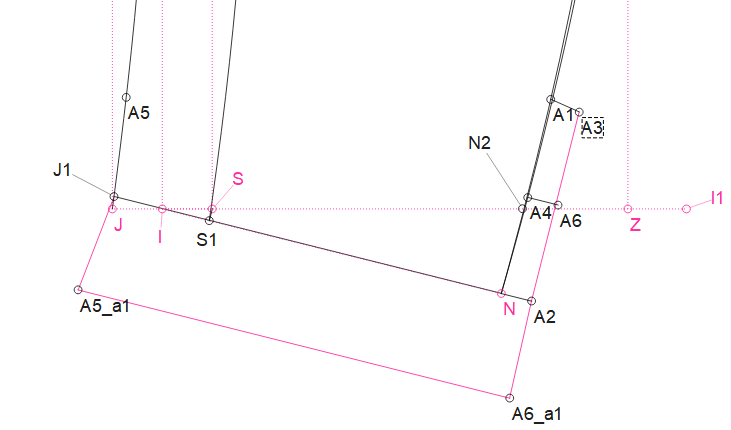
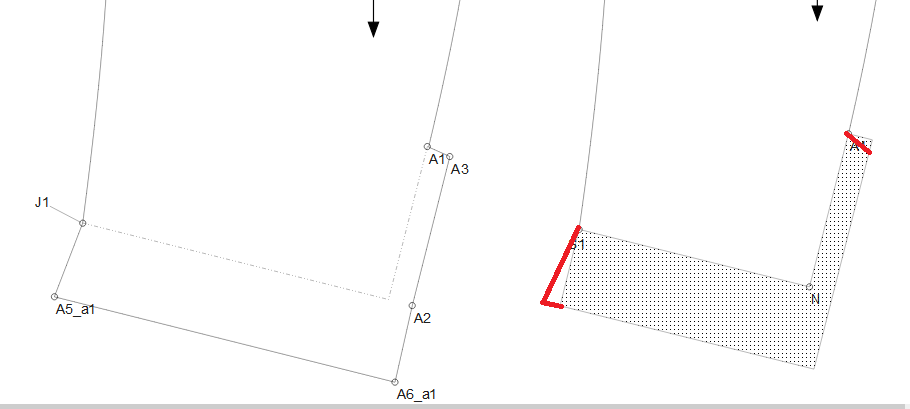
Which yields this on the left as opposed to using a SA as on the right. :
Or like a sleeve pattern I just grabbed:
