Line lengths do not appear

Good morning,

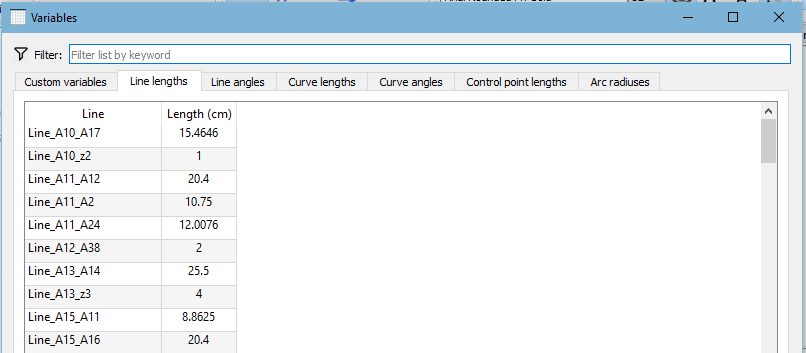
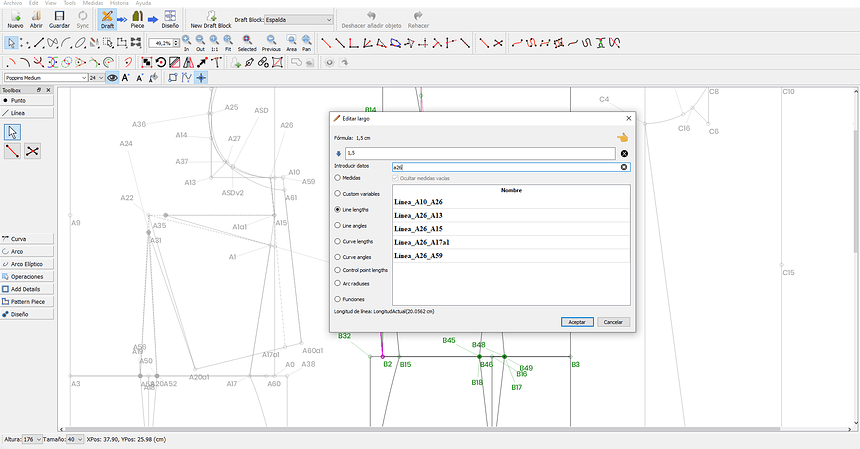
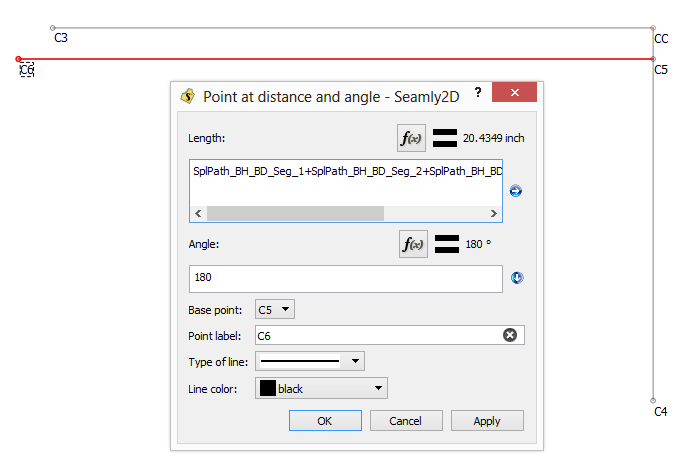
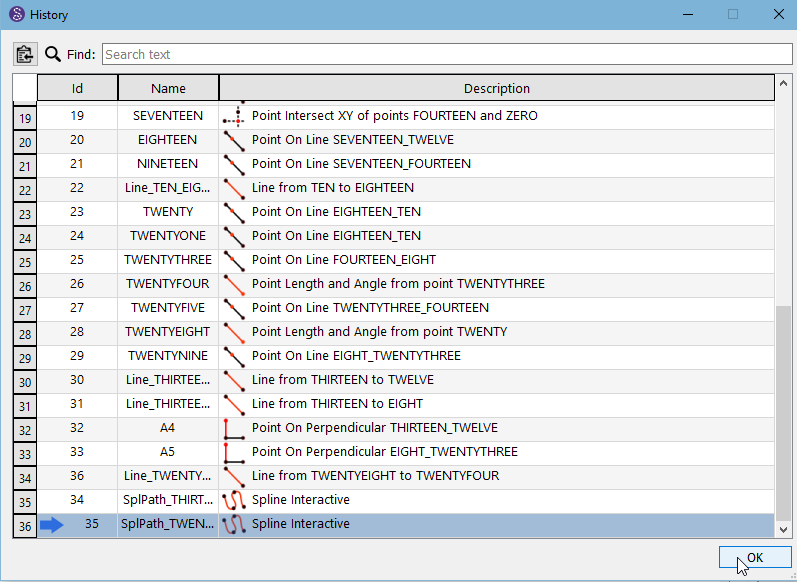
I have problems creating a formula in one of the pieces of the pattern, specifically, in the piece " cuerpo base de mujer " in the attached files (.val .vst). This is because not all the lines that are created in the pattern appear in the formula menu “line lengths”. (Screenshot 1 and 2)

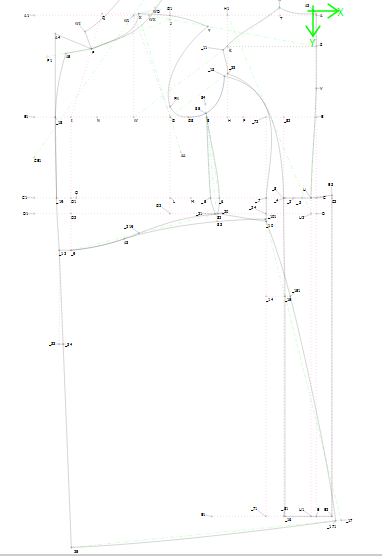
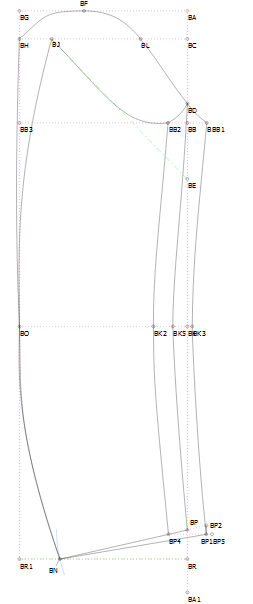
However, all the “line lengths” of the " cuerpo base de mujer" piece do appear in the formula menu of the rest of the pieces, such as “espalda” or “manga”. (Screenshot 3)

What could be happening and how can I solve it? Also, What can I do so that all line lengths appear in every piece?

Thank you very much,

Esther.

Prueba vestido - bug lines.val (59,7 KB)

Tabla de medidas cuerpo - bug lines.vst (3,9 KB)

1 Like

Am I understanding correctly that you are trying to edit A16 to be placed using a measurement involving A26?

If so, then what we’re seeing here is a time-travel issue. The creation of a previously created item cannot be based upon the status of a subsequently created item. Looking in the “Historia” menu, I see that that is the case here. The only exception is that all of pattern block B comes after pattern block A & before pattern block C, &c. even if you drafted them out of that order. The devs have discussed implementing an algorithm to allow expanded time-travel, (as long as the time-streams aren’t crossed,) but other issues have been more important so far.

@Grace is better equipped to advise on how to get around the time-travel issues than I am.

2 Likes

Hi Pneumarian,

Thanks for your support. Yes, we are on the same page as per your understanding.

Does this mean I cannot use measurements created from the back pattern (B) in the front pattern (A)? Also, I can see all the measurements from A in the other two patterns but not in A itself, which confuses me.

2 Likes

Correct. I have an idea that it’s probably best to draft all pieces of one garment on the same draft block, but I am not certain.

Yes. in the XML coding of the pattern file, each block is contiguous & sequential. One can call on any measurement listed prior to the current item in the XML, but not any subsequent.

…Which means that as long as A26 is not dependent on A16 in any way, using a txt editor to move the XML line on which A26 appears to just before the line on which A16 was created should work…

Prueba vestido - bug lines.2.val (59.7 KB)

There you go!

The issue is basically that if Point A1 is placed Line_A1_A2 away from A & Point A2 is placed 2+Line_A_A1 away from A1 the infinite recursion will attempt to be infinite. Modern systems are robust enough that this will only crash Seamly rather than force you to hard-reboot your computer, but rather than deal with all that, (& until a recursion-check algorithm is implemented,) calling any future measurements is banned.

:unicorn:

1 Like

That would be my advice. It’s a common practice I use even when normally drafting a jacket on paper. It’s just quicker to extend all the horizontal construction lines to cover both front & back. In fact some systems for men’s coats actually draft the F&B where they overlap, and you have to separate them. No big deal… I just use a tracing wheel to transfer each piece to another piece of paper and then add the seam allowances. Of course with Seamly2D this is not an issue, :slight_smile:

For example here’s a frock type coat using the Supreme System: Not only does it contain the front & back, but the side front, skirt, and collar.

period

Also many systems draft both parts of 2 part sleeve together:

sleeve

And sometimes what I do, because measurements from a previous draft block can be used - as a check of the armscye circumference, I draw two lines in a 3rd block, whose lengths are the sum of the curves making up the armscye circumference of the body and the sleeve. As long as the sleeve armscye circumference is within 1"-1 1/2" longer, there is no need to adjust the sleeve draft.

sleeve2

2 Likes

Thank you very much for your help.

With regard to plotting all the pieces of the pattern in the same draft block, I have a question and it is that if right now I don’t see all the line lengths and curve lengths that compose it in the front pattern piece, wouldn’t I be losing the advantage of seeing all the measurements of future pieces made in the same draft block as well?

Would there be a way to save certain line lengths of the pattern as constant values (per size) that can be used at any time, for example in the .vst file of measurements that is being used in the pattern?

1 Like

Seamly reads measurements in the order of:

  • measurement file
  • variables table (Custom Variables tab)
  • previous draft blocks
  • previously created measurements of current draft block

So, yes, as long as you can define the measurement in a previous step, you can use it.

I think you’ll find that you can’t see any of the measurements in B when you’re working on A, so no, you shouldn’t be losing anything.

Admittedly, some pattern drafting systems do call for a lot of fudging & time-travel. So it’s possible that the system you use is not compatible with a parametric design process, (without completely overhauling it,) but it’s also possible that with only minor work-flow tweaks it will be quite usable. If you would be so kind as to post which system you use, hopefully someone can help you figure out how best to use it with Seamly.

1 Like

Hi @Esther

To expand on what @Pneumarian & @Douglas have been telling you…

Seamly saves the pattern instruction lines in a very specific order. First is the 1st drawing board, in the order of creation - and then the 2nd drawing board, in the order of creation - and so on. And then Seamly will ‘read’ the file in this order. It can’t see past the current drawing board that you are working on or the current point that you are working on. And you can’t add a line to a point that was only made later or on a later drawing board.

It is for this reason, that I have been encouraging people to do their whole pattern on one drawing board, so that one can access EVERYTHING that was drawn before.

You can view the order of creation by clicking on the History tab or hitting CTRL/H:
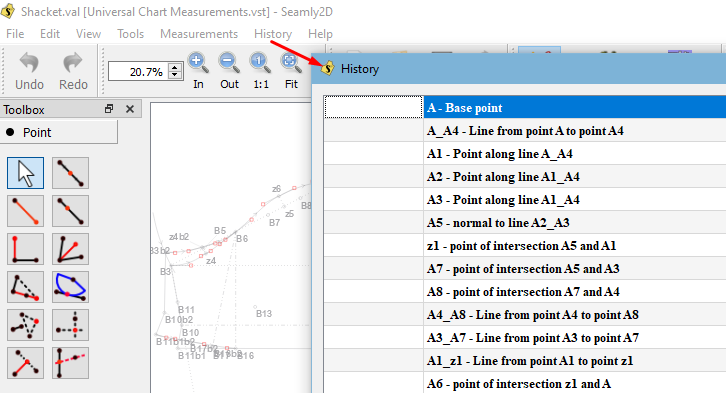
image

The only way to save the certain line lengths is to create them at a point before they are needed (and this is what @Pneumarian means by Time Travel :grin: which came about when we were teaching someone to use the History).

There are various discussions about how to add points in History to be found on the forum, that may help you, this being one to get you started: Hacking Points in Pattern Files - #2 by Grace

Other than that, ALL the different lengths are saved in the Variables Table:
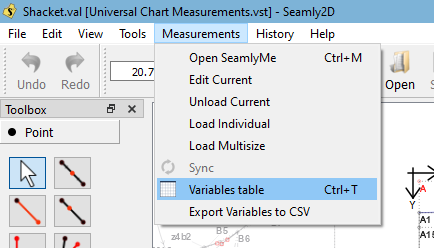
image

image

So… if you don’t have access to a certain line, because it was made in a different drawing board, you can look up its value, if you wish, and 'hard-code" the length into your pattern, but you won’t be able to link to it, so it won’t resize automatically when you change the size for the pattern.

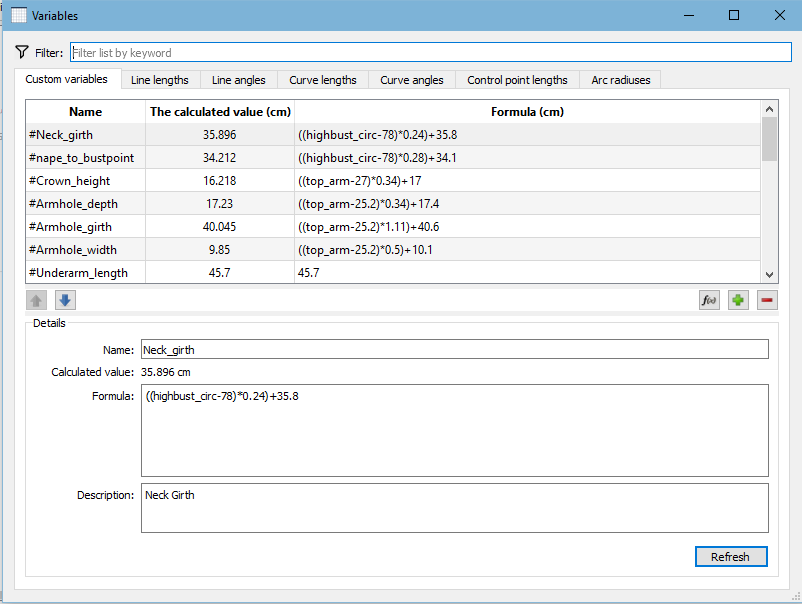
A way around this would be to create a Variable for this length and using it in all the places that require that length. Variables are also found in the 1st tab of the Variables Table:
image

Once again, with the Variables, it’s best not to reference a specific line, but rather to create a formula, since the Variables get saved before any of the artboards or pattern lines, therefore, they will always resort back to 0 as soon as you save, so best to use the measurements file and other “hard-coded” formulas as you can see that I do in the image.

So these are a few things that may help you to achieve/rescue the pattern that you are working on, that I use all the time. These tips take practice to get into hang of things, but so, we all settle into a specific way of working that sits well with us, personally, and we are all happy to share what works for us.

Please remember to save a backup before using the History, because it can create a crash very easily.

:slight_smile:

2 Likes

Hmmm… This would be another example of the usefulness of extending the autosave feature that I’m currently working on. By extending autosaves to include multiple versioned autosaves and backups, it could help a user recover in the event editing the history messes up the pattern as there could be multiple copies of the pattern to fall back on.

2 Likes

Hee-hee, @Douglas, why do you think I want that feature? :joy: :rofl: :star_struck:

1 Like

To be honest I didn’t specifically have messing up the History in mind as the cause of a crash for autosaves & (auto) recovering… but now I have at least one way I can trigger a crash to test the auto recovery. :slight_smile:

2 Likes

Oh, wow! @Douglas , I didn’t think of it when you said you need to create a crash :cry:

I probably could write a test and run it to trigger the autosave… or just yank the battery out of the laptop :open_mouth:… but it’s probably just as easy - and safer - to just play around creating some nodes willy nilly in the history and it’s bound to crash. :slight_smile: That way I can see how it operates in a real world example… Thing is, we actually should be looking at ways to capture some of these errors and gracefully exit, rather than the app crashing. IMO there should be no way of knowingly being able to crash an app.

2 Likes

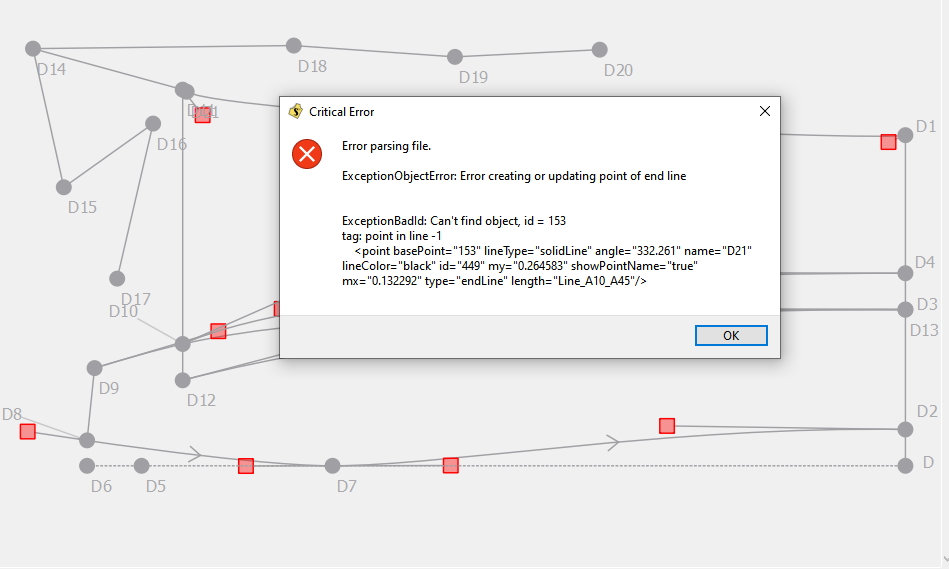
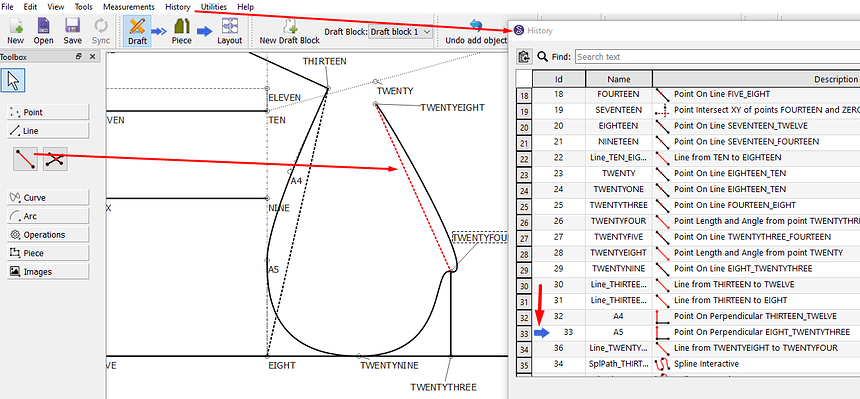
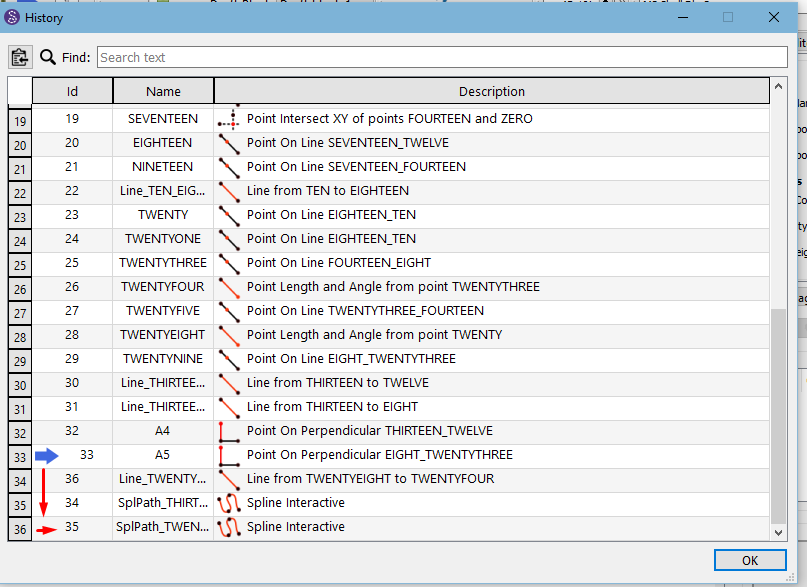
The history will crash if you add a point at a previous place and then add something else using the new point without moving to then next line in History.

I feel like I’m time travelling again, so if you don’t understand, I’ll make you some pics :slight_smile:

Once you’re done using this crash feature :grin: Perhaps you can change it to automatically move down to the current line added instead of staying in the same place and adding stuff below it.
1 Like

I completely understand. Like I said it’s actually too easy to intentionally crash the pattern randomly adding something to the history. Actually I already crashed it several times… it throws up the exception error and then the draft scene is all greyed out after closing the message box. A user has to figure out to close the pattern… if you’re lucky you can open the pattern again - possibly loosing some recent changes. The single autosave restore feature only works when the app totally crashes and you have to restart the app with xxx.val.autosave files existing. What should happen in this case where the pattern crashed and the scene is greyed out - the user should be presented at THAT point with a dialog asking if they want to restore the pattern from the autosave file - not be left looking at a greyed out screen. Back to the drawing board.

2 Likes

I was having issues trying to get a specific line to show up in the line length section, so I made a 45-second screen grab to demonstrate the problem. I found this question that seems similar, but I’m unsure if it’s exactly the same issue I’m facing (or how to fix it).

In short: Is what I’m facing here also a time travel issue? The line I want to base the length of the control point of the spline off of is newer than the spline itself but I face similar issues getting it to show up even when I add a random point. It still won’t let me make that point the length of the line created in the video.

Bodice Missing Line.sm2d (8,1 Ko) CLO ASTM MISSY CURVY 6.smis (1,8 Ko)

Also included the Seamly file and measurement file just in case

2 Likes

You can use the Menu > History > History to place a line prior to the spline that you want to reference it in, as long as the other points are existing or that you add them before placing the line.

Click on the last line before clicking on OK:

image

Like this:

image

Then you will be able to use the line in your formula:

I hope this solves your problems at the other places, too.

2 Likes