Oh, that sounds like a smart method to do this! A bit of extra work, but that would work for getting a variety of measurements right at one go!
2 Likes
Unless you like weeds… it’s hard to technically describe what the issue(s) are with the Union tool. ![]()
Yes… until I get around to fixing or more likely replacing the Union tool.
2 Likes
My wife is a senior programmer, I am quite used to hearing technical talk that I only partially understand ![]()
And I also understand the pain of open source programming, especially after the original author has nothing to do with it. So no worries there.
2 Likes
After working my brain for a good while, it seems to me that the length that the vents/darts take away from the chest piece are not taken out of the liner. That would allow for some ease, I suppose.
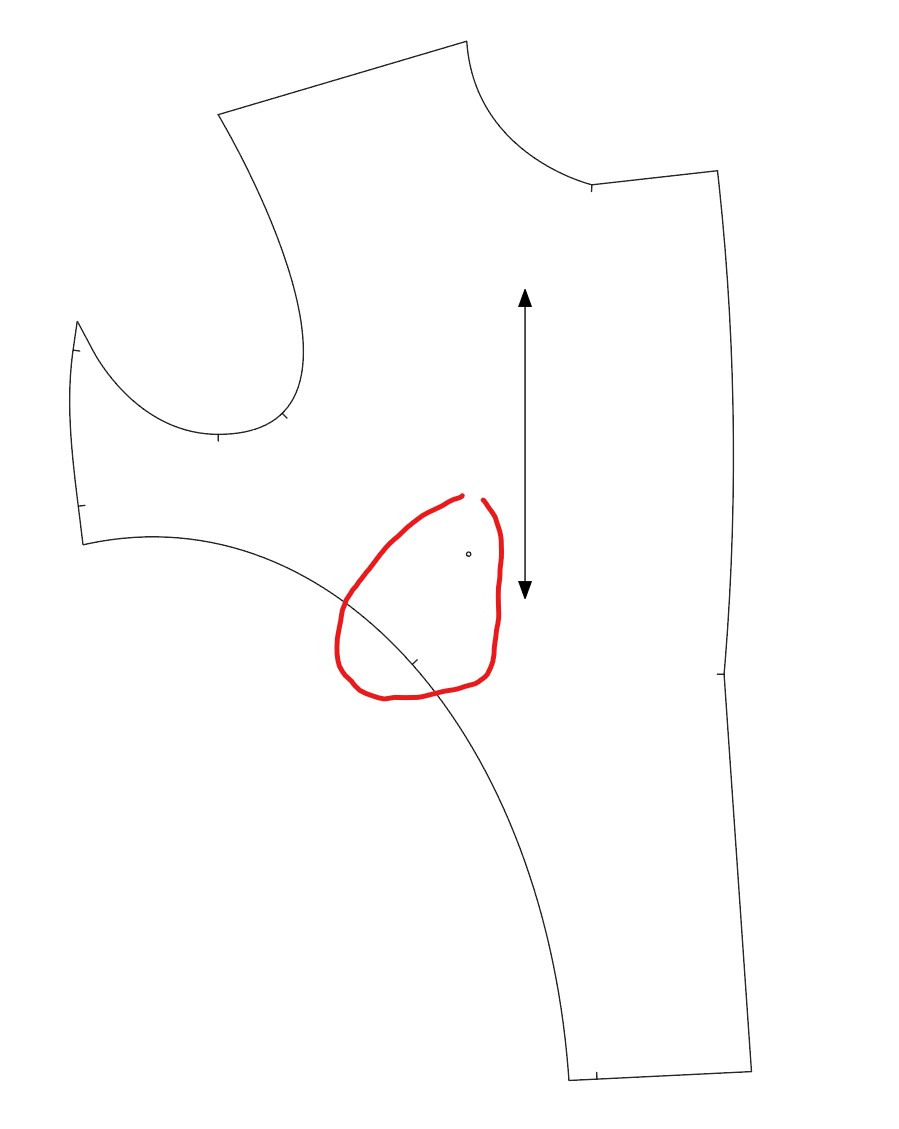
All the samples I have in all sizes I have show a small dart where I’ve circled here with red. But that dart seems pretty…. pointless? It’s only 0,5 cm in all of them, which doesn’t seem to do much at all shape wise.
Also adjusted the curve a little, but can’t be arsed to redo the picture.
2 Likes

Well, here’s all the parts I HOPE.
Except I just realized epaulettes are still missing. Luckily they are standard size, so I can just use one of my epaulette templates for them and perhaps draw them tomorrow.
I’ve ran out of time yet again, so tomorrow it is off to perhaps making the epaulette and then plotting the templates out. And start cutting!
2 Likes
It’s looking really good. I’m totally lost just looking at it ![]()
2 Likes
I found out…
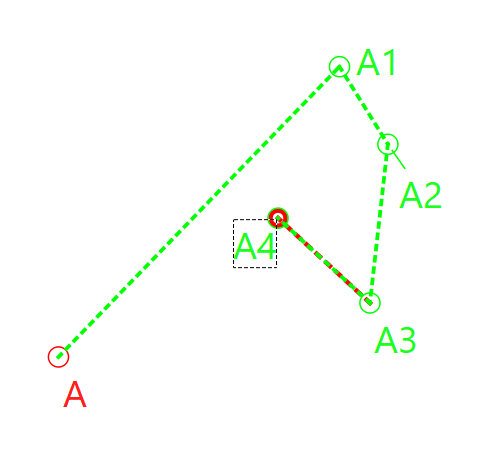
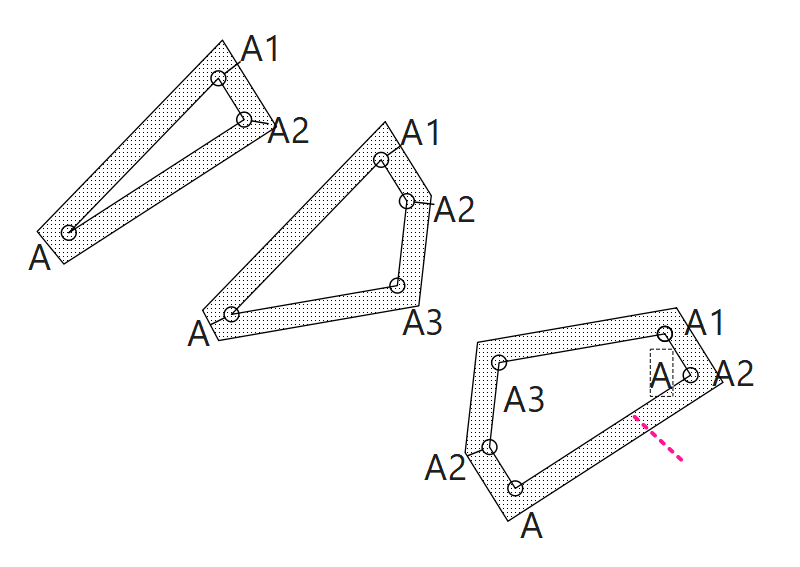
Because adding ipaths after the fact to a Union piece means the ipath is not transformed along wth the rest of the piece path. For ex: I took and joined these 2 pieces and added the ipath (magenta dotted line) from A3 to A4… and you can see the piece that contains point A3 got rotated, (transformed) but the ipath did not.
2 Likes
I promise there is a reason for all of these! ![]()
Hmm, interesting behaviour. I’ll have to take a look at that too just to figure out what’s going on as well out of curiosity.
2 Likes
Well you’re not going to be able to recreate what I last posted… I recompiled without restricting Union pieces from the combo box to select which piece to add an ipath to. I knew immediately what was going on, and why the code rejects union pieces from the list. The ipaths have to be attached to a piece, so when a piece gets transformed (rotated, moved, or scaled) when uniting the piece paths, the ipaths go along for the ride in the correct relative position.
3 Likes
Ah! Well fair enough, not going to be compiling code ![]()

I’ve now cut all my fabric and collected all the parts in bundles so that I don’t forget anything.
Now I’ve got to figure out the order of assembly… which seems to be mostly pretty straight forward, but I do have to be careful with the liners of the sleeves as well as how the button area is all assembled.
Time to take out the trusty notebook and start thinking… ![]()
3 Likes
Well, we’re almost finished.
One again…..:
Guess who forgot to adjust the buttonhole side and now has ridiculously wide buttonhole part…? ![]()
Third monday of the week, I guess. Have to fix it tomorrow… or I guess I’ll leave it as is for this test for now.
2 Likes
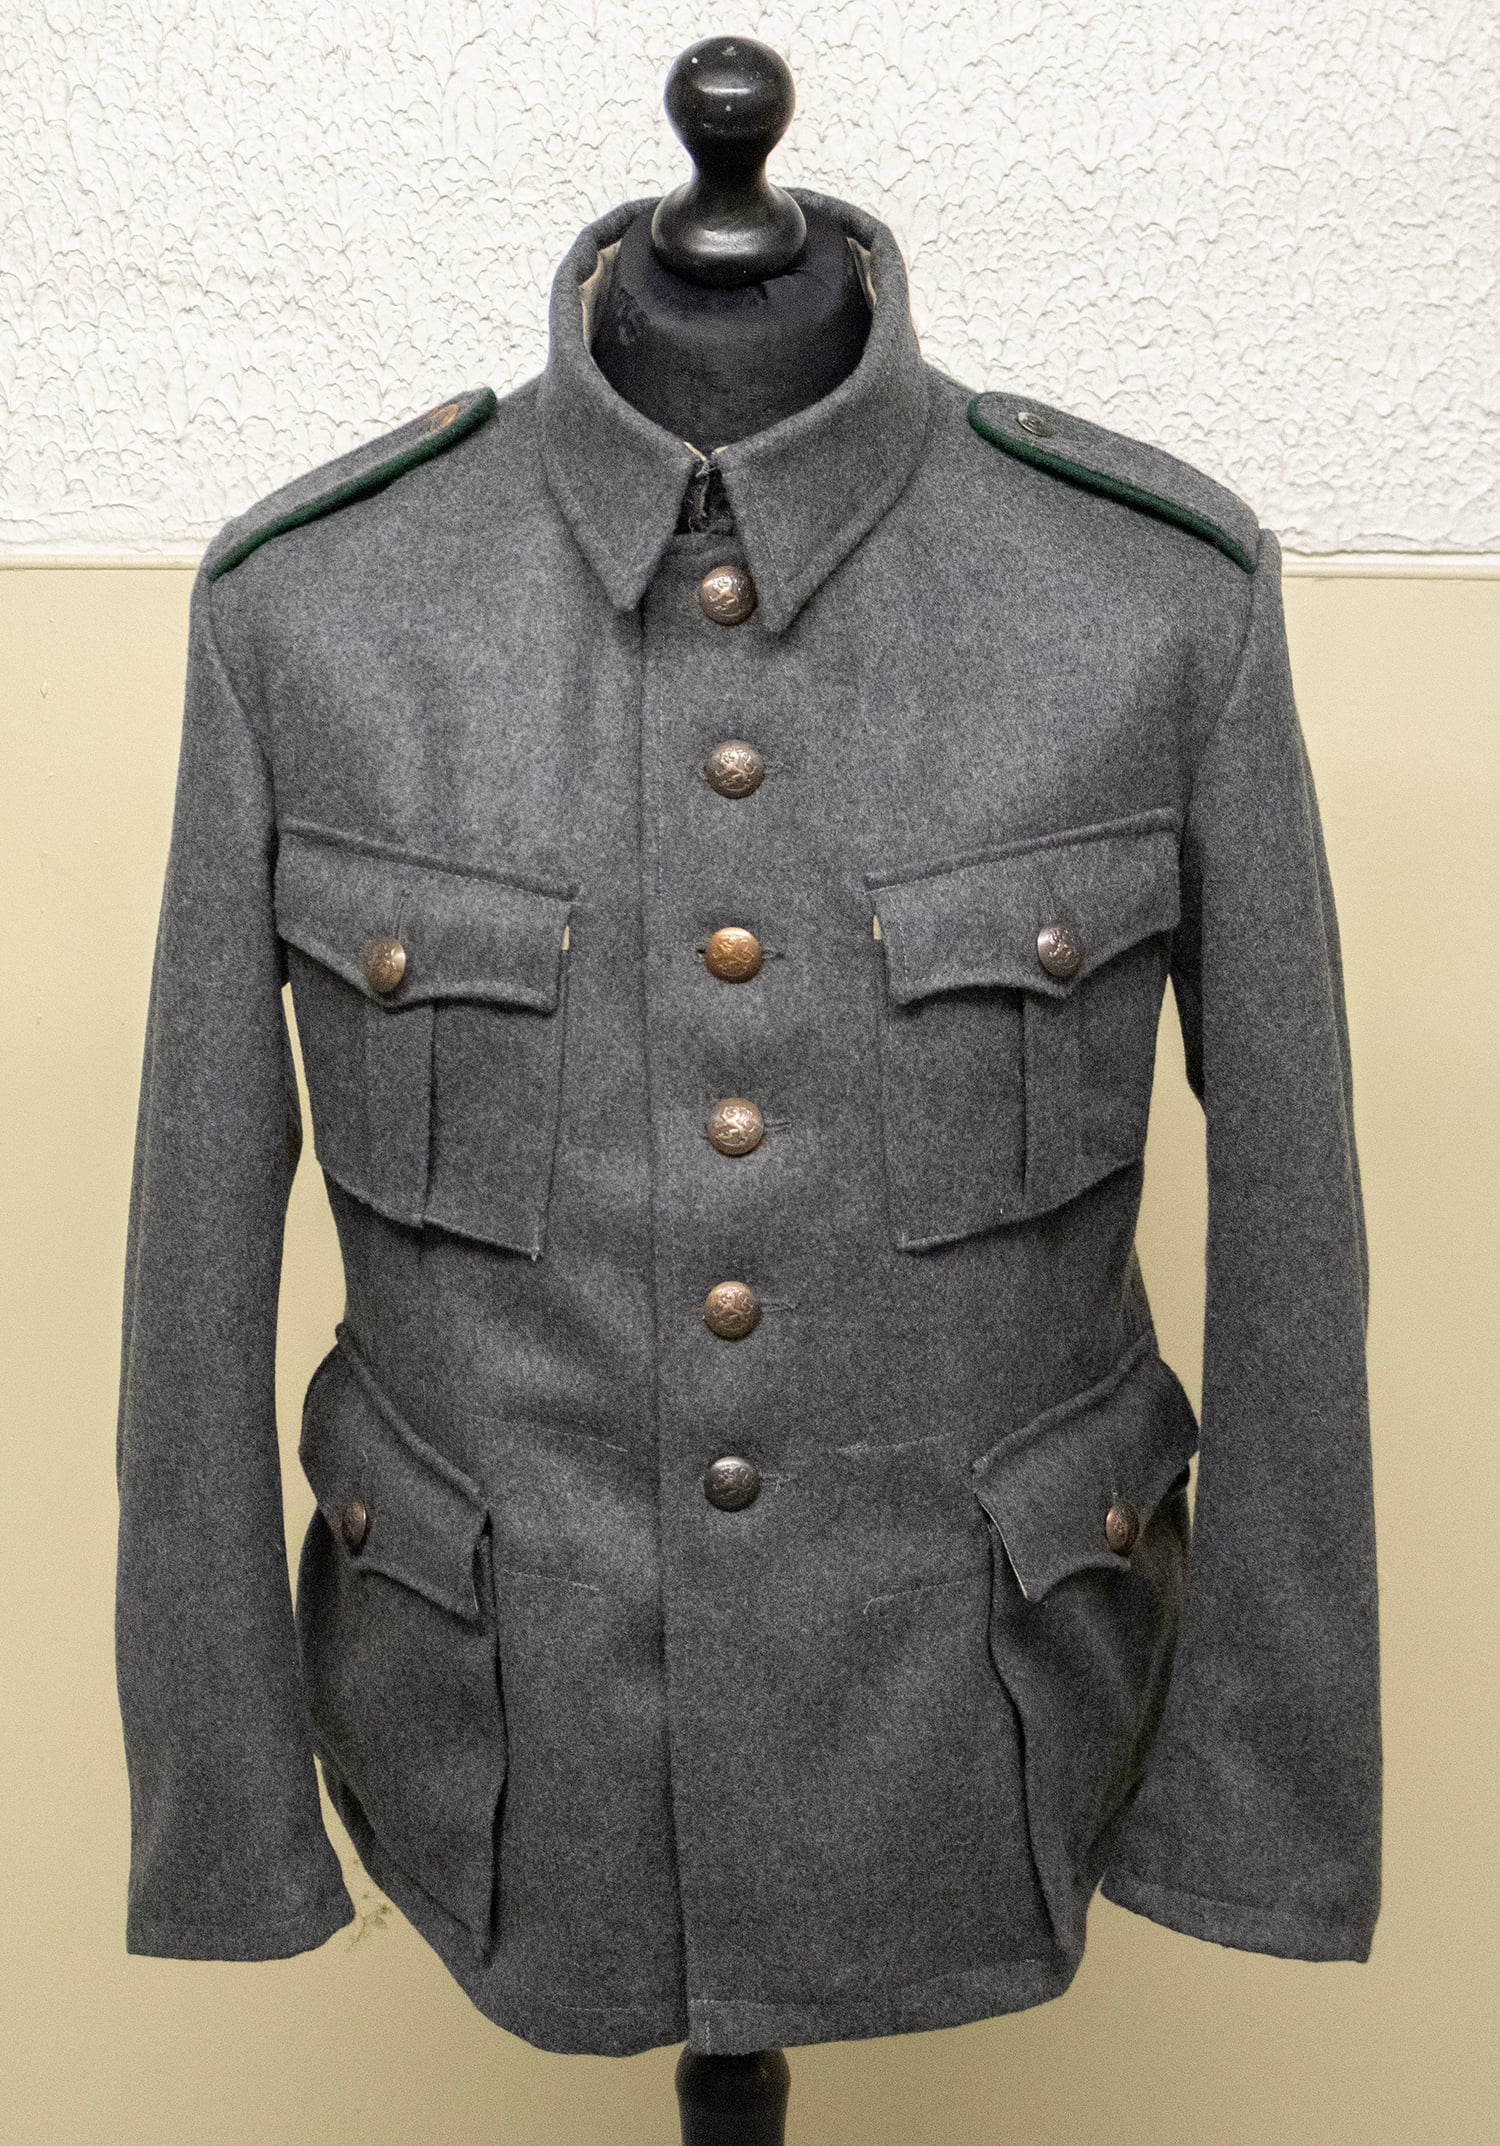
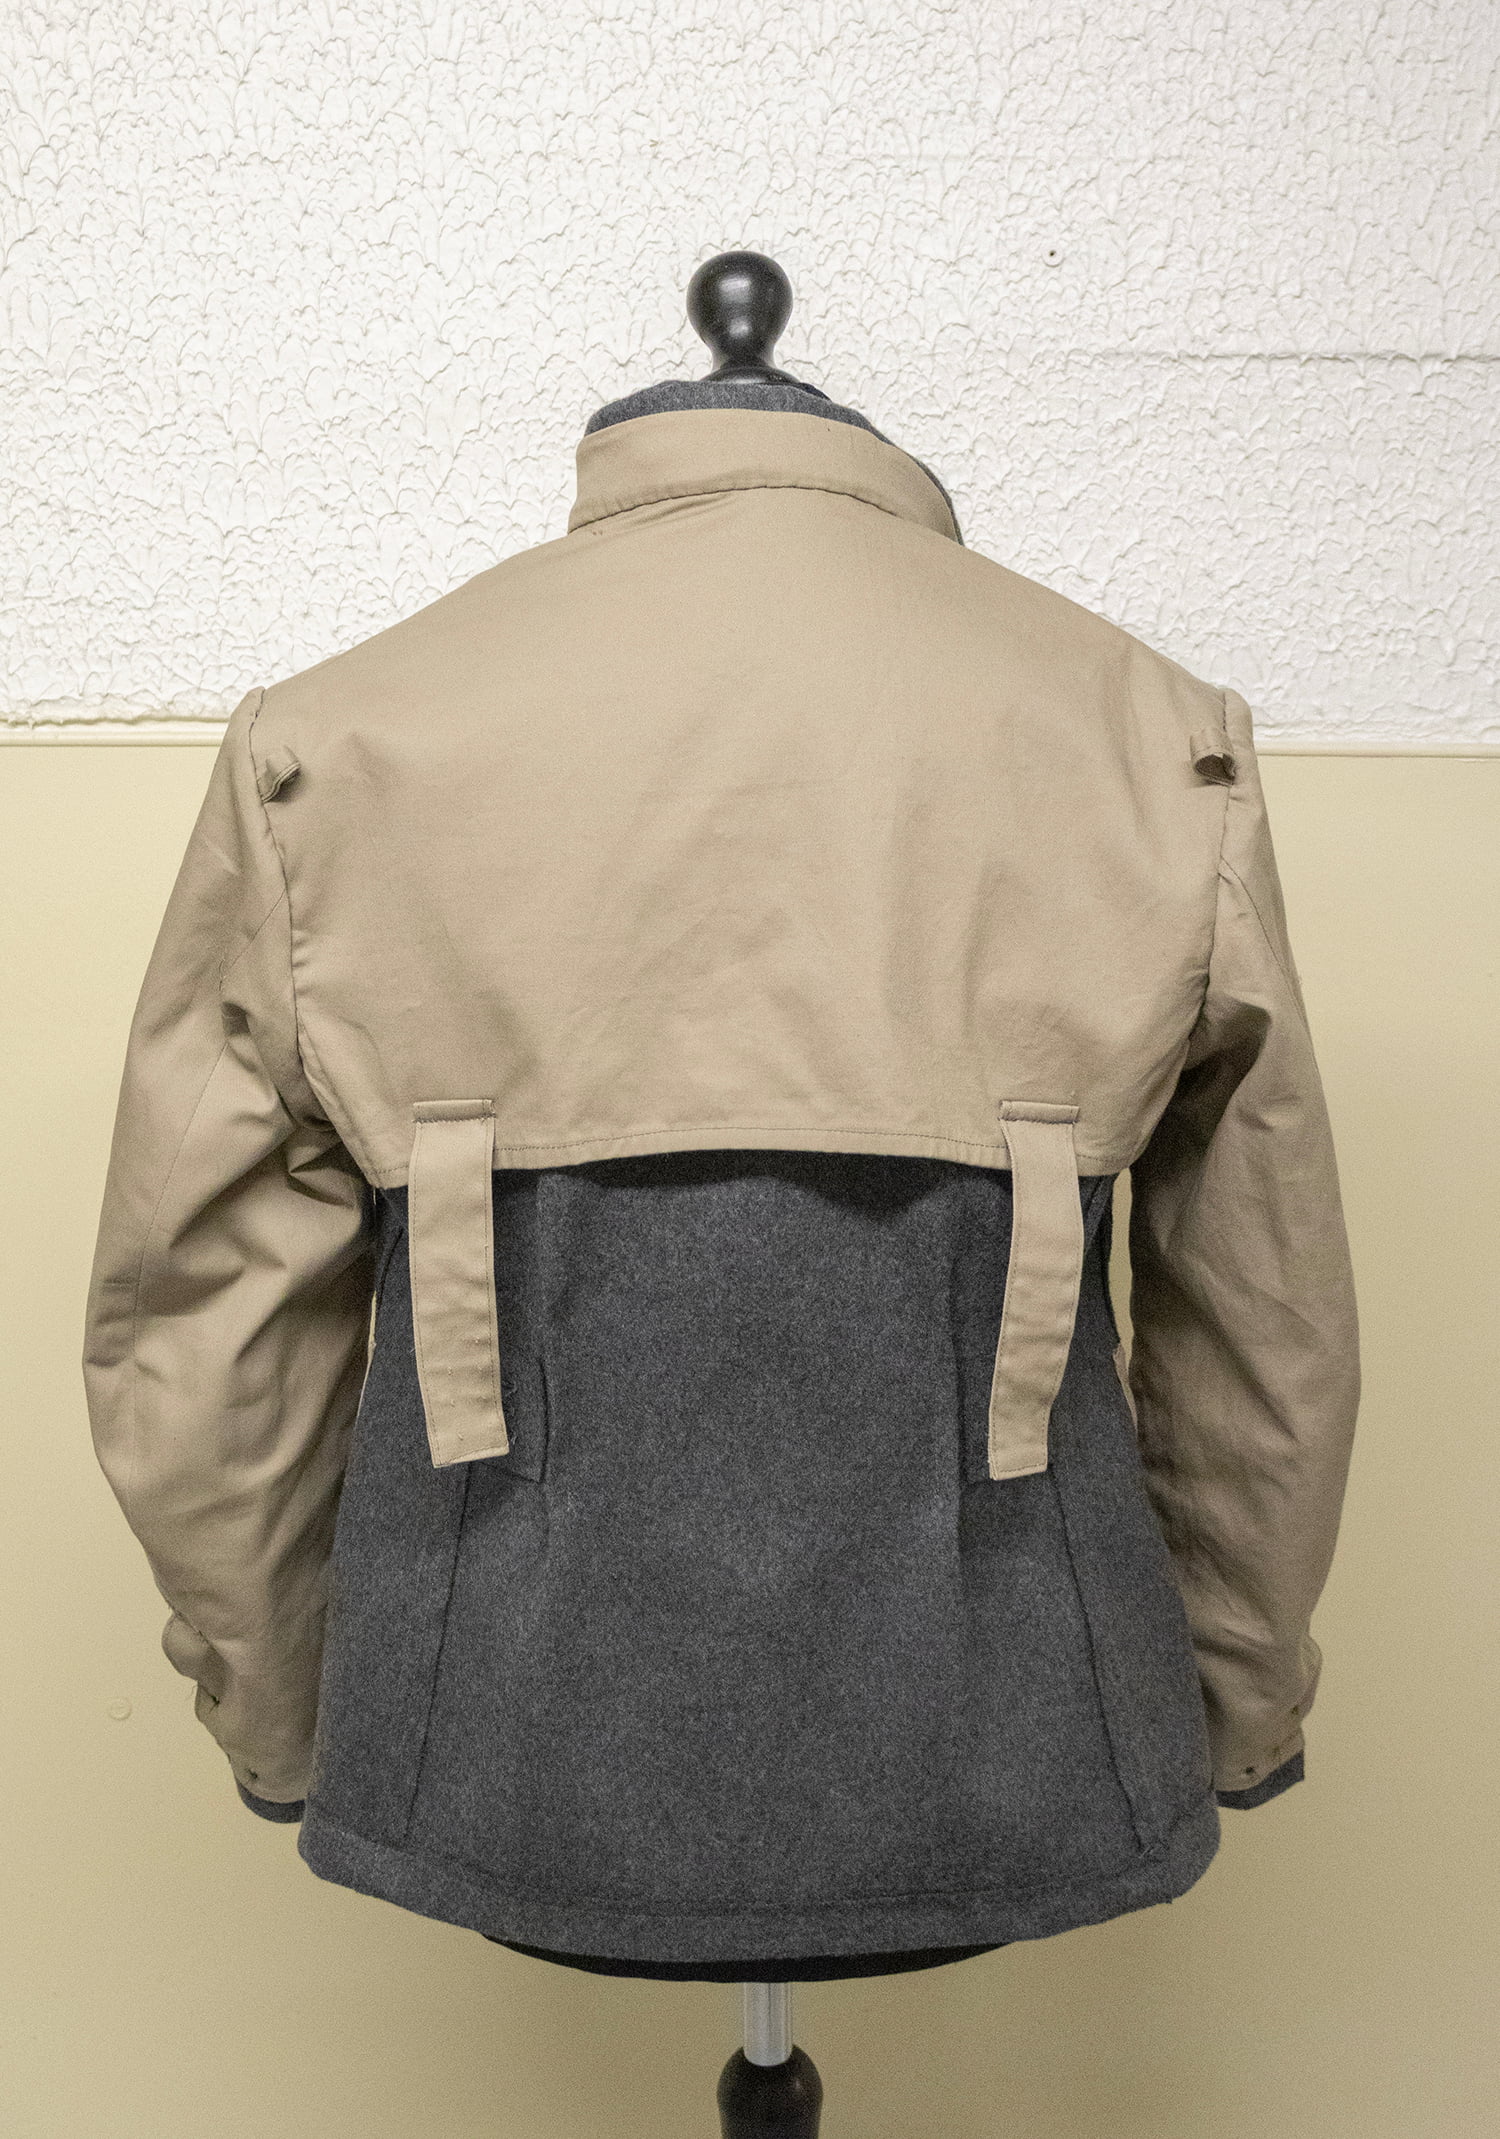
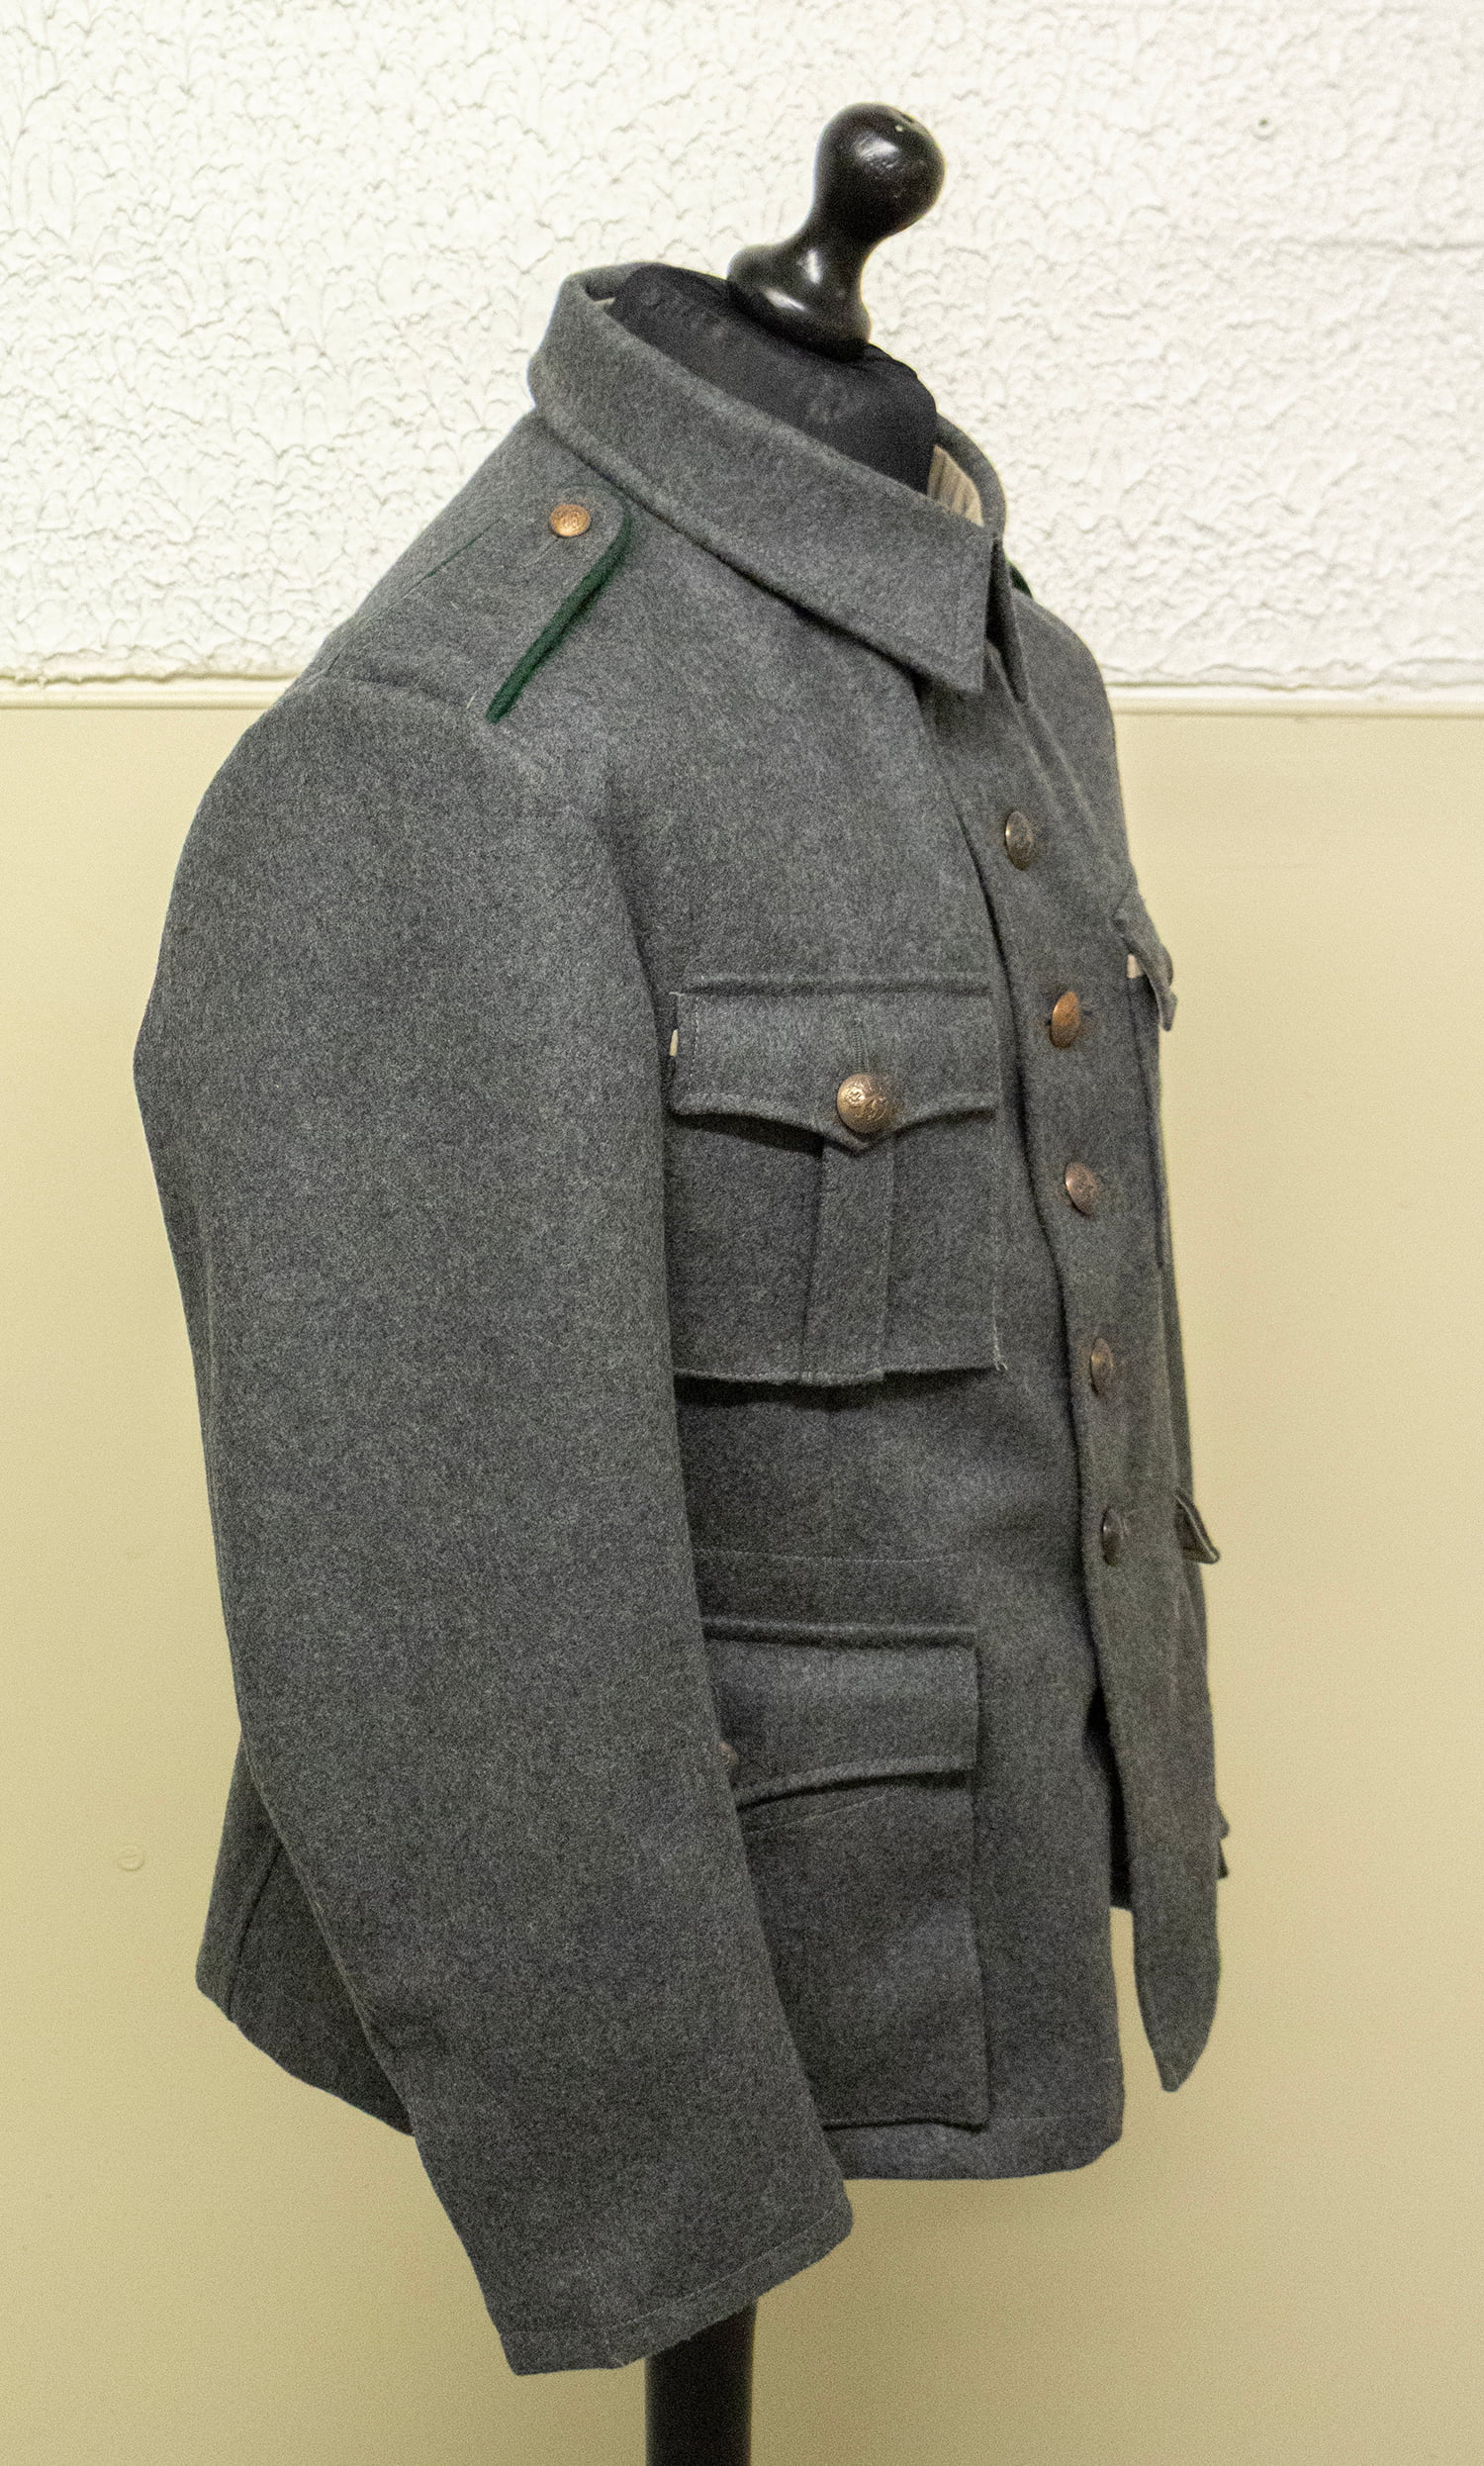
Well, here’s (finally) the finished first proper test.
Few things I’ve got to adjust:
- Collar is too long. In my haste, I added seam allowance to it. Forgetting that it actually already includes seam allowance. Old habits….
- Lower pockets need to be a bit bigger and roomier. Sewing them on was…. well, a lot of work.
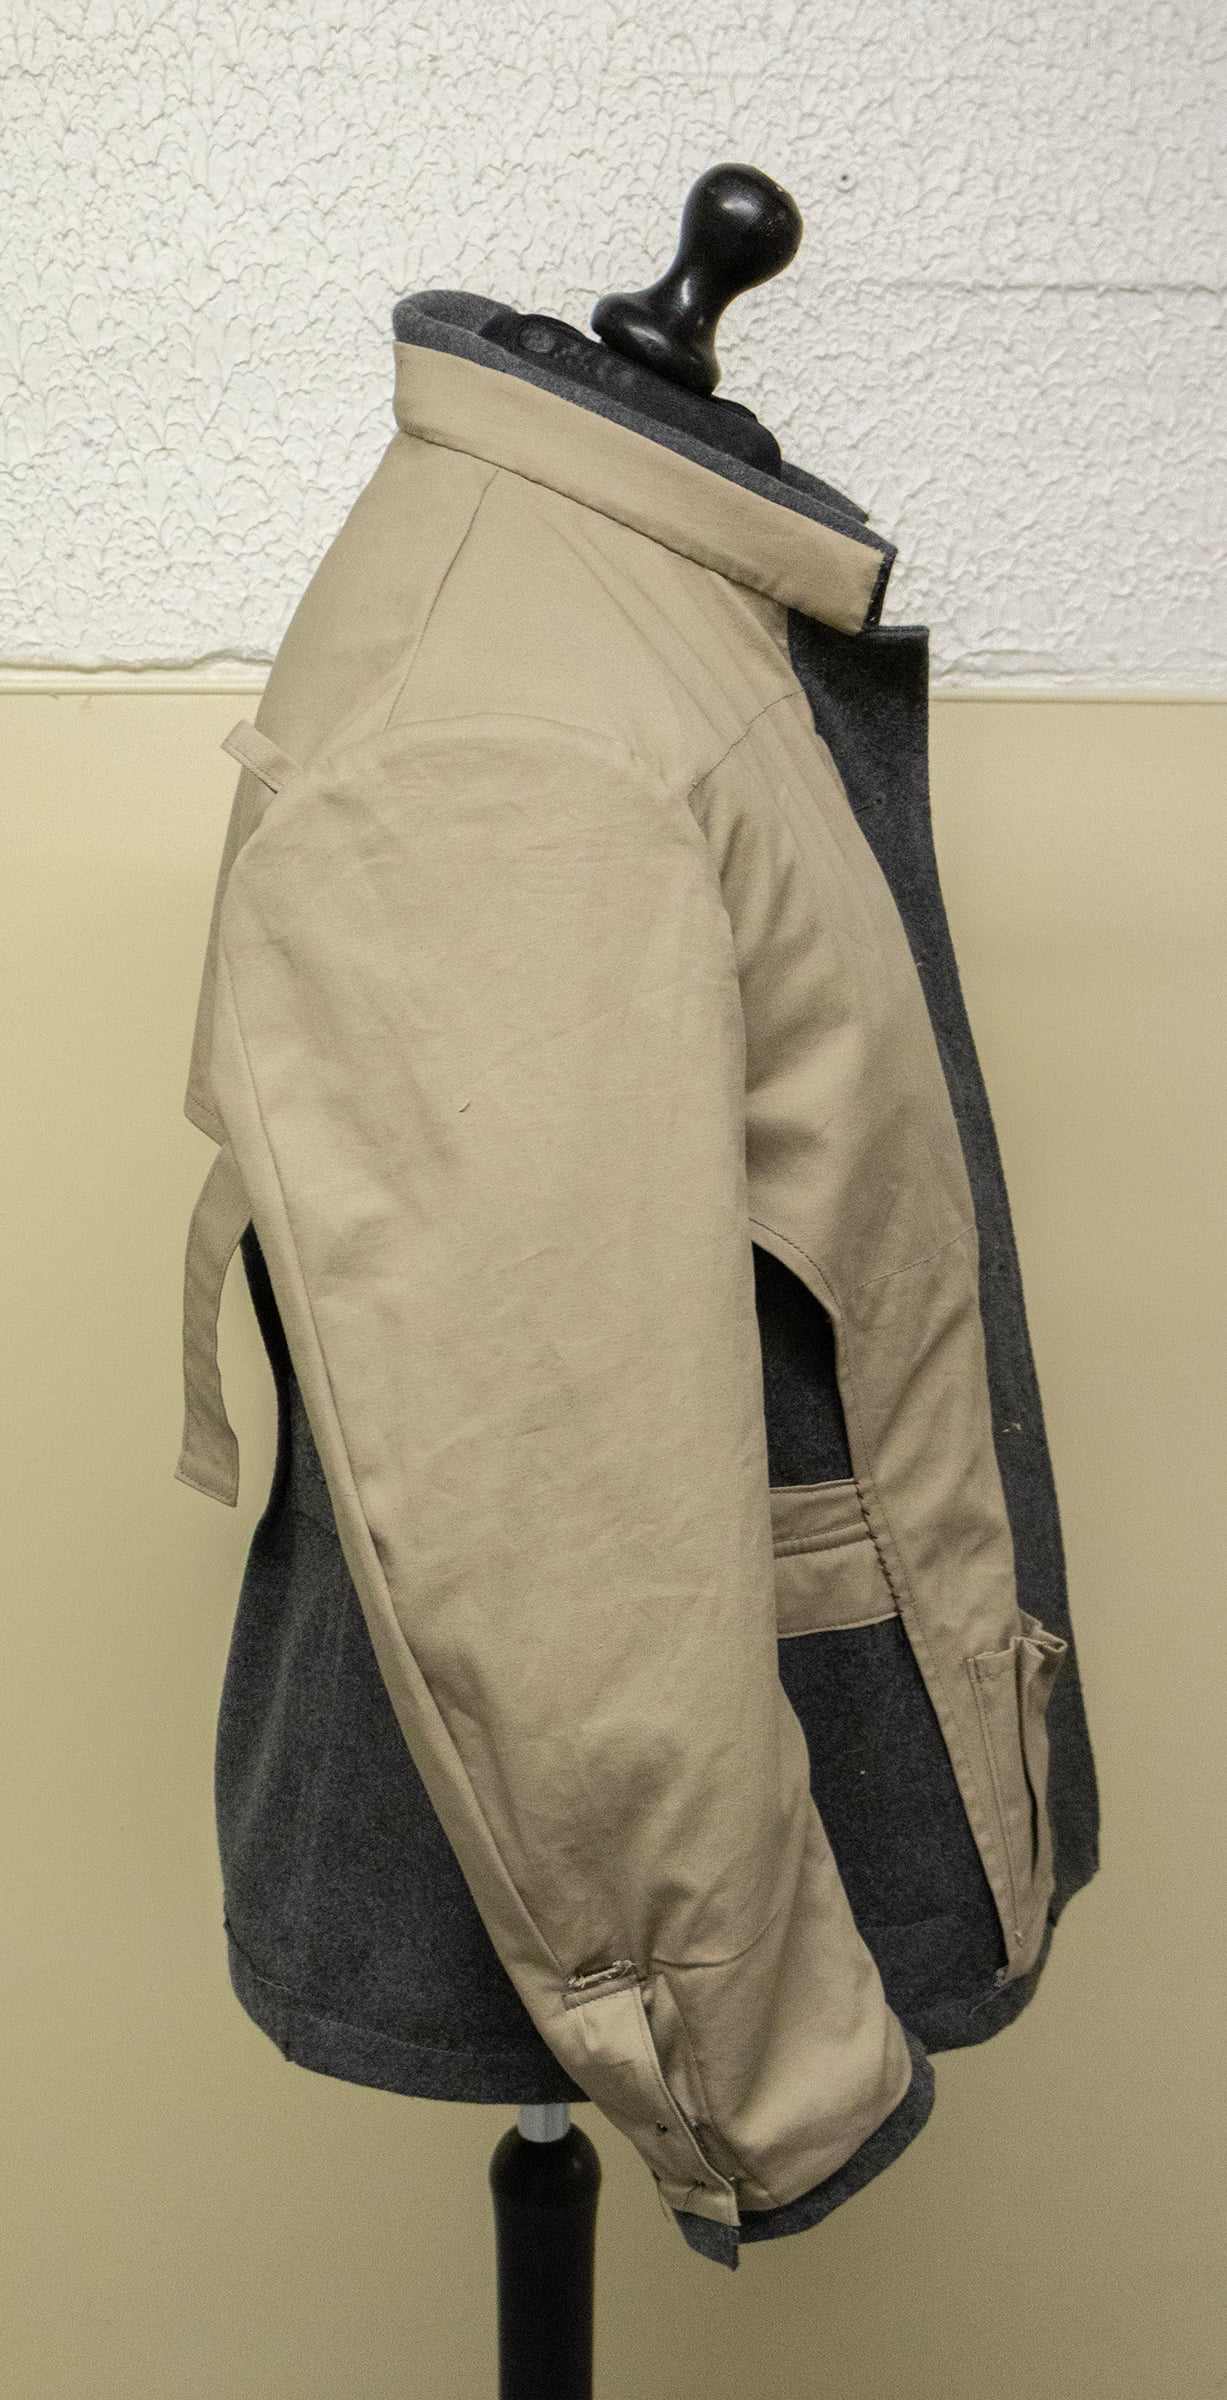
- Sleeve cuffs need a bit of fiddling, they don’t sit quite right.
- Sleeve liner has to be machine stitched, I did it by hand because one of the samples had them hand stitched on the armhole… and I didn’t double check the others. Hand stitching is annoying.
- Smaller adjustments on where the placement markers go so that things line up better and there’s less room for things drifting out of place.
- The button placement was off by about one centimetre, so I need to remark them.
Anyways, surprisingly pleasant experience and the results were better than I expected.
Next step is making another prototype with the fixes in a larger size and see how that fits a user. This one is made to my size and it fits perfectly. The mannequin is a size smaller, so the jacket isn’t quite as snug and tight on it as it is on me.
But yeah, then I’ll have 3 different sizes across the sizetable. If they all work fine and dandy, I can be pretty sure they all work.
And then it’s off to making a lot of them. Hopefully I’ll have patience with the next prototype to stitch everything properly and neatly and not go all lazy like with this one… ![]()
4 Likes
Forgot to mention that my iron decided to light itself on fire - so I haven’t been able to iron anything for a few weeks now! Gotta find a replacement somewhere that’s not too expensive.
Also my kids been sick on and off for the past few weeks, so I’ve had a bit of a spotty schedule with this.
2 Likes
I think your prototype looks amazing. Well done!!! I wouldn’t have had the patience ![]() So many buttons & pockets!!!
So many buttons & pockets!!!
Hmmm… My daughter keeps telling me she has an Elna steam iron with a tank for me… I think I should remind her about it.
I hope you find a good one soon for a price you’re happy to pay. And I hope that the kids get well soon. ![]()
2 Likes
Can’t count how many irons and brands over the 40+ years we went through.
Surprisingly over the last few years we were using several different Rowenta boiler type stream irons.
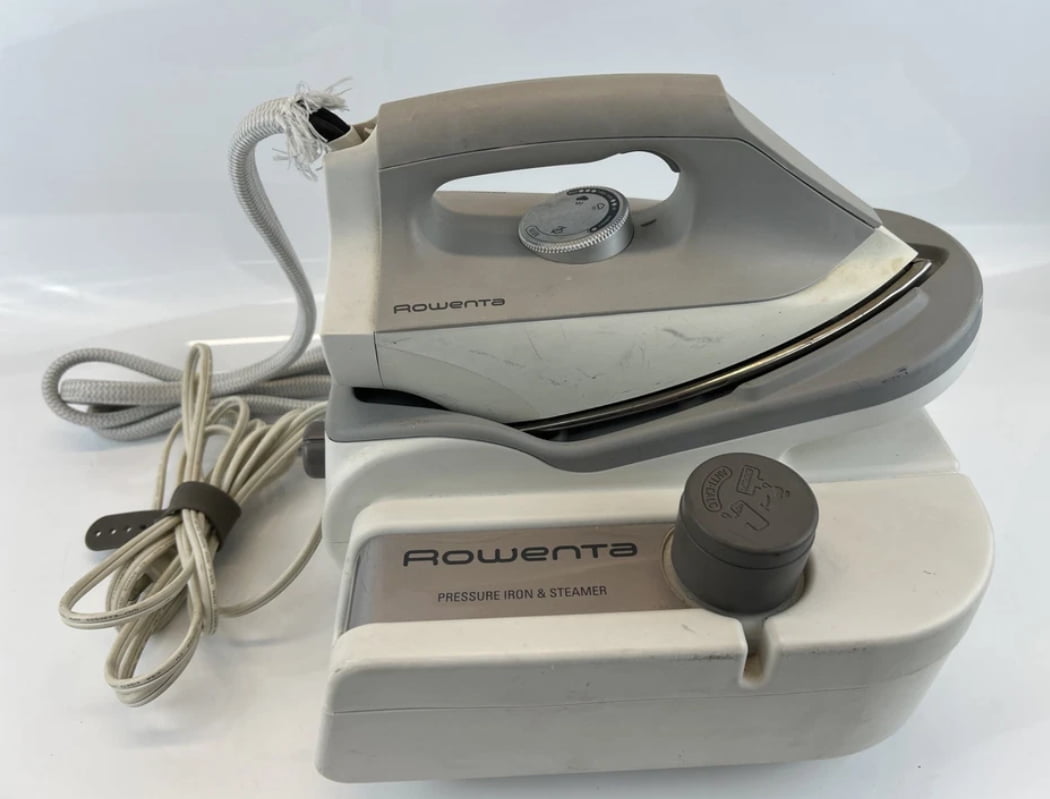
Mind you our iron(s) would run 8-10 hours a day 5 days a week , sometimes a few hours on saturdays. We beat our irons to death. ![]()
I would not recomend anything BUT a boiler type steam iron… preferrably NOT a gravity feed type with the bottle and water softener resin beads.
The big difference though when pressing is having a vacuum board. We had 3 working ones… a Hi-Steam, 2 that the name escapes me at the momment, and we had a huge Sussman vacuum table with a boiler that we never hooked up as it would have required a heavy duty 220v line that was very far from the fuse panel.
This what the Sussman looked like:
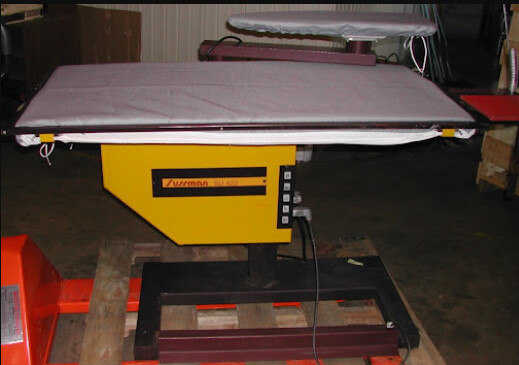
If you’ve never used a vacuum board you don’t know what you are missing.
2 Likes
Bravo. Made many different versions of this tunic over the years. ![]()
I’m assuming they are “pouch type” pockets? Yes they can be tricky… but not as tricky as top pockets like this that are NOT top stitched on:
I would suggest at least some lightweight fusible… 4-5 inch (what ever that translates to in cm) at the end of the sleeve. Wiil help give the cuff some stiffness and shape.
2 Likes
That’s pretty similar to what we had, forgot the make and model though already. Lasted only 3 years, though was practically free.
I just ordered a Battistella Vaporino Maxi Inox L, as I got recommended that by a tailor friend of mine. Should be an update over the previous one and last for a few years longer I hope!
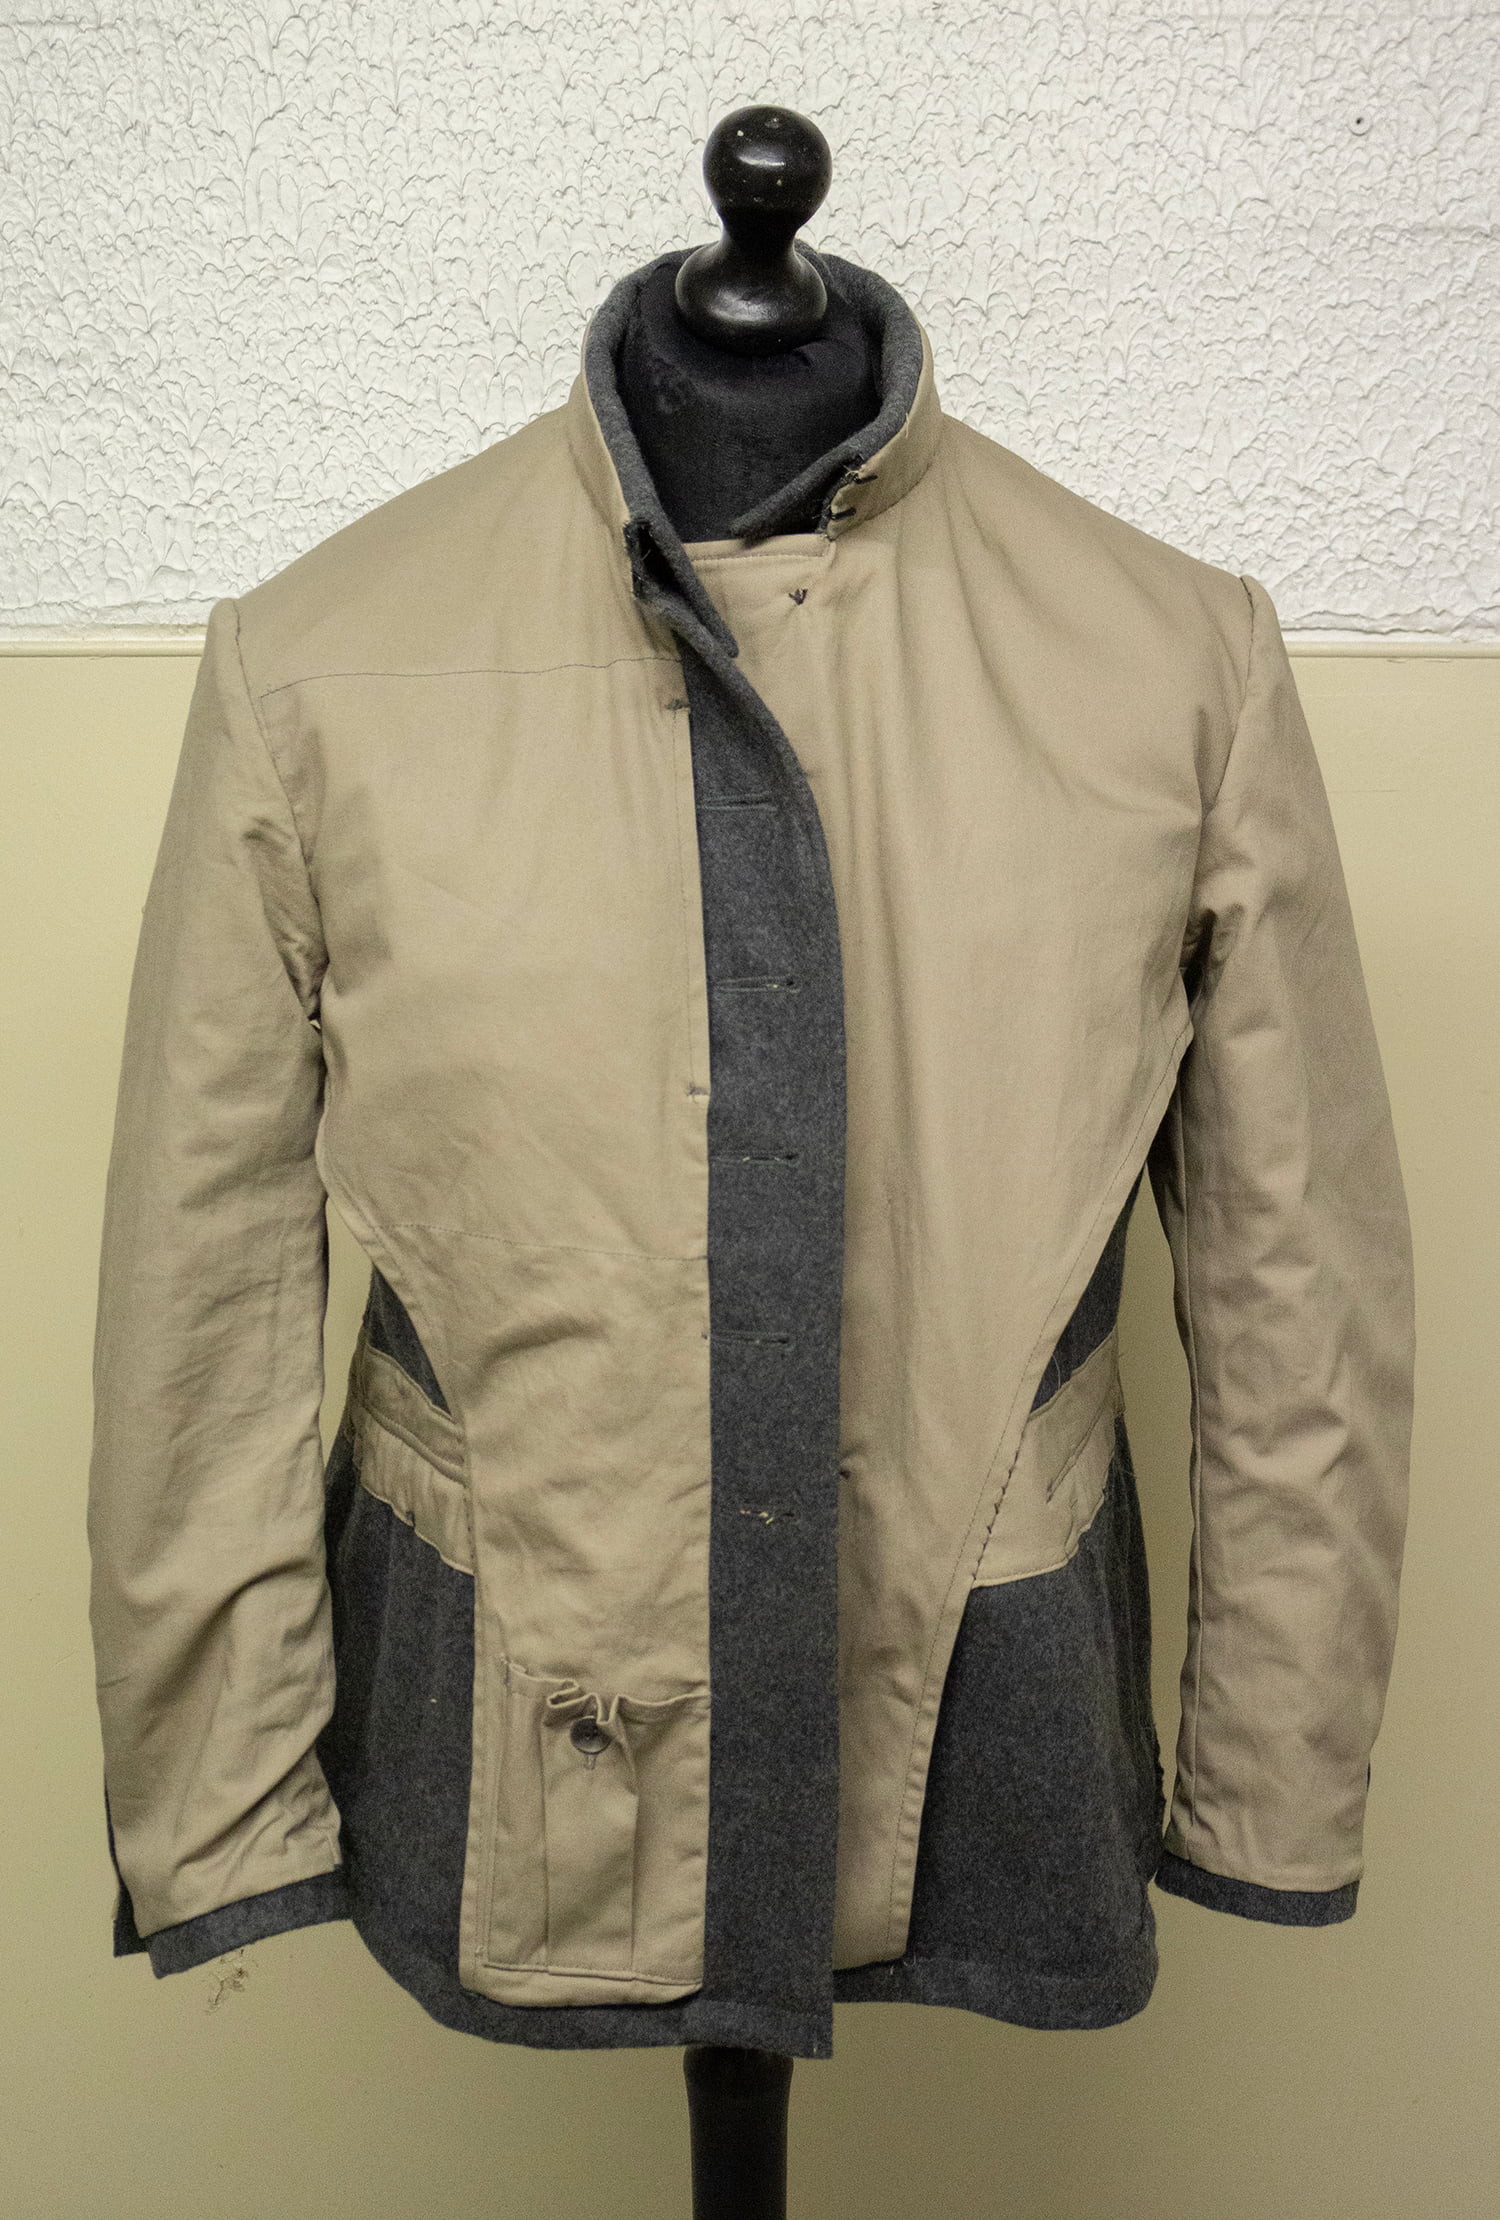
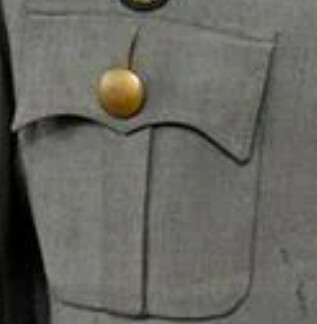
The chest pocket is topstitched to the chest along the sides, then the bottom is left “open" with a hidden stitch on the inside, which goes down to the bottom corners along the inside corner seam… if this explanation makes sense ![]()
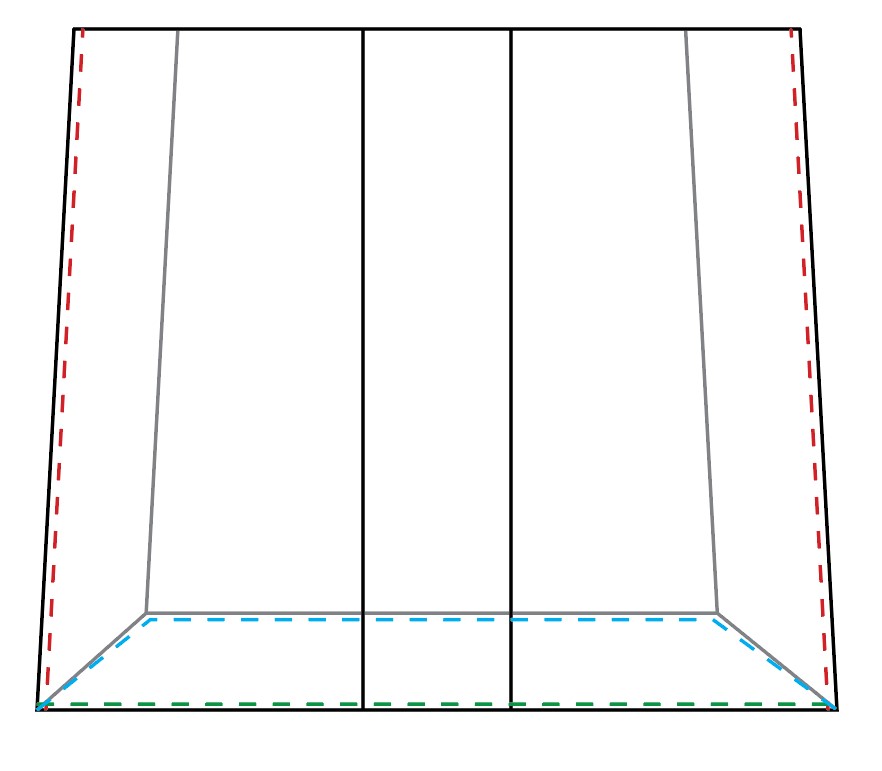
Red = Topstitched to the chest piece Green = Just the fold topstitched Blue = Sewn from the inside to the chest piece.

The waist pocket is bit simpler in theory at least. The red line is stitched on the inside, allowing the pocket to flare out and expand.
There’s also an interior pocket sewn first to the inside edge / seam allowance edge and the full assemboly is then stitched on the jacket.
Problem is that my sewing machine doesn’t fit properly when trying to stitch them; or I suppose I’ve not yet mastered the skill. I did first just baste it with a stitch along the outer edge, then did the hidden stitch. But as you can see from the photos, there’s some wavyness/stretch/tension from the process.
But this could be partially because I may have made the pocket a bit too small, and with a bit of extra space it can be done neater.
Part of me is terrified about having to make a number of these… one or two is fine, but 20 sounds like a lot of work ![]()
Luckily I have a button sewing machine, so the smaller buttons I can just stitch with it in seconds. Sadly I don’t want to go through the trouble of having to swap the shank button adapter all the time, so the larger copper exterior buttons will have to be hand stitched. I do have a second machine for buttons, but it has been sitting there for years not used, I have to clean and fix it first and perhaps set the shank adapter to that one so I can just do all the buttons with that…
But there’s 8 small casein (milk protein “plastic”) buttons, 1 large aluminium “plate” button, 10 large copper buttons with a shank and 2 small copper buttons with a shank.
Then there’s the two waist pockets (which also have an interior pocket), two chest pockets, one large breast pocket sewn on the liner and then one last, small pocket on the liner hem for the first aid kit. So a lot of pockets indeed. A lot of parts in general to align and do!
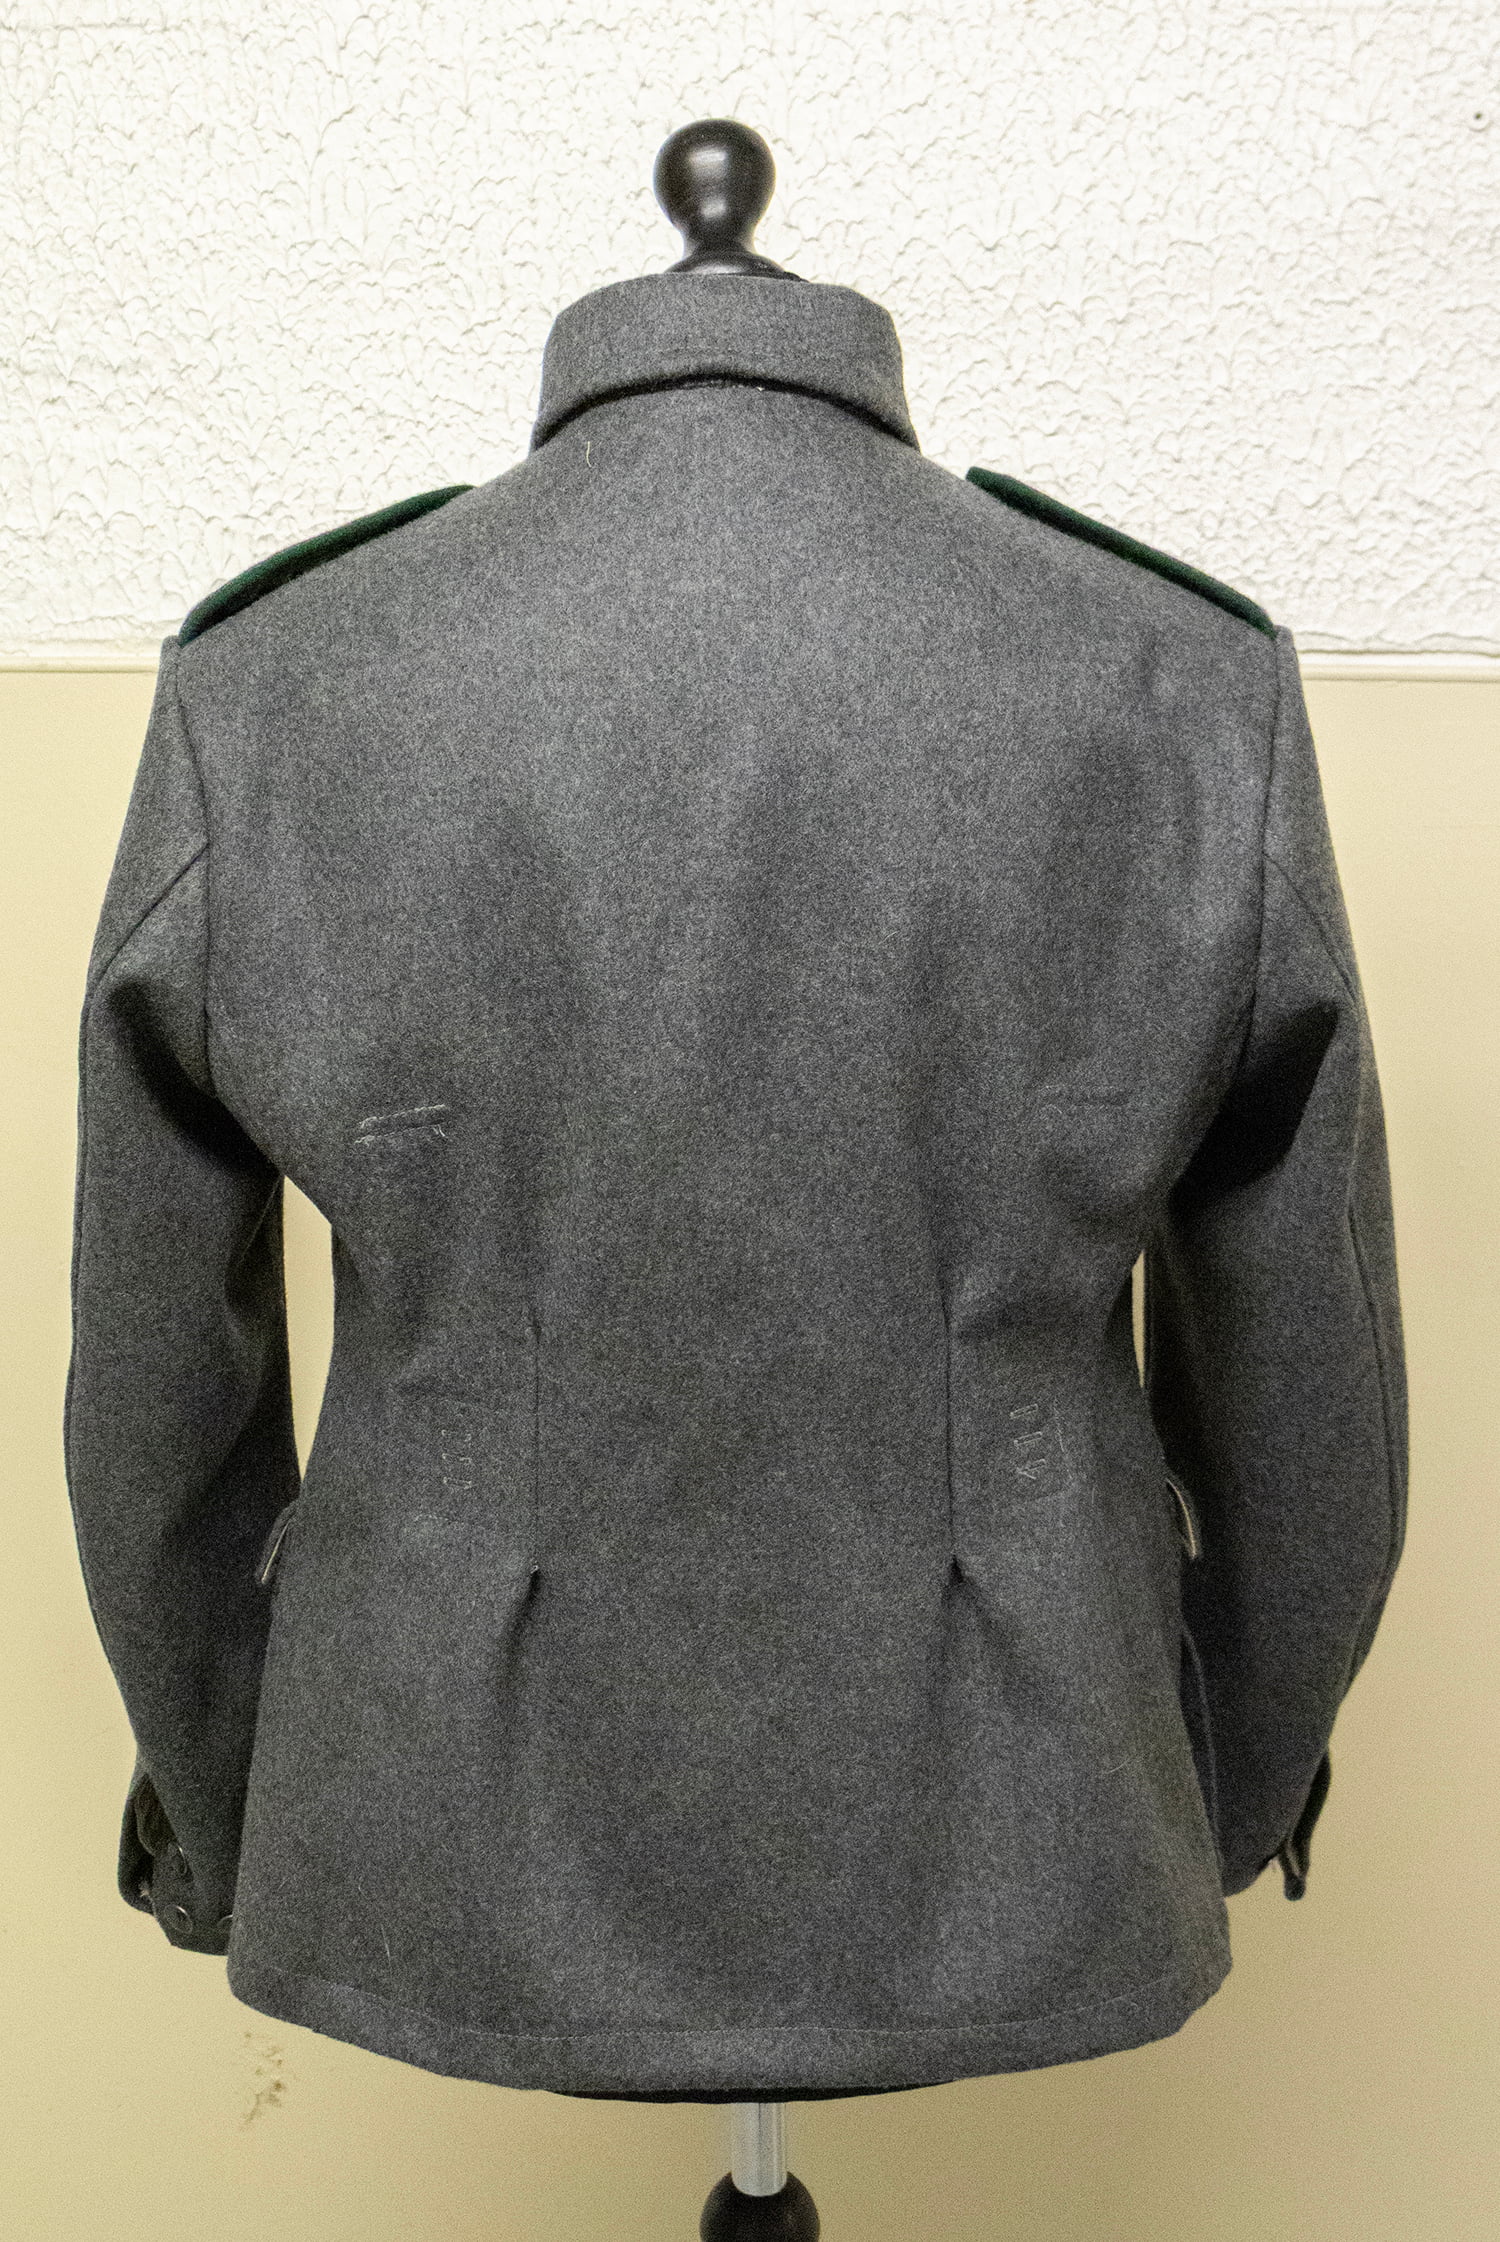
But I have to say I am still overly excited how well the jacket turned out. I made it in my measurements and the fit is perfect on me. With all the 1930’s canvas reinforcements and stiffeners it feels really sturdy and proper, unlike all the modern jackets. Shame that I can’t wear one in my civilian life, it’d be too odd. But might have to make a civilian version of it for me with a bit softer details and nicer pockets… ![]()
3 Likes
True story… during our history we used to make “show rental” quality costumes/ Mainly period wear with a lot of mens military. We use to make a British Redcoat and an American version. The 1st Costumers Association convention we went to as a vendor we didn’t have time to sew the buttons on the 2 samples with the shank machine… there’s 36 buttons on one of those coats alone! Not to mention the knickers and waistcoat. My partner and I sat there in the hotel room handsewing buttons dozens of buttons… with the help of a friend of ours from another shop. The kicker was during the vendors show we would hear costumers making comments like "look how all the buttons are really sewn on… not like the coats from {so and so} with the machine stiched buttons that always fall off. Little did they know that we would normaly use one of the good old Singer button machines. ![]()
That’s one of the points my costume design professor made that always stuck with me… if you want an actor to look, move, and act like they’re in a specific period the garment should be constructed as close to possible as it was back when AND that all the proper under garments and shoes are worn. The best example she gave was NEVER put a lady in a hooped ball gown wearing heels… or the hoop is going to bounce up and down… they basically wore slippers back then.
I’ve been on a Sherlock Holmes kick again lately and found some movies from the 30’s that predate the Basil Rathbone / Nigel Bruce movies. Even though I’m no longer doing the costume thing I cant help but analyse the costumes. ![]()
2 Likes