Click on the curve as you’re tracing, or at this point you could add it in the way which Douglas mentioned in the thread about adding notches. Link.
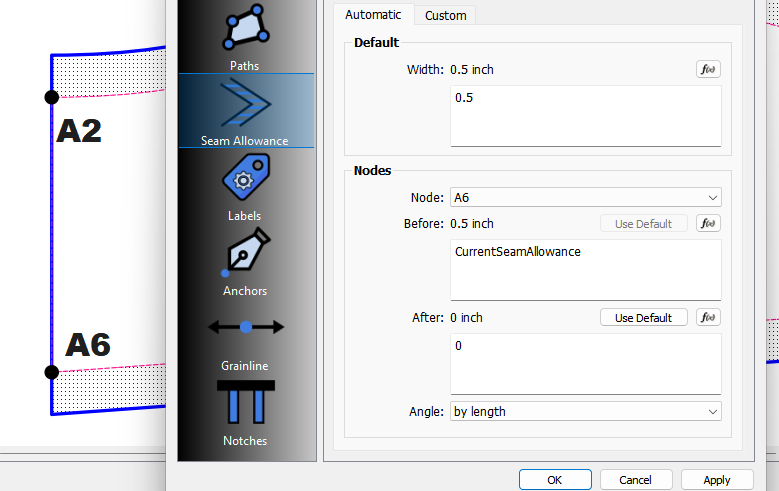
Right-click the pattern piece, & choose the Properties option at the top of the context menu. the Seam Allowances section is the third down on the sidebar.
Yes, you can set different seam allowances between any two points.
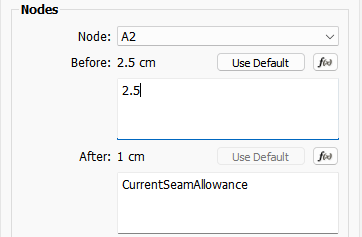
To expand on that… each Node point has a Before and and After SA (Seam Allowance)… in a clockwise direction. For ex: Point A6 here has a Before SA of .5 and an Aferr SA of 0:… while A2 will have a Before SA of 0, and and After SA of .5. So the SA between A6 and a2 is 0 - such as a fold line.
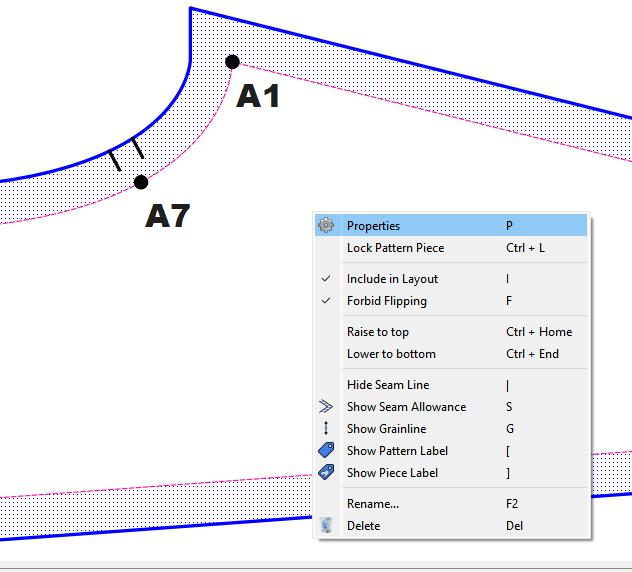
When I click the drawing in general and then right click I can see the Properties Menu.
But there Seam Allowance section changes the seam allowance of whole piece.
Again I can not click a node.
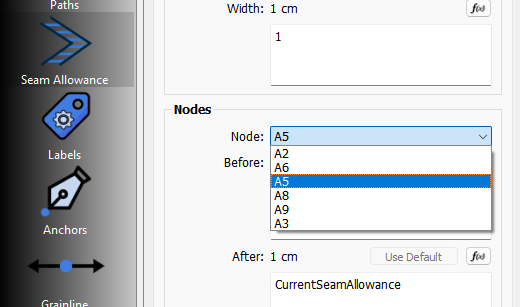
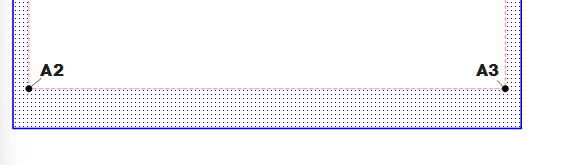
How can I change the seam allowance to 2.5 cm on the line between the nodes A2 and A3?
No… it changes the SA between each node point as per the Before and After allowances set. Unless you change them, the SA for all nodes is set to the default CurrentSeamAllowance.
Goodness knows what the Node Screen is. Is this the Draft mode or the Piece mode?
However, before and after always refers to whether the instruction is needed before the node or after the node. So, regardless of where the node is and which direction you’re moving in, there is always a before and an after.
If you were approaching a door, you would be moving towards the door, so you would be Before the door, however, if you’d already gone through the door, you would be After the door.
A node is only a peg that is placed on a continuous piece of string, which is labelled in the draft. So think of that piece of string… Is it approaching (before) the peg or is it going away (after) from the peg?
Question 2)
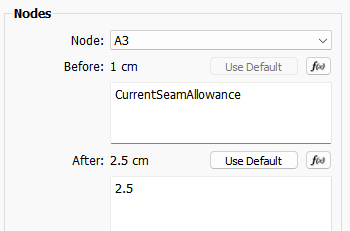
Since the piece of string in question 1) is attaching to the pegs in a clockwise direction, A3 is approached first, so before A3 is default while after A3 is 2.5, then the piece of string approaches A2, so before A2 is 2.5, while default is after A2.
That’s why I asked if you would prefer having the app in your native language?
That being said: Before refers to the “preceeding edge” of a node, while After refers the “succeeding edge”. An edge being the line that connects 2 node points or a curve between 2 node points… as @Grace has succinctly pointed out.
@optimusprime93
In regards to pattern pieces the path direction is always clockwise. A curve may be drafted in Draft mode counter clockwise, but it has to be reversed in Piece mode so it’s points then go clockwise.